
Bob Shillito saves the 1953 Yachting Monthly three-tonner, Sparrow, from being scrapped and gets her sea-ready with a budget-friendly boat renovation.
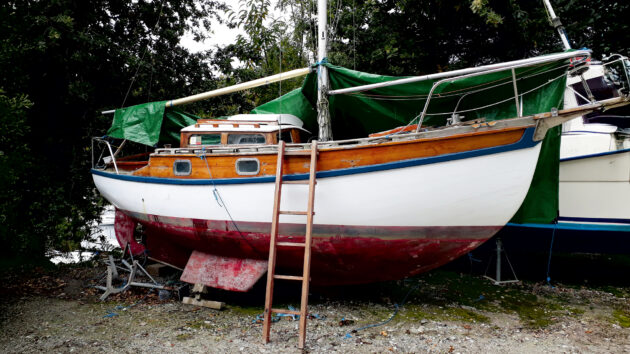
‘How are you getting on with selling your boat?’ It was a simple question, which launched an endeavour to grant new life to a classic wooden 22ft Yachting Monthly 3-Tonner with a DIY boat renovation.
My friend, Trevor, had enjoyed the 1953-built Sparrow for around 10 years but, despite routine maintenance, she needed some serious work.
A boatbuilder had estimated £9,000 to ‘fix the problems that I can see’, so Trevor reluctantly decided to sell her.
With no takers, he asked the boatyard for a price to break her up, at which point I heard about it and thought there must be an alternative.
The princely sum of £1 changed hands, and I went to take a good look at her.
Initial assessment
The online world is awash with tales of people buying yachts for £1 and fixing them up, but as a compulsive renovator I was well prepared for that sinking feeling as you assess the enormity of the challenge you’ve taken on.
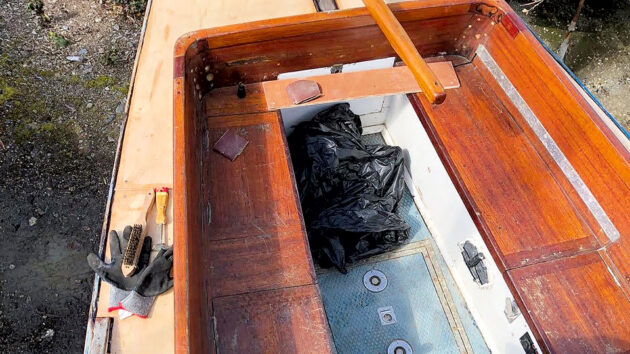
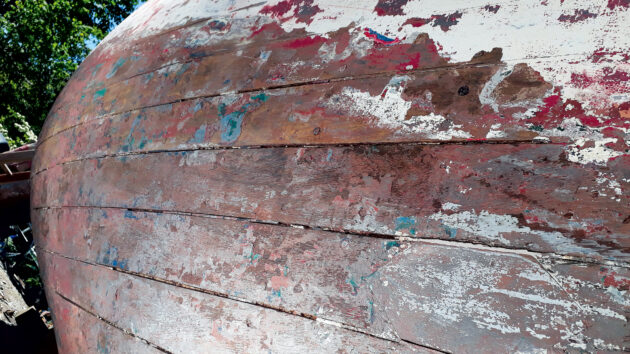
I pulled off the covers to see what I’d purchased and climbed aboard – carefully, to avoid falling through the deck.
What was I thinking! The rot, corrosion, mould and detritus almost put me off.
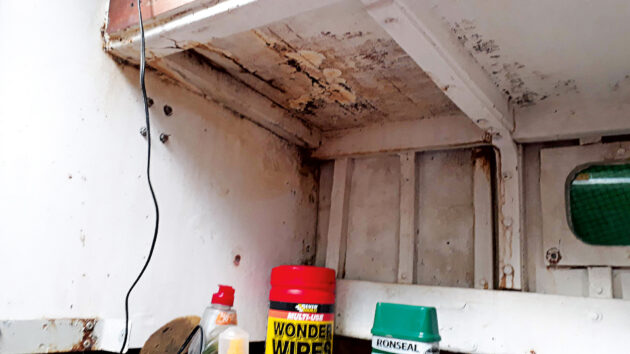
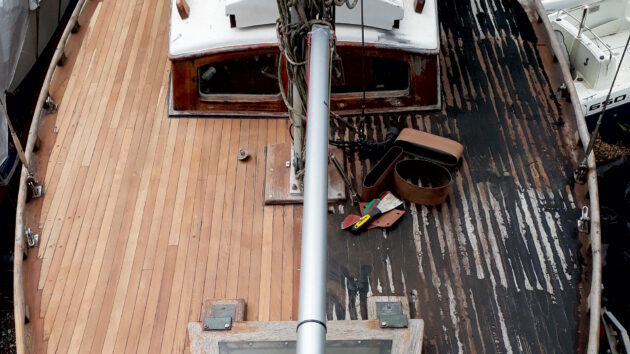
Rotten ply under the teak deck posed a significant challenge. Photo by Bob Shillito
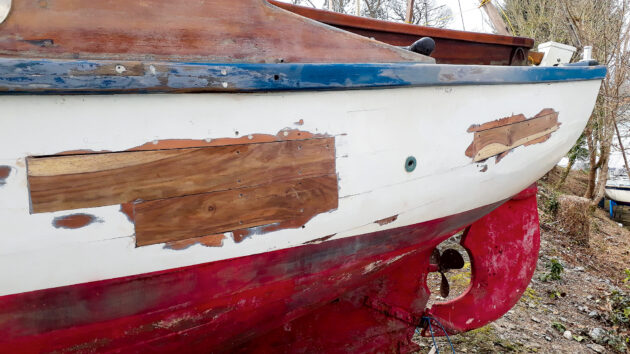
Sparrow suffered from two major problems.
Like most wooden boats kept on salt water, she was pretty good below the waterline but severely affected by rainwater above. The elegant sweep of her decks had caused water to collect amidships and rot the woodwork below.
The starboard side had previously been repaired and was mainly okay, but the port side was in a bad way: poking it with a screwdriver was a depressing experience.
The original teak deck is at two levels, with the aft section around the cockpit being lower than the forward section.
Although the teak itself was in reasonable condition, it was laid on ply, much of which was rotten. The deck caulking had failed so there was nothing to stop rain soaking through to the ply beneath.
Aside from the rot amidships and the deck, Sparrow looked in reasonable shape, although she’d paid a price for being laid up ashore for two years. You could sit in the cabin and see people walk past through the gaps in the planking!
Guiding principle of boat renovation
The project could range from a bodge-job using buckets of filler, right through to a full boat renovation, epitomised by the world-famous Tally Ho, totally rebuilt over seven years and watched by 6.6 million people on YouTube.
The guiding principle behind this project was to go sailing, not to spend years working on a boat. That narrowed the spectrum of potential repairs.
Sparrow is aesthetically pleasing, well-built and worthy of some effort but, as I’d never tried to repair a proper boat before, my skill set was in doubt.
Beyond the difference between clinker and carvel construction, I knew little of boatbuilding detail.
To figure out how to proceed, I bought a book called Wooden Boat Renovation by Jim Trefethen.
The subtitle of the book is ‘New life for old boats using modern methods’ and it turns out that he is a keen advocate for using epoxy for repair work, alongside ‘proper’ building techniques.
Reading the book was both fascinating and alarming as it set out the extraordinary skills involved in boatbuilding and repair, using techniques unchanged for hundreds of years.
I’ve had plenty of epoxy experience repairing broken windsurf boards, so I’m comfortable using it and this revealed an important factor in scoping the repairs: play to your strengths.
However, I was still left with a decision about how far to go with the work.
Making the call: full restoration or boat renovation?
Was I trying to restore or renovate Sparrow?
Frankly, although she’s nice-looking, she’s hardly a product of William Fife III (the Glaswegian designer of spectacular Edwardian yachts), nor is she a family heirloom, so there was a definite limit to the amount of time and work that could be justified.
This, and my evident lack of skill ruled out a full restoration and put the project firmly in boat renovation or repair territory.
I was going to make Sparrow seaworthy by a combination of techniques, aimed at strength and reasonable longevity.
A family affair: all hands on deck to get the paintwork done. Photo by Bob Shillito
I decided to aim to extend Sparrow’s life by five years. This seemed a reasonable target, since aiming for a longer lifespan would involve dismantling a lot more boat and buying more tools and materials – never mind the additional skills required.
Going for a shorter lifespan would hardly be worth the effort and would feel like half a job. (Of course, a boatbuilder doing a proper job would make repairs that could extend her life indefinitely.)
I wanted Sparrow to be fully seaworthy, so she could be used reliably for coastal cruising. Our first voyage was already planned for the 60 miles from Fowey to Dartmouth, which focused the mind.
Although lacking any boatbuilding experience, I have good DIY skills so, using decent materials, epoxy and common sense, I reckoned I could make Sparrow genuinely seaworthy, unless I came across some dreadful issue like the keel falling off.
Resource realism
My guidebook described repair techniques that assumed a workshop environment and included such phrases as ‘cut the wood into strips using your bandsaw’, which instantly disqualified me, since I would be using hand tools, in the open air.
This forced me to be realistic about my resources. Firstly, where to do the work?
If the boat is in a workshop or barn, there is no problem. But the reality of working in a boatyard is outdoors, dodging the weather, and some boatyards will apply hurdles, such as fees or regulations to restrict or even prevent such work.
I was lucky in that South Cornwall has a boatyard scene that is commercial yet flexible, and both the yards I used for Sparrow were very accommodating.
It was important to respect that attitude by being careful; for example, laying a tarpaulin on the ground to catch paint and detritus to avoid mess and pollution.
Inevitably, working outside involves a degree of compromise but even if the weather isn’t great, you can work under a tarpaulin – as long as it’s clear or white, so that you can see what you’re doing.
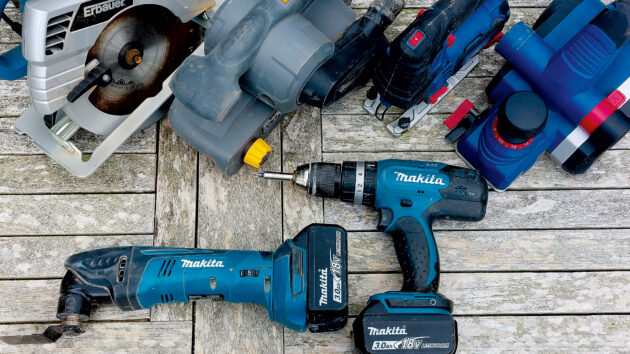
A selection of the power tools needed. Photo by Bob Shillito
Aside from regular hand tools, I needed power tools for the project, most of which I already owned: a belt sander, circular saw, jigsaw, plane, drill and above all, a multitool, which I did buy especially. It proved ideal for cutting out rot and shaping accurate scarf joints in situ.
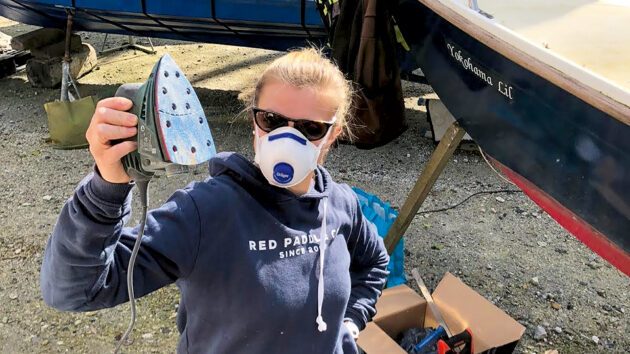
Two other resources were essential: a workmate-type portable bench and a powerful vacuum cleaner. The larger power tools all accept a vacuum hose, which reduces the amount of mess and dust created; it also reduces the time spent wearing a face mask.
Ed’s note: it is recommended to always wear a properly rated respirator, even when using a vacuum cleaner for dust collection.
Structural repairs
With rotten sections of planking to replace, I had a pressing need for suitable timber. I discovered that Sparrow is built of mahogany on oak ribs, but I was horrified by both the potential cost and environmental responsibility of buying it.
When I bought our house (another basket case in need of renovation…), it contained a broken hardwood bed, which I put to one side. On close inspection, I found it to be similar to mahogany.
Furthermore, the dimensions of the side rails were perfect: wider and thicker than Sparrow’s planking so I could cut them to fit.
The accepted procedure for preparing replacement sections of hull planking is called ‘spiling’, a templating technique.
I found it too complicated for a beginner with a limited number of repairs to complete, so I simply took measurements from the hole and then marked out my stock a little over-size before cutting it with the circular saw.
A replacement plank needs to span at least two ribs so that it is adequately connected to the frame and joined to the good planking by shaping a scarf joint that is as long as possible.
New plank sections with scarf joints glued in and screwed. Photo by Bob Shillito
With patience, I could gradually reduce the size of the new plank and shape the bevelled edges and scarf joints until it fitted perfectly, using the power plane and multitool.
Being a little thicker than the original, the new plank stood proud of the surrounding hull, and I could then plane it and run the belt sander over it, after it was fitted.
The scarf joints were completed with epoxy, avoiding glueing the new piece to the plank above and below, or to the ribs, since that would create a large, rigid patch, which might cause surrounding areas to fail with the natural flex of the boat.
Although the original planking was fixed to the ribs with copper rivets, I used marine stainless steel screws for the repairs.
Apart from the planks, I also needed to replace some sections of rib.
Fortunately, I only needed fairly short sections, so I cut in new pieces of oak and glued them to the existing rib, or ‘sistered’ the rib by fitting a new piece alongside the damaged part.
Finally, I had one area of rot in the main port-side beam to mend, which I fixed with a new piece of timber, secured with epoxy and large screws.
But before I could do that, I had to gain access by removing a section of deck.
Deck repairs
I agonised over the deck. It’s Sparrow’s finest aesthetic feature, but repairing it would be hard.
Eventually I decided that I could save the majority, but the aft section would have to go, partly because it was so bad and partly to allow access for that main beam repair.
The only way to deal with the rotten ply under the teak was to dig it out from below, with hand tools, the multitool – and a very stiff neck.
Fitting the new ply deck before glueing it in place with epoxy. Photo by Bob Shillito
I cut rectangles of ply and glued them in place between the deck beams, with a sandwich of CT1 to attach the teak to the ply, preserving some flexibility. Once I had stabilised the teak, I could re-caulk it.
This took more than a week of careful work, scratching out the old caulking with a sharp blade and a metal hook.
Recaulking with specialist SDS SIS-440 was straightforward, although incredibly messy.
Once it had set, I could run the belt sander over the whole deck, with truly spectacular results. It looked fantastic and I felt I was finally getting somewhere. The aft deck was ripped out and I glued in ply, shaped using a paper template.
What a transformation! Before and after sanding. Photo by Bob Shillito
Hull caulking
The final repair decision was how to treat the hull caulking. Sparrow was originally caulked in the traditional way with cotton or oakum (hemp) and then finished with red lead putty.
Some parts, where the hull curves, also have thin wood fillets in the seams. Several had fallen out and the caulking was missing in other areas.
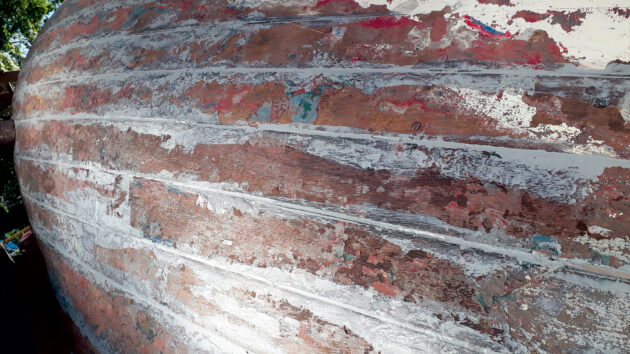
After refinishing the seams with CT1. Photo by Bob Shillito
Caulking is another traditional art of which I have no experience; instead (purists please look away now), I simply went over all the dodgy seams with CT1, pressed home firmly.
CT1 is wonderful stuff: it sticks well, retains flexibility and it is reversible: you can cut it out if necessary. It also takes paint well.
Leaky seams below the waterline. Photo by Bob Shillito
I had a good look at the keel bolts, rigging, sails, furler, winches, seacocks, bilge pump and, of course the engine.
I knew the Yanmar 1GM10 had been serviced regularly and carried out the usual checks – oil, impeller and battery – before pressing the starter button with my fingers crossed. It chugged into life instantly, so I decided not to worry.
Everything else seemed to be okay, at least for now, so we were almost set for sea trials.
However, I did add a good-quality solar panel and charge controller because I didn’t want the bilge pump draining the battery; I was expecting quite a lot of leaks as Sparrow had been laid up for two years.
Having recently watched another wooden boat take to the water and promptly start to sink, I was fully focused on the hazards!
Launch day went exceptionally well and, over the next few days, I sailed my ‘new’ boat around the bay in winds ranging from light to 20 knots.
It was quite a learning curve but she handled well and after about a week, hardly any water was coming in.
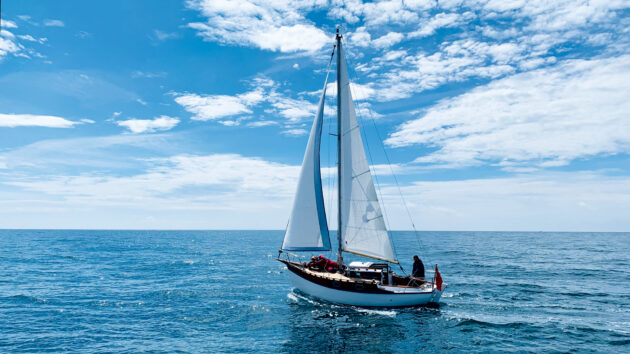
Relaxed cruising round Start Point and across to Dartmouth. Photo by Bob Shillito
The total cost of boat renovation
The cost for the boat renovation was remarkably low as I had only bought supplies like epoxy, ply, paint and caulking.
The total was about £800, which turned out to be terrific value as Sparrow has sailed all around the Fowey area, as well as our maiden voyage to Dartmouth and as far west as Helford.
The next objective is the Isles of Scilly!
Sparrow’s maiden voyage
As Sparrow’s renovation gathered pace, a plan emerged for my son to keep her on the River Dart. This raised the prospect of a daunting maiden voyage from Fowey to Dartmouth – about 60 miles – after extensive sea trials.
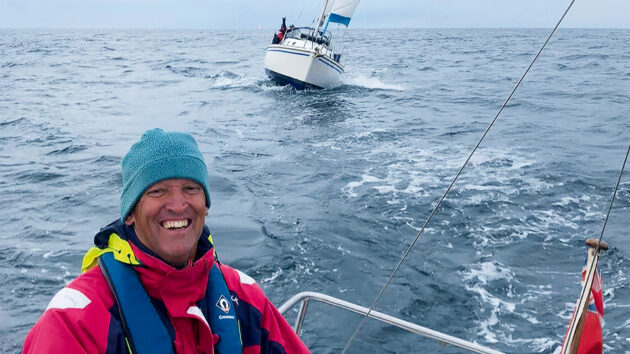
Then a friend offered to escort us in his yacht, which was an opportunity too good to miss. The catch was that he could only do it a week after Sparrow’s launch, which allowed a bare minimum of time to build confidence and eliminate snags.
Of course, we went for it.
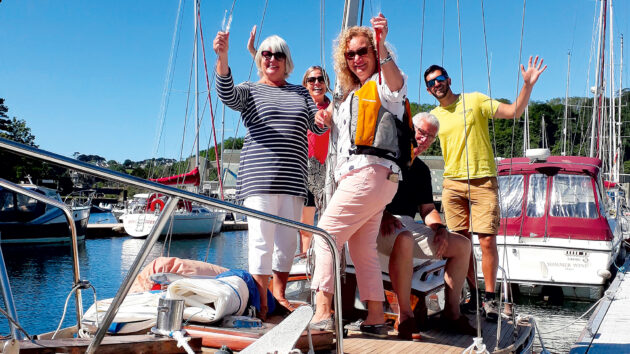
Photo by George Shillito
The crew assembled around a barbecue on the evening before the voyage as we planned our passage. The forecast showed no wind for the early morning, followed by a south-easterly for the rest of the day: not great for our easterly route.
We planned to motor 10 miles south in the morning calm, so we would be able to lay a course straight to an overnight stop on the River Yealm, near Plymouth, when the wind arrived.
We set out on mirror-flat waters at the crack of dawn but the further we went from land, the more alarmed I became that we were so evidently relying on my carpentry. I was mighty glad of our escort.
The wind arrived on cue, and we set off upwind at an increasingly brisk pace, thumping into the steep chop of Plymouth Sound under grey skies, increasing my carpentry anxiety.
Celebrating Sparrow’s new lease of life with former owners, Trevor and Suzanne. Photo by George Shillito
Then one of our crew, who had retired to a berth after losing his breakfast, roused himself just enough to point out that the floorboards were floating.
After a flurry of activity, it emerged that the bilge pump was switched off: I must have knocked it when reaching for the adjacent isolator switch. Panic over, we eventually made it into the Yealm for a well-earned beer.
The next day produced fantastic weather as we rounded Start Point and sailed across the bay to Dartmouth, where it felt as if we had just conquered the Atlantic.
Motoring up the Dart next to a gleaming modern yacht, the helmsman looked down from his elevated position, where his hand rested on a huge wheel, and said: ‘Great boat! I’d rather be on that’. ‘Thanks mate!’
Find your wooden boat now! There are plenty awaiting a new lease of life. Just be sure to first read Mark Shiner’s great article about Beating the boat renovation blues first.
The test of time
The work described here was all done in the spring of 2021 and Sparrow has now completed her fifth season.
I’m happy to report that my boat renovation has stood the test of time, except for the aft deck.
As the Covid pandemic was raging, no marine ply was available locally, so I’d used ‘exterior’ ply, which started delaminating in less than two years.
Unwilling to face ripping it out, I stabilised the ply and then glassed over it with heavy matting and epoxy which has produced a practical, if not very authentic, deck.
The forward deck was remarkably successful, as the caulking has remained intact, with the teak still looking great.
Since the initial boat renovation, I have replaced a few further planking sections, rebuilt the cockpit floor and attended to the other elements that I’d ignored, such as proper engine maintenance, navigation lights, and running rigging replacement.
Disasters excepted, I see no reason why Sparrow cannot continue to provide brilliant boating for at least another five years, and I’m glad I heard about her before she was chopped up.
Bob Shillito lives and works in South Cornwall and can be found afloat on the River Fowey or St Austell Bay on a sailing boat, motorboat, windsurfer or paddleboard, often with his wife, Lynn. He previously set up a watersports centre at Polkerris Beach near Fowey. He has a passion for extending the life of craft of all types.
Want to read more articles about boat renovation?
A subscription to Practical Boat Owner magazine costs around 40% less than the cover price.
Print and digital editions are available through Magazines Direct – where you can also find the latest deals.
PBO is packed with information to help you get the most from boat ownership – whether sail or power.
-
-
-
- Take your DIY skills to the next level with trusted advice on boat maintenance and repairs
- Impartial, in-depth gear reviews
- Practical cruising tips for making the most of your time afloat
-
-
Follow us on Facebook, Instagram, TikTok and Twitter