
You don’t have to be a boatbuilder to learn how to build a boat, argue Roger Nadin and Polly Robinson. Here is their guide to building your first kit boat

The question of how to build a boat can be met with a dizzying array of answers. A website search will reveal hundreds of small boat designs from around the world: dories and skiffs; whitehalls and wherries; pram dinghies and faerings; guide-boats and catboats, writes Roger Nadin.
Your difficulty will only be in choosing which boat is best for your particular requirements. These boats are all based on traditional boat designs, usually working boats that years ago served the working men of harbours, hunters out in the wild or fishermen out on the sea.
These old boats were built using traditional skills and methods which today tend to be hard to find and costly to use. Fortunately, modern boat designers have found ways to design and construct these same boats using up-to-date methods and materials that require far less skill.
Your choice is to (a) have your boat built for you, (b) buy plans and a manual to build what you want, or (c) buy a kit of pre-cut parts and follow simple instructions.
In terms of cost, buying plans is the least expensive option, but the next cheapest – a kit boat – will still give you the thrill and satisfaction of building a beautiful craft that will give you many years of pleasure.
Article continues below…
Free boat plans – Build your own Nigel Irens 14ft rowing and sailing skiff
Fancy building your own Nigel Irens-designed 14ft rowing/sailing skiff? Nic Compton explains how to get the plans for free

Build a boat from a kit
There’s a great way to own a new boat on a budget – build it yourself. We followed five builders…
At the end of this article is a list of oar, paddle or sail boats. This is just a taster of what is on offer (apologies to any designer who has been left out). Visit the websites linked below and you’ll be spoiled for choice.
There are designers all around the world and, in most cases, a great support network provided by each designer. Where you are really doesn’t matter since plans and kits are available just about anywhere in the world.
So, you’ve decided that you want to learn how to build a boat. What’s next? Ask yourself a few questions:
- How many people do you want to carry in the boat?
- Do I want to use a trailer or to carry my boat on a roof-rack?
- How much do I want to spend?
- Can I afford the time that it will take to build a boat?
- Do I want a boat just for rowing, for paddling, or would I like to sail as well?
- Do I want to enjoy camping on board?
There are lots of ‘off the shelf’ glassfibre boats on the market but wooden boats built using modern materials and methods can prove to be as long-lasting and a real pleasure to own.
How to build a boat: 5 popular methods
If the pleasure and satisfaction of building your own attracts you, then there are designs available to suit all levels of skill. Methods of building vary. Let’s take a look at just a few examples of available row/paddle/sail craft:
1. Stitch and tape
In this method, marine plywood panels are temporarily stitched together then fixed using glassfibre tape and epoxy.
An example from French designer Françoise Vivier is the 5m Doris Dory. Doris (French for ‘dory’) is intended to be a simple home-build but is also available professionally, built to a remarkably high quality (see steinboot.at).
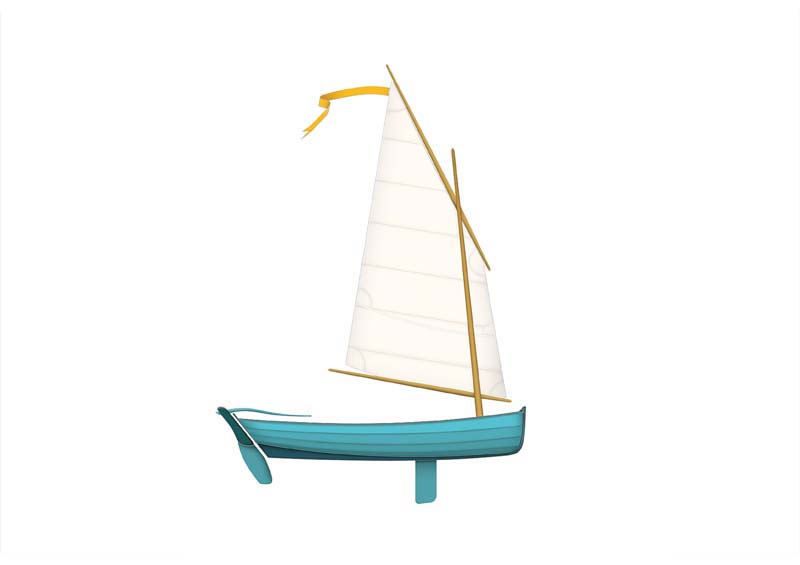
Doris Dory
She is a reworking of a traditional Banks dory – an 1850s fishing boat on the Grand Banks of Newfoundland – but with more stability, and is equally good as a sailing or rowing boat.
Another even simpler craft from New Zealand designer John Welsford is his Light Dory. Easily carried on a car roof-rack, this light, seaworthy iteration of the ubiquitous dory can carry plenty of equipment.
There are also open canoes that can be paddled and sailed. Some require the addition of floats on either side of the hull, which can be cumbersome, but Michael Storer in Australia has designed two canoes that encompass the stability of a dinghy with the speed and lightness of an open Canadian canoe. The Viola 14 and his larger KOMBI sailing canoes are well worth checking out.
Viola 14
2. Ply on frame
This technique involves the construction of an inner framework, which is then covered in ply panels.
The Drake 17 by American designer Clint Chase is a 17ft fixed-seat rowing boat, available both as plans or as a kit. It’s a boat for serious long-distance rowing and is capable of downwind sailing.
Also from the US comes the 15ft Jeff Spira Cape Cod Rowing Skiff. This has great capacity and is particularly simple to build. It looks like a good project for the first time builder.
Cape Code Rowing Skiff
3. Glued lapstrake
With glued lapstrake, pre-formed ply panels are epoxied together.
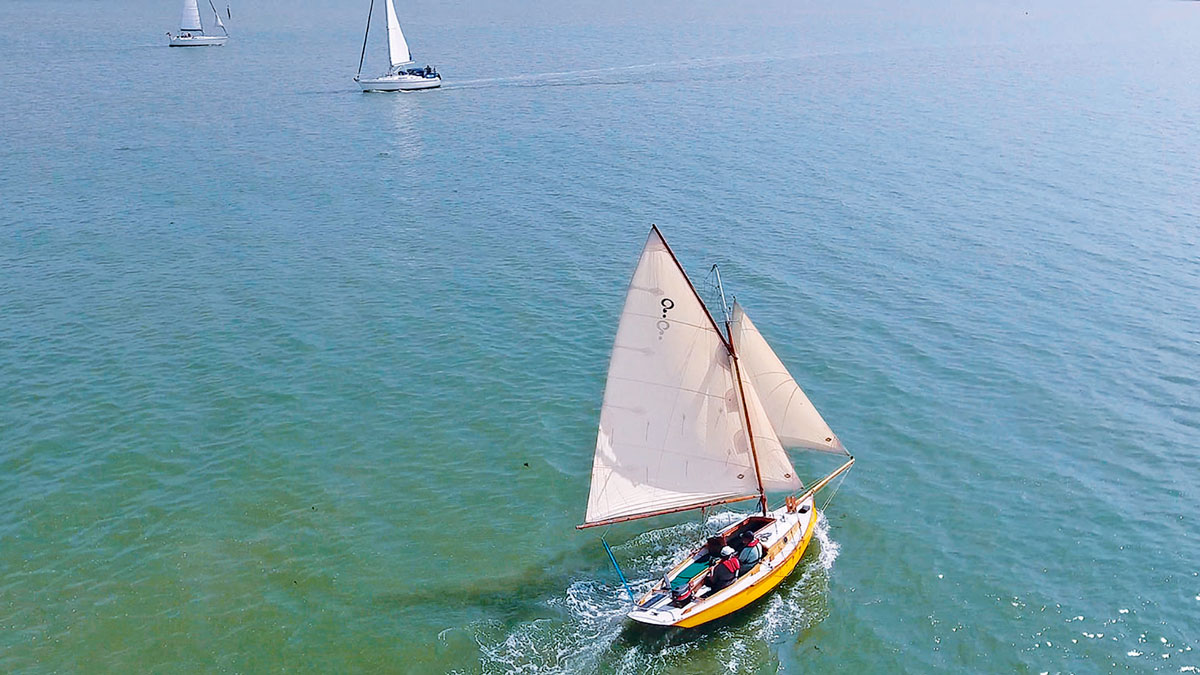
UK designer Iain Oughtred is well known for his beautifully proportioned and attractive boats. His 15ft Elf Faering is based on a historic Norwegian design.
Another option from Doug Hylan in the US is the solid and seaworthy 3.55m (11ft 6in) pram dinghy, named Oonagh after a Celtic faery queen.
Oonagh. Photo: Benjamin Mendlowitz Marine Photography
4. LapStitch
This trademarked system of accurately cutting and joining plywood planks is used in the Passagemaker design from John C. Harris. A 3.5m (11ft 6in) pram dinghy, it’s similar to other prams, but its light build makes it an easy boat to carry and attach to a roof rack.
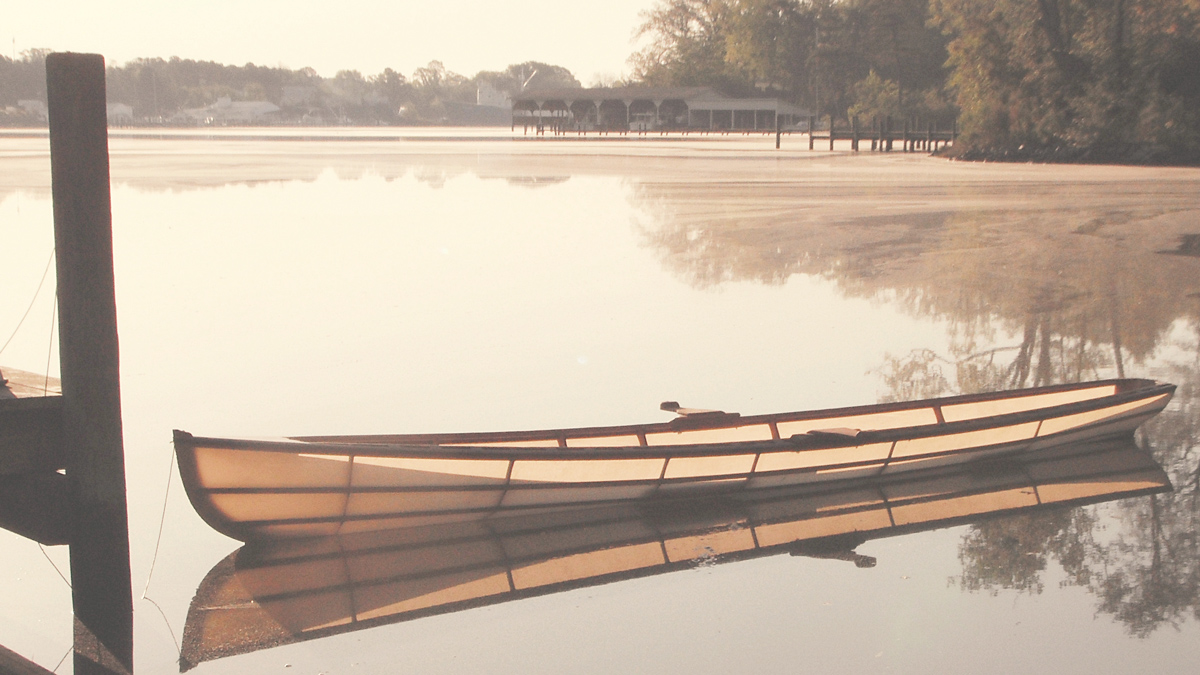
5. Skin-on-frame
This is an ancient method of creating a boat using a framework covered with a waterproof fabric. Originally constructed using animal skins or waterproofed canvas, the Baidarka ‘Eskimo’ kayaks are possibly the best known. These were originally built using bones for the frame and seal skins for the cover.
Skin-on-frame (SoF) is a very quick and cost-effective build method giving a lightweight but rugged vessel. These days, the craft is covered by modern ‘bullet-proof’ polyester and resin.
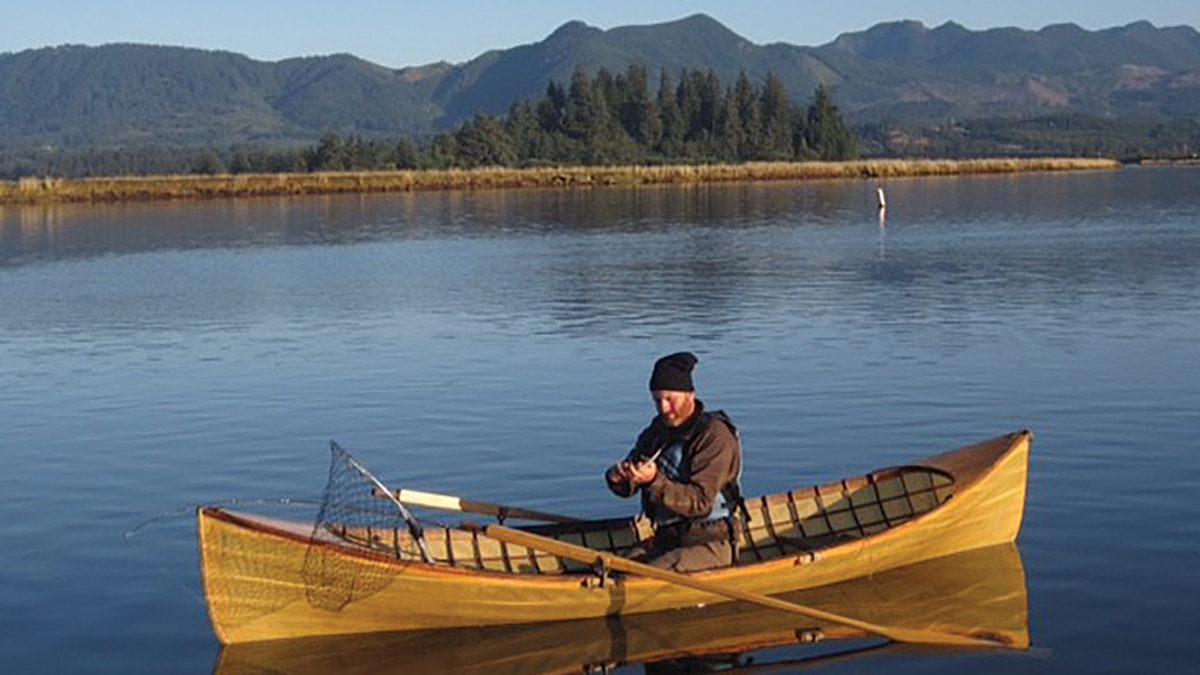
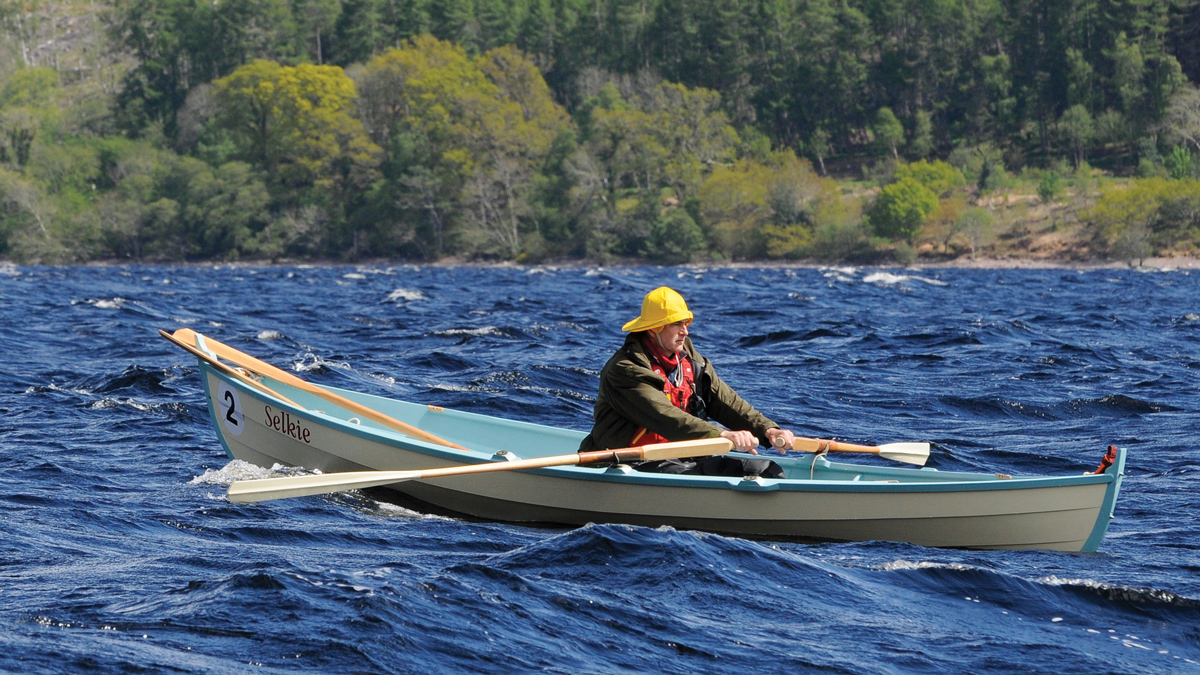
Adirondack Guideboat
Brian Schulz’s Guide Boat is based on traditional hunting and fishing boats from the Adirondack Mountains in the US. This elegant rowing boat weighs just 17kg (depending on length) and looks like a joy to own and row.
Another SoF craft is the US-designed 18ft rowing wherry Ruth. Available from Dave Gentry, at just 21kg this is another lightweight boat that’s also light on the pocket.
How to build a boat: Best practice
 Professional kit boat builder Polly Robinson shares her expert advice on how to build a boat from a pre-cut kit, and how to troubleshoot the most common problems…
Plywood boatbuilding has been popular for years – it’s cheaper, quicker and more accessible than traditional building methods – but in the past you’d need to loft the plans onto the plywood or use large, full-size paper plans to transfer to the panels.
Enter Computerised Numerical Control (CNC) machines which allow the designer to transfer all the panels into a computer-aided design (CAD) program that then allows the CNC machine to cut out the panels with great precision and speed.
The builder then gets started straight away with the fun part – building a boat with minimum risk of misshapen panels or human error.

CNC machine-cut panels means there’s less to go wrong if it’s your first time learning how to build a boat. Photo: Nic Compton
Epoxy allowed plywood boatbuilding to become faster and easier. Using a stitch and glue method – where panels are held together with wire or cable ties (stitched!) to get the boat’s shape and then secured with thickened epoxy applied as a ‘fillet’ to hold the shape permanently (glued!) – the epoxy is stronger than the wood it’s holding together.
It’s a method that hasn’t changed much in the years it has been used – The Gougeon Brothers on Boat Construction: Wood and West System Materials by Meade Gougeon is still as relevant today as it was when first published – and a great source of information for all kit builders.
The nature of a plywood boat kit with pre-cut panels means the risk of a disaster is greatly minimised. It’s a great method for first time builders or those who want to learn how to build a boat and get on the water as quickly as possible. Although problems are minimal there are a few areas where some care should be taken, as well as some best practices to follow.
1. Sharpening tools
At the start of most woodworking or boatbuilding classes the first task is always tool sharpening – with good reason. Trying to use any tool that isn’t properly sharpened will be a struggle.
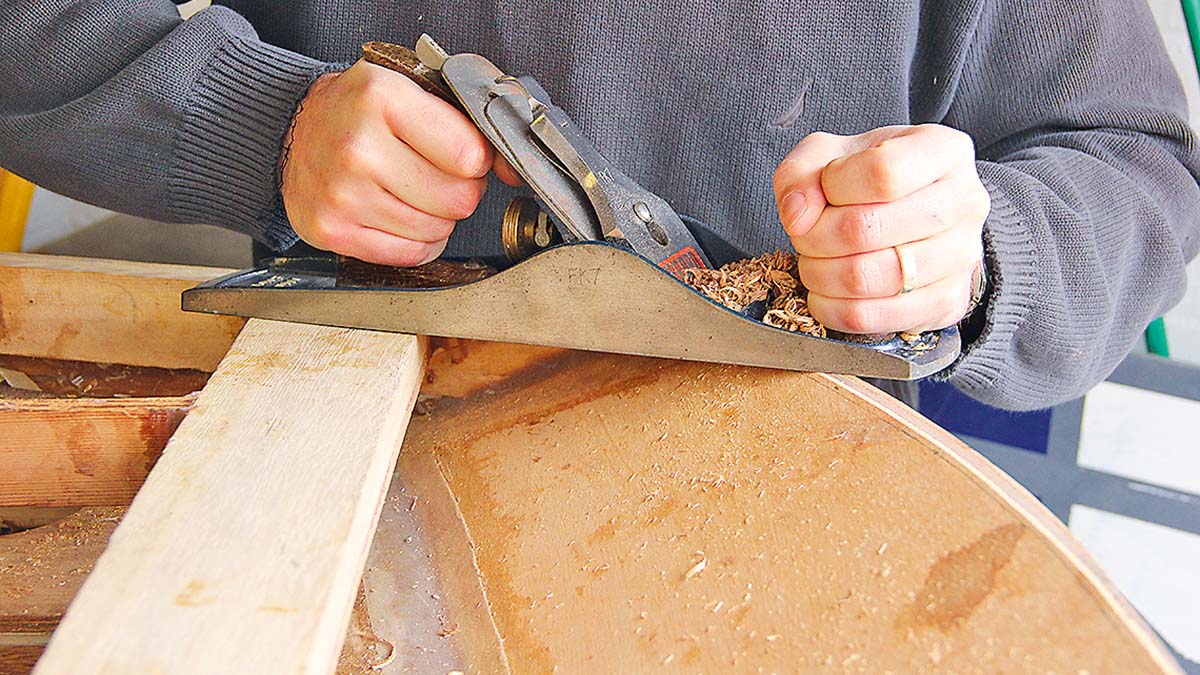
Make sure all tools are as sharp as possible before using them to build your kit boat
Building a kit boat should be fun, so the first port of call should always be dusting off the toolkit and getting prepped. Most kit boats will come with a manual and in it a list of tools needed – but if not, a hand plane is usually the most used tool!
2. Getting the right temperature
The temperature in your boat shed/workshop is something to consider. Ideally, we’d all work on our boats in the winter ready to launch on the first sunny day in spring, but unfortunately in the UK without a heated shop this can be an issue.

Be aware of the temperature of your boat workshop as it could affect how materials, like epoxy, perform
Epoxy likes warmth, most common brands will have a working temperature from about 10°C-25°C and going any lower than this will cause the epoxy to be thick and difficult to work with, especially when fibreglassing.
There are workarounds: heating the epoxy rather than a whole shed is more cost-efficient in the current climate, or building a tarp tent around your boat means you can keep the heat in a set area.
3. Using the right materials
When it comes to materials the age-old saying ‘You get what you pay for’ is very applicable. Boat kit manufacturers should be using the best materials possible: sustainably managed marine grade plywood and a reputable epoxy brand.
Always use epoxy resin otherwise you could compromise the strength of your boat
For epoxy, I always use West System and find it to be really user friendly and the highest quality. BS100 FCS certified plywood is the industry standard. Non marine grade will have more voids in the glue and will therefore not be as strong as the marine grade equivalent. You are putting time and money into a build: cutting corners with materials should not be acceptable.
Stitch and glue boatbuilding should always use epoxy resin for the fillets and fibreglassing. There are other types of resin available such as polyester and vinyl ester but these are not strong enough. Using them could compromise the strength of your boat. Designers usually issue a bill of materials for each design, this should always be followed.
Care should always be taken when using epoxy resin as it can cause sensitivity. You should always wear gloves and avoid exposure to the skin. Ideally, wear overalls or at least long sleeves and trousers. The dust can cause problems too; when sanding, always cover up and use a respirator. People who are regularly exposed can suddenly react, so prevention is key.
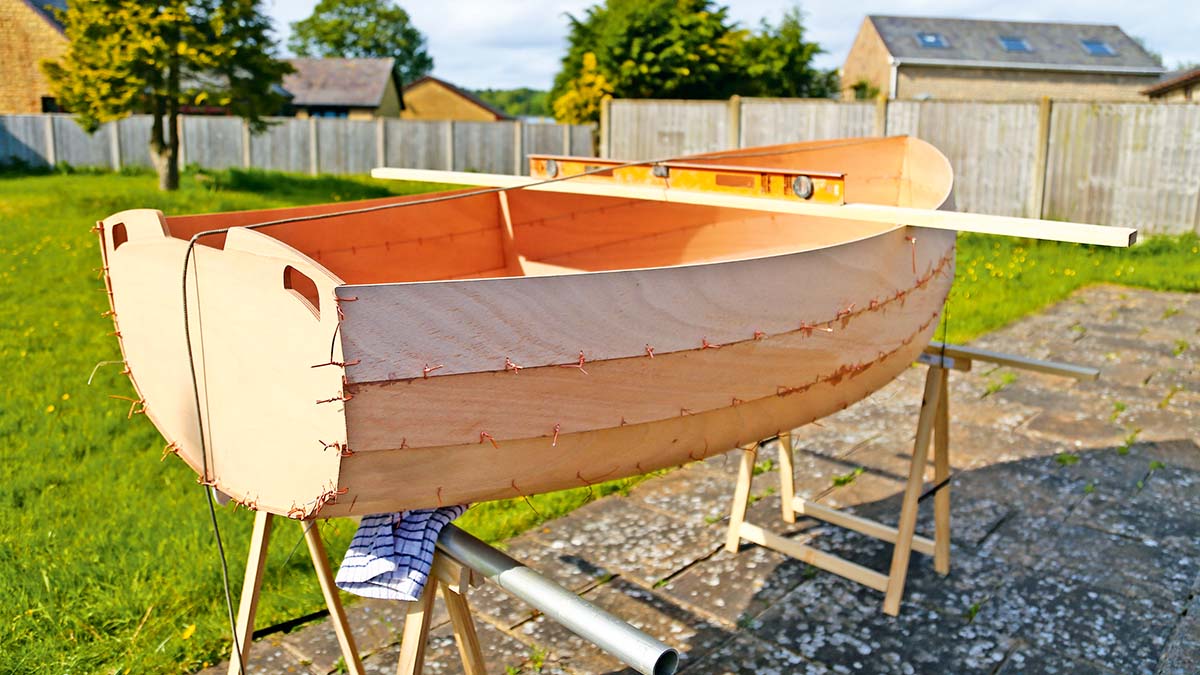
A Stem Dinghy with a centre line and spirit level to check the alignment is correct. The Stem Dinghy is based on a design by Selway Fisher and the kit is manufactured by Fyne Boat Kits
Building a boat from a kit is a great way to get straight into the fun part of the build, the assembly. Using good quality tools and materials means the process will be smoother with less chance for things to go wrong. Using high quality materials mean your craft will last for a long time.
How to build a boat: Common problems and how to solve them
You can buy the best kit on the market, made using the best quality materials and things can still go wrong if you don’t know how to build a boat properly. The simple nature of stitch and glue boatbuilding means that should the worst happen, and you run into a problem you can fix it!
1. Misaligned rocker
The CNC-cut panels should fit together very well. They’re accurately cut and any human error with the panels would be apparent when the first kit was put together; this should have been done before it became a commercial product!
If you find your kit is not going together properly, the problem is usually due to it being assembled on too flat a surface. Moving the sawhorses further apart will allow the boat to find its correct rocker and shape, and you will normally find the panels that would not sit right suddenly fit like a glove.
2. Epoxy not mixed thoroughly
During my time working for a kit company, the most common problem to arise during a build was always to do with the epoxy resin. Epoxy comes in two parts: a resin and a hardener. Each brand is slightly different but they all must be mixed exactly to the manufacturer’s instructions – if not they won’t cure.
Epoxy companies try to make life easier by supplying pumps for the resin and hardener that – in theory – should disperse the right amounts. In practice, this isn’t always the case, and many disasters can be averted by also measuring the weight of the resin and hardener once dispersed to ensure the correct ratio.
Mixing the epoxy thoroughly is also important: try to mix for a minute, slowly, to stop bubbles from forming in the mixture.
3. Misaligned panels
Nothing affects the overall performance of your boat more than correctly aligned panels. This ensures the boat tracks well and moves through the water efficiently, as the designer envisioned. The panels should fit together properly, and many designers have now added puzzle joints to help achieve correct alignment.
A fair line – a smooth curve without any indents and bulges – is always the goal and getting down to the correct height and sighting along the boat is often the best way to ensure this. A spirit level used at random points along the boat is also critical to ensure one side isn’t sitting higher than the other.
The most common misalignment issues are often a twisted bow or a twist running throughout the length of the boat. Using a string along the centre line and checking the distances match from the centre to the edges is a good way to check this, as is eyeballing along the boat from the bow.
Once the boat is stitched and checked that it’s not twisted, do not move it until the fillets are applied and have been allowed to fully cure.
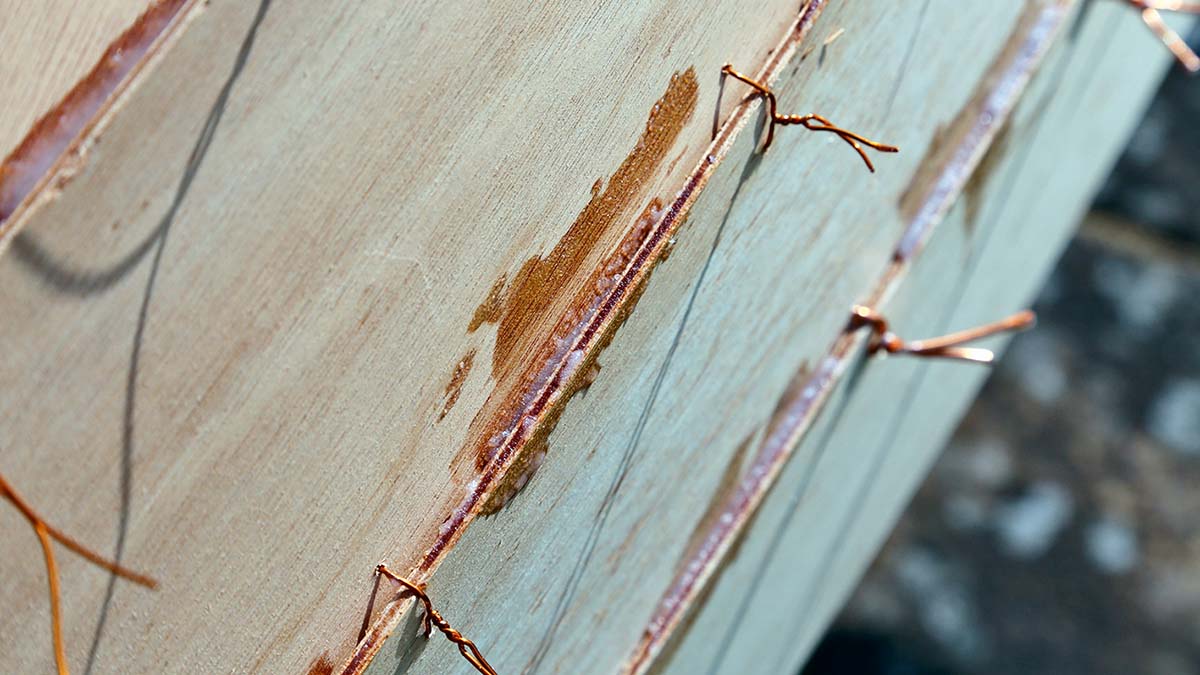
An incorrect tack weld – there is barely enough epoxy to hold the two panels together, it needs to bridge the gap between the panels.
4. Poor tack welding
Some boats that have a clinker-style shape require ‘tack welding’ before the fillets can be applied. This involves syringing a small amount of epoxy, thickened with microfibres, between the gaps of the panels while the boat is turned upside down, avoiding the wires.
Once cured the wires can then be cut and the boat will hold its shape while the fillets are applied. The tack welds should fill the gaps right up to the top. If they’re not ‘full enough’ the panels can still misalign. Ensuring they stay in the correct shape now means you can be confident your boat will be correct when the fillets are applied.

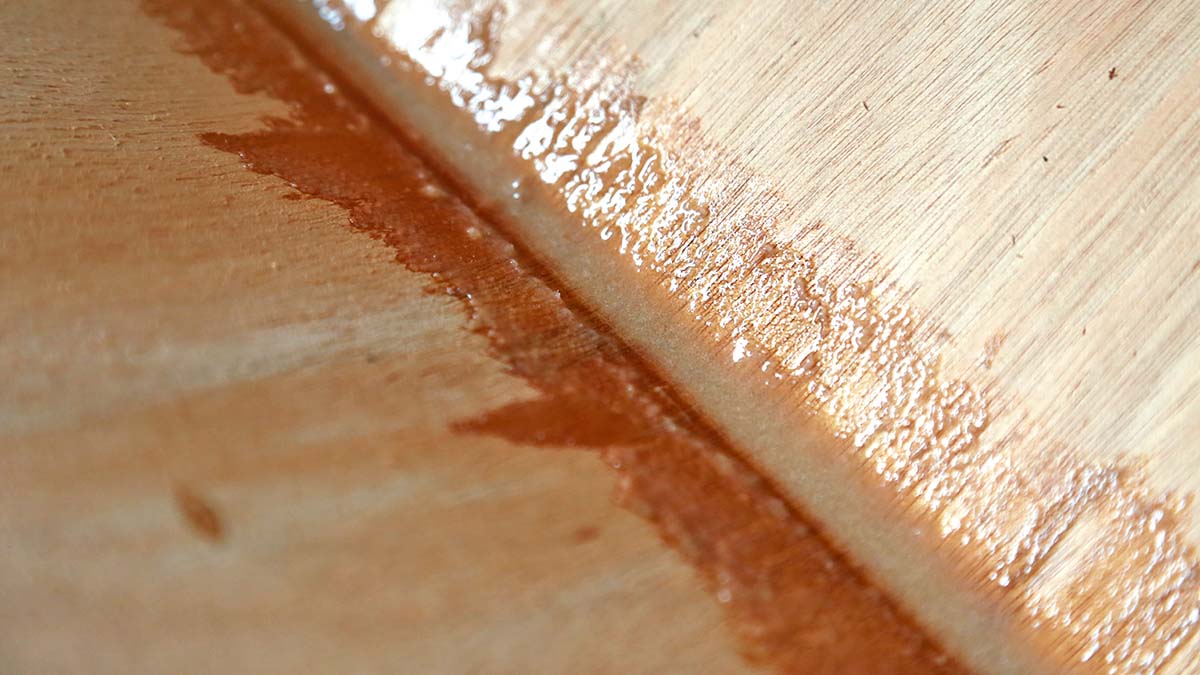
A correct tack weld – the epoxy is up to the top of the panel
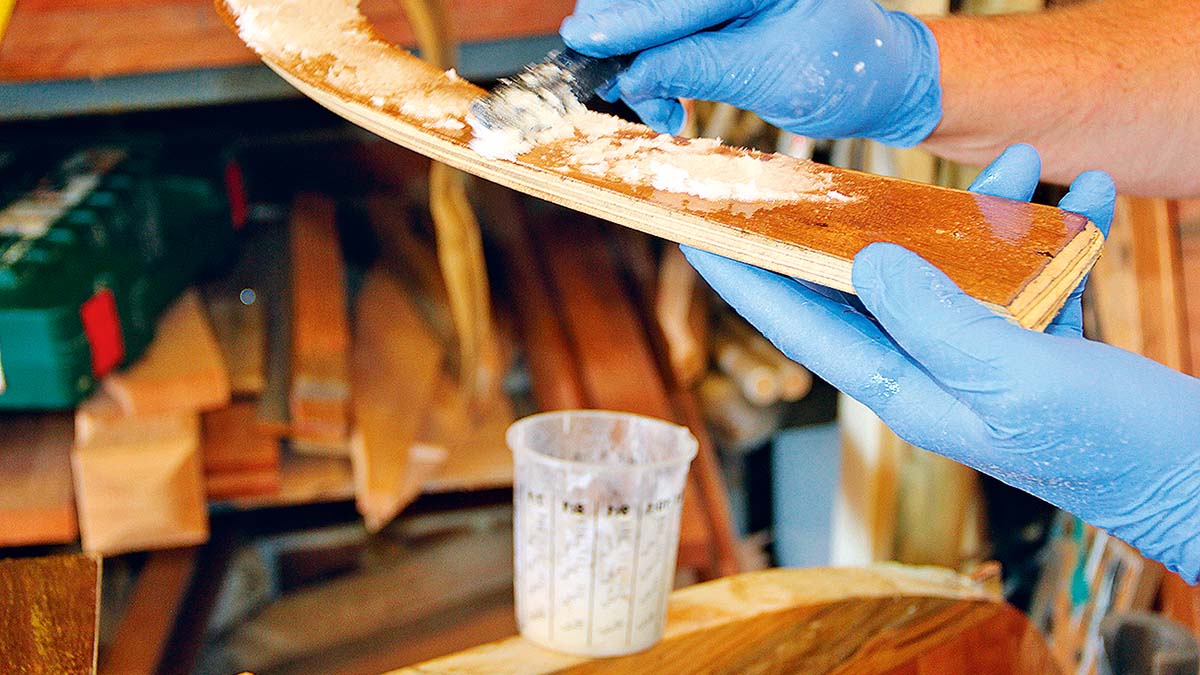
5. Skinny fillets
Fillets are made by mixing epoxy with a thickener, usually a mixture of microfibres for strength and wood flour for colour. The amount of wood flour can be altered depending on how light or dark you would like the fillets to appear.
The amount of thickeners to add is an art rather than a science: you should add a spoonful at a time until you get a consistency that resembles smooth peanut butter.
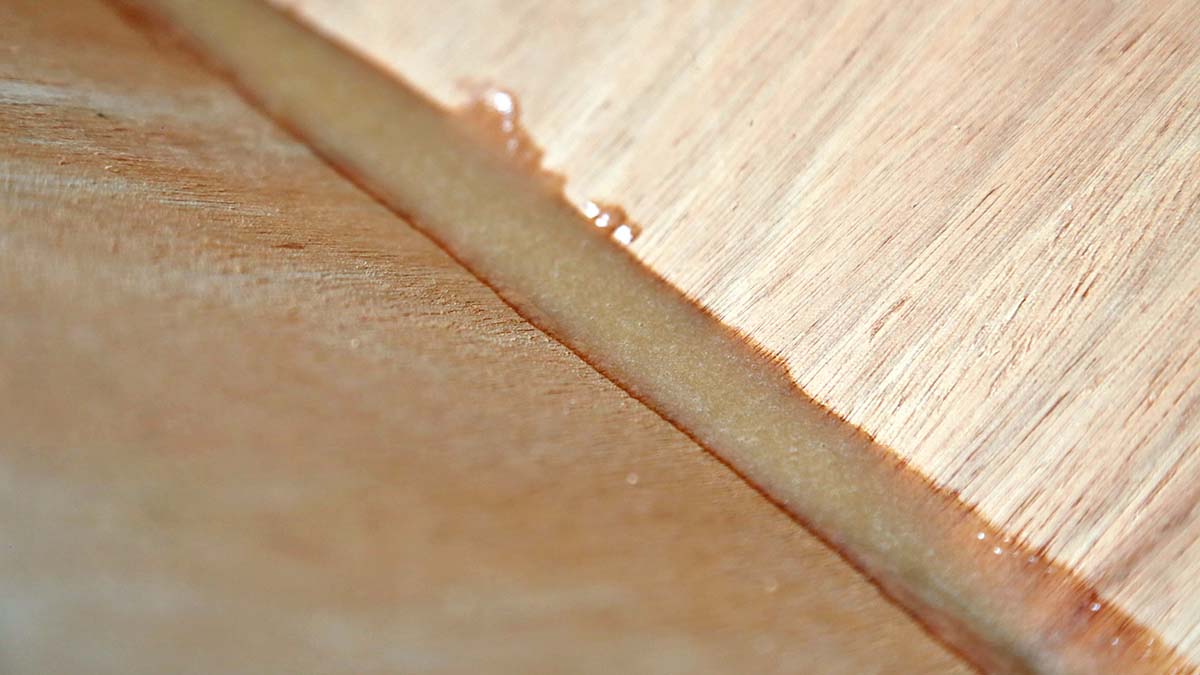
A poor fillet – there is not enough epoxy to breach the gap between the two pieces of plywood which will compromise the structural integrity of the join.
Getting the fillets right is a critical step in the build. Too small and they’ll not bridge the gap between the two panels properly; too big and they’ll add unnecessary weight and look less attractive. The fillets will be visible on most designs.
Practising on a scrap of wood or an area which will be hidden is a good idea. You don’t need expensive filleting bags; an icing bag works just as well – just cut the hole to roughly the size of the fillet you want!
Once the fillets have been applied and are on their way to curing, you can go back an hour or so later and use a finger dipped in unthickened epoxy to run along the top of the fillet. This will ensure a smooth fillet that needs less sanding.
A well-done fillet – notice how the epoxy bridges both pieces of plywood and is a consistent size.
6. Bubbles in fibreglass sheathing
Fibreglass wetted out with epoxy is what gives a boat its strength. Air trapped under the fibreglass will cause bubbles to form. These not only look unsightly but can cause a weak spot. Once the glass is applied, keep checking on the boat. If any bubbles start to form, push them down. A squeegee is a useful tool for this.
If they’ve formed and the epoxy has cured the best thing would be to cut them out and patch them with a fresh bit of glass, feathering the edges into the existing glass so it won’t show when you come to varnish or paint the boat. If they’re smaller than a 5p coin, you can simply make a small cut and syringe some epoxy in.
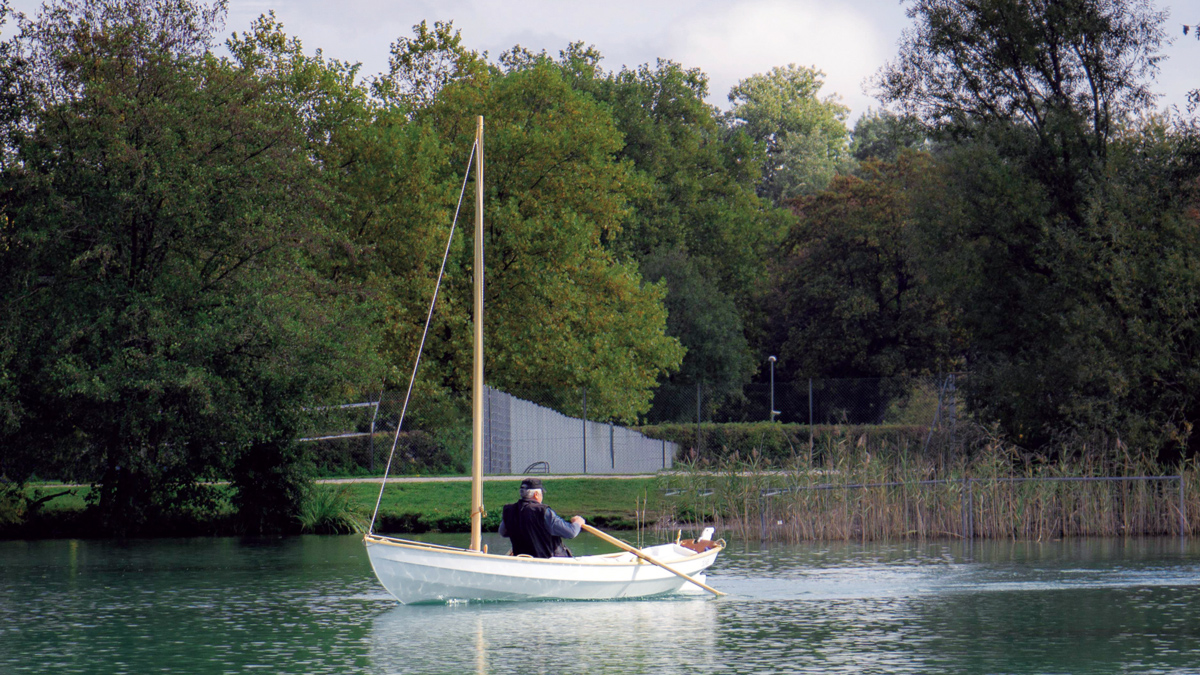
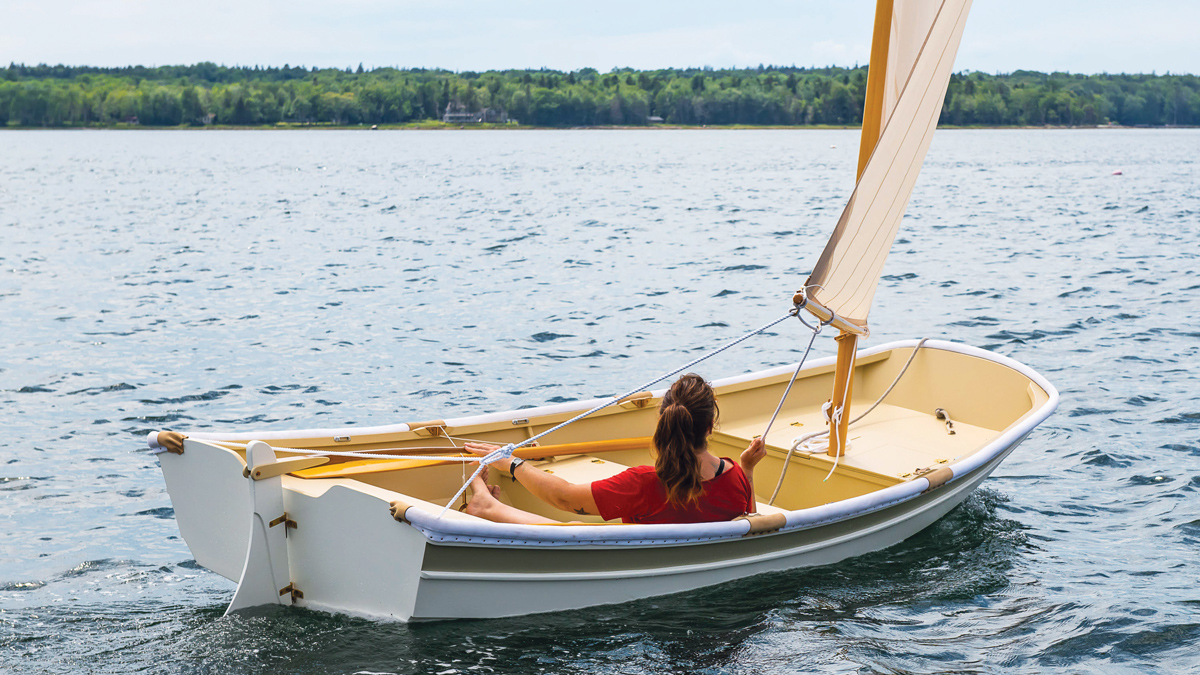
There’s nothing better than sailing a boat built with your own hands
How to build a boat: Choosing the right design
There are many books available on the subject of modern boatbuilding – so browsing through these will give you a good idea of what’s involved. Some boats take only a few days of part-time work to build, while for others you’ll need to commit to a few weeks of weekend and evening labour.
Now you’ve acquired your boat, where can you use it? Different countries have different rules – or none at all! In the UK you’ll need a permit or licence of some sort for just about any form of inland waterway. Check out local byelaws and/or the Canal & River Trust or the Environment Agency.
To launch in the sea, check local harbours and marinas who may or may not charge a launching fee. And please remember, if you are heading out to sea, seek some tide and weather details and take an RYA course on navigation.
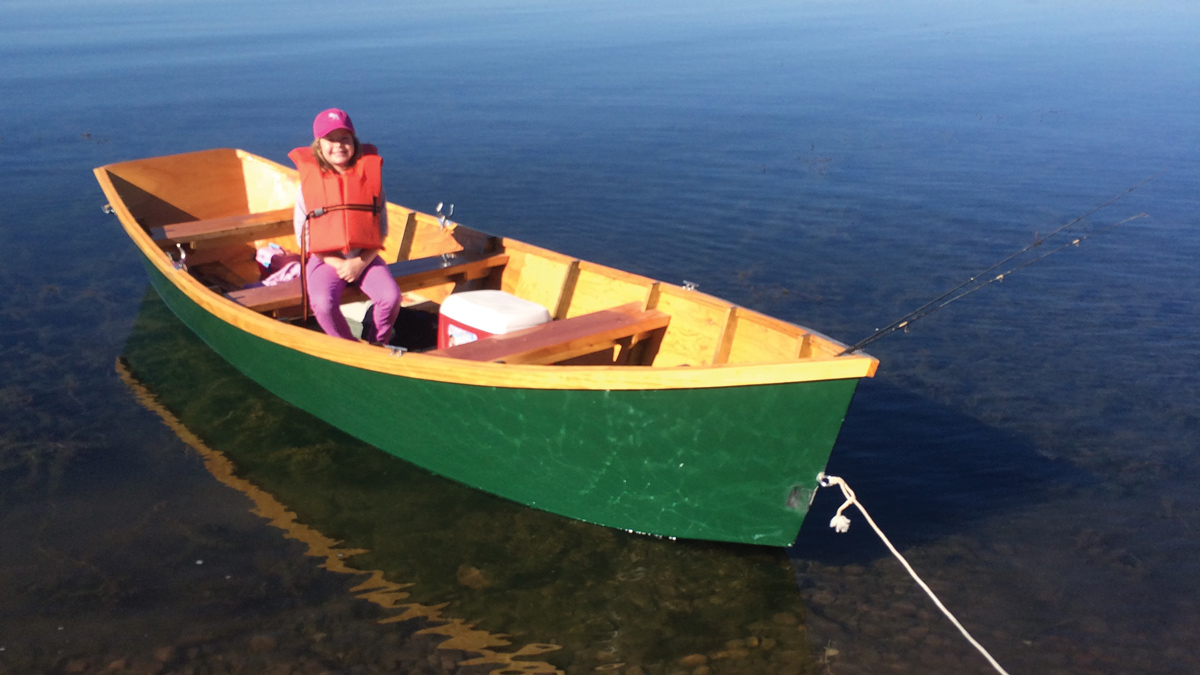
Whether your first trip is on a river, lake, canal, or sea, take a short trip to see that everything works well and that your rowing seat is comfortable.
Once you have checked everything then you can set about some longer distance journeys. These can, if you wish, include an overnight stop since most craft can be used for cruising. Your overnight can be in a tent on land or, probably better still, under canvas on your boat.
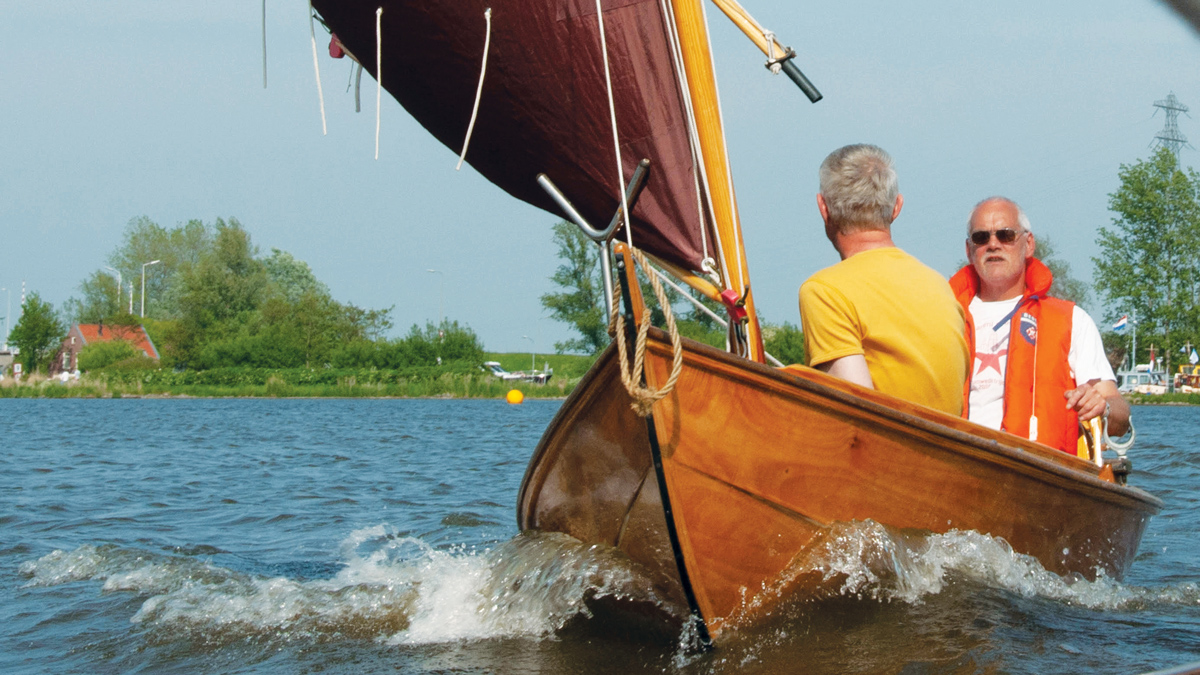
Photo: Kathy Mansfield
Night under canvas
If you have never spent a night under canvas this might all sound a bit daunting. Don’t expect a solid night’s sleep the first night. The boat may rock a bit, the canvas, blow and slap a bit and you might be alarmed by just how noticeably quiet it can be out in the country away from town.
My first overnight trip by boat was on the River Ardeche in France with a small group of canoeists. We pulled our boats up on the rocky bank and set up camp on a cliff-bottom ledge. As the sun dropped over the edge of the river gorge, a deep peace descended, and a black starry sky became our cover. Bliss!
Another canoe trip – with two friends – took me from the north coast of Germany over to the island of Wangerooge, one of the Frisian Islands. We stuffed our sea-going kayaks with tents, food and clothing and crossed the fast-flowing tides that run between the islands. We camped close to a little harbour, surrounded by seabirds and seals.
Whether for fitness (both physical or mental), a romantic picnic, or just the pleasure of being out in nature, a small open boat to row, paddle or sail will provide you with great pleasure.
17 of the best kit boats
Cape Cod Rowing Skiff
The 4.6m Cape Cod Rowing Skiff has a flat bottom and is probably one of the simplest boats to build.
LOA: 4.60m
Beam: 1.40m
Weight: 59kg
Build method: Ply on Frame
Designer: Jeff Spira
Kit and/or plan supplier: Spira International Inc.
Doris Dory
The 5m Doris is a French-designed Dory that can be rowed or sailed. It’s available as plans, a kit or can be built by an agent based in Austria.
LOA: 5.00m
Beam: 1.45m
Weight: 88kg
Build method: Stitch and tape
Designer: François Vivier
Kit and/or plan supplier: Vivier Boats
Drake 17
Drake 17 Rowboat
The Drake 17 fixed-seat rowing boat has some downwind sailing ability. Based mainly on a Norwegian faering it is built using the plywood on frame method.
LOA: 5.30m
Beam: 1.30m
Weight: 50kg
Build method: Plywood on frame
Designer: Clint Chase
Kit and/or plan supplier: Chase Small Craft
Elf Faering
At just 15ft (4.57m) the Elf Faering is capable of carrying a camping load and trekking along for many hours.
LOA: 4.57m
Beam: 1.34m
Weight: 65kg
Build method: Glued lapstrake
Designer: Iain Oughtred
Kit and/or plan supplier: Classic Marine/Jordan Boats

Elf Faering. Photo: Kathy Mansfield
Oonagh
Oonagh is a pram dinghy, which has the advantage of more space and stability than their ‘pointy-nose’ dinghy equivalents.
LOA: 3.60m
Beam: 1.52m
Weight: 77kg
Build method: Glued lapstrake
Designer: Doug Hylan
Kit and/or plan supplier: Classic Marine/Jordan Boats
Viola 14
The Viola 14 has the underwater shape of a dinghy for enhanced sailing and added stability. Like the KOMBI (below) it is based on an open canoe, and so can be used as either a sail or paddle craft.
LOA: 4.30m
Beam: 1.00m
Weight: 34kg
Build method: Stitch and glue
Designer: Michael Storer
Kit and/or plan supplier: Storer Boat Plans
KOMBI
LOA: 4.80m
Beam: 0.86m
Weight: 21kg
Build method: Stitch and glue
Designer: Michael Storer
Kit and/or plan supplier: Storer Boat Plans
The Ruth Wherry weighs just 21kg
Ruth Wherry
LOA: 5.50m
Beam: 0.84m
Weight: 21kg
Build method: Skin-on-Frame
Designer: Dave Gentry
Kit and/or plan supplier: Gentry Custom Boats
Adirondack Guideboat
LOA: 4.57m
Beam: 0.98m
Weight: 32kg
Build method: Kevlar or cedar
Designer: Traditional design
Kit and/or plan supplier: Adirondack Guideboat
Acorn 15
LOA: 4.60m
Beam: 1.20m
Weight: 60kg
Build method: Clinker ply
Designer: Iain Oughtred
Kit and/or plan supplier: Classic Marine/Jordan Boats
Cape Falcon Kayak
LOA: 3.7m-4.80m
Beam: 0.79m
Weight: 14-19kg
Build method: Skin-on-frame
Designer: Brian Schulz
Kit and/or plan supplier: Cape Falcon Kayaks
Caravelle Skiff
LOA: 4.40m
Beam: 1.23m
Weight: 52kg
Build method: Plywood on frame
Designer: Clint Chase
Kit and/or plan supplier: Chase Small Craft
Classic 12 Geodesic Skiff SOF
LOA: 3.70m
Beam: 1.23m
Weight: 13kg
Build method: Skin-on-Frame
Designer: Platt Monfort
Kit and/or plan supplier: Geodesic Airolite Boats
Light Dory
LOA: 5.10m
Beam: 1.26m
Weight: 42kg
Build method: Stitch and tape
Designer, Kit and/or plan supplier: John Welsford
Shenandoah Whitehall
LOA: 4.10m
Beam: 1.20m
Weight: 27kg
Build method: Skin-on-frame
Designer: Dave Gentry
Kit and/or plan supplier: Gentry Custom Boats
Skylark
LOA: 1.8m-3.7m
Beam: 1.1m-1.5m
Weight: 23 kg-45kg
Build method: Stitch and tape
Designer: Paul Fisher
Kit and/or plan supplier: Selway Fisher Design
Passagemaker
LOA: 3.50m
Beam: 1.40m
Weight: 41kg
Build method: LapStitch
Designer: John C. Harris
Kit and/or plan supplier: Fyne Boats / Chesapeake Light Craft
Why not subscribe today?
This feature appeared in the December 2021 edition of Practical Boat Owner. For more articles like this, including DIY, money-saving advice, great boat projects, expert tips and ways to improve your boat’s performance, take out a magazine subscription to Britain’s best-selling boating magazine.
Subscribe, or make a gift for someone else, and you’ll always save at least 30% compared to newsstand prices.
See the latest PBO subscription deals on magazinesdirect.com