
Wood veneer can revitalise and add a touch of class to many boats. Richard Johnstone-Bryden shares advice on techniques for cutting, gluing and fitting ply veneer
Varnished wood can enhance the appearance of any boat, especially one with classic lines. The trouble is, sanding back previously painted wood may not necessarily reveal its true beauty – there could be repairs lurking below the surface which, although practical, are not very attractive to look at.
An alternative is to apply a fresh layer of plywood veneer over the surface, which can then be varnished to a high standard.
There are two drawbacks to this idea. First, the varnish must be well maintained at all times, as the plywood veneer will not be thick enough to withstand much sanding back if water seeps through deteriorating varnish layers and stains the wood.
Second, on boats with cabin sides longer than 2.44m (8ft) it may be necessary to use more than one piece of ply veneer, which inevitably means a visible join. Once again, this join will be susceptible to water damage if the finish is not maintained.
Standard sheets of veneer come in 2.44m x 1.22m (8ft x 4ft) sheets, and although it is possible to buy longer sheets the price is significantly higher. The visual impact of any joins can be minimised with accurate cutting.
Cutting, gluing and fitting plywood veneer: step-by-step

Credit: Richard Johnstone-Bryden
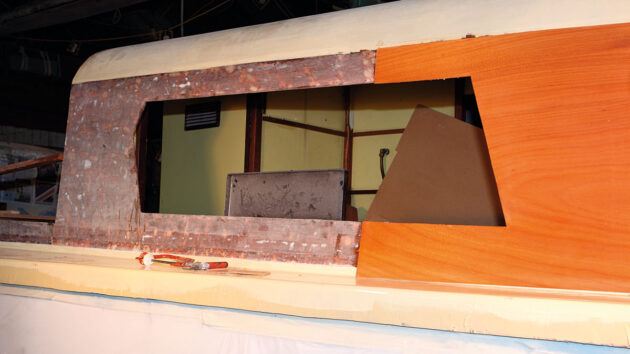
1. Before work can begin on the cabin sides of this 35-foot Bourne motor cruiser, the cabin roof and decks are coated with epoxy and glassfibre matting. Once the epoxy is cured, cut back the excess GRP matting, first with an angle grinder and then with a chisel to reveal the sanded wooden cabin sides.
Credit: Richard Johnstone-Bryden
2. To determine the exact size of the area to be covered by the veneer, use strips of fibreboard to make up a template. These strips reproduce the basic outline and a 50mm (2in) dummy stick (or spiling block) is used to determine the exact profile that is required. Here, the upper edge of the dummy stick is lined up exactly with the lower edge of the cabin roof’s GRP matting, and the position of the lower edge of the dummy stick is marked off against the template.
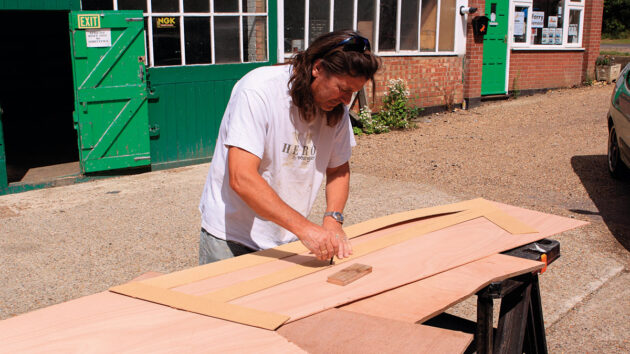
Credit: Richard Johnstone-Bryden
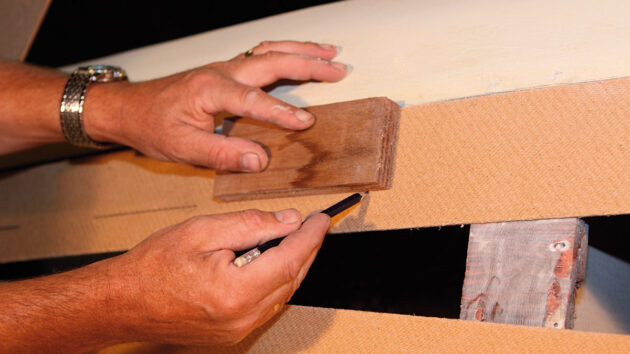
3. Lay the template over the plywood veneer so the shape can be marked out for cutting. The dummy stick is used to plot out the edges of the wood veneer: the stick’s lower edge is placed in line with the marks on the template and a pencil is run along the stick’s upper edge to mark out the exact shape.
Credit: Richard Johnstone-Bryden
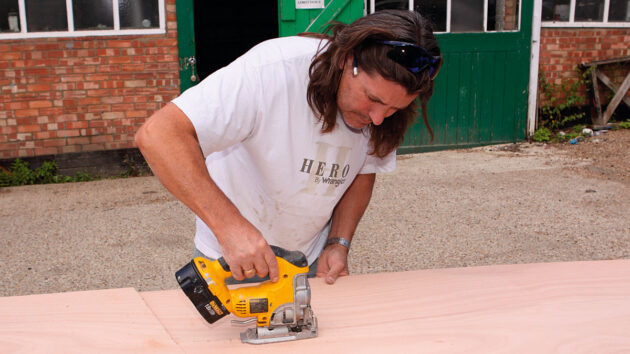
4. A jigsaw offers a quick way to cut the plywood veneer, but leave a small surplus of approximately 2-3mm around the edge, which can then be trimmed to shape with a block plane.
Credit: Richard Johnstone-Bryden
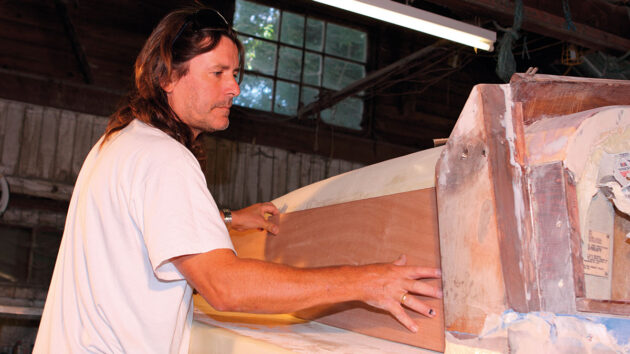
5. The veneer is offered up to the boat to check that it fits. While it is held in position someone marks out the shape of the window on the inside face. The opening for the window is cut with a jigsaw, again leaving a 2-3mm surplus that will be planed off once the veneer is glued in position.
Credit: Richard Johnstone-Bryden
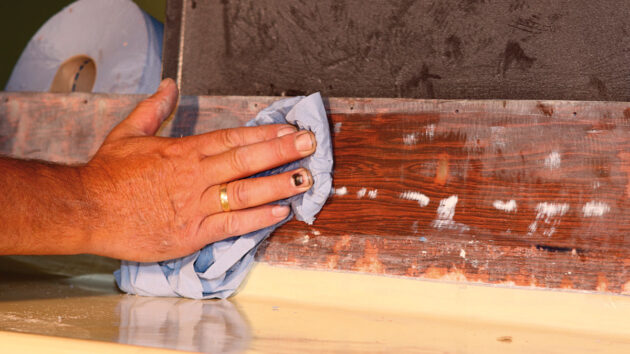
6. Now that the panel is cut to size, clean the cabin side with acetone before applying the epoxy.
Credit: Richard Johnstone-Bryden
7. The cabin sides are too long for a single sheet of veneer, so two sheets will be joined. Note the difference between the old timber and the new veneer.
Credit: Richard Johnstone-Bryden
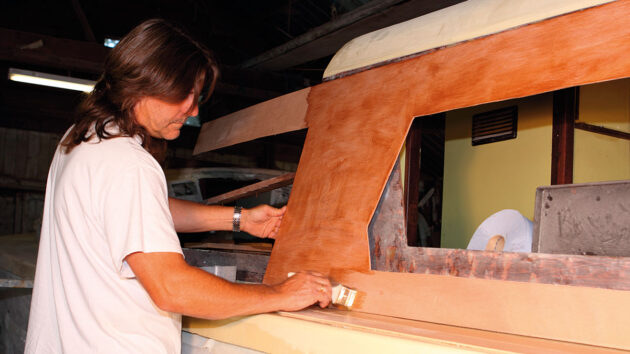
8. Mix up some epoxy and apply a coat to the inside face of the wood veneer. Apply a coat to the cabin side to ensure good adhesion.
Credit: Richard Johnstone-Bryden
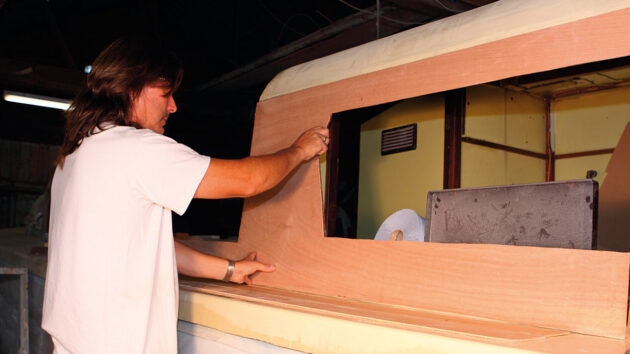
9. Speed, not haste, is required. Carefully lines up the panel. Once in the correct position, run your hands over the panel to ensure strong contact.
Credit: Richard Johnstone-Bryden
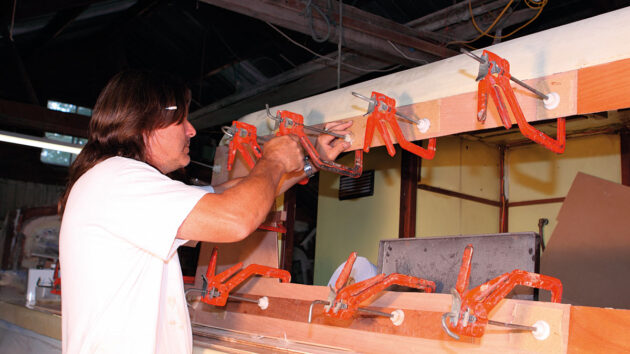
10. The success of the bonding process largely depends on the amount of pressure that can be applied, so use a large number of clamps to hold the veneer firmly in place until the epoxy has fully cured. Wooden battens help spread the pressure evenly across as wide an area as possible.
Credit: Richard Johnstone-Bryden
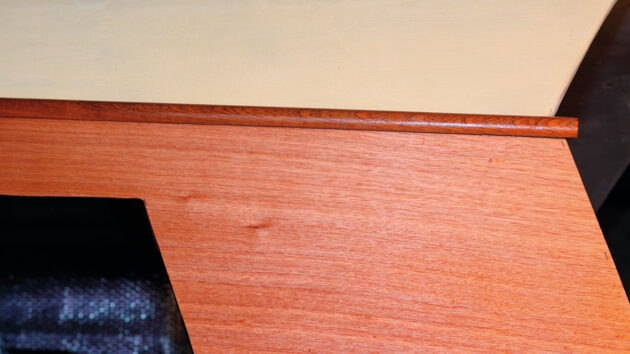
11. Finally, a tailor-made length of beading neatly seals the joint along the top edge between the epoxy-covered cabin roof and the wood veneer.

The art of veneering: step-by-step
Face up to the task of applying veneer with the help of boatbuilder Tony Davies
How to build a boat with cold moulding: the secret to a hull that looks like GRP
Richard Johnstone-Bryden explains cold moulding, a time- and cost-effective method of combining the beauty of wood with the strength and…

Boat wood: a complete guide for yacht owners
Boatbuilder and finisher Lyndon March explains which types of wood work best for different repairs and modifications on board

Making a headboard for comfier sleeping on board
Chris Mardon fabricates a removable wooden bunk headboard

What to read more practical articles?
A subscription to Practical Boat Owner magazine costs around 40% less than the cover price.
Print and digital editions are available through Magazines Direct – where you can also find the latest deals.
PBO is packed with information to help you get the most from boat ownership – whether sail or power.
-
-
-
- Take your DIY skills to the next level with trusted advice on boat maintenance and repairs
- Impartial, in-depth gear reviews
- Practical cruising tips for making the most of your time afloat
-
-
Follow us on Facebook, Instagram, TikTok and X