
No need to fear GRP repairs with these helpful tips from Andy Pag
Carrying out boat fibreglass repair can seem like a mystical art with so many products and techniques to know about.
Get it wrong and it’ll need redoing within the year.
There are numerous ways to repair fibreglass so just because you’re not mimicking your boatyard neighbour doesn’t mean you’re doing it wrong.
It’s helpful to understand the basics to avoid the pitfalls that lead to bad boat fibreglass repair.
Any repair is going to follow these four steps:
- Surface preparation
- Application of resin
- Gap filling
- Finish
You can buy resin systems and product ranges which take the guesswork out of some aspects, and each comes with its own instructions, but a bit of knowhow will prevent you from getting sucked into the sales pitch and buying supplies you don’t need or aren’t compatible with your boat.
Boat fibreglass repair Stage 1: surface preparation
This is the dirty part. Sanding and grinding fibreglass is a horrible job.
As it’s ground, minuscule shards of glass become airborne and land on your skin causing an itching that will drive you crazy.
Wearing a forensic-style suit helps, and a respirator and goggles are a must, but no matter how careful you are it’s still going to itch and send dust everywhere.
Low pressure compressed air is the best way to get it off your skin, followed by running water, but don’t be tempted to rub it off, as this sends the glass powder into your pores and makes the itch worse.
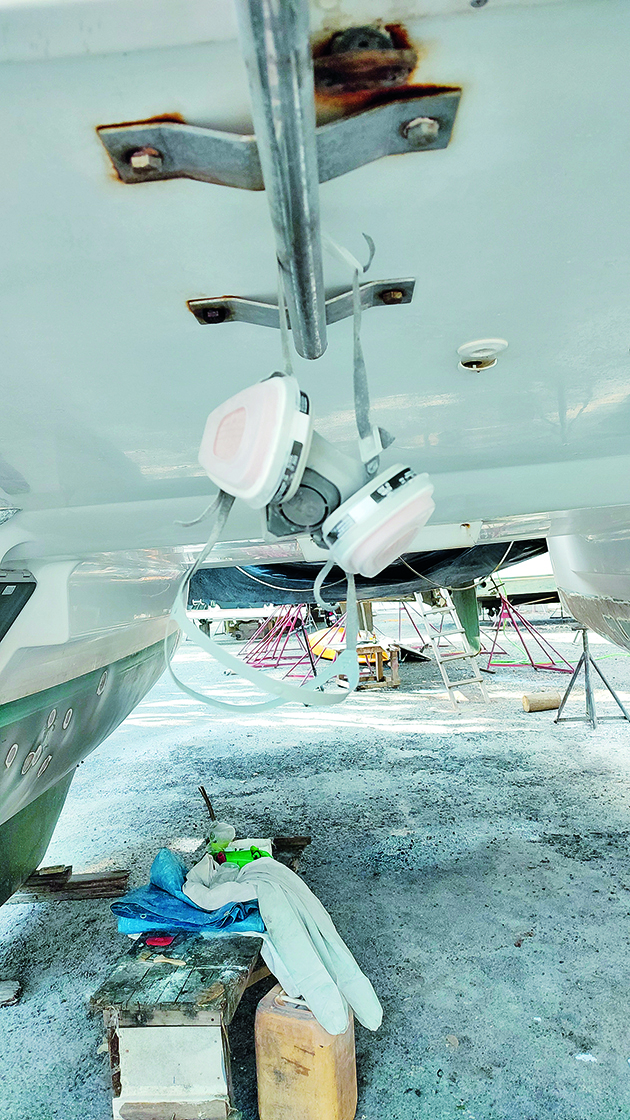
A respirator is essential if you are grinding fibreglass. Credit: Andy Pag
Using a grinder with an 80-grit flap wheel is the fastest way to clean up an area ready for glassing, but it sends dust everywhere.
Your boatyard neighbour will hate you and aside from itching, the microplastics you’re creating will end up in the watercourse.
A sander with a connected vacuum cleaner reduces the dust and a well-run boatyard will insist you use one.
A plant hire shop will rent you one if you don’t want to spring for the cost of buying.
A rule of thumb is to sand back 12x the thickness of the material you’re repairing.
So if the crack you’re repairing goes through a panel ¼in thick, sand back an area 3in around it.
The aim is to do it with a gentle slope so you take hardly any material off at the outer edge, and are almost breaking through near the crack.
Achieving an even gradient will help in the next stages.
Boat fibreglass repair Stage 2: application of resin
Deciding which resin, epoxy or polyester, will dictate the rest of the process.
Most people taking on boat fibreglass repair will automatically be drawn to using epoxy resin over polyester resin.
Epoxy is stronger and sticks to pretty much everything, and while it’s rarely the wrong choice, it’s often not the best choice.
Epoxy is a glue. It sticks to anything. Polyester is a polymer that creates a strong chemical bond with itself, but isn’t as good at sticking to other materials.
This means you can use epoxy to repair a polyester boat but you can’t use polyester to reliably repair epoxy surfaces because it won’t stick.
The good news is that unless your boat cost seven figures it’s almost certainly not made of epoxy but is polyester, so both polyester and epoxy will stick to a well-prepared surface.
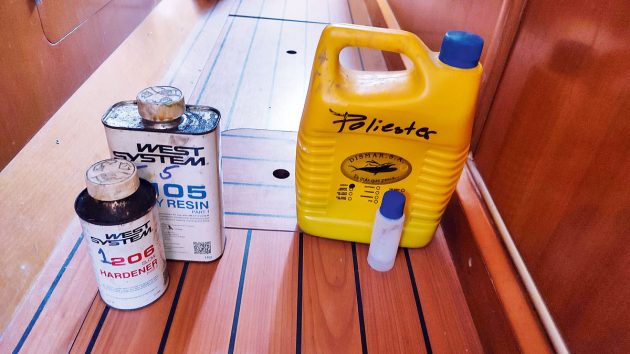
Epoxy and hardener versus polyester and catalyst. Credit: Andy Pag
Polyester has several advantages, which is why boat manufacturers use it.
Firstly it’s cheap, about a third of the cost of epoxy.
But if you’re making a small repair then the cost of resin material will be a small part of the total so unless you’re doing a large repair don’t let this sway you too much.
Polyester repairs on a polyester boat are a form of future-proofing.
Imagine a small prang on the bow of a polyester boat coming into dock.
If it’s repaired with epoxy and a few years later gets pranged again in the same spot the next repairer might not realise that this patch of the polyester boat is epoxy and mustn’t be repaired with polyester.
There’s an engineering tidiness to repairing a material with the same material.
So how to be sure if your damaged surface is polyester or epoxy?
You have to sand it back to the glass surface, even though finished polyester and epoxy look the same.
The clue is what you see on the way.
As you sand back you’ll either go through a thin layer of paint or a much thicker layer of gel coat.
If you see gel coat you can be confident your boat is polyester.
Freshly ground epoxy and polyester also smell different.
Polyester is sweeter but beware of breathing in even a very small amount as it isn’t good for you.
Before applying resin you need to clean off the dust you’ve made, and any contaminants.
With epoxy resin, wipe down with isopropyl alcohol. For polyester use acetone.
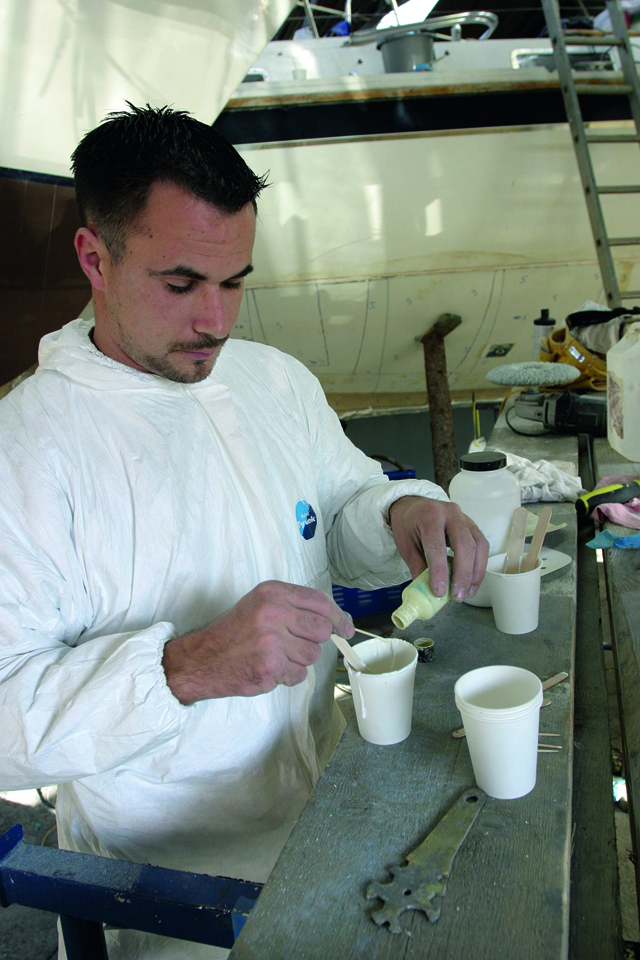
Mixes
Epoxy resin manufacturers will provide the hardener and the resin. Some offer different hardeners for slow or fast cures.
You can’t use one brand’s hardener with another brand’s resin.
Different manufacturers require different mix ratios too, so consult the instructions and check if the mix ratio is by weight or volume; they aren’t necessarily the same.
Polyester comes with a catalyst. It’s almost always MEK, and the recommended ratio is usually around 1-2%.
It’s quite hard to measure that small a quantity but one drop is about 0.05ml.
In both cases either adding slightly more hardener, or warmer ambient temperatures, will accelerate the curing reaction and give you less time to work with the batch.
Think about making several smaller batches if necessary, and clean out the mixing pot thoroughly in between.
Deviating too far from the mixing ratio or adding too much thinner can cause rubberiness to the cured resin, so don’t be tempted to eyeball it; always measure.
Keeping the remains that harden in the mixing pot for a day is a good way to assure yourself that the mix you made did harden properly.
Drying out
Before applying either resin, the area has to be bone dry. Any humidity, even in the air on a rainy day, will be trapped behind the resin and can cause problems.
With epoxy it prevents adhesion.
A water molecule is about the only thing epoxy doesn’t stick to. If there’s dampness in a polyester layup, trapped water will eventually react with the resin and expand causing bubbles and blisters similar to osmosis.
Glass mat
There are two types of glass mat to consider. Chopped Strand Mat (CSM) is a random bird’s nest of glass hairs that acts as a medium to hold the resin in place and provides a small amount of structural strength to the finished laminate.
It can be cut to size but tearing it up into patches is often a better way to use it as it creates feathered edges and avoids steps.
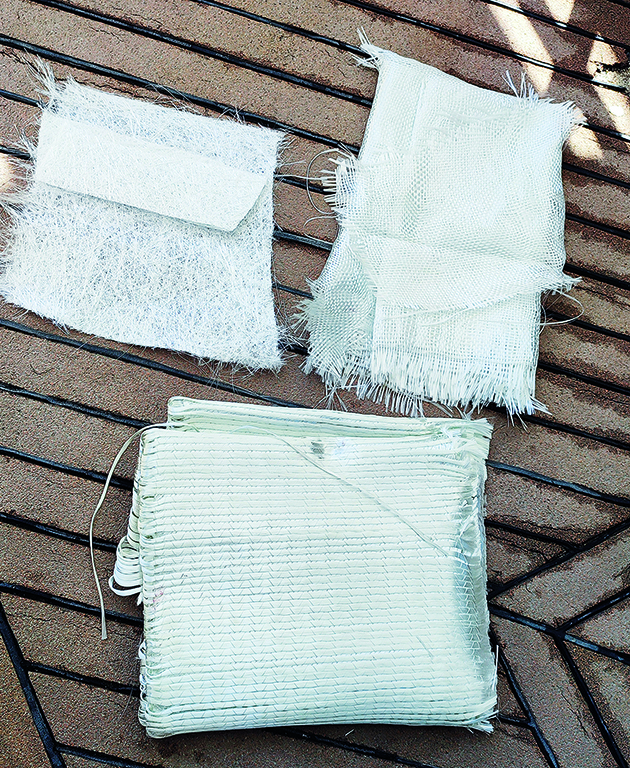
From top left: chop strand mat,
woven glass, triple strand mat. Credit: Andy Pag
Woven mat creates much more structural strength than CSM and it’s better for jobs like tabbing a bulkhead, where there are places that the glass alone will be carrying all the forces of the repair.
Ideally, you’ll line up the weave directions to cross over the structural weak line that needs reinforcing.
You can also get tri-radial weave with an extra layer at 45° but it’s expensive, hard to find, and is overkill for most DIY jobs.
Applying the glass and resin
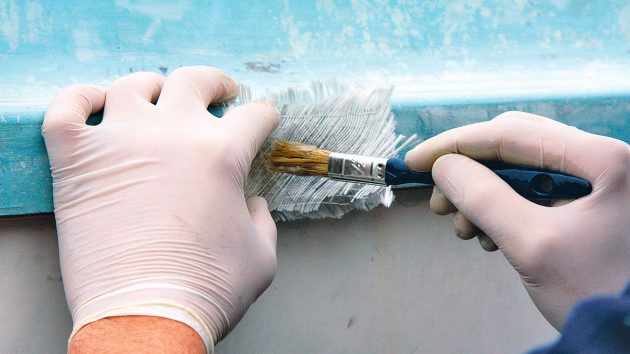
The technique you use will depend on the location and orientation of the repair but soak the prepared surface with resin with a brush or roller before you start.
Then you can either pre-soak the glass and slap it on (messy and a bit wasteful, but useful for hard-to-reach places), or apply the glass dry and soak it by pouring resin over it or painting it on with a roller or brush.
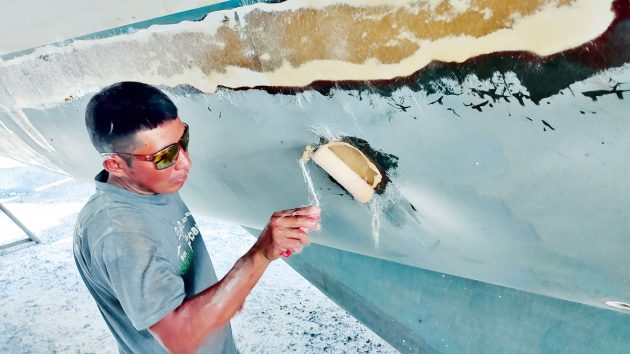
Using a roller to soak the chopped strand mat. Credit: Andy Pag
Brushes don’t work well with CSM as they tend to pull it apart.
A steel roller is nice because it can be cleaned and reused, but a small 2in mohair roller works well too and is cheaper for a one-off job.
Whichever method you choose, the aim is to get all the air out from under the mat and within its weave by soaking it.
You’ll have between 10-40 minutes of working time, depending on the temperature and how you’ve mixed the resin before it starts to gel up and become unusable, so think about how much time you’ll need when adding a catalyst to the mix and do it at the last minute.
Fast work
To work quickly, have your patches precut, and a second pair of hands will stop you from staining the clean patches with resiny fingers.
There are two schools of thought about the size of patches.
Start small and add progressively bigger ones, or vice versa. Both techniques fill the sloped shape you ground out in step 1.
As long as the mat is well soaked it doesn’t matter. Look along the repair to check you don’t have any low spots if it’s an external area or you’ll be doing lots of filling later.
Cut or rip a small patch of mat to fill them as needed. Another disadvantage of epoxy is that it creates heat as it cures.
Chopped Strand Mat (CSM) layup. Credit: Andy Pag
In extreme circumstances, a badly mixed pot on a hot day can catch fire.
A more prescient concern is that it means you can only add a few layers at a time to keep the volume of resin low compared to the surface area it has to dissipate heat.
Your repair is unlikely to burn but the resin can bubble and create weak spots if you rush it.
A lot depends on the ambient temperature, but feeling the repair with the back of your hand after the first layup will tell you everything you need to know.
Wait about 45-60 minutes for the surface to be cool but still sticky before applying the next round of layers of glass and epoxy and repeat until the ground area is filled.
The joy of polyester is you can slap as many layers on as you like in one go and the repair will be mostly cured and ready for gel coat in as little as an hour, whereas epoxy takes a day to fully harden.
In rainy climates and on exposed repairs, this is a big advantage.
Putty in your hands
An alternative to glass mat is to use a resin in putty form. Putty isn’t as structurally strong but it is useful when you need to fill a large volume or uneven surface.
A bit of putty can be a good foundation to build glass repairs on.
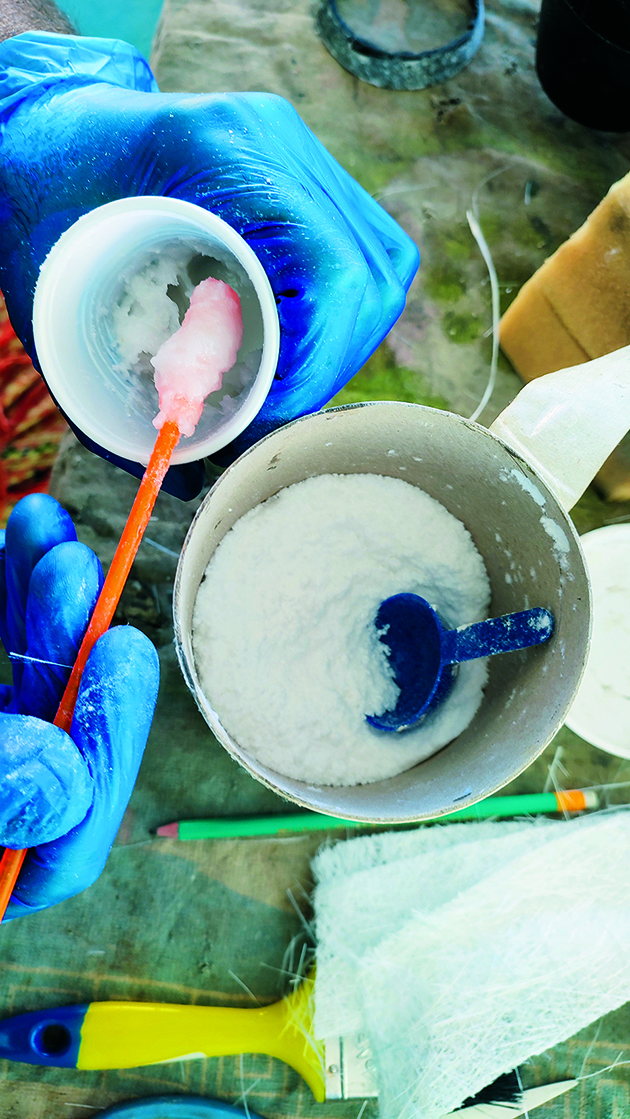
Mixing in microfibres to make a peanut butter paste. Credit: Andy Pag
You can purchase putty ready-made or you can make your own by mixing resin with industrial talcum powder until you get a peanut butter consistency.
Talc adds weight and a little bit of strength but finely cutting CSM with scissors and adding the short glass fibres to the mix increases the final repair’s rigidity.
You can also purchase ready-made mixing powders that transform resin into putty, but don’t confuse powders that make structural putty with powders for lightweight easy-to-sand fairing compound.
Boat fibreglass repair Stage 3: gap filling
No matter how diligently you work there will be low spots, dents and pits that need filling.
A simple rule of thumb then is to use a filler made of the same material as your resin. For epoxy, you can make putty by mixing resin with Aerosil.
Wait until the repair has hardened, sand it with 80-grit to key the surface and wipe down with isopropyl alcohol before applying.
Off-the-shelf epoxy fillers should be a little easier to sand so if it’s a big repair you may be grateful for purchasing something ready-made.
Gel coat
With polyester, wait until the surface is solid but still tacky and apply the gel coat.
Gel coat is a polyester coating with (usually white) pigment. It also has fillers to make it more bulky than resin but it’s helpful to simply think of it as more polyester resin.
Gel coat won’t fully harden in contact with air so you can either apply Peel Ply, a clingfilm-like barrier that seals it while it dries and can be peeled off later, or you’ll need to mix in some wax to the gel coat before applying, which does the job of sealing the surface.
Gel coat sold with wax already mixed in is sometimes called flowcoat.
Gel coat is both the filler and the finishing layer on a polyester repair.
Below the waterline, it will also need an epoxy barrier coat.
Colour-matching gel coat
The likelihood of your white deck matching the white gel coat you buy is almost negligible.
Below the waterline, this won’t matter. If the repair is small enough or out of sight, you might be happy to live with the mismatch.
If not you’ll have to use a pigment pack to colour-match the gel coat before you apply it.
Throughout the process, keep a mental note of how much of each pigment you have used for the match.
This can actually be quite a fun, creative part of the job.
You’ll need good, even, diffused light to match the colours; a bright but overcast day is perfect.
Chances are you’ll be adding yellow and black, to match the fading but traces of red and blue can make the match perfect.
Add less than you think you need, mix, test and repeat. Be prepared to take over 20 iterations to get it right.
Overdo it when applying this filler layer to the repair to make sure you’re definitely filling the gaps or you’ll be having to do it all again.
When it’s dried hard, sand the repaired gelcoat off back to a flush surface.
You might need to do this by hand or with a shaper board if necessary – 180-grit should shift the filler without making too much of a dent in the actual glass.
Stroke it to feel for a smooth shape as you go. Internal repairs that aren’t visible don’t need gap filling or finishing but if they might come into contact with water, say in a bilge or wet locker, paint polyester repairs with an epoxy barrier coat.
Boat fibreglass repair Stage 4: finishing
By now you should be thoroughly sick of sanding and fine dust. Bad news; there’s more sanding and fine dust to go.
Below the waterline, epoxy and polyester repairs are good to go with two or three coats of epoxy barrier coat.
In the case of the epoxy repair, this is to seal the ends of any fibres that were exposed during sanding.
They can act like wicks sucking in water if they weren’t fully saturated with resin.
A layer of barrier coat is a good insurance policy. In the case of the polyester repair, it’s to protect the hull from osmosis.
Continues below…

Repairing holes in GRP
If you need to plug a hole in your glassfibre boat, fear not – repairs are easy to make. Jake…

Gelcoat repair: How to make an invisible repair
Everything you need to know to make an invisible gelcoat repair, from preparation and filling to topcoat and polishing

Cracked gelcoat repair: step by step
Having accidentally drilled screws through the moulded non-slip surface of his boat’s deck, Jake Frith repairs the cracked gelcoat

How to remove gelcoat: Our expert’s advice on sanding back your boat
Antony Cole writes: “I have 50-year-old GRP trimaran with damaged gel coat undersides. “The gelcoat was left rough and pitted…
For external repairs on the deck or freeboard, epoxy can’t be covered with gel coat.
Gel coat is polyester and if there’s one lesson to take away here it’s that polyester doesn’t stick to epoxy.
Instead, it can be painted with polyurethane paint. It’s best applied by spraying.
You can buy it in a can but the white won’t match the rest of your boat, so you’ll need to get hold of a pigment pack, compressor, air gun and loads of newspaper and tape to prevent overspray.
This is another reason to use polyester for external repairs above the waterline.
Polyurethane paint is quite forgiving if it’s your first time using a spray gun, but the finish is a rough matt surface.
Using wet and dry paper and a hose, sand by hand in stages from 400-grit to 2,000-grit and then buff it with a polisher.
It’s hard work but it will look great. Having said all that, I’m now going to contradict it for completeness.
Polyester doesn’t stick to epoxy because of the amines, a chemical found in the epoxy hardener.
If the epoxy is mixed properly (ie there’s a correct amount of amines), and fully cured then the polyester gel coat can theoretically be made to stick to the epoxy.
Amines migrate to the surface of a cured epoxy surface, a process known as the amine blush, and they can be removed with a thorough rinsing with isopropyl alcohol.
Try it at your own risk, or stick to the rules of thumb: no polyester over epoxy, and gel coat is polyester.
Finishing gel coat is the same sanding process as polyurethane paint. In both cases use lots of water and stroking to feel the surface as you go.
Don’t use a machine for this, it’s very much about feel and elbow grease.
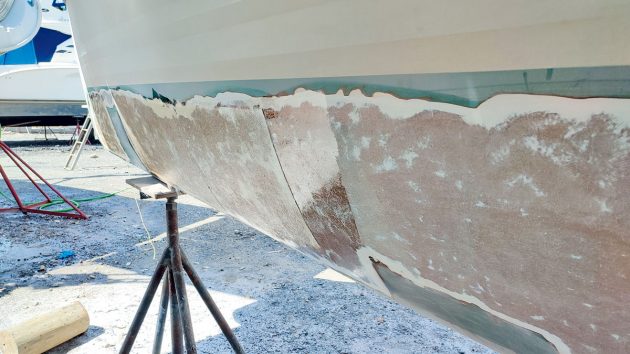
Osmosis repair Q& A
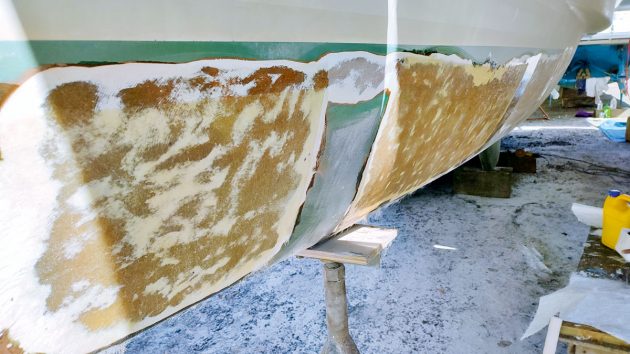
Stripped back for osmosis treatment. Credit: Andy Pag
Aside from cracks and crunches the most common type of DIY glassfibre repair is an osmosis repair.
What is osmosis?
Gel coat isn’t fully waterproof. It slowly absorbs water, a process called osmosis, if submerged for long periods of time. The formulation of gel coat used for hulls has got better since the 1980s when boatbuilders first started using it but even now gel coat used below the waterline needs sealing from the water. This is usually done with an epoxy barrier coat. Epoxy is waterproof, so an epoxy resin won’t suffer from osmosis.
What are osmosis blisters?
Once water gets into the gel coat it slowly reacts with the polyester laminate. The product of the reaction, which includes acetic acid, has a larger volume than its components so it expands and forms blisters. The blisters weaken and pit the polyester resin laminate. When you pop the blisters you can smell the acetic acid – a pungent, vinegar-like odour.
How to treat osmosis?
If you have just a few small blisters, grind back each blister so they are all open. Flush the area with water to remove the acid inside the blisters. Let it dry fully, clean it with solvent or alcohol and fill the area with a putty. Paint with an epoxy barrier coat. If faced with a large area, sand the whole area back to bare glassfibre removing all the blisters as you go. Rinse away the acid, allow it to dry fully and then apply a layer of resin-infused mat to compensate for the pitting. Paint with gel coat, sand, and seal with epoxy barrier coat.
Epoxy or polyester?
There’s a tendency to go with epoxy to prevent the problem from repeating. But modern gel coat is better than the 10 year old stuff you just sanded off, so as long as the repair was well cleaned and you apply an epoxy barrier coat, polyester resin is an acceptable option.
Enjoy reading Boat fibreglass repair: a beginner’s guide?

A subscription to Practical Boat Owner magazine costs around 40% less than the cover price.
Print and digital editions are available through Magazines Direct – where you can also find the latest deals.
PBO is packed with information to help you get the most from boat ownership – whether sail or power.
-
-
-
- Take your DIY skills to the next level with trusted advice on boat maintenance and repairs
- Impartial in-depth gear reviews
- Practical cruising tips for making the most of your time afloat
-
-
Follow us on Facebook, Instagram, TikTok and Twitter