
Ali Wood’s Sailor radio is given the VIP treatment
Portsmouth Museum and Art Gallery has our Sailor radio on display.
OK, it’s not actually Maximus’s radio – that was in the workshop at the time of our visit – but it’s a similar set belonging to Sir Alec Rose.
In 1967-68 this impressive radio was his only means of contact as he sailed solo around the world in Lively Lady.

Alec Rose’s Sailor radio on display in Portsmouth Museum
It reassured me that the Sailor radio was a fine piece of kit and my quest to repair and restore the one from Maximus wasn’t totally bonkers!
Our Sailor radio had been on board our Maxi 84 project boat since she was built in 1978.
However, when we acquired Maximus, rainwater had seeped through a gap between the companionway hatch boards.
Sadly, the leak found its way to the vintage marine radio and it no longer worked.
Radio surprise
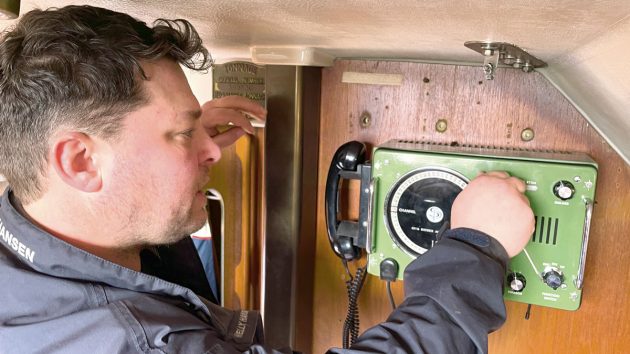
When marine surveyor Ben Sutcliffe-Davies visited Maximus he was astonished to see the RT144 radio.
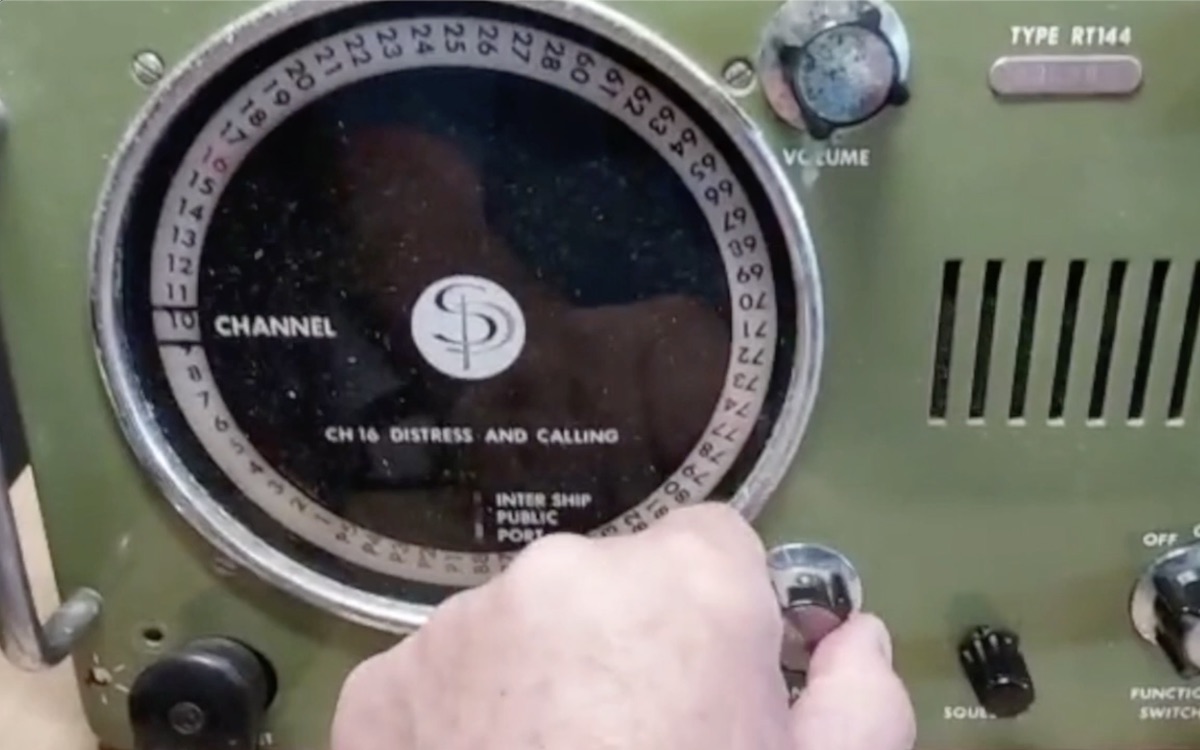
He used to have one on his fishing boat. “They were amazing sets!” he exclaimed. “They had the proper telephones and the beautiful serial numbers on them. Look, there are all the channels – P1, P2 – though the selector’s not working.”
I was very much in love with the Sailor radio, and though it had most of the channels you do today, it wasn’t the best solution for modern family cruising.
We needed a DSC radio, ideally fitted with an AIS (automatic identification system) receiver so we could monitor shipping.

Ali Wood thought Maximus’s classic Sailor was too good to throw away
I opted for Raymarine’s Ray73 DSC AIS radio… but still, I couldn’t part with the old Sailor!
I invited Raymarine’s Greg Wells to spec-up Maximus for electronics, and he too was enchanted by the old Sailor radio.
As luck would have it, his brother Rob was a radio enthusiast and a whizz at repairs. Would I like him to take a look?
We’d need two separate aerials for the radios, Greg warned. These would need to be 1.5m apart so there’s no interference.
A week later, marine electrician, ACM Marine’s Adam McMenemy, removed the radio and stripped out the old boat wiring.
“I hope you get it working again,” he said, handing me the Sailor radio. “If you do, we can move it to the rear bulkhead. I’ll leave the cable there ready.”
That afternoon I drove to the UK headquarters of Raymarine and dropped off a rusty old radio. “This is for your sales manager,” I said to the bemused receptionist.
The repair shop
A couple of weeks later I got a call from radio whizz Rob Wells.
“It’s not in too good a shape,” Rob said, “but I applied some voltage to the terminals and it made a bit of noise. I put a dummy load in, touched the PTT [push-to-talk] and I think it went into transmit!”
Rob’s first big challenge was getting the knobs off. The dimmer was beyond repair and had to be cut free but Rob managed to remove the squelch easily and free the channel selector knob using lots of release oil and manipulation.
Once the knobs were free he removed the fascia to inspect the channel selector.
This was completely seized and the stopper was rusted solid and required a new ball bearing.
Continues below…
Fixing the vintage Sailor radio 01 – “making a bit of noise” at the repair shop
Whether for listening to BBC cricket or calling up Dutch harbours, the old Sailor radio is still loved by boat…
Fixing the vintage Sailor radio 02 – WOW! Take a look inside…
In part 2 of the Sailor radio restoration, Rob Wells takes the knobs off. The dimmer has to be sawn…

Remember the Sailor vintage marine radio?
Wow! Take a look at this lovely vintage marine radio onboard Maximus, the PBO Project Boat. Marine surveyor Ben Sutcliffe-Davies…

Upgrading electronics on the PBO Project Boat
Upgrading electronics on Maximus seemed like a huge leap in the first weeks of ownership. We were still discovering new…
The speaker was beyond repair so Rob ordered a new one of these as well as a whip antenna, dimmer switch and LED to replace the bulb.
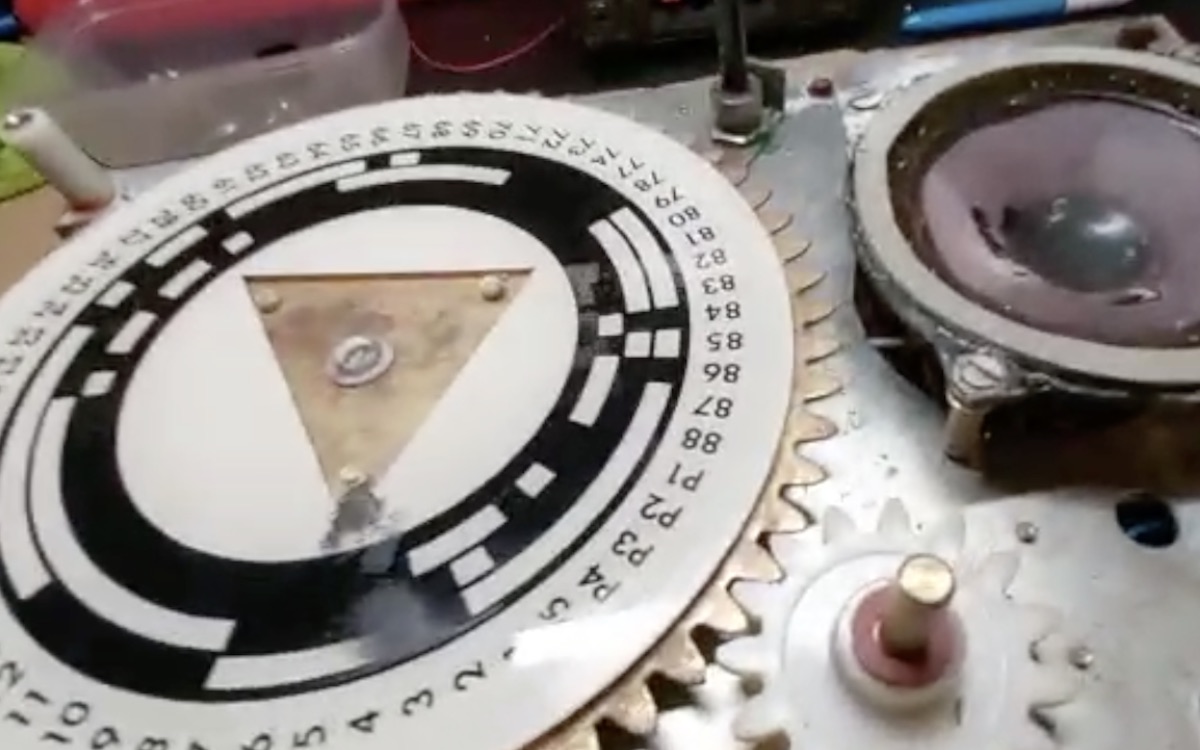
In the meantime he got to work cleaning and degreasing the index plate (which goes under the selector) and re-blacking the channel selector where bits had scrubbed away. He also cleaned the wafer switches.
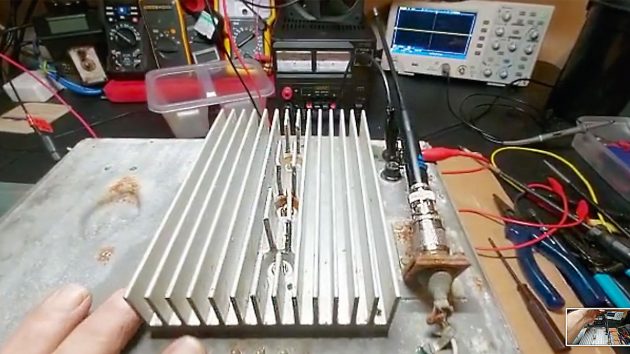
A nice touch with this radio is that the chassis neatly swings open to allow inspection of the circuitry.
Rob was pleased to see this was still in good condition and not water damaged.
When the new parts arrived, the holes for the speaker didn’t line up so Rob drilled and retapped these.
He also made an extension for the dimmer knob, which was too short, and replaced the bulb with an LED and resistor.
Finally, the radio was ready to test. Rob attached a small whip antenna so the radio would only receive within a short radius, and not transmit.
After all, we didn’t want it interfering with the ‘proper’ radio. I was keeping the Sailor radio for sentimental reasons, not functionality.
Rob applied the leads then, starting at 7V and increasing to 12V, applied power. The volume and squelch worked perfectly.
Next, he picked up the VHF and spoke into it. The radio transmitted perfectly. Success!
Step-by-step repair of a Sailor radio

1. Sailor radio on the bench ready for disassembly and repair.

2. The radio’s power in and out switches are identified.

3. The channel selector (right) is freed up and is now working.

4. The wafer switches have been cleaned for better connectivity.

5. The back of the index plate also gets a good clean.

6. New speaker, bearing, antenna and dimmer adjuster were ordered.

7. Rob Wells made an extension rod for the new dimmer.

8. Wires for the new speaker will have to be soldered on.

9. The circuitry proves to be in remarkably good condition.
10. New internal whip antenna is installed in the unit.

11. Time to power it up – clipping on some power supply cables.
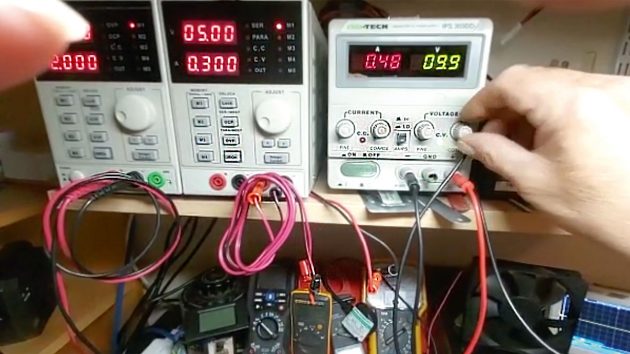
12. Rob dials up the voltage to check that everything works.
Installation of the Sailor radio
The next challenge was to reinstall the radio on Maximus. As we didn’t have a mount, it sat at home while we prioritised other jobs such as replacing worn sails and running rigging.
Then, in the winter of 2022, when Maximus was back on the hard, I got a call from Adam at ACM Marine. “You won’t believe this,” he said. “I’ve just removed the exact same radio as yours, complete with a mount. The owner doesn’t want it. Do you?”
Adam was fond of our Sailor radio and was keen to see it back on board Maximus so kindly drove down from Chichester to Davis’s Yard in Poole to install it.
We compared radios, and they were indeed identical.
Of course, I wanted to reinstall Maximus’s original radio, which Rob had lovingly restored, but we used the mount and handset bracket from the other set.
I asked Adam if he’d seen many sets like ours, but he said, no; they’re really not very common these days. Regulations and technology move on, and they’re not easy to repair. “While it’s nice to have a vintage radio on board, you can’t rely on it in an emergency,” he said. “You want your DSC button and a lot of sets come with AIS now as well.”
Adam secured the mount to the bulkhead between the saloon and heads. We then slid the refurbished radio into the mount.
It was a two-man job as the radio was surprisingly heavy. Once secure, Adam tested it with his multimeter. So far so good.
He then switched on the power at the switch panel. Nothing happened. Uh-oh!
He changed the 5A fuse, adjusted the volume and tried again. This time it worked. We tested the squelch and then the volume.
Although the radio wasn’t set-up to transmit it was clear the handset worked because the squelch went quiet when we pressed the PTT switch.
We listened for some radio chatter but, being in the boatyard in winter, didn’t hear any.
Instead, Adam went outside with the Ray 73 mic and called up Maximus. “PBO, PBO this is Maximus, over”.
His voice rang out loud and clear across the saloon. I couldn’t have been happier.
Step-by-step of the installation of a Sailor radio

1. Adam McMenemy bolts the ‘new’ radio mount into the bulkhead.

2. Radio wires will need to be connected to a power source.

3. Wires emerging from the bulkhead are stripped ready for connection.

4. Multimeter test shows there’s now power going into the radio.

5. Switchboard switch at bottom right had been reserved for the Sailor.

6. The radio set is lifted onto its mounting on the bulkhead.

7. Before knobs go back on, volume is adjusted by screwdriver for a test.

8. Sailor installation back on Maximus looks neat – and it works too!
You can see a video of the Sailor repair and installation at pbo.co.uk/tag/pbo-project-boat
Enjoyed reading this article? 
A subscription to Practical Boat Owner magazine costs around 40% less than the cover price.
Print and digital editions are available through Magazines Direct – where you can also find the latest deals.
PBO is packed with information to help you get the most from boat ownership – whether sail or power.
-
-
-
- Take your DIY skills to the next level with trusted advice on boat maintenance and repairs
- Impartial in-depth gear reviews
- Practical cruising tips for making the most of your time afloat
-
-