
James Wood gets to grips with epoxy when repairing a rotten step support on Maximus's companionway

Our PBO Project Boat Maximus was built 43 years ago, and beautifully built at that.
But, when you come to own a boat that is the same age as you, you accept that not everything is in as good a condition as it once was!
The Maxi 84 had been ashore for nearly two-years at Dell Quay, Chichester, during the Covid pandemic.
In that time, a number of leaks had developed. The companionway hatch cover was ill-fitting and rainwater had found its way in.
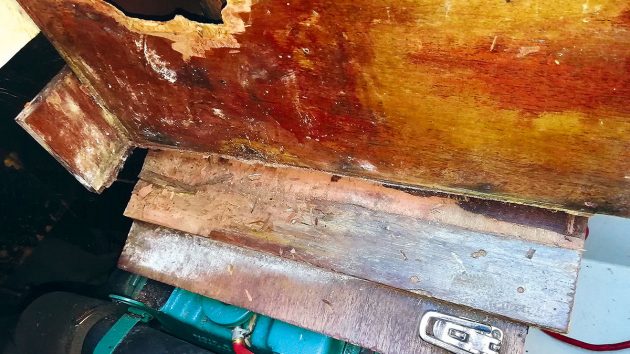
The rotten companionway step. Credit: James Wood
My wife, Ali, and I emptied buckets of dirty water out of the lockers, and also discovered that the wood in the companionway steps had rotted.
We got a quote from a woodworker but the timing didn’t work, and we were in a hurry to launch on the next spring tide.
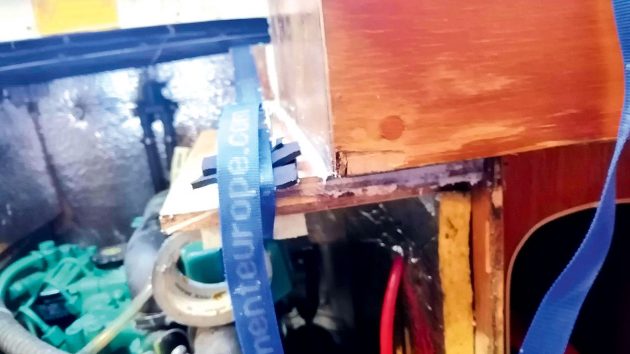
Unfortunately, once we were at Chichester Marina, and had three kids (not to mention several adults) climbing up and down the companionway steps, the structure supporting the top companionway step collapsed altogether!
Preparing the area to fix the companionway step
The existing woodwork had obviously done a good job for a long time, so I resolved to replace like-for-like.
We removed the top step and took it home to replace the plywood facings that had rotted. We also removed the wooden fittings that had failed, and measured up for replacing them.
We covered the companionway and engine with a tarpaulin while the repair was taking place.
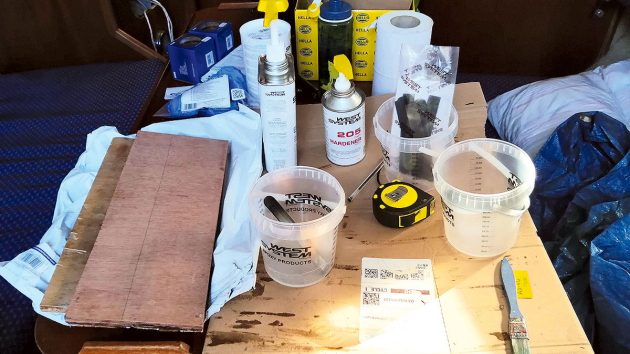
The materials and tools are all set out. Credit: James Wood
Access to the companionway was restricted, so any repair would have to be completed using glue. This was also what the original boatbuilder had used.
I managed to narrow the choice down to either a polyurethane wood glue, or a structural epoxy resin and hardener system.
As an amateur DIYer, I was leaning towards using polyurethane glue, it being for use indoors, and straightforward to apply.
I’d never used epoxy before, and I have to admit I was slightly daunted.
However, when we consulted Laurie Brebner of Marine & Industrial, he told us epoxy was the right glue for the job.
A beginner’s guide to epoxy
Before returning to Maximus in Chichester, I did as much preparation as I could.
I bought a sheet of 12mm marine ply from the local timber yard – then realised I actually needed a 15mm sheet so duly returned it.
With the right wood secured, it was quick and easy to cut out the correct sized sheets for the areas I was replacing in the companionway.
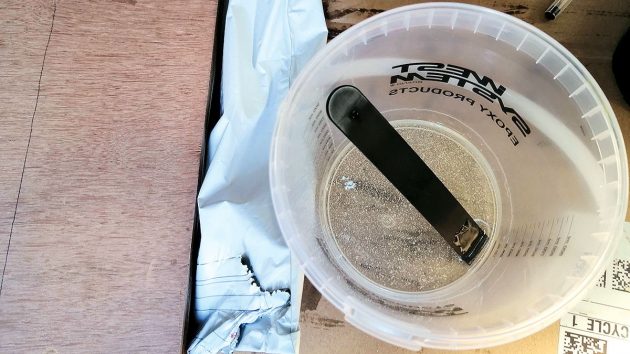
The mixing container and plastic spatula. Credit: James Wood
We also got in touch with David Johnson at Wessex Resins, who kindly supplied us with West System 105 epoxy resin and 205 hardener.
He also offered to come down and demonstrate but the September fuel crisis (where pumps ran dry) put an end to that visit.
Fortunately, West System has excellent video tutorials on the topic for people getting started.
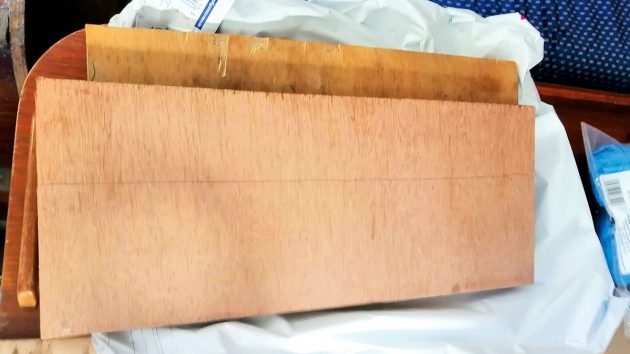
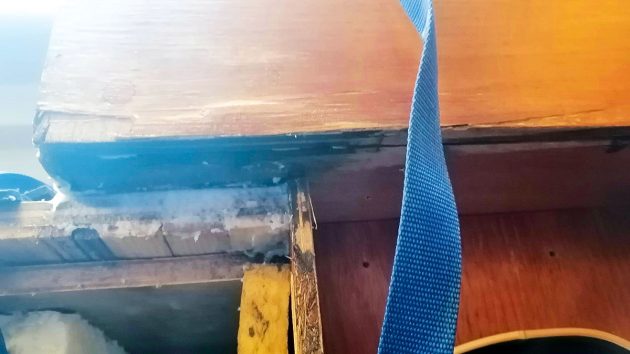
The contact surfaces sanded and degreased. Credit: James Wood
First I cleaned the area I was going to be working on, before giving it – and the replacement plywood – a light sanding.
This is to maximise the adhesion of the epoxy system. West System epoxy works best with their pre-calibrated pumps, which deliver the resin and hardener in the correct proportions.
I had installed these, and primed both the resin and hardener pumps during my dry run the day before.
The epoxy has a short working life once mixed with the hardener (about 20 minutes, depending on the working temperature) so it’s important to be organised before you start work!
Applying the epoxy system
Using a plastic mixing tub and spatula, I mixed a couple of pumps of the resin and hardener, before priming all the contact areas by applying a thin coat of the mixed epoxy with a 1in brush.
The next stage was the one I was most concerned about; adding a third component into the mix, the filler.
The filler is used to thicken the epoxy resin mix when creating a bond between two surfaces.
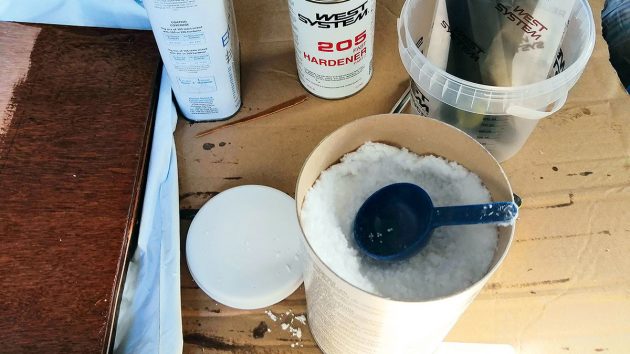
Preparing filler to thicken the mix. This is approximately 1:1 with epoxy. Credit: James Wood
We were using wood, and wouldn’t have any visibility of the contact area, so gap filling would be impossible without creating a thicker mix than the 105 and 205 system creates in isolation.
The idea is that once the two bits of wood were lightly clamped together, the thickened epoxy will be squeezed into any gaps or irregularities, to create a more consistent join and a stronger bond.
Continues below…

Boat wood: a complete guide for yacht owners
Boatbuilder and finisher Lyndon March explains which types of wood work best for different repairs and modifications on board

How to service a marine diesel engine in 12 simple steps
It was time to service the marine diesel engine on our Maxi 84 cruiser. Knowing how to diagnose and fix…

Boat rewire tips: How we completely rewired the PBO Project Boat
Our marine surveyor Ben Sutcliffe-Davies switched on the instruments of our Maxi 84, Maximus, and I held my breath. Nothing.…

New electronics on the PBO Project Boat
The day was approaching for Maximus’s shakedown cruise, a two-day voyage from Chichester to her new home at Cobbs Quay…
This time, I used three pumps of both the resin and the hardener, mixed them for two minutes, then added roughly the same amount of West System 403 microfibre adhesive filler.
I was nervous about this step in the process because the thickened epoxy is harder to work with, and coupled with the short working life before curing,
I only had one chance to get it right! I used a plastic spatula to apply the thickened mix to the contact areas of the replacement wooden part that I had created the previous day.
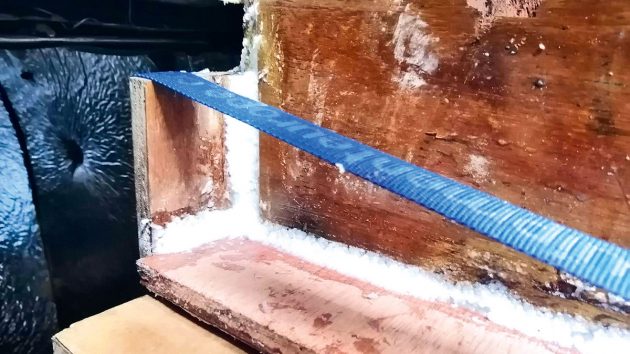
Positioning the replacement support and applying tension with a strap. Credit: James Wood
Once I was happy with the coverage, I moved the part into place and clamped it lightly using a car roofbar tensioner strap.
I had intended to use a couple of G clamps, but I didn’t have any to hand, so the tensioner would have to do.
Fortunately, it served its purpose and excess epoxy mix was visibly squeezed from the joint.
Excess epoxy was removed from the surface of the new companionway step with a spatula…Credit: James Wood
As this was a load bearing part, I wanted to create as strong a bond as possible, so I used the excess epoxy to create a bead at the join between the replacement wood and the existing companionway structure.
Reversing the West System spatula, I ran the rounded, bevelled end along the bead to squeeze it into a more concentrated joint, and supposedly a neater joint… though in my case the joint wasn’t all that neat!
Putting it to test
The guidance from West System was to let the new joint cure for 24 hours before use.
I live a couple of hours from Chichester, so I wasn’t able to return until a week later, but when I did it was with a burly test team!
… and was then used to create a beaded joint for extra strength. Credit: James Wood
I’m pleased to say the top companionway step took my 14-stone frame without any problems, and was happy to also deal with the visit of our electricians and others to the boat.
At the end of a day of comings and goings, I was happy to declare my first trial of West System epoxy a success.
Epoxy system care
There was a significant amount of the epoxy left after completing my job, so I looked into how to best store it.
We were hoping to sail Maximus back to Poole in the coming weeks, so it was unlikely I’d need it any time soon.
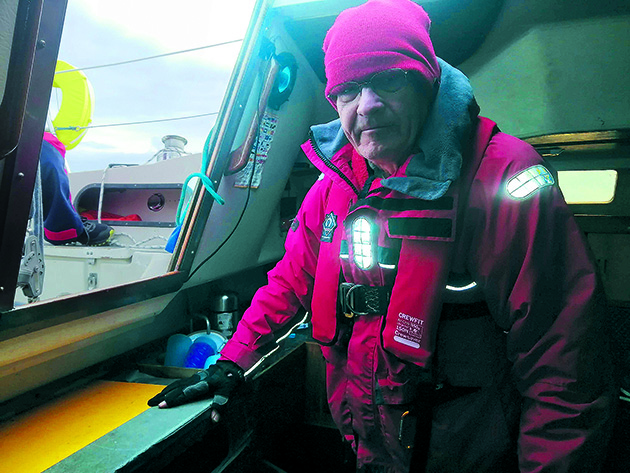
The companionway step is now ready to support Gilbert Park and other crew on the delivery voyage to Poole. Credit: James Wood
West System recommends removing the pump system if storing unused for three months or more, so I did that, pumping any unused product out.
I then sealed the cans with the original lids. The epoxy system was easy to use and effective. I’ll use it without hesitation next time.
■ Thanks to Wessex Resins, wessexresins.co.uk
Enjoyed reading Replacing a rotten companionway step?
A subscription to Practical Boat Owner magazine costs around 40% less than the cover price.
Print and digital editions are available through Magazines Direct – where you can also find the latest deals.
PBO is packed with information to help you get the most from boat ownership – whether sail or power.
-
-
-
- Take your DIY skills to the next level with trusted advice on boat maintenance and repairs
- Impartial in-depth gear reviews
- Practical cruising tips for making the most of your time afloat
-
-