
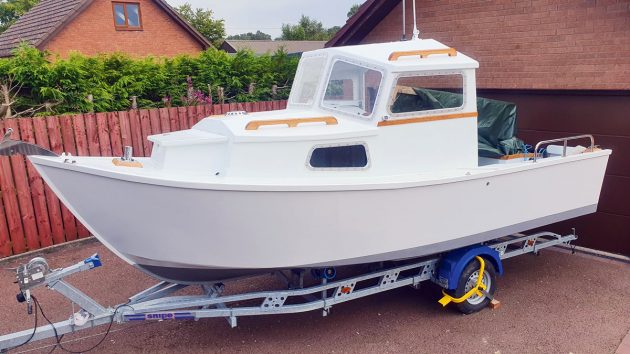
Having already built a dinghy and a dayboat, Ben Russell decided to design and construct an 18ft Selway Fisher Clyde motorboat
After a period of being without a boat, I started looking through both the classified ads and the websites offering plans for boats for amateur construction, writes Ben Russell.
Having already built two small boats, I leaned towards a build, rather than a buy. I get as much enjoyment from being around boats as I do being in them when they are on the water.
My previous builds were both open sailing boats, so building a boat with a cabin would make for an interesting project.
A cabin would also provide some welcome cover for those wet and windy days.
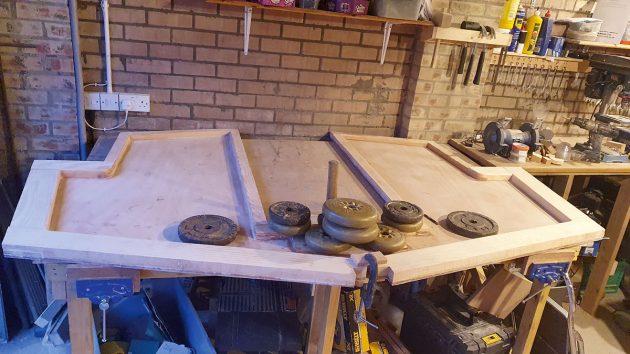
The frames dry fitted, to see what the boat would look like. Credit: Ben Russell
I’d been in small outboard-powered fishing boats as a teenager, and RIBs when I helped out at the local sailing club, but I’d never owned a motorboat.
When I completed my RYA Coastal practical on the Firth of Clyde the instructor had a 37ft motor cruiser, as well as the yacht he used for running training courses.
The motor cruiser seemed to have a larger accommodation volume than the yacht, even though it was shorter.
A motorboat, even with a small to medium-sized outboard, would cruise at 12-15 knots, considerably quicker than a sailboat.
The decision was made: a motorboat it was to be. I wanted a boat that could be built in a reasonable time as an evening/weekend hobby.
My teenage son is a keen woodworker, and this would be a project we could work on together.
Which motorboat design?
I came up with a list of the features I’d like in a motorboat. My garage is 18ft long and wide, so that was the size limit.
It’s much easier to build a boat under cover. I wanted a boat with an 8ft beam so it could be towed on UK roads.
Dedicated anchor and chain stowage would be handy up front. Wide side decks would make going forward easier.
A wheelhouse, to provide shelter from the elements while underway is essential.
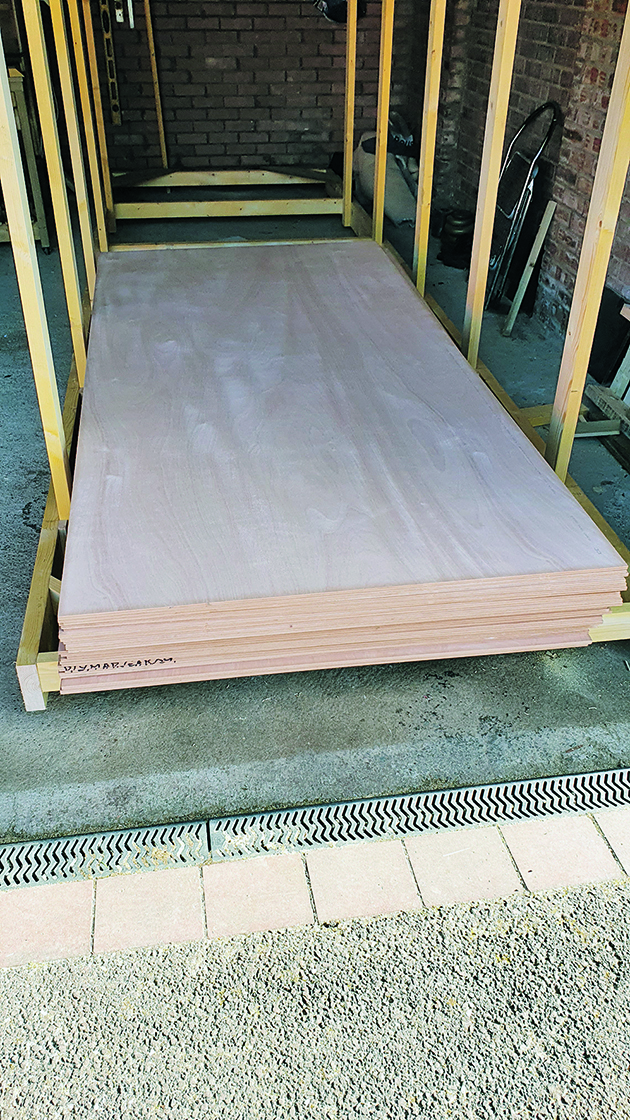
The plywood sheets for the build were stored on the strongback. Adding castors meant it could be easily moved. Credit: Ben Russell
I wanted a small cabin, with room to store gear, and somewhere to sit during the day for lunch, out of the weather.
A self-draining cockpit would be a useful feature.
Now that I had a better idea of what I wanted I started to look closer at designs.
There are several designers who can supply plans for amateur construction, but I couldn’t find any motorboat designs that had everything on my wish list.
Instead, I spoke to Paul Fisher at Selway Fisher and he offered to modify one of his existing designs to incorporate both my suggestions and his.
Motorboat construction begins
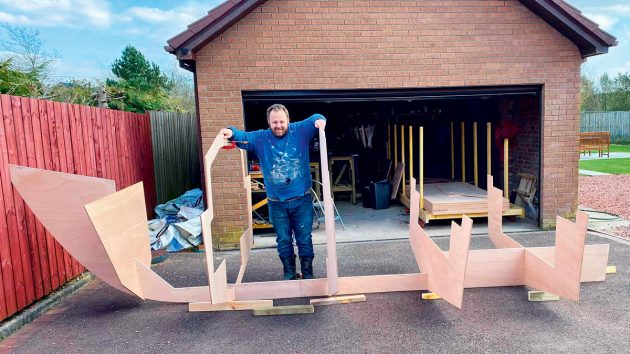
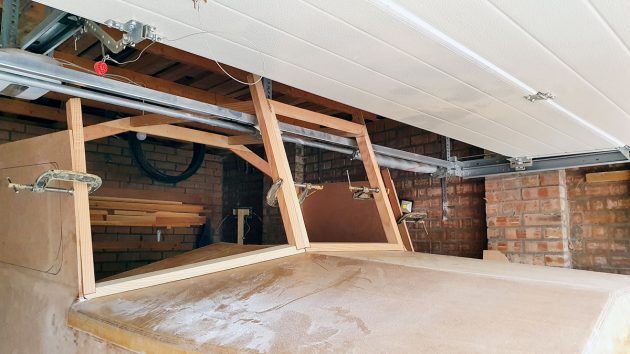
The Clyde 18 is a single chine boat, built using the ‘ply-on-frame’ construction method.
This is fairly quick and straightforward; a series of frames are erected upside down on a strongback, and the plywood hull skin is fitted oversize and trimmed afterwards.
The frames form part of the permanent structure of the boat – bulkheads, cabin frames, bunk dividers.
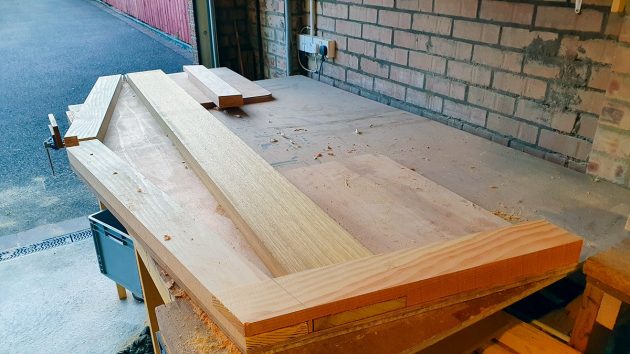
The building frame with the central girder clamped to the side. The slots in the girder, just in front of the vertical timbers, are where the frames of the boat slot into. Credit: Ben Russell
The only redundant framing was the strongback itself, which I repurposed to become a sheet storage rack once the boat was removed from it.
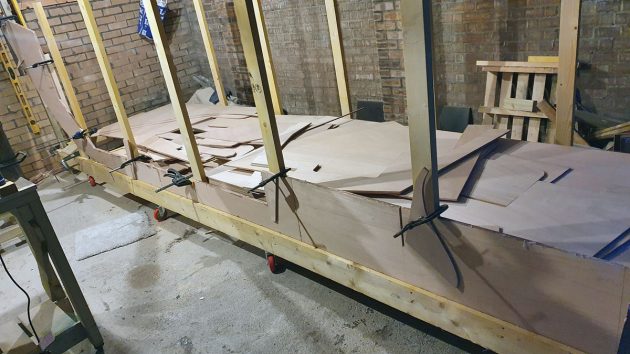
The first job was to build the strongback.
For this, I used 147x47mm timbers from a local timber merchant.
As space was limited, I incorporated a suitable flat area on the strongback bed to store the plywood sheets.
I attached heavy-duty castors to it, so that I could shuffle it from side to side to squeeze myself up each side of the hull.
Hull assembly
I marked and cut out the plywood frames first, before attaching the timbers to the perimeter of the frame using epoxy thickened with microfibres.
Once all frames are complete they can be mounted on the strongback. It’s worth taking the time at this stage to make sure the frames are true and level.
Any errors here will flow through the boat. I used a laser level to help.
A second pair of hands is definitely useful; my son helped with this.
Once the frames are up, the central girder can be built. This is constructed from ply with timber framing, similar to the other frames and runs fore and aft from the stem to the transom.
The cabin entrance. Note the weights – sometimes Ben used temporary screws, other times he used weights to hold parts in place while the epoxy cured. Credit: Ben Russell
Slots are cut in the frames and the girder, and it all locks together.
Chine and intermediate stringers were notched into the hull frames. Some of these had quite a twist, particularly near the bow.
There are various ways of making steam boxes.
I used an incredibly simple method: I bought a roll of plastic ‘lay-flat’ plastic tubing, put the timbers in and stuffed a towel in each end.
A wallpaper stripper inserted into one end provided the steam. About an hour per inch thickness of timber worked well for me.
Plywood frames and timbers being assembled before mounting on the strongback. This is the transom. Credit: Ben Russell
Where I could, I temporarily fitted the timber to the boat while steaming so it could take the shape and be clamped, so that it took on the correct set.
In some places I couldn’t do this, so I didn’t have long between taking the hot timbers out of the bag and getting them clamped in position before they set.
Once the stringers are on, they are planed to suit the frames so the ply hull skin can be epoxied in place.
I tried my best to get it as good as I could, although thickened epoxy will take up any gaps.
Planking
I was extremely tight on space. The bow of the boat was almost hard to the garage wall at one end and I had only a few centimetres between the transom and the garage door at the other.
Had I had more room I’d have scarfed together the pieces of plywood that make up the hull planks.
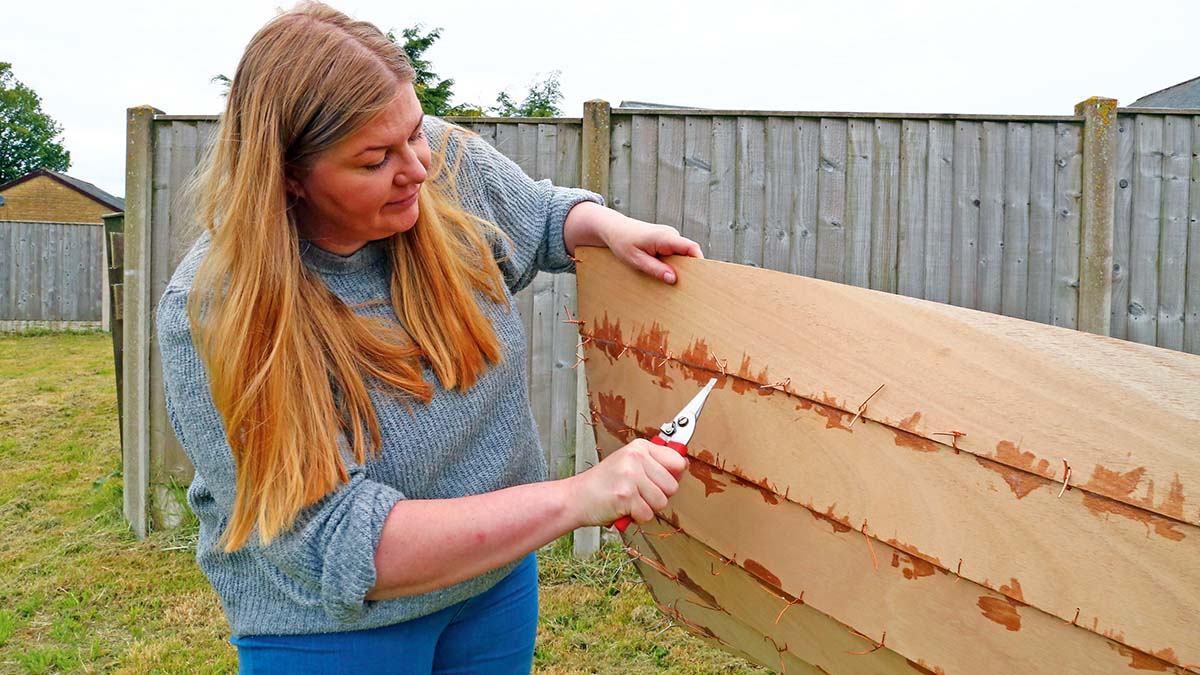
Instead, I used simple butt straps – the bottom could be planked from two lengths of ply so I only needed one join.
The plywood sheets I had were 2500mm long; had I had sheets that were 2400/2440mm then two straps would’ve been required.
The boat has a raised floor, so the straps for the bottom panel wouldn’t be visible.
The top plank needed two straps, so I placed one in the side benches in the cockpit, and the other in the cabin.
The bottom of the hull timbers planed and ready for the bottom plywood panels to be fitted. Credit: Ben Russell
Having shorter lengths of plywood to manoeuvre into place was quicker, and easier and meant it wasn’t such a rush when the epoxy was going off.
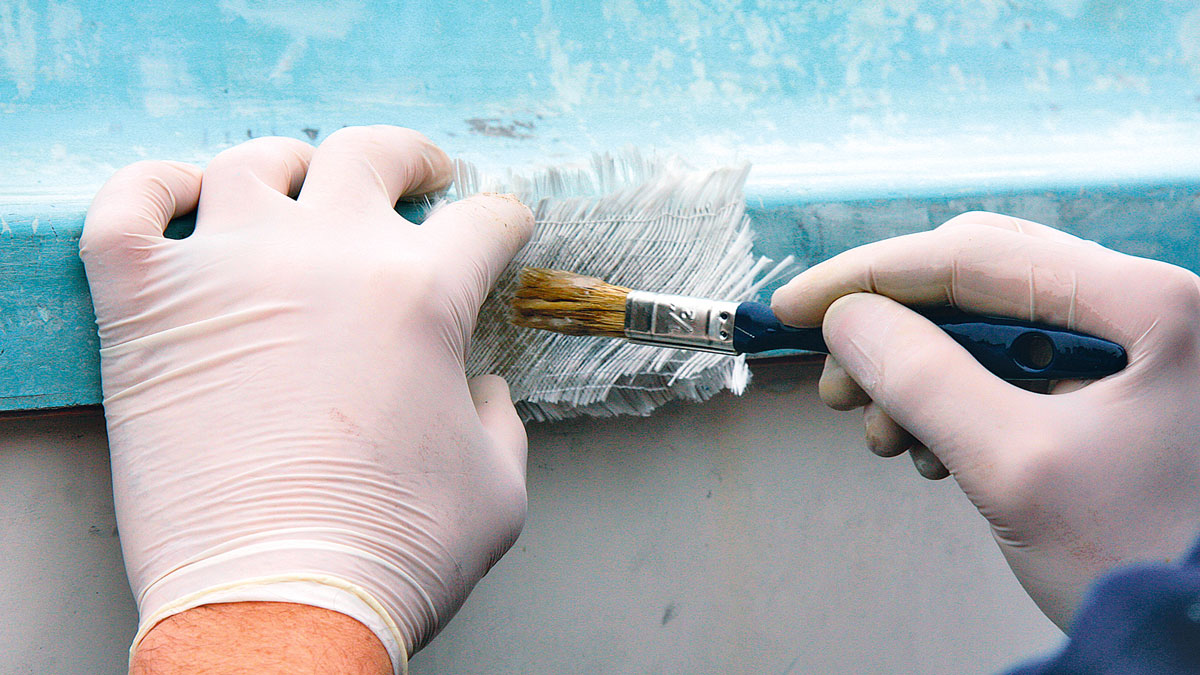
Epoxy sheathing I wanted to sheath the boat in glass cloth and epoxy.
While I was comfortable using epoxy, I hadn’t sheathed a whole hull before. I applied a couple of coats of epoxy to the boat and sanded it after it had completely cured.
The glass cloth, which came in a 1m-wide roll, was cut roughly to size, rolled up and marked, so it was easy to know which piece went where.
Once the temperatures had settled for the day my partner and I started work.
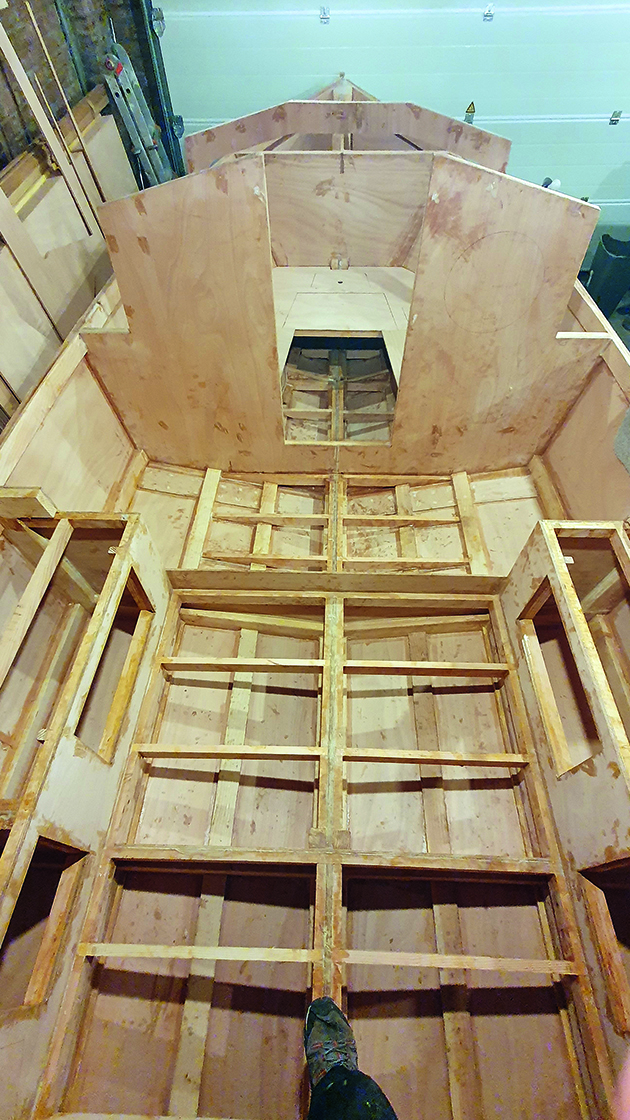
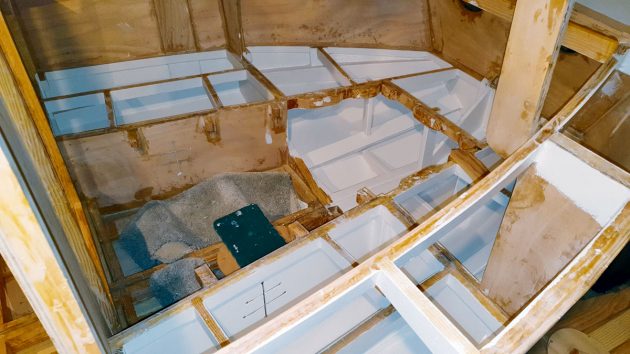
The completed cockpit and cabin framing, ready for the soles to be fitted. Credit: Ben Russell
She mixed the epoxy and I spread it out on the boat, laid the cloth over it and let it ‘wet out’.
I applied more epoxy on top where it hadn’t and then laid ‘peel ply’ on the surface. Again, this is rolled out until it becomes transparent.
Once the epoxy has cured, the peel ply is removed.
Peel ply is a thin nylon fabric that leaves an imprint on the surface of the glass cloth equivalent to one that has been sanded with 80-grit sandpaper.
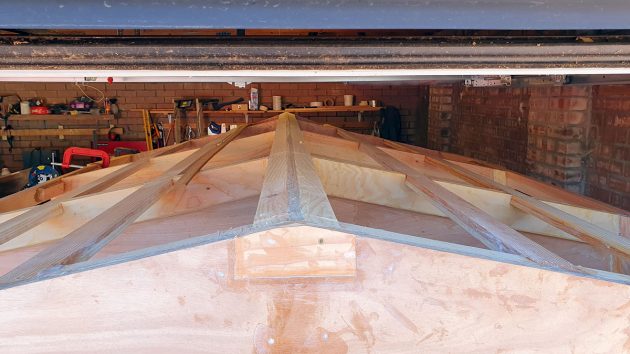
The outer stem being laminated and glued with bracing sticks being used to hold it in place. Credit: Ben Russell
Another advantage of using this is that any amine blush (a waxy deposit formed on the surface of epoxy as it cures) forms on the surface of the peel ply and not on the glass cloth.
I found it drastically reduced the amount of additional surface preparation required for painting.
Once this was done the outer stem and external timber rails and skeg were fitted to the boat.
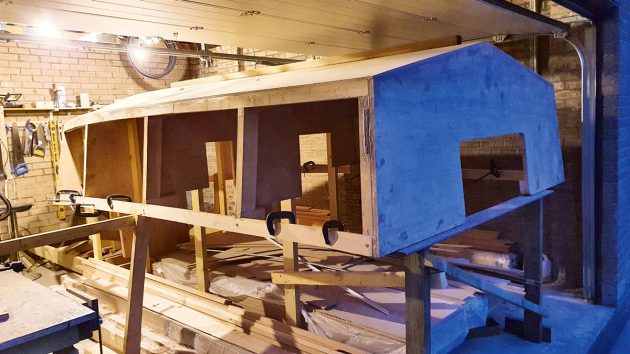
A little bit of fairing, filling and sanding and a couple of coats of primer, and the hull was ready to be turned over and removed from the strongback.
Rolling over the motorboat
A lot can go wrong on rollover day; damage could easily be done. My dad and son helped with this job.
We rolled the boat out, placed a thick bed of polystyrene sheets to the side of the hull for the boat to land on, jacked it up on the opposite side, and lowered it onto the polystyrene.
It is much easier to paint inside the bunks before
the lids are attached. Credit: Ben Russell
Some fall arrest bags might have provided a softer landing, but there was no damage to the boat so all was well.
What surprised me was that a lot of the interior framing was already in place from the frames.
I could see the blanks that needed to be filled in, and there were a lot of them!
The boat was put back in the garage, on rollers so I could roll it out when the time came, and with frames to keep it level.
Fitting out the motorboat interior
I started in the cockpit, purely because it was easiest for me to get in and out of the boat from there, and worked my way forwards.
I ordered hatches so that I could frame openings to suit. I had access to every compartment on the boat, nowhere was hidden.
The under sole compartments, cockpit lockers and buoyancy tanks all had a few coats of epoxy.
I bought fixtures and fittings for the boat as I went along.
Doing it this way meant that I could build the boat with the knowledge that when I came to fit these parts, all of the doublers, framework etc would be in the right place.
Before I epoxied the bunk tops into position, I took them to a local upholsterer so he could use them as templates to make the upholstery.
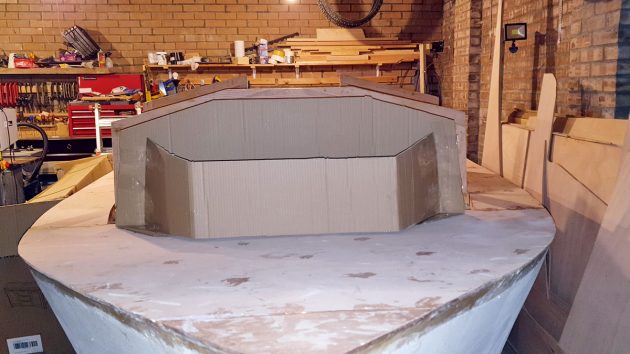
Using cardboard to mock up what the foredeck locker might look like. Credit: Ben Russell
I finished as much work in the cabin as I could before I started to fit the roof and sides.
It’s much easier to work through open framework than trying to squeeze plywood parts through the cabin entrance.
As well as the length constraints of my garage, I also had height limits.
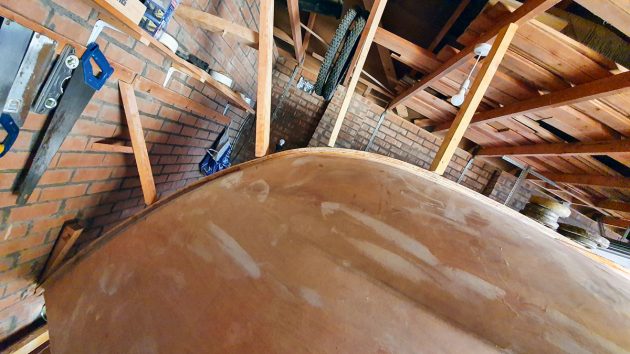
The garage door height and framework meant I couldn’t build the wheelhouse on the boat and get it out.
To overcome this, I built as much as I could and removed it from the boat for completion on the bench.
There is vertical timber on each side, inboard of the aft edge of the wheelhouse.
Continues below…

What to expect to learn on a boat building course
Fancy building or restoring your own boat? Ali Wood takes a tour of the Boat Building Academy in Lyme Regis
How to build a boat: Essential guide to building your first kit boat
You don’t have to be a boatbuilder to learn how to build a boat, argue Roger Nadin and Polly Robinson.…

How to become a boat builder in 40 weeks
Inspired by a stunning homebuilt yacht, Ali Wood visits the Boat Building Academy to learn how any of us can…
Boat fibreglass repair: a beginner’s guide
No need to fear GRP repairs with these helpful tips from Andy Pag
I cut these as one length for each side, but before I epoxied them to the wheelhouse sides, I cut a scarf at the place where I was going to make the cut to separate the wheelhouse upper and lower sides.
I used plastic tape to cover the mating faces of the scarf so that they didn’t stick together when I epoxied these timbers to the wheelhouse sides.
These scarfs would be epoxied later when the wheelhouse was reattached.
I marked where the horizontal cut was to be made and removed the wheelhouse.
To give another reference point when reattaching it, I attached a small horizontal timber to either side of the lower section of the wheelhouse (the part that stayed on the boat).
Half of the timber was epoxied to the boat, the other half sat proud of the cut, so that the wheelhouse could sit against this timber when the time came to reattach it.
The removal sounds more brutal than it was.
And in fact, it was probably easier to complete it on the bench, than be climbing up on the cabin roof.
Even in the construction of a small cabin and wheelhouse, there is a considerable amount of work.
Fitting the windows
I did obtain prices for the seven windows to be made, but the cost was prohibitive.
Instead I used 8mm Perspex for the four side windows and 10mm for the three front windows.
To get the shape of the window onto the Perspex, I laid the plywood cutouts on it and used a length of timber that was as wide as the overlap I wanted when the window was fitted to the boat; I drew around this, with an appropriate radius at each corner.
I read some stories online of Perspex shattering when it was being worked on, so I took my time with a jigsaw.
There’s no way the wheelhouse can be built on the motorboat while it’s in the garage. Credit: Ben Russell
I kept the Perspex indoors, apart from when it was being cut; cutting it when it’s cold increases the chances of damage.
Cutting it at a 30° angle and then sanding it with increasingly fine sandpaper gave it a reasonably good edge.
Holes were drilled slightly oversized to give the Perspex room to expand.
I used Scapa tape, interscrews and machine screws (with a blob of butyl sealant under the heads) to hold the windows in place.
I enjoy working with wood and working with Perspex was a nice change.
Into the outdoors
My dad, son and some friends came to help roll the boat out of the garage and load it onto the trailer.
Before they arrived, I adjusted the rollers on the trailer to take account of the length of the boat and the shape of the skeg, so that the boat would sit level.
I used the data from the plans to help work out heights and distances.
With the boat and the trailer lined up, and the trailer jockey wheel high, we used a high lift 3.5-tonne jack to lift the bow of the boat onto the trailer’s aft roller.
Some late night hull planking sessions were needed to get the motorboat finished. Credit: Ben Russell
For the second lift, the jack was moved further down the hull.
We tried to keep the jack close to the frames, to spread the weight. It was time to attach the wheelhouse.
I hoped I hadn’t twisted it out of alignment during the completion otherwise, it wouldn’t be an easy job.
With three of us, we had plenty of hands to lift the wheelhouse over the transom and up into place.
It didn’t go the first time (some gloops of epoxy stopped it going on nicely), but after some minor fettling, it went neatly into place.
Now the motorboat was outside, I was at the mercy of the weather to finish the epoxy fillets and touch up the paint.
Unfortunately, this was one of the wettest summers I could remember, so I picked the least bad days to work, with plastic sheets covering my progress.
Electrics
I wanted to keep the motorboat as simple as I could. I’ve fitted two 90Ah AGM (Absorbent Glass Mat) batteries, on a framework epoxied to the hull stringers and plywood skin underneath the port bunk.
I mounted a small cabinet on the port side of the inside of the cabin entrance bulkhead for busbars, switches etc.
I’ve fitted a fixed VHF, automatic bilge pump, LED navigation lights, LED cabin light, compass with backlight and a transom mounted depth sounder.
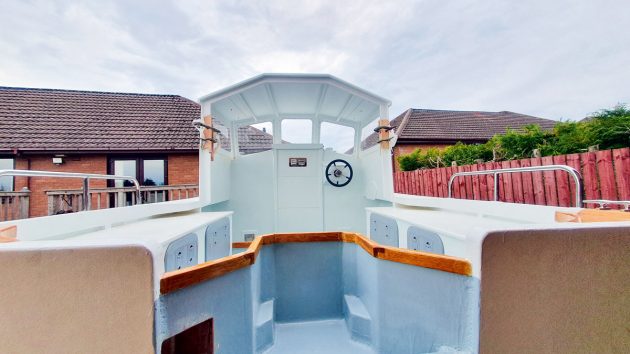
The completed and painted wheelhouse. Credit: Ben Russell
I’ve also fitted a solar panel, VHF aerial and an LED all-round white light to the wheelhouse roof.
The 30hp outboard can charge the battery, as can the solar panel.
I fitted the Blue Sea ‘Add a battery’ kit which has a main switch and an ACR (Automatic Charging Relay) to allow both batteries to be charged.
Even with a simple installation like this, there is a reasonable number of cables to keep track of.
Lessons learned
Building a motorboat is a time-consuming task. I tended to work a few evenings a week and a bit more at the weekends on the boat.
I’m glad I chose a boat of this size and complexity, it meant I’ve got an (almost) finished boat, in a couple of years.
Life gets in the way, and there were times when I didn’t work on the boat at all and other times when I did a little more.
Boatbuilding is just a series of tasks – every task completed is one step closer to a finished boat.
You don’t need to be able to produce cabinet maker quality work.
And while a fully equipped workshop will make life easier, it is perfectly possible to build a nice boat with hand and portable power tools.
I have a few stationary power tools which did make some jobs a bit quicker.
It’s also worth shopping around for materials.
Some industrial suppliers are happy to provide quality materials at surprisingly competitive prices.
Enjoy reading How I built my own 18ft motorboat?

A subscription to Practical Boat Owner magazine costs around 40% less than the cover price.
Print and digital editions are available through Magazines Direct – where you can also find the latest deals.
PBO is packed with information to help you get the most from boat ownership – whether sail or power.
-
-
-
- Take your DIY skills to the next level with trusted advice on boat maintenance and repairs
- Impartial in-depth gear reviews
- Practical cruising tips for making the most of your time afloat
-
-
Follow us on Facebook, Instagram, TikTok and Twitter