


Using digital sources to answer basic navigational questions can take some of the hard work out of passage planning and making… explains Craig Burton, head of training operations at the Royal Yachting Association (RYA)
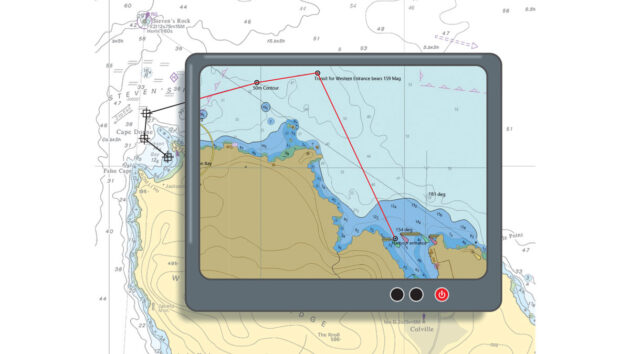
The four stages of passage planning and making still apply when navigating with electronic equipment: appraise, plan, execute, monitor.
In almost every way, once you have mastered your onboard systems and identified your go-to sources, passage planning can become infinitely quicker by letting the electronics do the heavy lifting.
Passage planning stage 1: Appraise
There are new skills to learn, new equipment to master and new sources of information to explore, but the human gathering the information will still need to link pieces of the puzzle into decisions and a plan.
The information in publications such as Reeds Almanac or pilotage guides will still be relevant, but in future it may be presented in a digital format, or within electronic charts.
In this lies not only great benefits but also hidden dangers.
Many manufacturers have their own operating system, terminology, user interface and even chart formats.
We’ll need to develop skills to identify systems and sources that we trust or simply prefer.
Screen size will be a limiting factor.
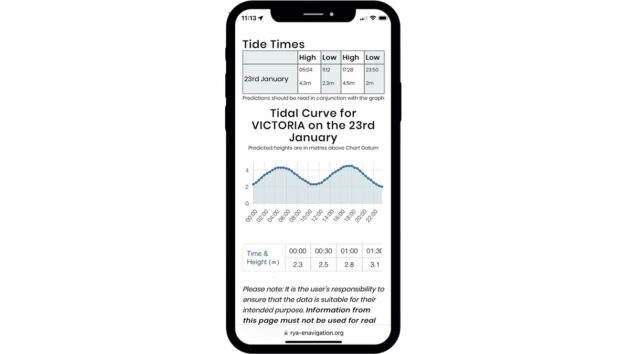
Mobile devices can assist with gathering information for passage planning, but their small size will limit their use for primary navigation. Credit: RYA
A mobile phone charting app may be useful for bigger picture overviews of an area, but the limited screen size increases the risk of missing detail.
It’s also predominantly deriving its navigational information from a single source – Global Navigation Satellite System (GNSS).
The golden rule that navigators should not rely on one source of information remains true.
Passage planning, stage 2: Plan
This should cover the full voyage from berth to berth.
When creating a plan we need to place waypoints and routes in such a way that we can independently verify that the GNSS position is accurate.
This independent verification is essential for spotting when things aren’t right.
We can use Dilution of Precision numbers as an indication of likely precision and on more modern systems we may have a traffic light system.
While electronic methods indicate reduced precision, they don’t tell you what that means in terms of error in position.
This is where pilotage routines using visual, compass, depth or radar techniques remain valid.

While plotters are brilliant at doing all the hard work, you also need to use eyeball navigation, read almanac passage notes and pilot books etc.
Building a route in your electronic chart systems (ECS) is essential to monitor progress against your plan.
The most common ways to manage lack of screen space are to use rubber banding or auto-route.
Rubber banding is the practice of starting with the first and last waypoints, then working forward from the start waypoint to place additional waypoints as needed.
Auto-route is implemented differently in each brand of ECS, from using minimum depth required to all vessel dimensions.
The autoroute will usually be created by entering start and finish waypoints and the ECS suggests a route.
We should never use an autoroute without checking each waypoint, adjusting its position or adding or deleting as necessary to ensure the route is correct.
If you cannot adjust the waypoint on your system, stick with rubber banding.
The route in itself is not a plan, and you cannot create a route until you have identified all the limiting or significant factors.
When creating the route, we can incorporate much of the additional information needed for a plan – each waypoint should mark an action or decision to be made.
Part of passage planning in the digital system is to identify the settings that need to be used at various stages of the voyage.
We recommend setting COG vectors and heading vectors to a meaningful length.
Other settings that may need to change are cross track distance, waypoint arrival distance, or depth alarms.
Set alarms intelligently and identify a sensible value for triggering alarms.
By setting these parameters you’ll see where you’re meant to be (the route), where you are (the vessel position) and where you’re projected to be.
This is the minimum to monitor progress and identify if action is needed.
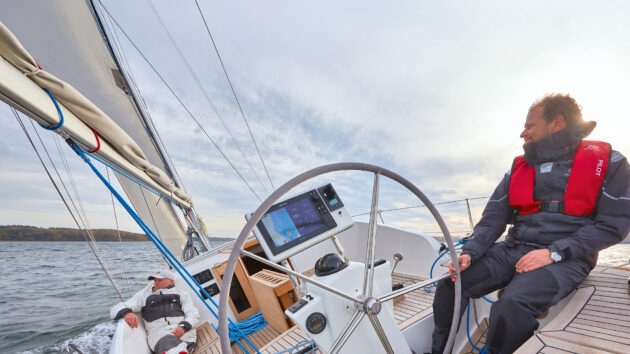
Basic navigational knowledge is the key to understanding and getting the most out of your chartplotter. Photo: Graham Snook/Future.
Passage planning stages 3 and 4: Execution and monitor
Execution of the plan has not really changed in the digital world.
Ensure that answers and assumptions used haven’t changed sufficiently to require a fresh look at the plan.
With a carefully crafted set of waypoints, it’s easy to monitor progress along the plan and monitor the reliability of position.
Take every opportunity to monitor your position by means other than the GNSS data.
If you have a heading sensor, as recommended, it can be as easy as using the cursor range and bearing feature to verify the bearing of a charted object or a rising/dipping light.
Perhaps the easiest is using radar overlay.
If the radar targets match charted objects, then the position is good.
Remember, electronic devices can take much of the drudgery and human error out of passage planning but the one who must ultimately make the decisions is the person acting as navigator.
Chart display explained
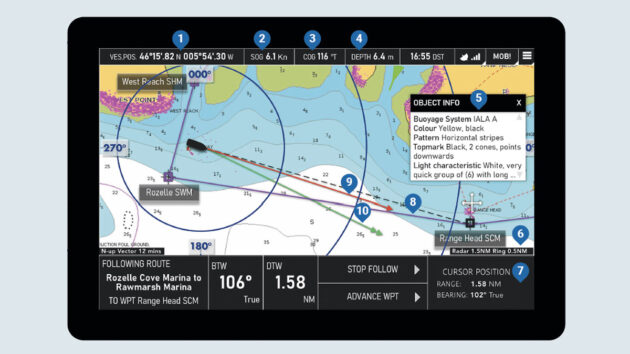
Chartplotter: Set up for success
1. Vessel position: shows current latitude and longitude in degrees, decimal minutes and is usually from GNSS.
2. Speed over ground (SOG): measured in knots and derived from GNSS.
3. Course over ground (COG): the actual direction of progress of a vessel, derived from GNSS.
4. Depth: measured in metres. Derived from an echo sounder which may be adjusted from the waterline or under the keel.
From the vessel picture (above), it is most likely to be from the waterline in this case.
Plotters may show charted depth as chart datum or adjusted for tidal height.
5. Object info: additional detail about a specific charted object or area.
6. Range Head SCM: is a named waypoint. It is the active waypoint, indicated by the dotted line and the text box on the bottom left.
Not all chart plotters use this technique but they will all identify the active waypoint in some way.
Location and name are set by the navigator in the planning phase.
Each waypoint should have a meaningful name and represent an action or decision that is needed.
7. Cursor position: shown as a range and bearing from the vessel, derived from GNSS in chart-only display.
8. Route: a series of waypoints joined to create a route. The route is set and named by the navigator during the planning phase.
9. Heading vector: shows heading from a compass input.
Vectors can be set as infinite but this has been set to the distance the vessel is likely to travel through the water in 12 minutes (N-up Vector 12 mins, shown bottom left of display).
10. Course over ground (COG) vector: shows the direction of travel over the ground.
Derived from GNSS information and can be set up as a fixed distance or a time frame, such as 12 minutes, to help with scale and projecting your vessel’s position.
About the author

Craig Burton is head of training operations at the Royal Yachting Association (RYA)
PBO’s new eNav in a Nutshell series is supported by Navimaps.co.uk – experts in marine cartography – Navionics & Garmin Navionics for chartplotters.
How I switched to electronic charts
Ali Wood recalls her first sailing passage using electronic charts
What is S-100 and how will it affect the future of electronic charts?
“S-100 is indeed a great step forward. However, it does not promise any new chart data in the areas where…
GNSS-enabled electronic devices have ‘cyber-security vulnerability’
Sailors are being warned of the threat of spoofing or jamming of electronic kit, such as Man Overboard (MOB) devices…
What to read more features like Passage planning in the digital age?
A subscription to Practical Boat Owner magazine costs around 40% less than the cover price.
Print and digital editions are available through Magazines Direct – where you can also find the latest deals.
PBO is packed with information to help you get the most from boat ownership – whether sail or power.
-
-
-
- Take your DIY skills to the next level with trusted advice on boat maintenance and repairs
- Impartial, in-depth gear reviews
- Practical cruising tips for making the most of your time afloat
-
-
Follow us on Facebook, Instagram, TikTok and X