
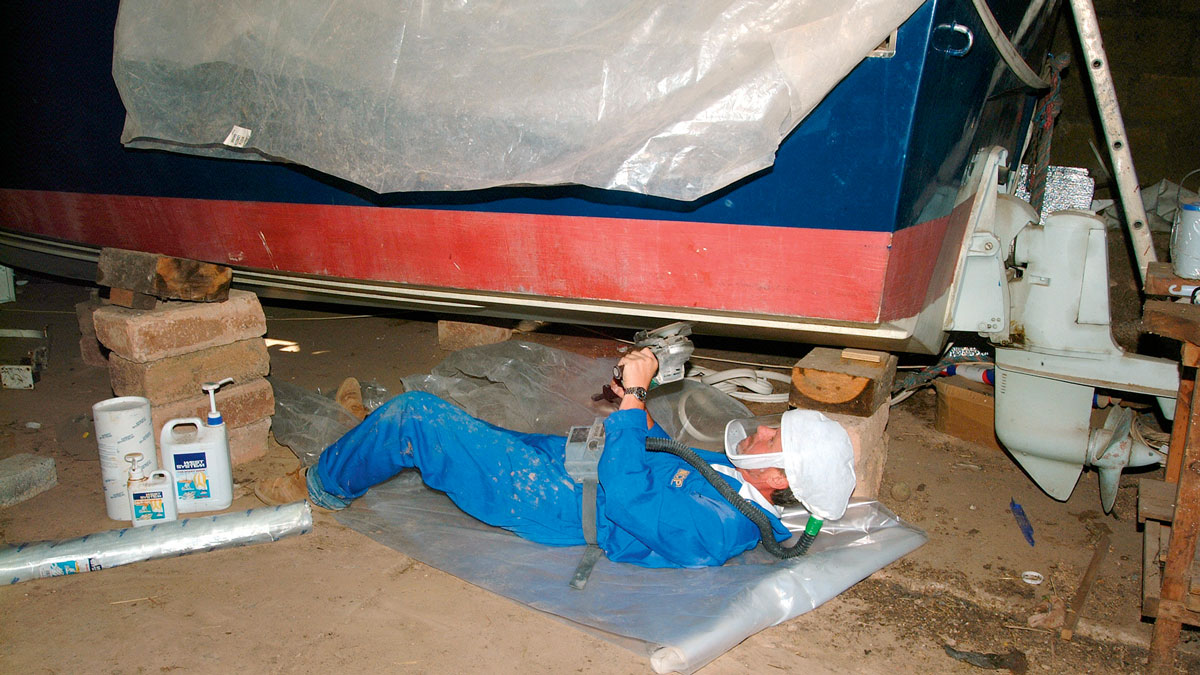
When traditional plywood didn't match the curves of his Corribee 21, Jake Kavanagh found an ingenious—and free—solution at the local scrapyard
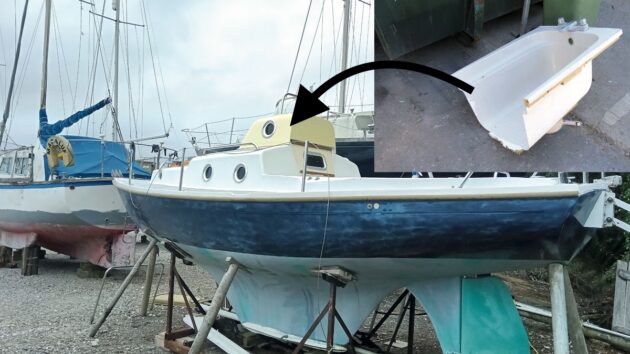
Whenever anything is created in glass reinforced plastic (GRP), there is usually a mould involved. Normally, to make the mould, a plug is used, which is a sculpted replica of the finished item. However, for a one-off, it’s not always worth the time and effort to make a plug and then cast a mould from it. Fortunately for me, when creating a doghouse for my Corribee 21 Pod, an old bath saved me the trouble.
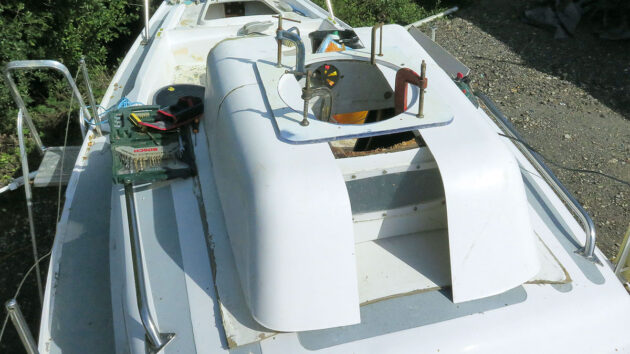
The Corribee is built to a design by Robert Tucker inspired by the Folkboat. The superstructure has some very pronounced curves, so previous plywood doghouses with sharp corners had looked quite out of place. I realised that a doghouse matching Tucker’s original design would look almost intentional if the radii matched, and if made from GRP it would be virtually indestructible.
The angular old doghouse didn’t really suit the boat. Credit: Jake Kavanagh
An idea came from a run to the local tip where I saw two halves of a domestic bath lying next to a skip. The internal shape looked just about right for the Corribee’s cabin sides, and the smooth finish of the inside of the bath would make an ideal surface to mould from. I also had an old Astrodome, a clear Perspex bubble bought from a boat jumble for £40, that would fit over the top. This would give me full standing headroom for watchkeeping.
Moulding and laminating in polyester GRP is quite straightforward and relatively inexpensive, especially when compared to using epoxy resin. The materials are easy to source, have a long shelf life, and are quite forgiving of basic mistakes.
The outer surface can be filled, sanded, and painted, so the amateur moulder doesn’t need to aim for a perfect mirror-gloss finish. If any errors are made, the material is easy to cut, patch, and rework, retaining its strength in the process.
There is a risk, when new to moulding, that you’ll over-engineer the product and make it too heavy, but the more items you make the better you get. So, old bath liberated, to the bemusement of the council staff, and with some measurements taken from the boat, it was time to cast my doghouse.
It was during the build that I decided to move from having a fixed doghouse to a sliding version. The beauty of GRP is that you can make radical changes like that, and still end up with a good result. The project was more cost-effective for me as I already had most of the materials left over from other projects. Otherwise, it would have cost:
- Fibreglass materials: around £120
- Portholes: Vetus £174.35rrp (£35 eBay)
- Dome: Around £160rrp (£40 jumble)
- Filler: £35
- Paint: (two-pack) £50
- Ancillaries: screws, fittings, plastic runners £30
- Tripod: £80-£120 (£35 from a jumble)
- Bath: free – council was glad to see the back of it
Prepping the doghouse mould
The object being created in a mould is known as a moulding, and the key to success is the release agent. Internal shape also matters, as it’s quite possible to make a moulding with reverse angles that lock it into the mould – you’d have to cut apart to get the moulding out.
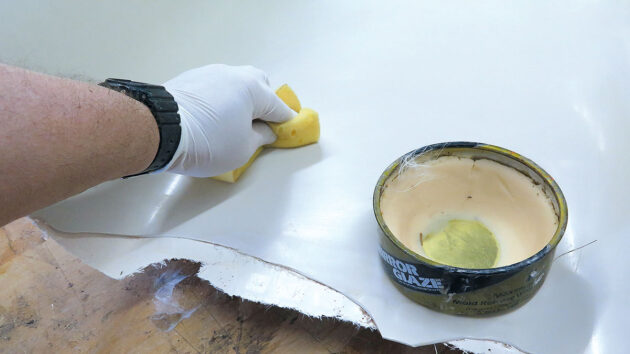
Don’t take shortcuts in the application of release wax. Credit: Jake Kavanagh
Measurements revealed the bath may be too narrow to completely cover the hatch, and would need widening, but first I had to create a basic moulding to work with. The inside of the bath was cleaned, wiped with acetone to remove contaminants, and then waxed.
Luckily, it was free from any scratches or damage, and being the far end had no plughole. For laying the wax down, a sponge works well. Don’t skimp. The wax used is specific to GRP work and is applied in three coats.
If you want a mirror finish in the gel coat, make sure each coat is polished with a dry cloth after application.
Adding the gel coat
Gel coat is basically clear polyester resin with a pigment added, and can be bought pre-mixed. If you want a special colour, pigments can be added to clear gel coat, normally at a ratio of 2-5% for strong colours (black, red, blue) and 5- 10% for lighter ones.
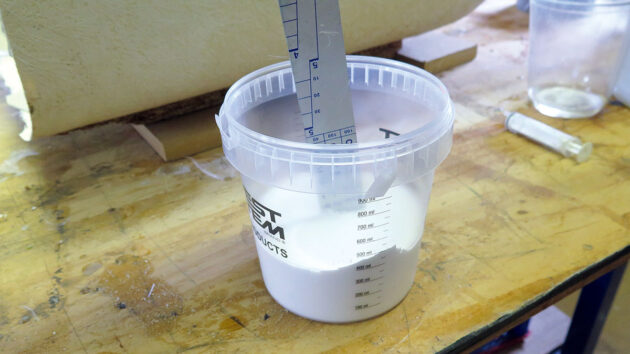
Measuring up for a gel coat mix. Credit: Jake Kavanagh
I measured out what I thought I’d need for one coat of gel coat (around 450ml), and then activated it with 2% by volume MEK (methyl ethyl ketone peroxide) catalyst, supplied with the tin. I’d aim for the thickness of a business card for each of the two coats.
Having stirred the catalyst into the gel coat, I used a large brush and began to paint the inside of the mould. On a warm day, working time is about 30 minutes, but by increasing or decreasing the percentage of catalyst (between 1%-3%), pot life can be advanced or retarded accordingly.
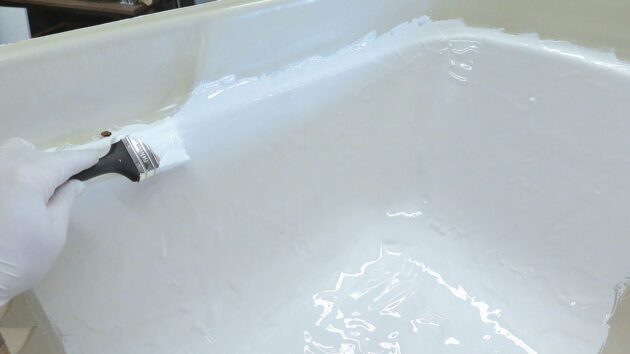
Painting gel coat into the bath mould that has been coated with release wax. Credit: Jake Kavanagh
Laying up
Laminating, or ‘laying up’, is the process of adding layers of reinforcement behind the decorative gel coat. Some laminators use a glass tissue as an intermediate layer, as it irons out slight imperfections, fills corners easily, and hides the weave of the denser CSM (chopped strand mat). I went straight in with the CSM, knowing that paint would hide any see-through issues.
CSM is available in several ‘weights’ (grams per square metre, or gsm). The denser the material, the less easy it is to work with. I went for a midrange version at 450gsm, considered the general standard for hand lamination. When saturated with resin, it sagged easily and took the inside of the curves well.
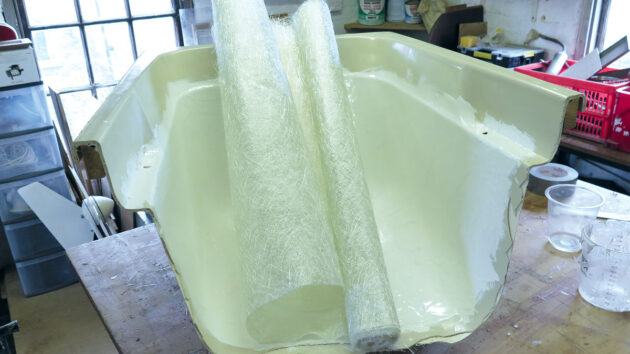
Plenty of chopped strand mat (CSM) ready for the lay-up. Credit: Jake Kavanagh
When ‘consolidating’ the laminate, the aim is to use a special roller made up of metal washers to eliminate any white patches, where the resin hasn’t fully penetrated. You want a consistent colour of wetted CSM throughout.
After the first layer had partly cured, I added foam reinforcement in patches. The foam adds strength where it’s needed, but without a major weight penalty. You could use thin plywood patches if preferred, with the edges chamfered to allow the CSM to sit more easily. The foam is overlaid with CSM and wetted out.
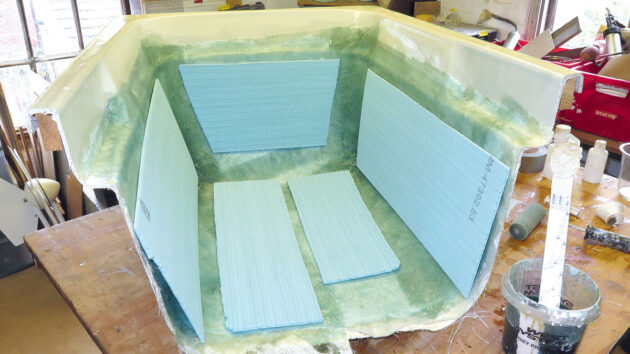
P.E.T foam reinforcement applied over the first layer of CSM. Credit: Jake Kavanagh
With the moulding fully formed and the excess material trimmed, it was time to release it from the mould. This can be the tricky part, but the usual method is to introduce a sharp object, such as a knife or scraper, between the mould and the moulding. By teasing the more flexible moulding along the join, air gets in and the seal is broken. Some laminators will add tags to the moulding to help them grip it for release, grinding them off later. The result for me was a mirror image of the original bath, but with the finish on the outside.
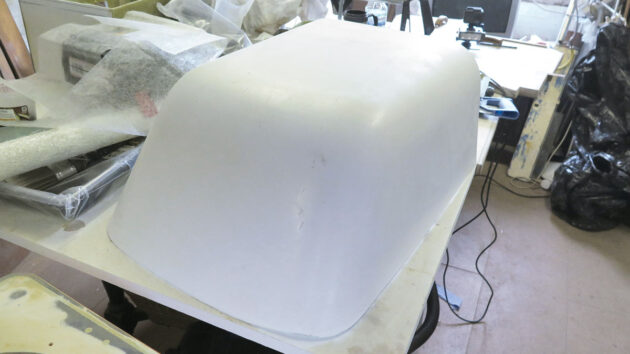
Moulding released from the mould… is it a bath or is it a doghouse? Credit: Jake Kavanagh
Fettling to fit
I didn’t expect it to fit perfectly to begin with, and it didn’t. The next job was to widen the original moulding by using the bath as a mould again and casting a mid-section. An old hatch cover was used to show the width of the Perspex bubble and to clamp the structure.
Sliced into quarters, the moulding could be widened and lengthened to fit the boat. Credit: Jake Kavanagh
The original moulding was cut in half (a metal-cutting blade in a jigsaw works well) and sections also cast from the bath were introduced to widen and lengthen it. Another layer of CSM was laid up for strength. Once the hatch was at the right width, I added filler to fair the joins.
New panels inserted and laid up inside to make a strong join. An old hatch was a dome template. Credit: Jake Kavanagh
Detailing
Front of the doghouse cut out to accommodate an opening portlight. Credit: Jake Kavanagh
At this stage I wanted an opening portlight forward, so the slightly curved front section was cut open, and a flat section for the portlight was added. A hot glue gun is great for temporarily attaching pieces before bonding them into place. This saves a lot of awkward clamping.
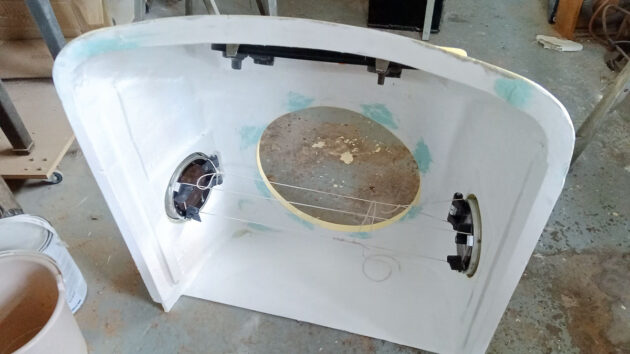
Portholes cut into the doghouse sides and strung together while sealant cures. Credit: Jake Kavanagh
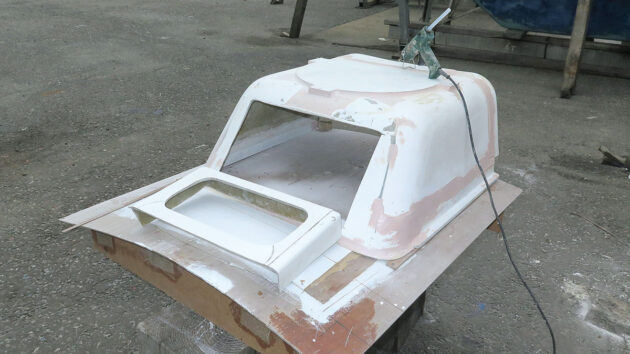
The basis for a sun shade was also added over the portlight, with Nautix watertight filler used to contour the whole thing. A circular pad to support the Perspex dome was also added, with pads for the feet of the protective tripod.
A template of the deck curve was made from a thin sheet of plywood, and once stabilised with batons, became a replica of the Corribee’s cabin. This aided in making the new hatch a perfect fit. The stainless steel tube tripod, bought from a boat jumble, has come from a large dorade vent.
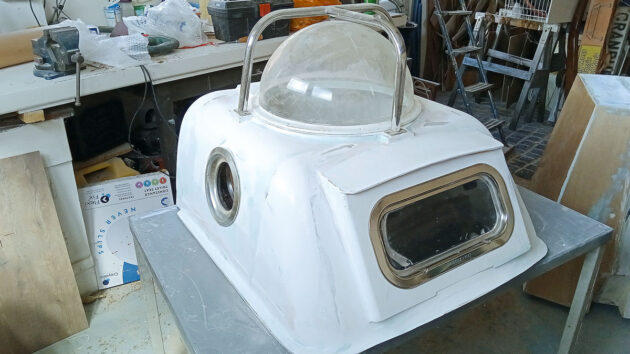
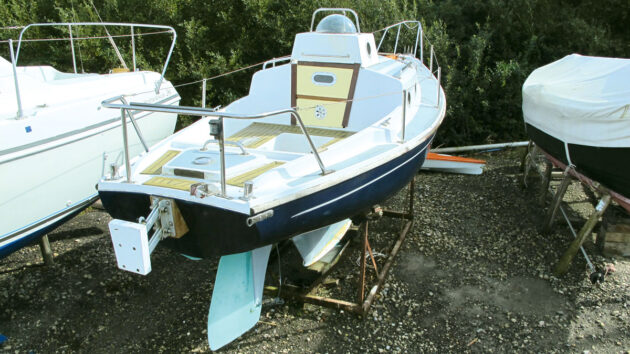
Almost finished – a sunshade has been added, too. Credit: Jake Kavanagh
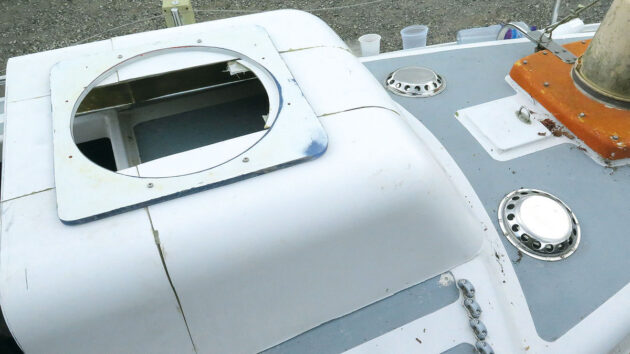
By matching portholes or windows to those in the hull, the hatch can be made to look even more authentic. I inserted a pair of Vetus opening portlights, which are easy to install as they literally clamp each side of the opening. String between them held them in place while the sealant cured.
Once the final shape had been achieved, the dome needed to be through-bolted onto a watertight seal. Plastic strips have been bonded to the base to make sliding over a matching set on the cabin top a much easier operation.

Final touch will be a handle and compass. Credit: Jake Kavanagh
Everything was sanded back before painting with a standout colour. The hatch when fitted will be held down by wooden batons. The final touch, waiting for the spring, will be a steering compass and stainless steel grab handle added to the rear vertical surface.
In the doghouse: fixed or sliding
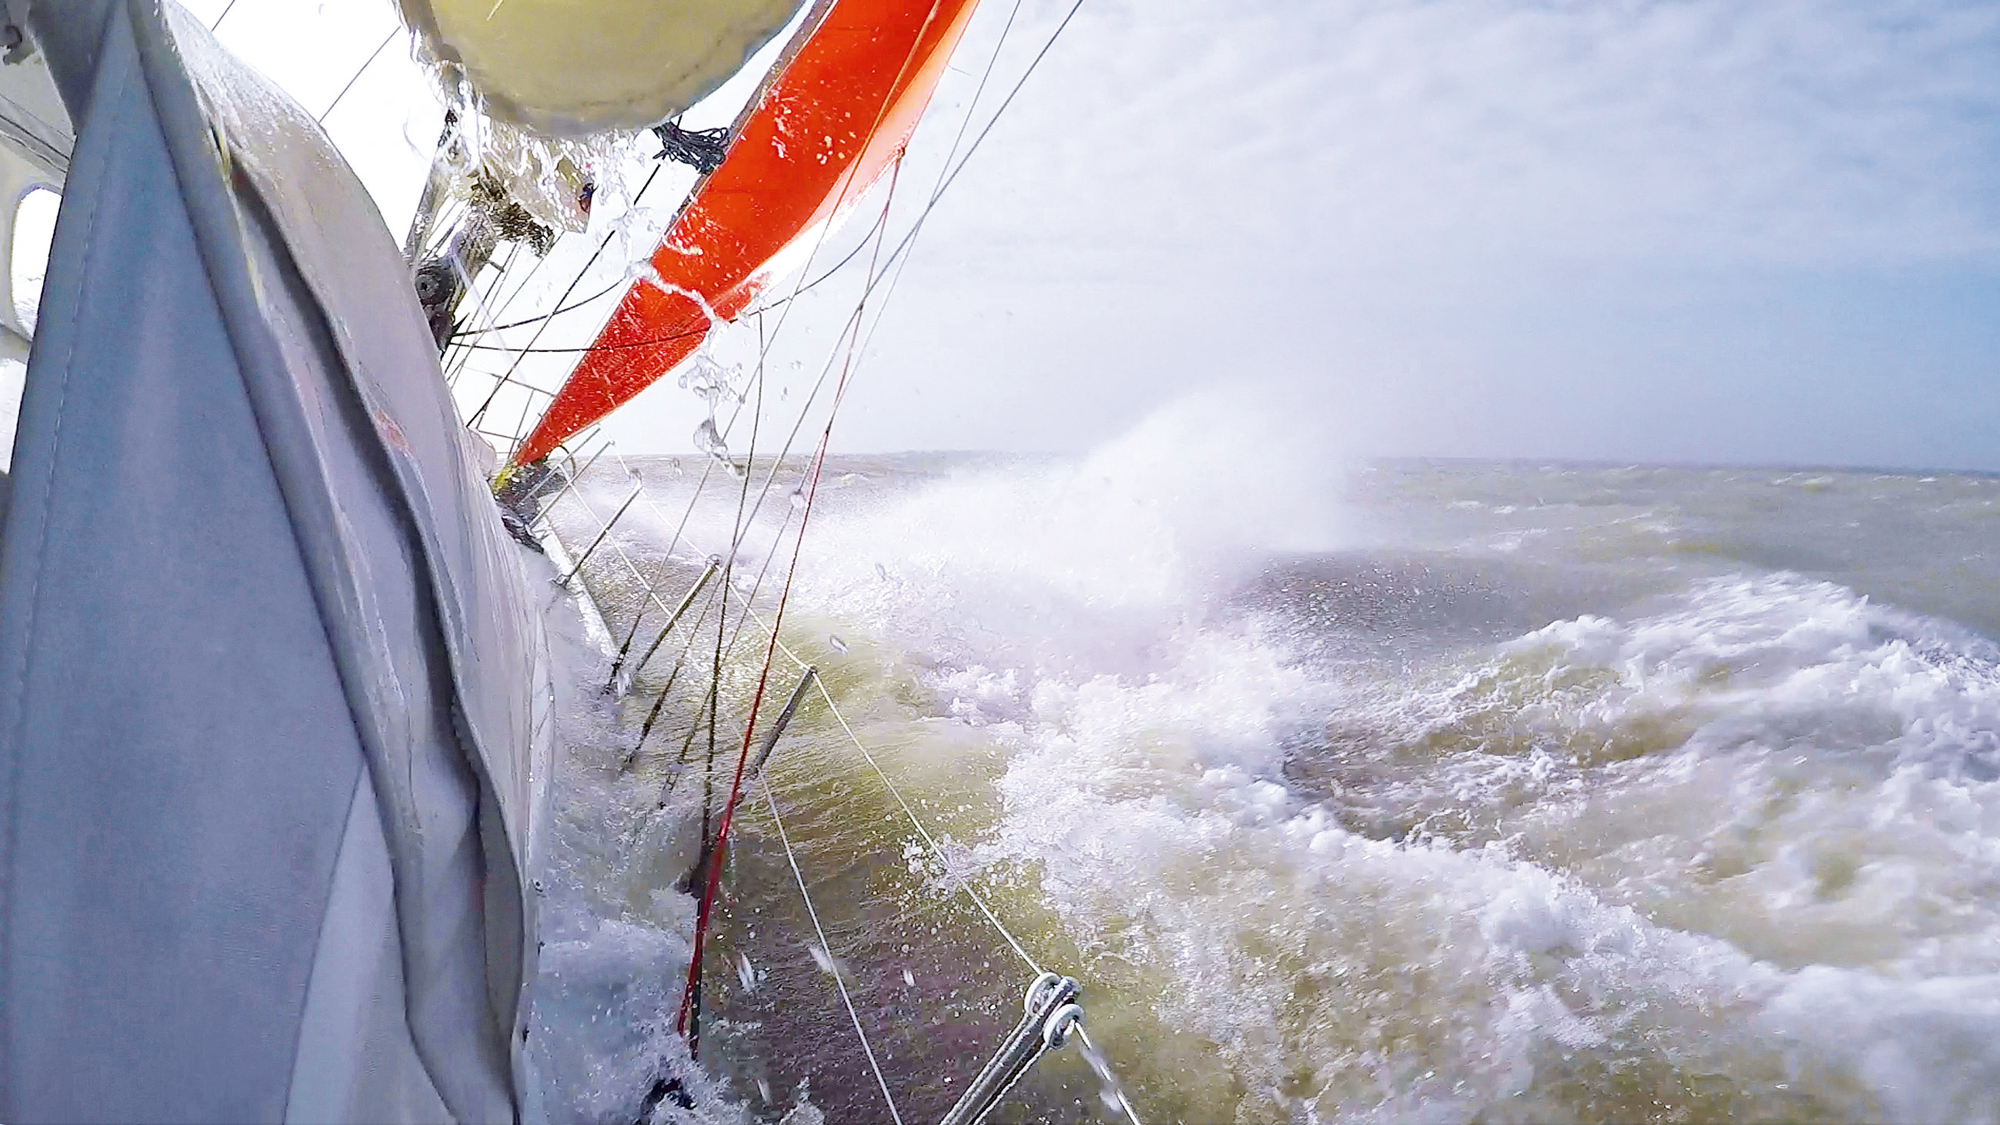
Practical Boat Owner regularly reports on the Jester Challenge, where single-handed sailors cross the Atlantic in production boats of less than 30ft. A key element to their modification often involves an all-weather watchkeeping doghouse. Two styles of design were my inspiration.
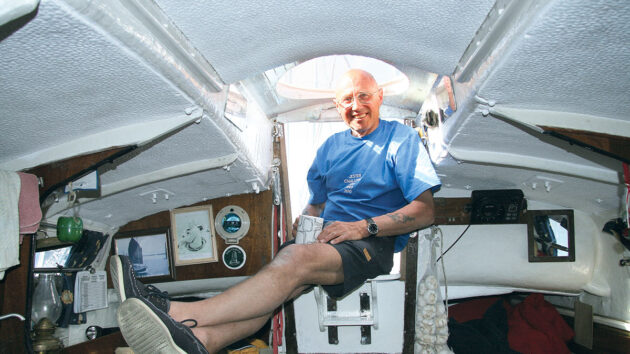
Bill Churchouse added a raised plinth and Perspex dome to the hatch of his Westerly Nomad. A detachable seat provides an internal watchkeeping position. Credit: Jake Kavanagh
The first was from Grahame Jewitt, who built a permanent extension over the main hatch of his Kingfisher 20. The second was Bill Churchouse’s Westerly Nomad, where he added a plinth and a Perspex blister to the main hatch. I originally intended to make a fixed doghouse with a sliding hatch, and then realised that a smaller, fully sliding version would be more versatile.
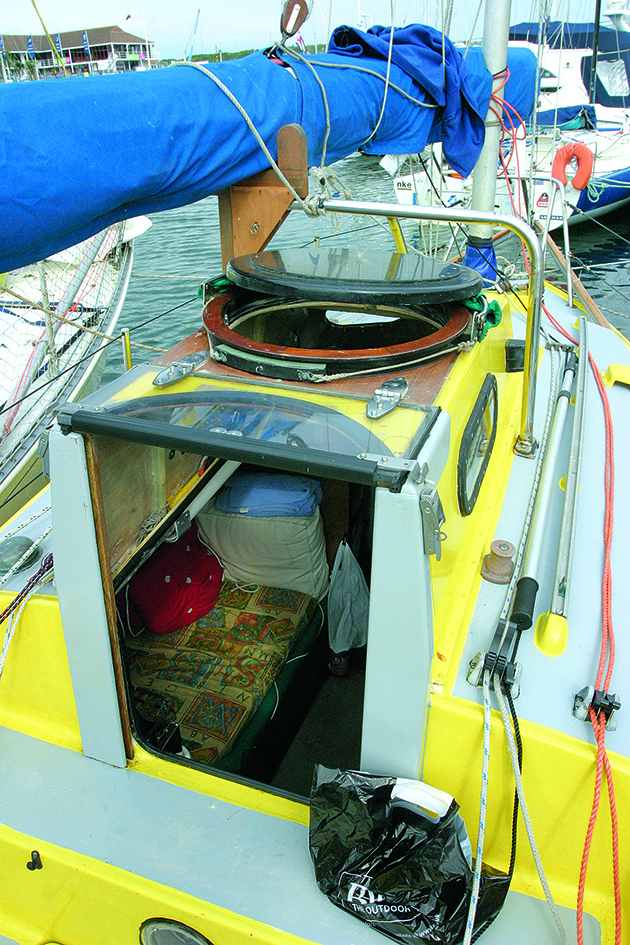
Grahame Jewitt built this highly practical doghouse for his Kingfisher 20. Credit: Jake Kavanagh
This type of addition can be tried and tested, modified and removed many times until the right shape is found. If selling the boat, it can be discarded altogether, and the original hatch reinstated – important if your boat is a well-known model loved by purists.
How to build a boat with cold moulding: the secret to a hull that looks like GRP
Richard Johnstone-Bryden explains cold moulding, a time- and cost-effective method of combining the beauty of wood with the strength and…

Coating a GRP deck with SoftSand coating
Genevieve Leaper and Aleko Stephan remove the old teak deck on their Nicholson 32 and renovate the original GRP with…
DIY GRP repair: step by step guide
Guide to achieving a professional finish with a do-it-yourself GRP hull repair to fix boat damage using West System's glassfibre…
Preparing a small boat for heavy weather with advice from the skippers of the Jester Challenge 2025
The Jester Challenge 2025 once again proved a fertile ground for examples of how a short-handed crew can prepare for…
What kit has impressed while maintaining or modifying your boat?

Follow Practical Boat Owner on Facebook, Instagram, TikTok and X