
Chris Comerie uses retirement to fulfil a teenage boatbuild ambition, resulting in a trailable gaff-slooped pocket cruiser

You may wonder why a home-built boat was preferable to the hundreds of vessels both new and used out there in the marketplace.
But, for me this was more than just about getting a boat to go sailing.
My father was a keen boatman and owned a small sailing yacht while he was posted with the Royal Air Force in Egypt during World War II.

Bunty B beached at Loch Scresort, the Isle of Rum, the Small Isles. Credit: Chris Comerie
When my brother and I were young, his influence resulted in us always messing about in boats which, in my later teenage years, inspired me to begin building a wooden rowing boat, and of course Dad got involved.
Unfinished business
We found a design in a book borrowed from the local library from which we lofted out the lines on wallpaper stuck together with Sellotape and laid out on the landing at the top of the stairs.
Unfortunately due to my limited finances and space constraints, I never completed the project.

Bunty B moored in Tarbert Harbour, Argyll and Bute. Credit: Chris Comerie
However, years later after serving an apprenticeship as a pattern maker, constructing precision wooden patterns for sand moulding and casting, I set up in business as a self-employed joiner.
After a year or so the owner of a local boatyard and chandlery asked me if I’d like to do some sub-contract work in the boatyard, initially to build two pontoons to allow leisure cruisers to land from the River Trent.
I loved it, and was thrilled when the job was completed and installed. Then as a result of its success, I was further employed carrying out repairs and alterations to all manner of different vessels.
Project boat
During my time there I purchased a run down GRP boat which, subsequently turned into a modest restoration project that for the time being satisfied my desire to get afloat again.
My joinery business grew then developed into a construction company building extensions and carrying out alterations to domestic property.
After 45 years of running my business I retired.
I’m fortunate enough to live in a property with outbuilding space and an equipped joiner’s workshop to boot.

Undergoing construction on the jig. Credit: Chris Comerie
My building site in a barn high in the Cumbrian Fells that used to house cows and sheep, appeared somewhat incongruous to hikers passing by on the public footpath who often referred to me as ‘Noah’, and asked ‘are you expecting a flood?’
But with these facilities to hand, I began to think about the boat that I’d started to build all those years ago.
While I hasten to add that I’m a complete amateur when it comes to building boats, my skills base and background gave me the confidence that I could construct a decent boat.
This time I was determined to finish the job and go sailing. I produced a wish list:
- A visually aesthetically pleasing classic styled sailing boat built in wood.
- To be able to go lake or coastal cruising with a crew of up to three adults.
- A small cabin to enable a few nights away, prepare food and be somewhere to retreat in poor weather.
- Trailer-able, easy to launch and recover.
- An outboard motor discreetly mounted in a centreline well, rather than transom.
- A retractable centreplate that did not compromise cockpit or cabin space.
Design research
After months of systematic research and investigation into modern methods and materials of wooden boat building, I discovered a design by the Brittany-based naval architect François Vivier that really caught my eye.
The Beniguet, a trailer-able classic cabin yacht with a gaff sloop rig was the pocket ship for me.
Ideally I’d have preferred a larger boat but we have a very long, steep and convoluted track leading up to our old farmhouse which was to be the build site, and it would be impossible to manoeuvre anything bigger than the Beniguet out to the road.
I bought a set of Monsieur Vivier’s plans and began work during February 2017.

Home-built boat: Lovely foredeck with bronze fittings. Credit: Chris Comerie
There then followed two years and nine months of intense, absorbing work and study.
Along the way I researched every detail of the structure and the fittings, to satisfy an overwhelming desire to learn and fully understand every single aspect of the design.
During that period the actual hands-on build time consumed 2,770 hours, although I must add that this total could have been greatly reduced by adhering to the original basic design.
From the outset I’d decided to build the boat to a high specification, fully fitted out with a chartplotter, VHF radio, navigation lights, cabin lighting, teak decking, additional reinforcement of the hull and a whole host of other personalisations and additions.
Launch day for my home-built boat
My father’s boat was called Bunty, so I named her Bunty B.
We launched her on Lake Windermere on 2 November 2019 with the family in attendance.
Later that day, following the successful trials, we recovered her and trailed her back home to overwinter undercover in anticipation of future adventures during the following summer season of 2020.
Unfortunately the coronavirus pandemic interfered with those plans.

Very smart: Bunty B is a François Vivier design. Credit: Chris Comerie
I was frustratingly prevented from being able to sail her by the government-imposed lockdown and I had to be patient until restrictions were eased.
It was 29 August 2020 when at last I launched her at Dunstaffnage Marina just north of Oban, and from there I was able to take her to sea for the first time.
Since then I have sailed Bunty B around 1,000 miles, mainly single-handed, exploring the Hebrides off the west coast of Scotland and crossing the Irish Sea to the Isle of Man.
As my experience of handling the boat has grown, I have made further additions, alterations, and fine-tuned the boat, continuing to do so right up to the present day.
No regrets
I earlier alluded to my desire to build a bigger boat, but the size restrictions imposed upon me by our restricted access have inadvertently proved that there are some significant advantages in having a small day-sailer.
Bunty B is very easy to tow, launch and sail single-handed. These attributes allow you greater flexibility in your choice of cruising grounds.
Provided there is a suitable slipway available, you can go just about anywhere you choose, and of course there are no annual expensive marina
or mooring fees to worry about.
The onboard facilities and locker space are more than adequate to allow me to cruise for two weeks or more, with of course the occasional visit to a marina.
Continues below…

How I built a bespoke aluminium powerboat at home
Late in 2015, just as James Oakley was finishing the hull of his home-built aluminium speedboat, he was diagnosed with…

Around the world in a 5.8m boat! Meet the sailor preparing to race a Class Globe 5.80
British sailor Adam Waugh is currently building his 5.8m boat at his home in Northumberland before taking part in the…
How to build a boat: Essential guide to building your first kit boat
You don’t have to be a boatbuilder to learn how to build a boat, argue Roger Nadin and Polly Robinson.…

Build your own Western Skiff – part 1: the first steps
Finally, after months of planning and discussion, the moment of truth had arrived: the first Western Skiff MkII kit, put…
In fact I’m usually away for 10 or more days at a time.
I particularly enjoy the ability to take the ground, just hoist up the centreplate, pop on the drying out legs and, on the ebb tide she’ll sit gently on a secluded sandy beach of your choice.
You can then just walk ashore. Very satisfying.
I have to be honest, overall I found the building of my own boat to be initially quite daunting, and by completion it proved to be an expensive undertaking.
However, you shouldn’t underestimate the benefits you reap from the experience which proved to be totally consuming, enjoyable and fulfilling.
First things first
Before embarking on any project, it’s best to sit quietly with a cup of tea and mull it over.
Well, I must have drunk gallons of tea before embarking on this particular home-built boat project.
I eventually chose a design that would, as close as possible, fulfil my requirements and, importantly, be towable from my build site to the public highway.
Before committing to buy the full plans from François Vivier, I purchased the study plans for just a few pounds which enabled me to check the lines and fully understand the construction.
I contacted the architect directly who proved to be very accommodating with my queries.

The full size pattern of the outline of the hull hitched up ready to set off down the hill. Credit: Chris Comerie
I then attempted to estimate the cost. This was informative but time-consuming due to my lack of knowledge of much of the terminology and where you could buy the materials and myriad of fixtures and fittings required.
Needless to say, on completion of the build I’d underestimated the final cost.
To ascertain if I could tow the boat out to the road from my Cumbrian Fells property, I took detailed measurements and surveyed the pinch points of our access track.
The final bend before the track meets the highway is very tight and in order to be sure that I could manoeuvre the boat around this obstacle, I used the study plans to construct a full sized pattern of the outline of the hull, sporting two bicycle wheels at the estimated centre of balance of the boat.
Then I hooked it up to the tow bar of my pickup truck. I towed the pattern to confirm (or otherwise) that I’d be able to negotiate the convoluted track.
As I approached the suspected problem bend at the bottom of the hill, two of my neighbours suddenly appeared; the track is a public footpath and they were out for a stroll.
The astonished and amused look on their faces was priceless.
The outcome proved that we could get the pattern out to the road, yet despite this there was always a nagging doubt in the back of my mind throughout the build thinking, what if I can’t actually get the boat around that bend?
And so now I’m going to attempt to illustrate 2,770 hours of work carried out over a period of 31 months into a handful of photographs: impossible I know but, I’ll try to touch on some of the key elements of the build.
The build: step by step

1. To get building under way my first job was to construct the jig which had to be very accurate – any imperfections would irretrievably be transferred into the build. Here the overturned jig is being used to provide a large, flat working area for glueing up the planking strakes. Each joint was then sheathed in epoxy saturated glass fibre cloth then faired with epoxy filler. They were then sanded flat and smooth before fitting to the jig.

2. The jig, the correct way up, fitted with the timber supports holding the transverse bulkheads in their correct positions. The backbone has been glued in and the clamps are holding the laminated outer or stem to the inner to allow a perfect fit. The backbone gap is the aperture to carry the lead ballast. I had the 29 sheets of marine plywood CNC cut, though in retrospect I wished that I’d purchased the patterns to mark and cut out the plywood components myself.

3. The ballast aperture follows the hull lines and is designed to be filled with around 80kg of lead. I constructed a plywood mould to follow these lines and dimensions that was divided into five sections then, coated the internal faces with sodium silicate solution as a fire prevention. The plywood strips between the aluminium separators are temporary supports – as each section cooled and set after casting they were removed as the work progressed along the mould.

4. The ballast is securely glued into its cavity by thickened epoxy – ensure there are no voids. A capping hardwood strip is then bedded in epoxy and screwed down to seal the compartment. To prevent chafing when taking the ground, I capped the entire backbone/keel in marine grade stainless steel flat bar.

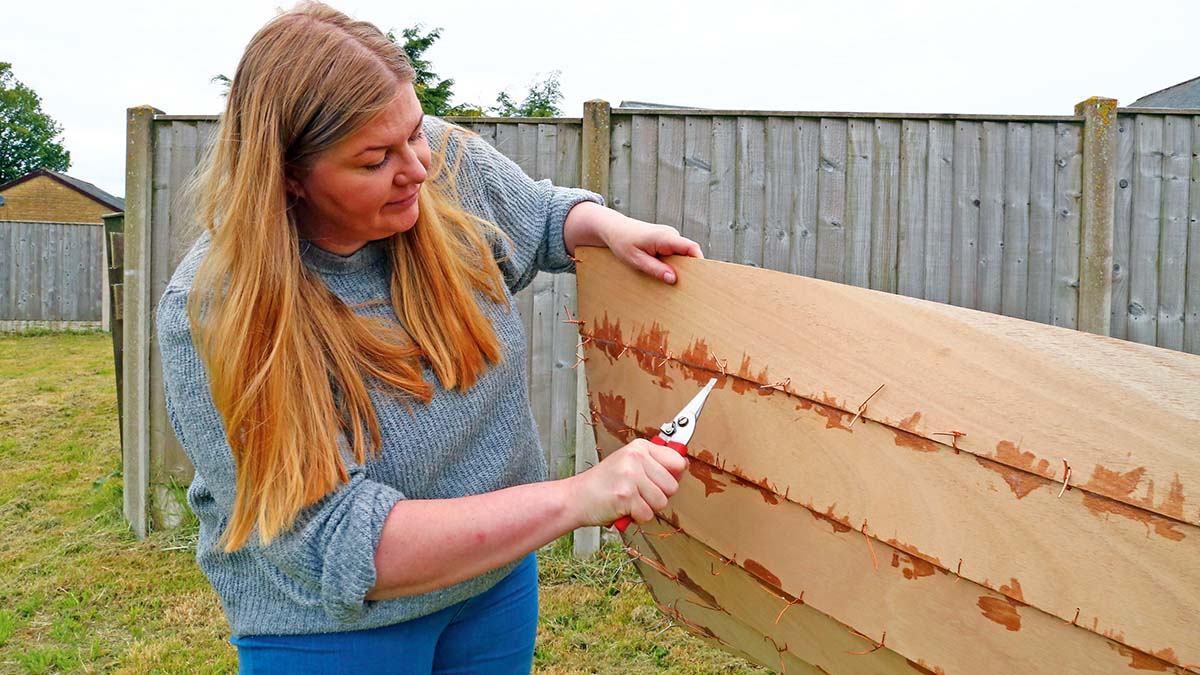
5. I applied thickened epoxy fillets to all the strake joints, garboard and backbone, the latter was then completely sheathed in epoxy saturated glassfibre cloth and faired with epoxy filler. The entire hull was then faired and sanded down flat and smooth. A sealing coat was applied followed by eight coats of paint.

6. The hull was then turned and set level in readiness for fitting out. All joints between planking, bulkheads, transom, backbone, shelving and any internal fitting out were epoxy filleted, sheathed in glassfibre and faired. I also sheathed in epoxy saturated glassfibre all the planking up to the water level. Epoxy sheathed plywood produces an enormously strong material. I tested this using the waste cut from the engine well aperture, which I securely clamped in the bench vice and beat with a hammer. It amazed me how tough it was – the edge joint between the pieces did not break!

7. Before the decks, coachroof and other inaccessible areas were closed off, I applied the full paint regime. I also fitted the conduits for wiring; this necessitated the increase in some of the timber sections to accommodate it. At this stage, I’d already made the drying out legs and put them to use during the build to stabilise the hull

8. The mast is laminated from four boards of Douglas fir. I had to customise the design to allow cables to pass through to the mast head. This shows my solution using plastic conduit supported at intervals by plywood cradles. The mast was a challenging project: to achieve dead straight true boards and perfect jointing faces over its entire length required care. I assembled and glued it on a hot summer’s day to take advantage of the perfect conditions, which allowed the epoxy to fully penetrate the jointing surfaces and achieve an excellent bond.

9. All of the spars were made from Douglas fir with the exception of the gaff jaws. These were manufactured from laminated ash that required me to make a jig to achieve the desired shape. You can see I’ve also fixed leather sheathing in the base of the jaws to help prevent damage to the mast.

10. The 100kg centreplate also forms part of the ballast total and is manufactured from 25mm-thick 316 marine grade stainless steel. I had the outline shape laser cut. Further machining was carried out on a friend’s milling machine while the drilling, shaping and finishing I did by hand using an angle grinder, a pillar drill and a file. That was hard work, and even harder work fitting it in the boat!

11. I built a lot of detail into Bunty B, for example you can see the inlay in the transverse board on the transom aft deck and the ball on the end of the tiller. All of the timber used for the build was cut from rough sawn boards, machined and prepared in my workshop. The ash tiller and the gaff jaws were manufactured from a tree that I’d felled on our land some years previously. The ball spliced into the end of the tiller is mahogany that I’d reclaimed from some old furniture more than 20 years ago. I use recycled timber where possible. At a later date I removed the paint from the cockpit seats then re-covered them in teak planking.

12. The big day, loading Bunty B onto her new customised trailer. It took two of us the best part of a day to manoeuvre her out and onto the trailer using various jacks, levers and rollers. Similar I suspect, to the methods used by the Egyptians when moving the large stone blocks when building the pyramids!

13. The signal flags are tied to the rigging, gold gilt inlay has been applied to the detail in the rubbing strip at the bows; she’s spick and span, shipshape and Bristol fashion and ready for the launch.
Cost breakdown of a home-built boat
- Purchase of drawings £450
- Plywood & CNC cutting £3,776
- Timber, epoxy, fittings, paints etc £15,122
- Sails and cushions £1,900
- Stainless steel centreplate £1,000
- Radio, plotter, tiller pilot, electronics etc £2,900
- Engine and fuel tank £1,421
- Trailer £2,688
- Total cost £29,257
- Hours (initial build) 2,770
- Plus additions 104
- Total hours 2,874
The teak deck
Despite attempting to steam bend in a jig or, dry bending by applying gradual pressure, I could not coax the teak planking around the tight radius of the side decks.
The only solution I could think of was to purchase some wide boards and cut each plank individually with the appropriate radius.
The supplier of the Burmese teak I managed to obtain for this purpose told me that it had come from the salvage operation in 2011 of a World War I wreck, the SS Pegu.
I found this intriguing and carried out some online research to try and find out what had happened.
The Wrecksite website described how the Pegu was a steam powered cargo ship owned by the Henderson Shipping Company.
She was said to have been torpedoed by a German U-boat (U57) under the command of Carl-Siegfried Ritter von Georg on 8 July 1917.
Unfortunately, the sinking of the ship caused the loss of one life, 22-year-old 4th engineer, Robert Maxwell.
The ship had been carrying general cargo which included a large supply of Burmese teak, from Rangoon to Liverpool.
Apparently this timber was destined to be used for the fortification of heavy gun emplacements in France and Belgium.
The teak then lay on the seabed for more than 90 years before being salvaged.
I believe that in part, the salvaged timber provided a source of material for the repairs to the Cutty Sark project following a serious fire that nearly destroyed the renovation.
Using this fine, historical wood for cladding the deck of Bunty B felt like a privilege.
Enjoyed reading Home-built boat: how I made and launched my own day sailer?
A subscription to Practical Boat Owner magazine costs around 40% less than the cover price.
Print and digital editions are available through Magazines Direct – where you can also find the latest deals.
PBO is packed with information to help you get the most from boat ownership – whether sail or power.
-
-
-
- Take your DIY skills to the next level with trusted advice on boat maintenance and repairs
- Impartial in-depth gear reviews
- Practical cruising tips for making the most of your time afloat
-
-