
Richard Johnstone-Bryden explains cold moulding, a time- and cost-effective method of combining the beauty of wood with the strength and practicality of GRP
Cold moulding involves the use of two or more layers of wood veneers to form either a hull or specific components such as coamings. The first layer of wood veneers is formed into the desired shape using a jig. Subsequent layers of wood veneers are directly applied on top of the previous layer and attached using epoxy. During the curing process, the veneer is held firmly in position, either by removable metal staples or plastic staples which are left in place.
Although the creation of the first layer should ideally be carried out by an experienced craftsman, subsequent layers can be applied by less experienced woodworkers thanks to the gap-filling qualities of the epoxy which can make up for minor errors in the precision of the application of the wood veneers.
Cold moulding: makes almost any shape
There are few constraints when it comes to the type of shape that can be achieved with cold moulding. In essence, the more extreme the shape, the thinner the veneers have to be. If the veneers are expected to follow a very tight curve, it’ll be necessary to steam each one, as depicted in the following photos, which illustrate the application of 2.8mm-thick wooden veneers to replace a damaged layer on a Canadian canoe.
Cold moulding construction can be used to create almost any shape. Credit: Richard Johnstone-Bryden
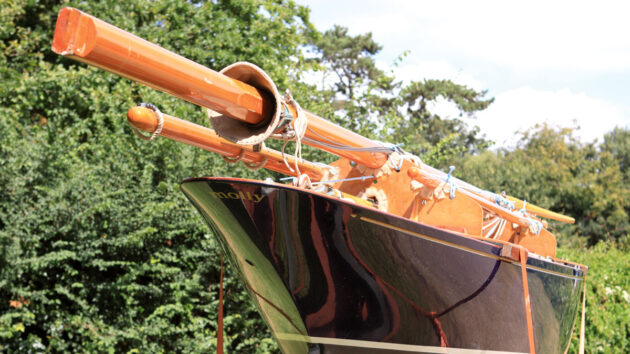
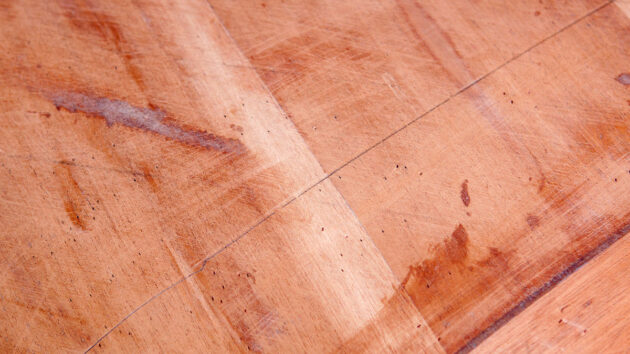
It is possible to achieve an extremely high standard of finish when using cold moulding for the construction of a hull, which may result in it being mistaken for GRP! Even so, you will still benefit from the natural beauty of the wood inside the hull, which should be varnished so that you can spot any ingress of water immediately and deal with it before it leads to further serious damage.
Those who choose to paint the interior surface of a cold-moulded hull may unwittingly create the perfect environment for serious problems to develop undetected because of the increased difficulty of spotting water if it gets in. The use of ccold moulding offers practical benefits for trailer-sailers by avoiding the drying-out issues encountered with traditional wooden construction.
Step-by-step
Credit: Richard Johnstone-Bryden
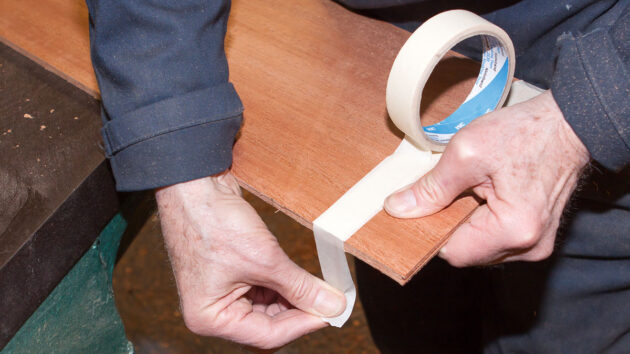
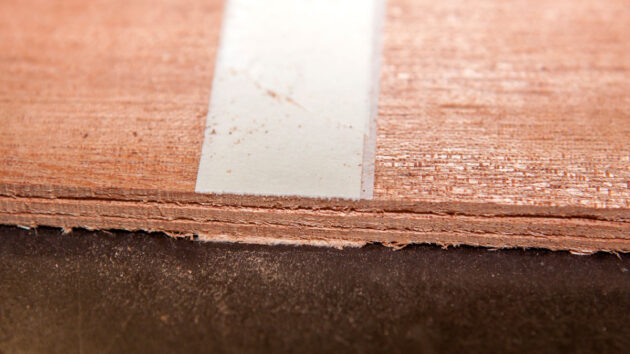
1. Cut Veneers: If you’re fitting several veneers with a standard width, you can save time by cutting some of them to the required dimensions at the same time. In this example, we put together a bundle of three leaves of khaya veneer, which is 2.8 to 3mm-thick constructional veneer. The same straight edge of the veneers is used to line them up before securing them together using masking tape. Although this bundle has just three leaves, you could assemble a thicker bundle – although the practicality of handling them on the bandsaw will ultimately restrict the number you would want to cut at the same time. Depending on the lengths involved, this will probably be in the region of six leaves. The leaves should be secured together at either end and in the middle. The length of the leaves will dictate whether further bands of masking tape will be required.
Credit: Richard Johnstone-Bryden
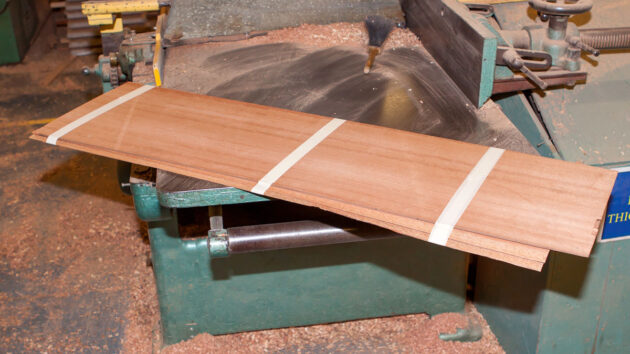
2. Prepare for Cutting: Having secured the bundle of three khaya veneers together with masking tape, they are ready to be cut to the required size.
Credit: Richard Johnstone-Bryden
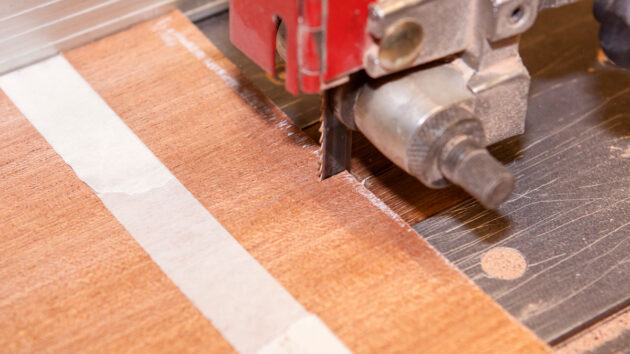
3. Cutting on the Bandsaw: The bundle of veneers is cut to the required width on a bandsaw. A small circular saw can also be used.
Credit: Richard Johnstone-Bryden
4. Achieve Uniformity: Cutting the veneers together gives a uniform finish. If more than one cut is required, you’ll have to reapply the masking tape along the side that has just been cut.
Credit: Richard Johnstone-Bryden
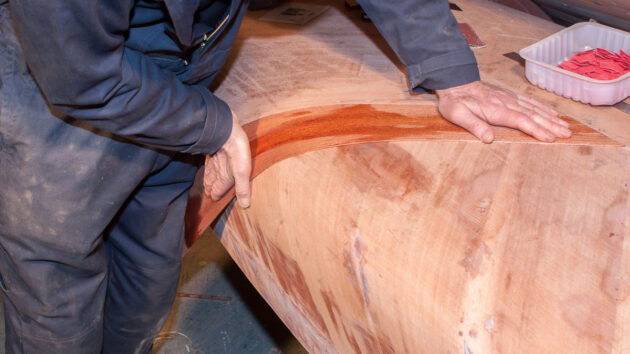
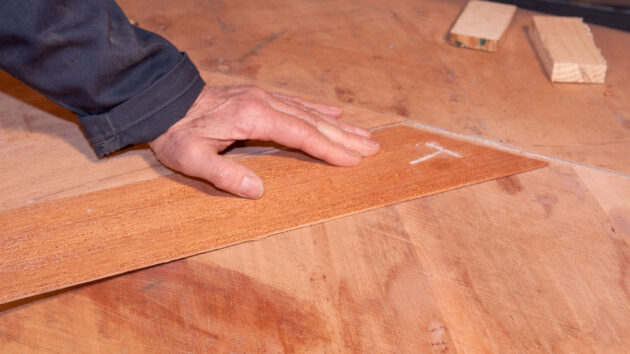
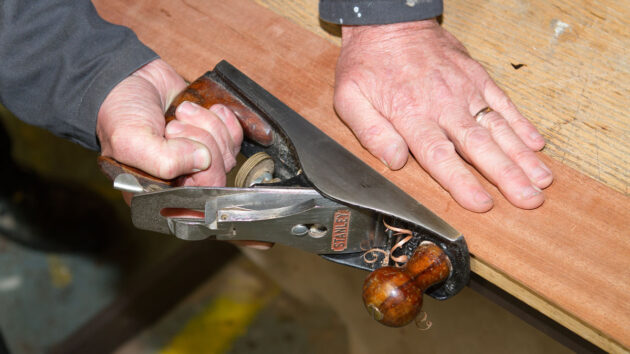
5. Fit the First Veneer: The veneers have been cut so that they will meet along the canoe’s centreline. When you are building a new boat, the backbone is normally set up in the jig. Depending on the shape of the boat, this is likely to be either part of the keel or hog with the apron forward and the sternpost aft. The keel, external sternpost and stem are normally applied afterwards. This allows you to let the top half of the veneer run past the keel. In this case, the second layer of veneers has already been applied along one half of the canoe’s hull, and these have been roughly joined to the middle section. A keel will be fitted on top of the centreline, covering up any minor imperfections in the leading edges of the veneers along the centreline. The epoxy will fill any uneven edges along the centreline to ensure the structural integrity is not undermined. Use a bevel gauge to take the required angle for the edge of the veneer that will be placed along the centreline and mark it on the veneer. Remember to mark the letter T (top) in chalk to indicate the upper face of the veneer to avoid any confusion when it is applied to the hull. Line it up with the centre joint as well as the previous piece that has been glued to see if any further adjustments are needed. To provide an accurate datum point for the next veneer to be fitted, the adjacent leading edge is planed using a No4 plane.
Credit: Richard Johnstone-Bryden
ABOVE: Due to the thickness of the veneer, it must be placed flat on a workbench while planing: if placed in a vice, there’s a high risk that the force applied while planing could be enough to snap the veneer.
Credit: Richard Johnstone-Bryden
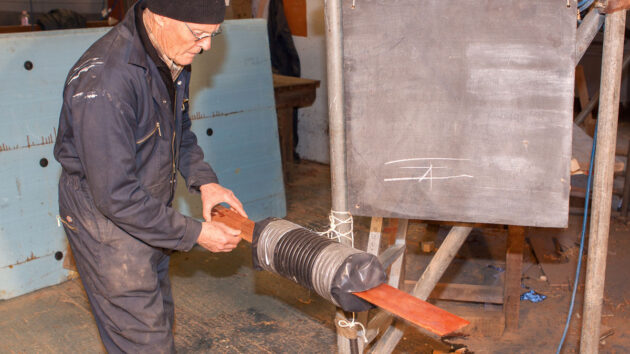
6. Steam for Tight Curves: To ensure the laminates will follow the tight curve around the turn of the bilge, they’re placed in a jury-rigged apparatus consisting of a wallpaper stripper connected to a black pipe which is joined to a ‘steam box’ made from a second piece of black rubber tube. The ends of the steam box have been sealed with a black plastic sheet which is slit just wide enough to accept the veneer, ensuring a good seal when the veneer is in place. The veneer only has to be capable of bending along a relatively narrow strip, so it doesn’t matter that either end remains outside the steam box. The veneer goes in the steam box for approximately 3-4 minutes before it is hot enough to be bent into shape.
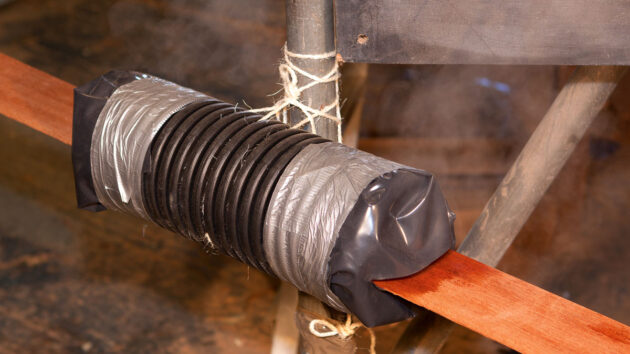
The DIY steam box used in the cold moulding process. Credit: Richard Johnstone-Bryden
The general rule of thumb is that a piece of wood needs to be placed in a steamer for an hour per inch of thickness. That said, the exact timing will be influenced by other factors, including whether it is a hard wood (which requires longer steaming time) or soft wood, or if it has been dried or is green wood (which is ready in a shorter time). Some woods, such as dried American Oak, will also benefit from soaking for five days beforehand to improve their handling characteristics.
Credit: Richard Johnstone-Bryden
7. Bend into Shape: Once the veneer has been removed from the steam box, time is of the essence. The veneer is quickly placed in position and bent to the required shape.
Credit: Richard Johnstone-Bryden
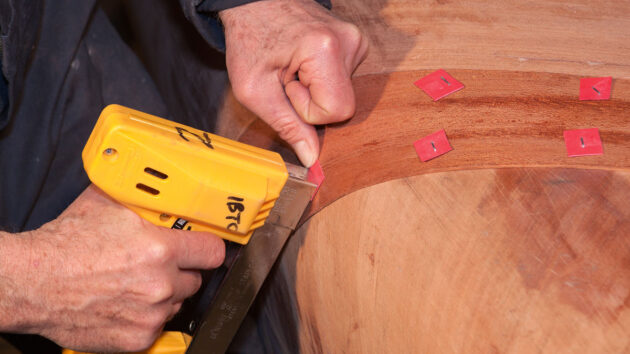
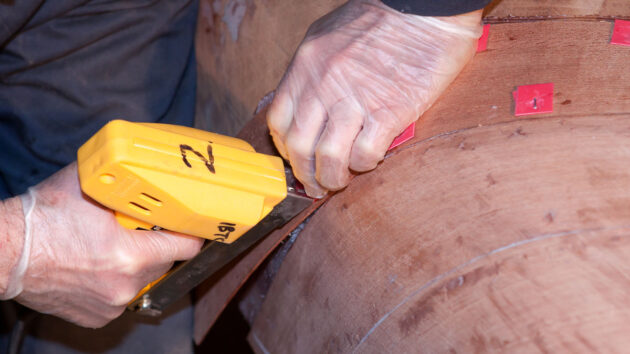
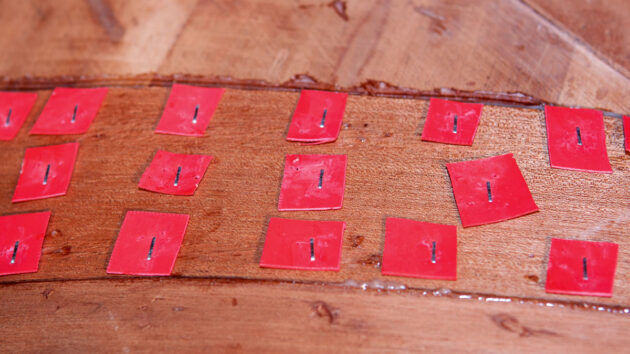
8. Staple Sparingly: Hold one end of the veneer against the hull with your leg while securing the other end using an electric staple gun (manual staplers involve greater force, which increases the risk of bruising the veneer). The staples are applied sparingly at this stage through plastic squares, referred to as stamps, which won’t stick to the wood when the veneer is finally glued in place. They also protect the veneer during the application and extraction of the staples. A higher level of protection is provided by using 1.5mm-thick birch plywood stamps – important if the hull is to be varnished. If a hull is to be varnished, the size of the holes left by the staples in the final layer can be reduced: simply place a damp cloth over the holes and iron it, which causes the holes to close up.
Credit: Richard Johnstone-Bryden
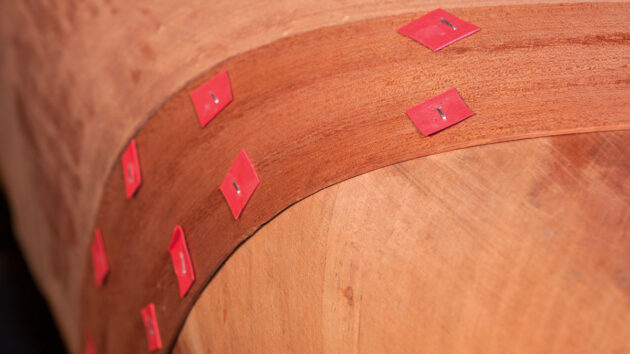
9. Cool and Dry: The veneer has been stapled in position and left to cool down and dry out before the next stage.
Credit: Richard Johnstone-Bryden
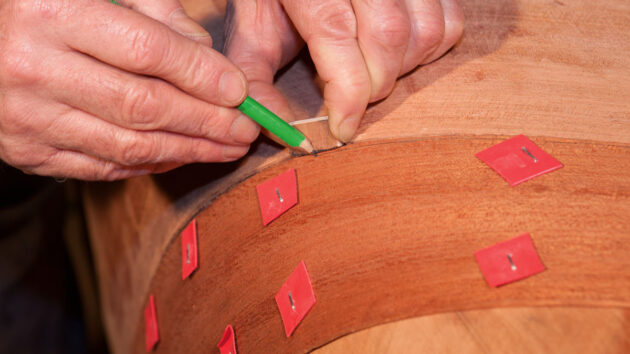
10. Mark and Plane for a Tight Fit: To ensure a tight fit between the two veneers, the exact profile of the previous veneer’s leading edge is marked on to the new veneer’s adjacent edge using a dummy stick and pencil. Once the veneer has been removed, plane to the line to create the perfect fit.
Credit: Richard Johnstone-Bryden
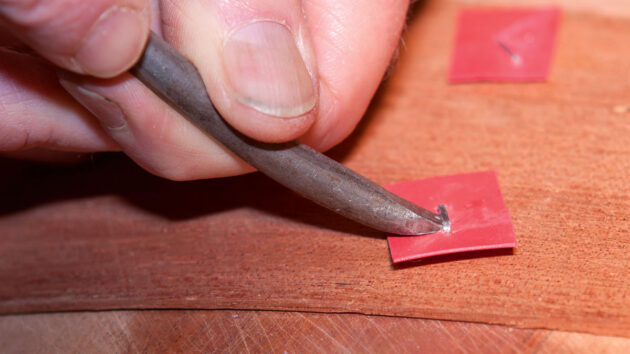
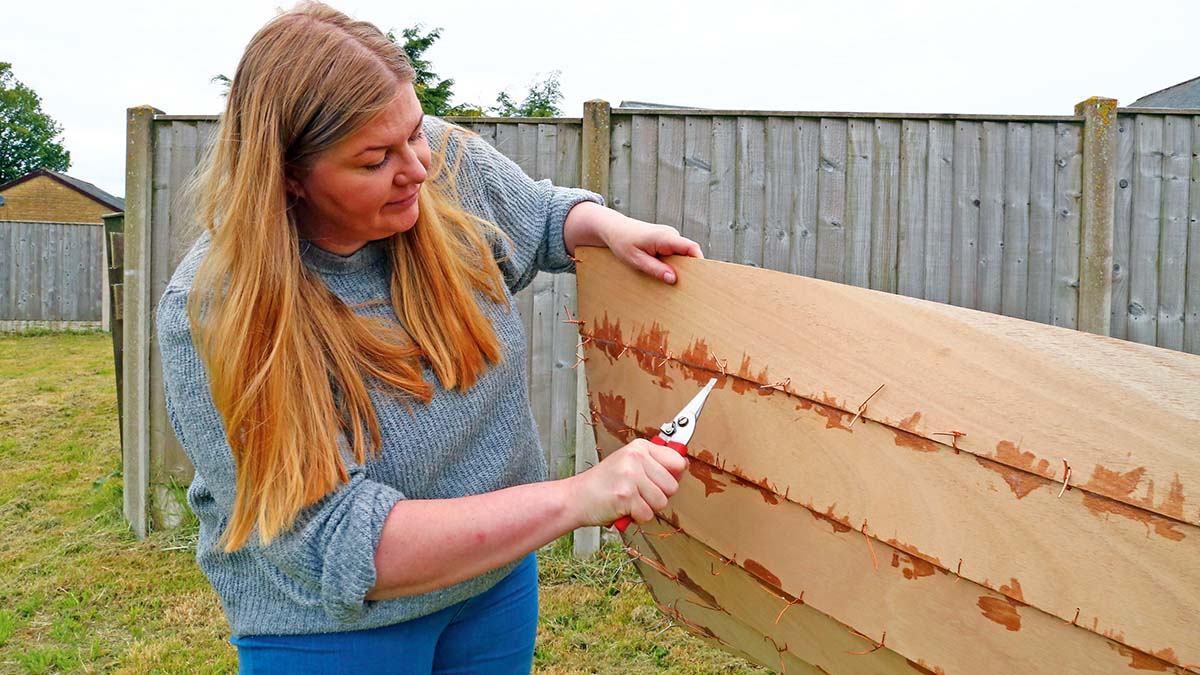
ABOVE: The veneer has cooled down and dried out, so the staples are carefully removed to release the veneer.
Credit: Richard Johnstone-Bryden
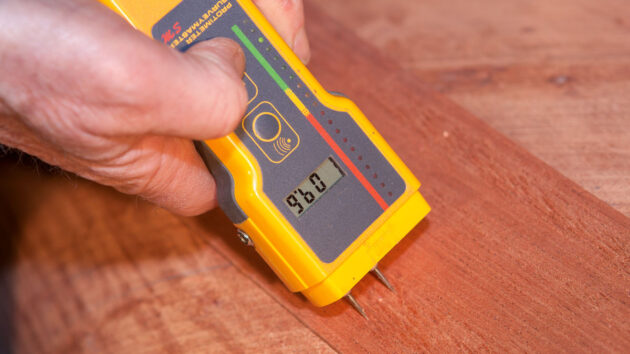
11. Check Moisture Content: Once veneers have been steamed, they must be left long enough to dry out before they can be glued in place. Epoxy will not adhere to the wood if the moisture content is too high, thereby undermining the integrity of the end result. If you need to force-dry the wood to speed up the process, you could, in an instance such as this, with veneer just 3mm thick, use a hot air gun. A moisture meter is being used here to check that the veneer’s moisture content is less than 12%.
Credit: Richard Johnstone-Bryden
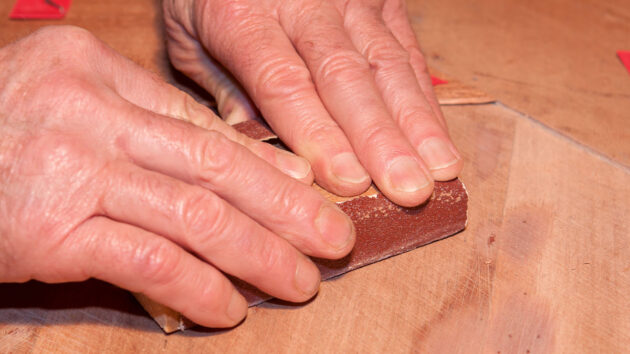
12. Key Up and Fair: The previous layer is keyed up and faired with 80-grit sandpaper. The darker patches indicate where fairing compound was used to fill in minor imperfections. When working along the centreline, the sandpaper is folded in half to ensure the central joint is properly prepared, getting the sandpaper nice and tight into the joint. Gentle keying up of the previous layer creates the perfect surface to which the epoxy can bond.
Credit: Richard Johnstone-Bryden
ABOVE: Before the veneer was removed, the outer edge of the previous layer was marked out as a guide for the application of the epoxy.
Credit: Richard Johnstone-Bryden
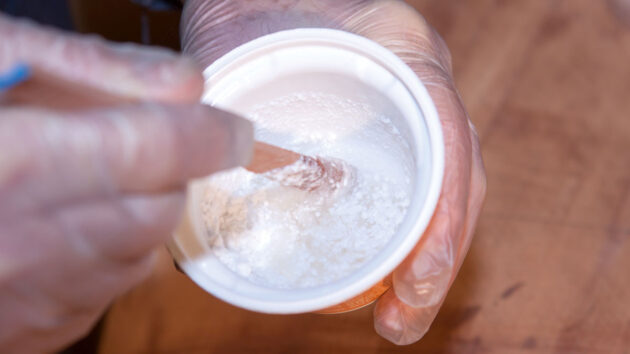
13. Mix and Fill Epoxy: The epoxy hardener and resin must be thoroughly mixed before adding an appropriate filler, such as colloidal silica. The importance of following the precise instructions for the specific product you are using cannot be overemphasised. If you have any doubts about whether you’ve mixed up the epoxy properly, it is worth leaving a little in the pot afterwards. This can be checked the next day, by which time the leftovers should simply break off from the pot and be nice and dry.
Credit: Richard Johnstone-Bryden
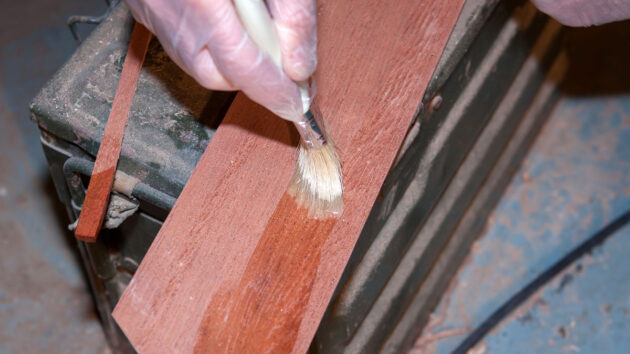
14. Apply Epoxy: If you want to improve adhesion, you can apply neat epoxy to the back of the veneer. The filled epoxy is then applied to the upper surface of the previous layer of veneer using a serrated spreader, which enables you to work very quickly and achieve a nice, even spread of epoxy. During the gluing up of the laminates, the epoxy will seep through to infuse and saturate the wood: this will help the finished product’s longevity, not least because the epoxy will prevent any water ingress from being drawn into the wood.
Credit: Richard Johnstone-Bryden
15. Staple for Curing: Once the epoxy has been spread, the veneer can be applied. When in position, it is stapled to the previous layer, in the first instance, using staples sparingly in strategic positions.
Credit: Richard Johnstone-Bryden
ABOVE: Once this has been achieved, increase the number of staples to ensure the tightest possible fit while the epoxy cures. To ensure you have enough staples, look at where the veneer butts up against the previous piece. It should be flush, so if it stands proud or moves when you press up and down, apply more staples to eliminate any voids. Failing to do this properly will result in bumps in the hull’s profile, which will have to be planed out later, reducing the thickness of the veneer in that part of the hull. In low temperatures, you’ll need to rig a tent made with plastic sheet or bubble wrap, and use an electric oil-filled radiator to maintain the required temperature for the epoxy to cure.
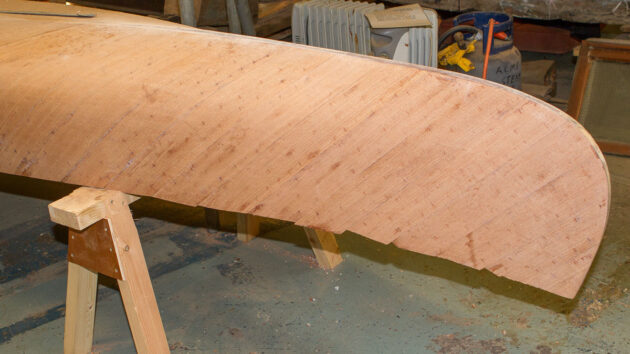
The finished hull made using cold moulding. Credit: Richard Johnstone-Bryden
16. Finish the Surface: The staples were removed the following day, and a sanding block with 80-grit sandpaper was used to get rid of the worst bumps and lumps of glue. This was followed by the use of a finely set block plane worked across the hull at an angle of approximately 45° to the veneers, before a final round of sanding to achieve a nice, fair hull.

The art of veneering: step-by-step
Face up to the task of applying veneer with the help of boatbuilder Tony Davies
How to build a boat: Essential guide to building your first kit boat
You don’t have to be a boatbuilder to learn how to build a boat, argue Roger Nadin and Polly Robinson.…

Hull plank repair on a boat: step-by-step
With a few practical woodworking skills anyone should be able to replace a plank on a carvel-built wooden hull, as…

Clinker-built boat repair: step-by-step
Richard Johnstone-Bryden explains the basic principles of clinker construction and the method of replacing damaged hull planking
Want to read more articles like How to build a boat with cold moulding: the secret to a hull that looks like GRP?

A subscription to Practical Boat Owner magazine costs around 40% less than the cover price.
Print and digital editions are available through Magazines Direct – where you can also find the latest deals.
PBO is packed with information to help you get the most from boat ownership – whether sail or power.
-
-
-
- Take your DIY skills to the next level with trusted advice on boat maintenance and repairs
- Impartial, in-depth gear reviews
- Practical cruising tips for making the most of your time afloat
-
-
Follow us on Facebook, Instagram, TikTok and Twitter