



Few things look better on a boat than beautifully varnished woodwork. The best results are all down to the preparation and here sailor, cabinetmaker and antique furniture restorer Roger Oliver shows how to achieve a perfect finish
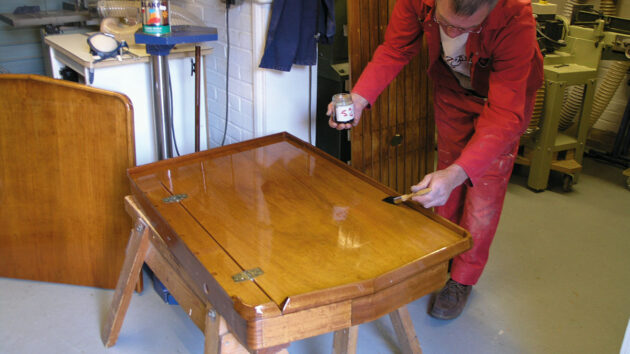
As well as enjoying sailing, for decades I have also been a cabinetmaker and have restored antique furniture, including some pieces for the British Museum, using many materials to bring surfaces back to life. I’d like to pass on a few marine varnishing tips to help other boat owners obtain that hard, durable varnish finish which we all love to see.
A good finish is all down to thorough preparation: skimp and you’ll be disappointed. When I refitted Jalina, my Sadler 25, I ensured I could remove as many items as possible, such as the chart table and dining table, so they could be varnished in a dust-free area at home and stored to avoid damage while other maintenance work was completed on the boat during the winter.
Jalina is sailed extensively most years, so I need a durable finish to maintain her good looks for the whole season. Hours of preparation and varnishing can be spoiled by leaving the work until just before sailing: It’s much better to carry out all the preparation and varnishing directly after the sailing season, say in October, which allows the solvents in the varnish to dry off over the winter. By doing this the finish could well last for several seasons.
What you will need for marine varnishing
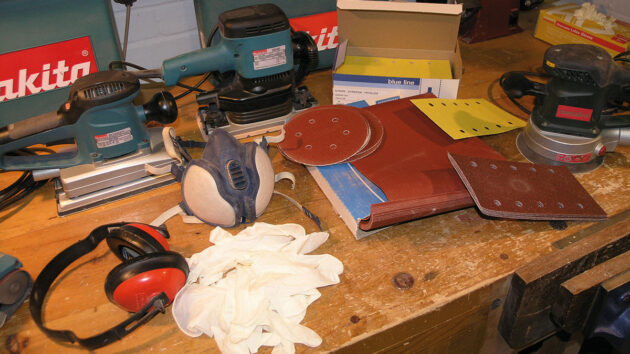
A selection of abrasives, electric sanders and safety gear for marine varnishing. Credit: Roger Oliver
Abrasives
It is important to use good-quality abrasives such as aluminium oxide. This is available with cloth or paper backing, or pre-punched for dust extraction using modern sanders and with Velcro backing, making grade changing more flexible. A variety of grades are available, the most widely used being 80-, 120-, 180-, 240- and 320-grit.
Cheap grade with poor bonding of the grit may contaminate new work, with the grit getting embedded in the grain.
Pre-punched abrasive material fitted to modern sanders with a dust extraction system lasts much longer, and with very little clogging of the abrasive material a much finer finish can be achieved.
Sanders
These should only be used for pre-finish sanding: the final two coats of varnish should be completed by hand- sanding to avoid orbital sanding rings showing through the varnish with the final finish.
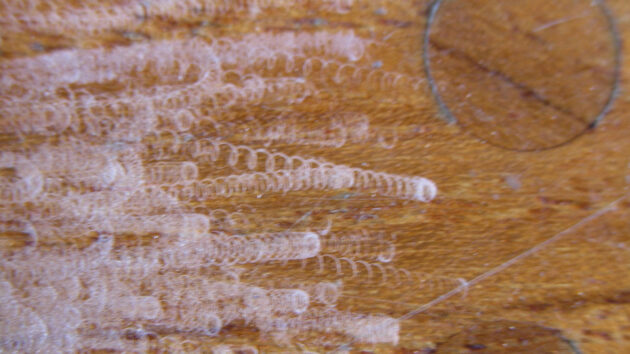
Marine varnishing mistakes to avoid: Sanding rings – avoid using an orbital sander in the preparation of the penultimate and final coats. Credit: Roger Oliver
There are a wide variety of sanders available, some capable of removing thick coatings to a pre-finish, with an orbit range of 2.6mm to 5mm.
Using the old type of sander without dust extraction, some clogging of the abrasive may occur. Much of this can be removed by swiping the base of a plastic bottle across the abrasive surface, or you can purchase abrasive belt cleaner specifically for the job.
Brushes
Good quality brushes are expensive: the trade usually recommends squirrel or badger hair brushes for varnishing. Use a 25mm brush for small awkward places and 38mm or 50mm for the large areas.
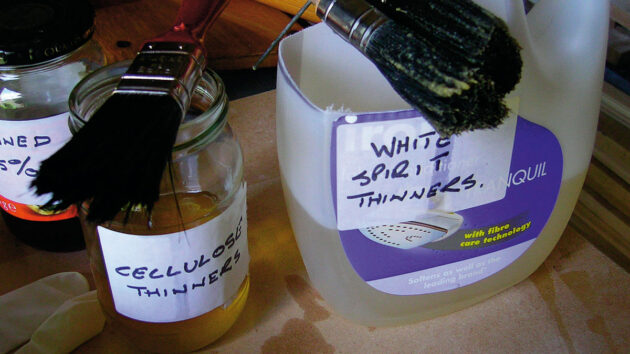
Coagulated varnish on a brush stored in white spirit: with cellulose thinners, however, the brush is clean and free from old varnish. Credit: Roger Oliver
After varnishing, storing brushes in thinners for several days between coats will allow spent varnish in suspension in the thinners to coagulate and contaminate the finish for the next time the brush is used. To avoid this, store in cellulose thinners but wipe off any surplus cellulose before using the brush.
When the work is complete, clean brushes in thinners and wash thoroughly in detergent and warm water. Dry and bind the bristles in brown paper to avoid them being misshapen in storage.
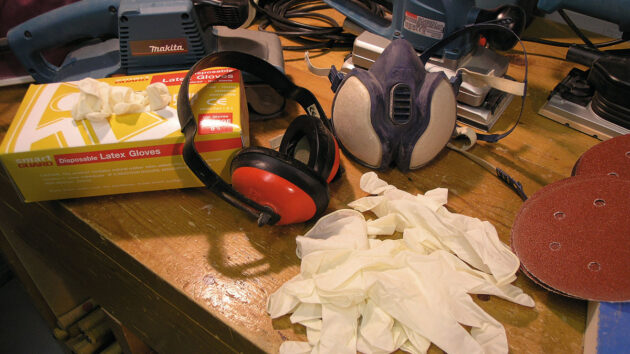
Good quality ear defenders, a dust mask and latex gloves are essential. Credit: Roger Oliver
Dust mask
Essential wear during all stages of sanding and varnishing, a dust mask is particularly important if you are working in confined spaces on the boat, which should be well ventilated. The 3M A1P2 EN 405 vapour respirator offers excellent protection.
Latex gloves
To avoid skin contact with paints and varnishes, use disposable surgical latex gloves.
The right stuff
Avoid working from the main source of the varnish: decant what you need into a container and thin as necessary. Store all marine varnishing materials in a dust-free cupboard. Gloss varnish should not be stirred immediately before, otherwise air bubbles may spoil the finished surface. Matt varnish contains a matting agent, so it must therefore be stirred to ensure an even mix – after which, as for gloss, it must be left for a short while for any air bubbles to come to the surface to disperse.
A good quality varnish will have a high solids content, while a poor quality one can contain as little as 30% to 40% solids. The higher the percentage, the thicker the film per application. Good quality varnishes are usually warmer looking as you build up the coats.
Traditional ‘classic varnish’ is easy to use for touching up damaged areas and gives a good depth of colour, emphasising the wood grain below the surface. It is also more flexible than the hard surface of two-pack products.
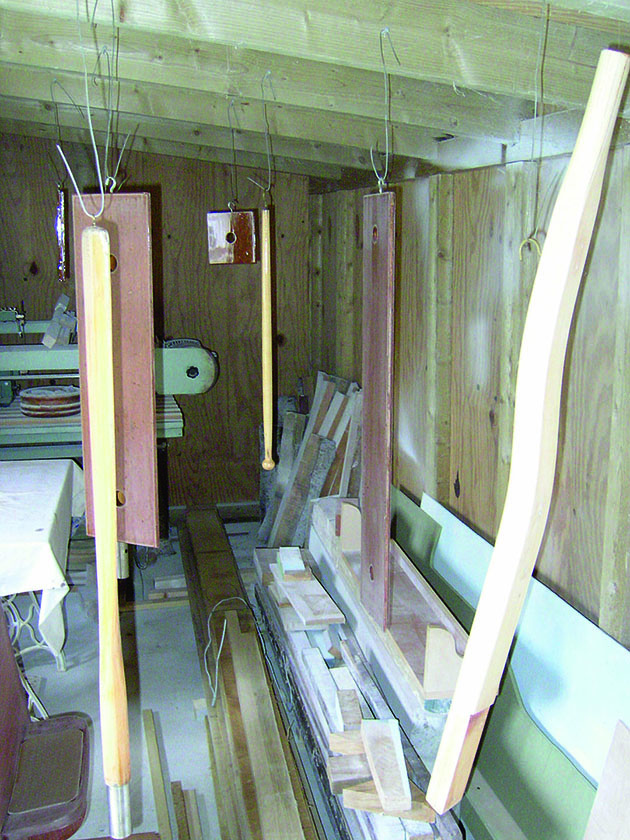
Hang small items from cup hooks to reduce dust contamination. Credit: Roger Oliver
Most good traditional varnishes contain quality materials such as tung oil, blended to give a flexible finish with UV filters, and are suitable for external and internal use above the waterline.
If you do decide to apply a two-pack varnish on an existing coated surface, first check you are applying it onto a similar two-pack surface: it won’t be compatible with ordinary one-pot varnish. To check compatibility, wipe the surface with two-pack thinners: if it affects the surface you may be faced with having to strip back to bare wood. You can, however, safely work the other way around by applying one-pot varnish on top of a properly cured two-pack surface.
Two-pack is much more difficult to touch up: it often has to be completely removed and cut back to the wood, then reapplied to get a professional finish again.
New work
New work or bare wood is best done dry, starting with 120- to 180-grade paper with a sander. Let the weight of the machine do the work: set it at medium speed and ensure the abrasive is not clogging and marring the wood surface. Use a hand-sanding pad with 180-grade, working with the grain to remove any sanding ringlets from the surface.
Dust contamination can spoil the best-prepared work: decontaminate the sanded items and surrounding area before varnishing or, even better, varnish them in a separate dust-free room. Hanging small items from cup hooks helps to reduce dust contamination. Wearing clothes such as woollen sweaters or dusty overalls can also be a source of contamination.
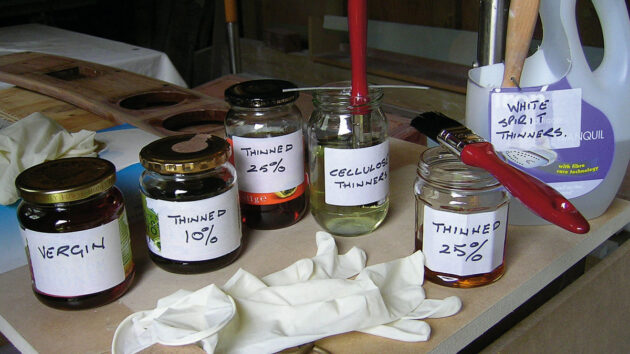
Varnish thinned in preparation for application. Credit: Roger Oliver
Thin down the first coat of varnish for new work by 25% with white spirit, which helps it to soak into the wood. Allow to dry for several days: this first coat will take longer to dry. For the second and third coats, lightly rub down by hand with 240-grade, and thin the varnish by 10%.
Sand with 320-grade before the final coat. A tack cloth can be used to collect the very fine dust left from fine sanding: this cloth should be stored in a clean, airtight glass jar.
The number of coats applied will depend upon the wood used, its grain and the quality of finish you require. Several thin coats are better than a few thick coats: they’ll dry quicker, and also to a harder finish.
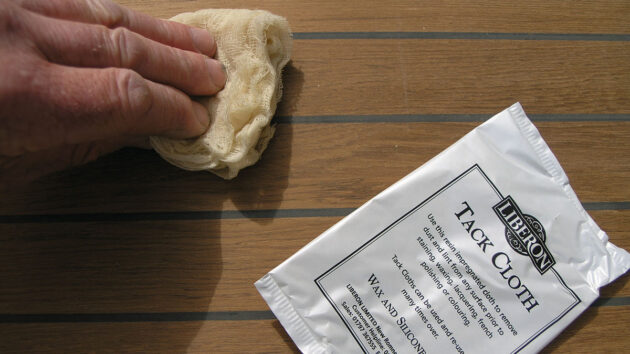
Use a tack cloth to collect fine dust. Credit: Roger Oliver
The final coat can be thinned by 5%. Warming the varnish will assist its flow and will reduce runs as it cools. Avoid going back to re-brush the surface as it will soon become tacky as it cools.
Marine varnishing previously coated surfaces
Previously vanished surfaces will have accumulated dirt and grease over time, and to avoid this clogging the abrasive in the initial sanding it is important to wash it off with detergent.
A deteriorated surface requires cutting back to the wood, in which case it should be treated as a new surface. A sound surface also requires thorough preparation – sanding with 240-grade before a first coat of new varnish and with 320-grade before a final coat.
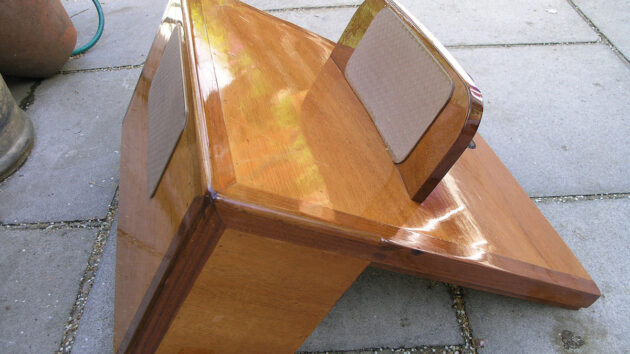
Finished items will be stored to allow the varnish to harden properly. Credit: Roger Oliver
If you sand down too soon between coats the surface may roll or tear, clogging the abrasive and spoiling the finish.
Varnish should be applied in a warm, dry atmosphere: if applied to a damp surface, the result will be an opaque bloom finish.
First apply across the grain then finally lay off with the grain: be methodical in the sequence and don’t spend too long brushing the varnish flat because the surface will soon become tacky – let the solvent help with the job of flowing the varnish.
Tackling teak
Teak, being particularly high in oil content, will shed varnish easily without pre-treatment. The surface of teak must be purged of oil for varnish to key to it: this can be done by rubbing it vigorously with a liberal coat of white spirit or cellulose thinners, then applying a thinned first coat of varnish as for a new wood surface.
The natural oil present in the teak will eventually soften the varnished surface and will require a periodic light rub-down and re-varnish.
Brush up on the main points
Carry out the varnishing soon after lay-up, in the late autumn, for a more durable finish next season
- Use cellulose thinners to store brushes for a short time
- Decant enough varnish for the job and store the source container in a dust-free area
- After use, store a tack cloth in an airtight container
- Don’t try to brush the varnish flat – the solvent will assist the flow
- Warm the varnish in a bain-marie to assist the flow
- With teak, purge the surface oil before varnishing for a better key
- Varnish in a warm, dry atmosphere
- To avoid bloom, ensure the surface is dry
- Use cup hooks for small items – hanging vertically reduces dust contamination
- Varnish the area to be covered in small square sections. The adjoining edges will still be relatively fresh and the varnish will flow together correctly
- Regularly put your (dust-free) head close to the varnished surface and look along it for areas you may have missed. Oblique lighting will also help here
- With classic yacht varnish, if you are able to apply a coat every 24 hours you can rub down between coats with a felt pad and whiting (fine chalk dust). This is enough to key the surface but is not as abrasive as sandpaper, allowing you to rub down while the varnish is less hard. Clean the surface after rubbing down with a tack cloth

Painting and varnishing a boat: how to get the perfect finish
Kit boat builder Polly Robinson shares her tips for painting and varnishing a plywood-epoxy boat

Surface preparation for polishing or varnishing a boat
Mirka’s Andy Mierau shares trade tips on how to prepare surfaces for polishing or varnishing
Best boat varnish: 7 top options for gleaming woodwork
Few things are as quintessential to the archetypal sailboat as gleaming, iridescent woodwork that is indicative of a recent coat…

8 quick tips for varnishing
Some tips and tricks to get the best finish possible when varnishing your boat's woodwork
Want to read more articles on boat maintenance?

A subscription to Practical Boat Owner magazine costs around 40% less than the cover price.
Print and digital editions are available through Magazines Direct – where you can also find the latest deals.
PBO is packed with information to help you get the most from boat ownership – whether sail or power.
-
-
-
- Take your DIY skills to the next level with trusted advice on boat maintenance and repairs
- Impartial, in-depth gear reviews
- Practical cruising tips for making the most of your time afloat
-
-
Follow us on Facebook, Instagram, TikTok and X