
While restoring his bargain £900 Quarter Tonner, Rupert Holmes shows how he added luff slides and two reefs to a second-hand mainsail
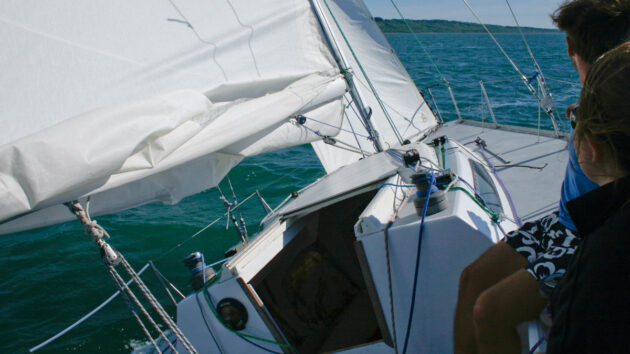
Many smaller yachts have mainsails fitted with only one or two relatively small reefs, yet these are often the boats that need to reef early. My Quarter-Tonner Minestrone’s second-hand Etchells keelboat mainsail originally had no reefs at all, so I needed to fit reefing points.
I first sailed her relying on the bendy fractional rig to depower the mainsail in a stiff breeze, but adding reefing points was a priority. Other keys to making many performance-oriented small boats more manageable for short-handed sailing are adding luff slides to the mainsail and converting headsails that are configured for a non-furling luff foil so that they can be hanked directly to the forestay.
Making the new reefing points
In keeping with the boat’s simple layout, I was keen to only have two reefs – both fairly deep, each reducing the luff length by around 2m. In addition, with full sail set the aft end of the boom droops noticeably, so the leech cringles needed to be positioned to lift the aft end of the boom with each reef – by about 30cm for the first reef and 15cm for the second.
In the end I settled on the following measurements, taken vertically from the foot of the sail: luff positions 2.0m, 3.8m; leech positions 2.35m, 4.35m. In retrospect, it would have been better to follow convention and fit three reefs, as the two deep reefs result in a lot of sail to gather up – and Minestrone’s low boom means visibility is seriously impaired until the sail is tidied up.
I therefore intend to insert an extra reef below the current first one.
Reinforcing the sail for the reefing points
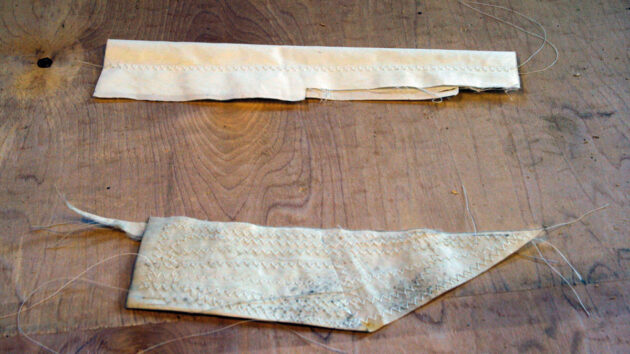
Luff and leech reefing cringles are subject to a lot of tension, so sails need to be heavily reinforced in these areas. I used Dacron cloth of a similar specification to that of the sail, with three layers used at the luff and four at the leech, this being the most highly loaded part of the sail.
The size of the largest patch was determined by the rule of thumb of 8% of the length of each side of the sail, as recommended in Emiliano Marino’s excellent The Sailmaker’s Apprentice. This gave a length of around 85cm for each one, and a width of 35cm, although the leech piece was made slightly wider to account for the extra layer of cloth needed here.
To spread the load as evenly as possible, each additional layer was smaller than this – by around 8cm on the top and inner sides, and 2½ cm on the base of the patches. The shape of the patches was determined by three factors – speed of construction, and the need to spread load as widely as possible, without adding unnecessary excess weight.
I settled on a triangle, but then snipped the top corners off to save weight. This quadrilateral shape seemed the best compromise, even though it wasn’t as good at load spreading as the more complex shape of the sail’s clew reinforcing.
Having decided on the shape and measurements, I made templates from card and placed these on the sail to confirm they looked right before cutting the sailcloth.
Step-by-step method for reinforcing sails for reefing points
Credit: Rupert Holmes
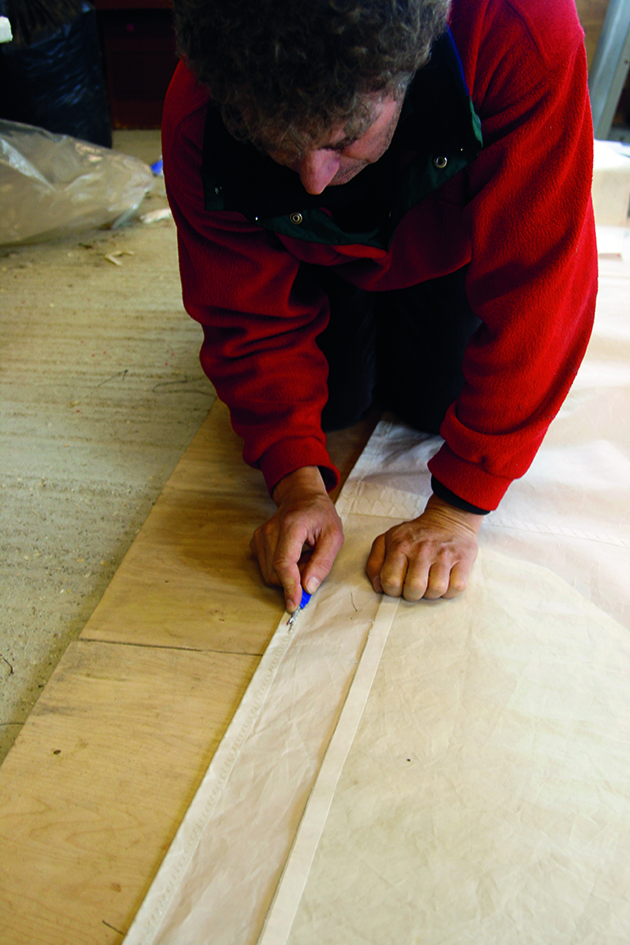
1. Unpicking the stitching on the leech tabling, to allow the reinforcing patch to be slid underneath it.
Credit: Rupert Holmes
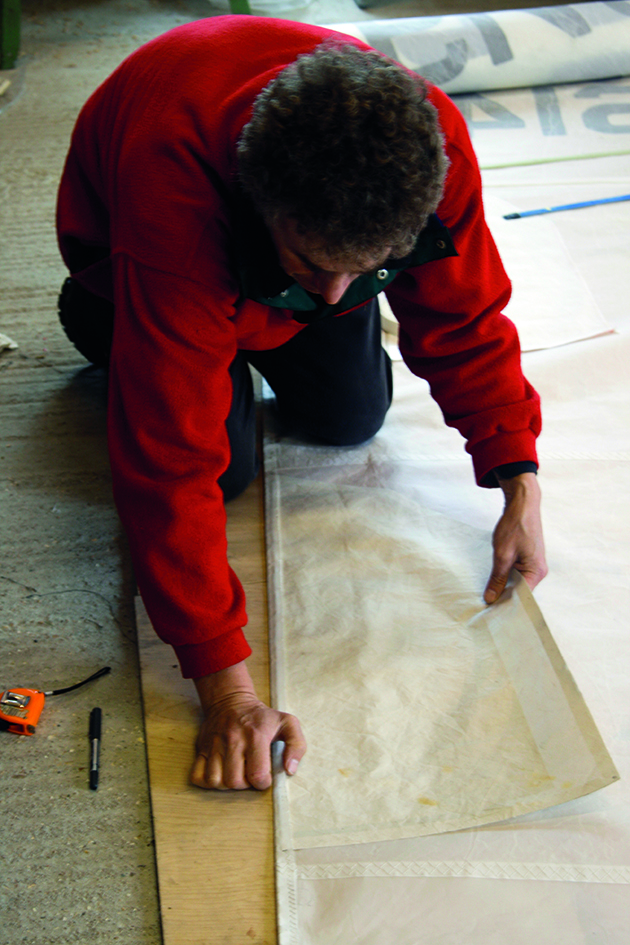
2. Initial careful positioning of the first patch.
Credit: Rupert Holmes
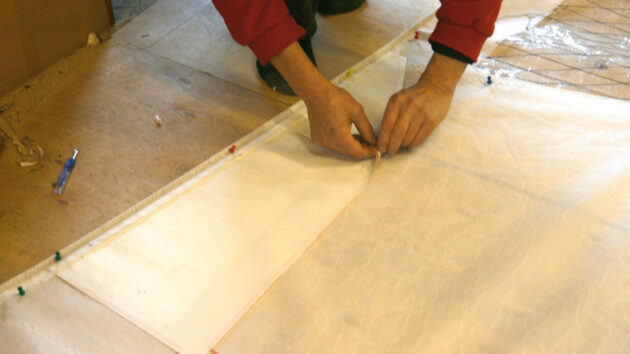
3. Before removing the backing from the double-sided tape, I pinned both sail and patch to a plywood board, to ensure they were exactly aligned.
Credit: Rupert Holmes
4. Before starting, practice your stitching on a few pieces of scrap sailcloth until the thread tension is perfectly adjusted.
Credit: Rupert Holmes
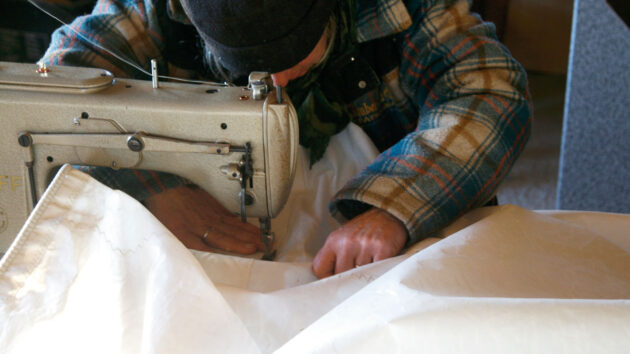
5. Many domestic sewing machines will cope with stitching a few layers of sailcloth, but a heavy-duty machine makes the task easier.
Cutting the cloth
Sailmakers cut cloth using an electrically heated hot knife to seal exposed edges and prevent them from fraying. If you don’t have a hot knife (they are expensive), a sharp knife blade repeatedly heated in a gas flame will work, but will take much longer.
Next, I assembled all the individual pieces of each patch, apart from the very largest element, using double-sided tape to hold them together before stitching. I’ve always used household double-sided tape rather than sail repair tape, and never had any problems, even though the tape is left inside once the pieces are stitched together.
Don’t underestimate the amount of tape needed – my initial rough calculation of 24m was more than 20% short. Next, the stitching on the tabling on the luff and leech of the sail was unpicked to let each patch slide underneath.
The partially-assembled patch (still missing the largest element) is then stuck to the sail with double-sided tape. At this stage, it’s important to take time to get the patch to lie perfectly smoothly on the sail. In effect, you’re attaching a two-dimensional patch to a three-dimensional sail, so it may need patience to get the two lined up properly.
Many domestic sewing machines are capable of stitching sail repairs, providing a heavy-grade needle is used, but practice first with a few layers of scrap sailcloth until the correct thread tension is achieved. I sewed around each side of the partial patches (apart from the side adjacent to the luff or leech) with a continuous line of stitching, starting and finishing under the luff or leech tabling.
Next, the largest layer of each patch was sewn in position on top of the rest, first with a line of stitching around its perimeter. It then needs to be stitched to each of the patches underneath.
The last element of stitching was to re-sew the luff and leech tapes back together. This also anchors the start and finish point of the sewing around each element of the patches.
Adding the cringles
I had initially thought of simply attaching a stainless steel ring with webbing hand-stitched to the sail, to form the cringles. However, this is time-consuming and not the tidiest solution.
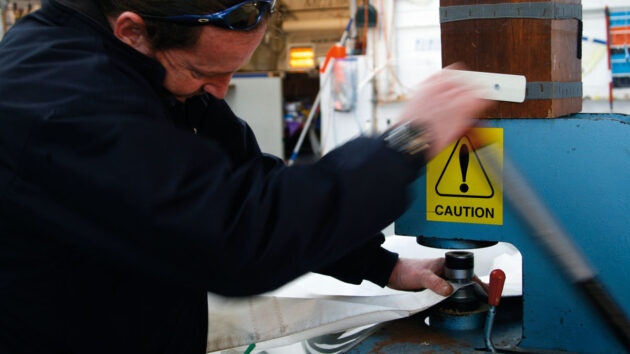
A traditional hand-stitched eye, which would have been neater, would also represent a lot of work. In the end I took the sail to a sailmaker who fitted the four rings – 20mm diameter for the leech, 14mm for the clew – in around 30 minutes.
The larger cringles needed to be fitted with a hydraulic press, although the 14mm ones can be punched home using a hammer. Cringles installed, I also put in points for four to six sail ties 15cm below the direct line between leech and luff cringles, to be sure there’d be no tension on these other than the weight of the unused sail they were supporting.
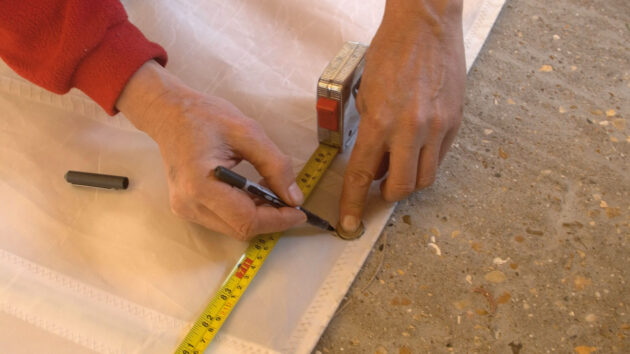
The exact line of positioning was determined by bending a batten between leech and luff cringles. Ideally, the reef points are placed at intervals of not more than 60cm apart.
As the ties aren’t load-bearing, the sail was given minimal reinforcement – just a 5cm2 self-adhesive Dacron patch on each side, with rounded corners. I used 11mm eyes that can be fitted by hand, making it a quick part of the overall project.
How to add cringles: step-by-step
Credit: Rupert Holmes
1. Measuring and marking the position of the first leech cringle.
Credit: Rupert Holmes
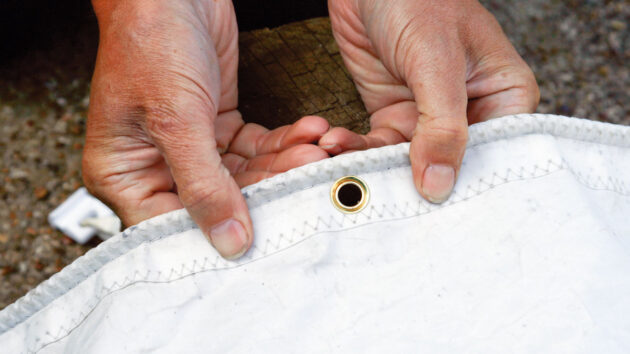
2. A sailmaker fitted the spiked cringles to the reinforcing patches.
Credit: Rupert Holmes
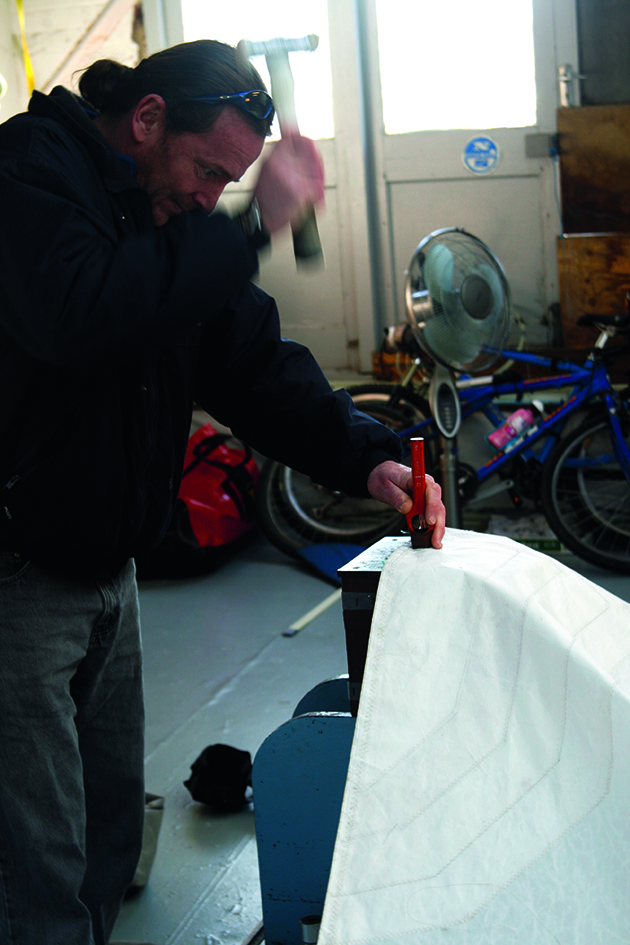
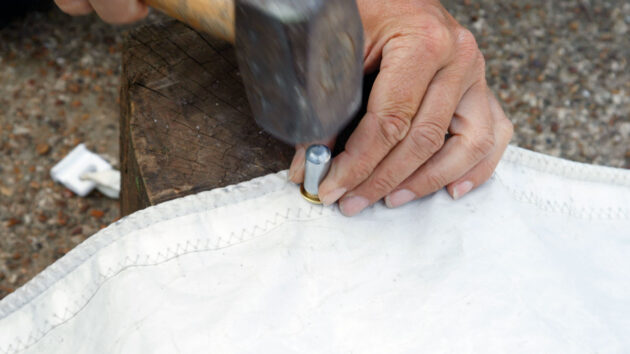
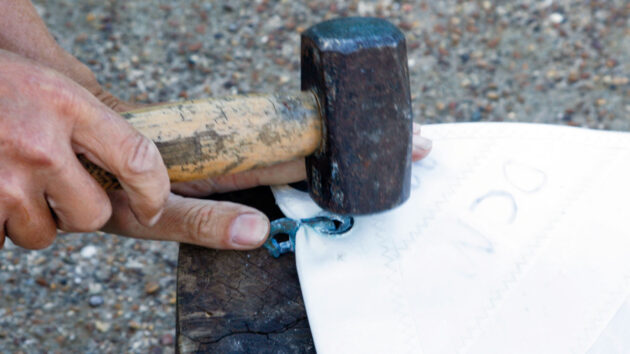
3. The smaller 14mm cringles could be fitted with a hammer and punch… … but the larger 20mm cringles for the leech needed driving home with a hydraulic press.
Deck layout
All that remained was to figure out the deck layout for the new reefing lines. For single- and short-handed sailing I was keen to be able to reef from the cockpit, and the halyard and vang were already led aft for this reason.
Although it’s relatively easy to retrofit single-line reefing into a boom, Minestrone’s reefs are too deep for this, so I rigged separate leech and luff pennants for each one. Gerry had positioned the luff cringles a few inches back from the bolt rope, so that they would be pulled forwards as well as downwards by the reefing line.
An alternative would be to put fairleads on each side of the mast, although these would increase friction. I also added more clutches for the additional lines, aligning them directly between the mast base and the secondary winches on the coachroof.
Leading the lines in a group along the side of the coachroof to a bank of identical clutches via deck organisers would have been neater, but diverting the lines this way adds friction to the system, and modern deck layouts increasingly use individual clutches directly aligned with the load in each line.
Adding luff slides and piston hanks
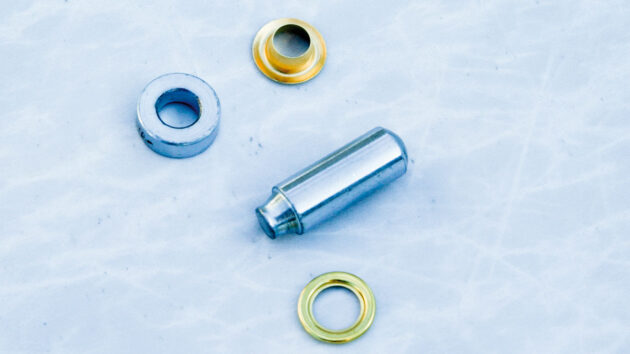
The first job was to insert eyelets just behind the luff of the sail. These are relatively small and can be fitted by hand. They’re normally sold with a die and punch for both cutting the hole in the sail, and closing the eye. If possible, use spiked eyes for a better grip on the sail.
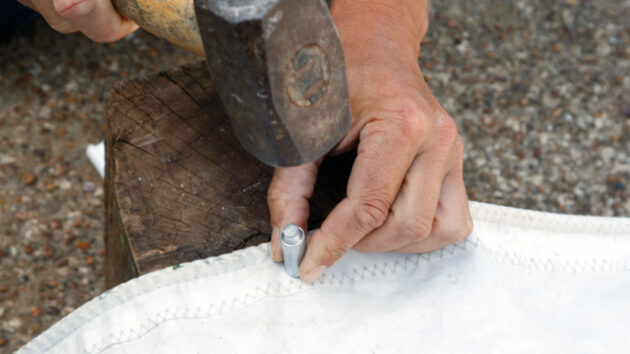
The 11mm eyes I used were small enough to fit on the double layer of cloth at the luff of each sail, so no further reinforcement needed to be added. The holes are made by placing the flat side of the die under the sailcloth with the rounded end of the punch directly above it.
A few sharp taps with a heavy hammer will cut perfect round holes. A 20kg-ish baulk of hardwood under the die will ensure it won’t move under the force of the hammer blows. To insert the eyes, the die is turned dished-side uppermost.
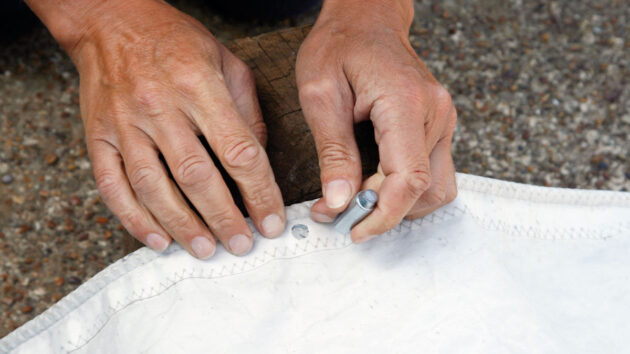
The eyelets are in two parts – one sits in the die, the other is placed on the other side of the sailcloth. The eye is closed using the tapered end of the punch and a few more strikes of the hammer.
Spacing of the eyes is important – around 60cm apart is ideal for both mainsail slides and headsail hanks. However, the mainsail should also have two slides attached to the headboard, and one at the end of every full-length batten.
With headsails, the only limitation is that the lowest hank must clear the forestay bottlescrew and the swage on the bottom of the stay. Once all the eyes are in place, slides and hanks can be added. Mainsail slides are held in place with an easy-fit plastic shackle.
Make sure the slides are matched to the mast’s luff groove – they should be an easy fit and slide up and down without sticking. Most headsail piston hanks have a tang that’s hammered closed over the eye in the sail. Use a mallet and, again, place the underside of the sail on a hard surface.
The biggest disadvantage of this type of hank is that they cannot be re-used – if you’re adding hanks to an elderly sail, it may be better to find the type that is sewn through the eye. Unfortunately, these are increasingly hard to source – try looking for them second-hand, or salvaging them from sails at the end of their life.
Step-by-Step
Credit: Rupert Holmes
1. The punch kit and a two-part eyelet.
Credit: Rupert Holmes
2. Put the die dished side down on a lump of wood, place the sail over it and hit the punch with a hammer to make the hole.
Credit: Rupert Holmes
3. The perfectly formed hole through the sailcloth.

Credit: Rupert Holmes
4. Push one part of the eyelet up through the hole and slip the other part over the top.
Credit: Rupert Holmes
5. Use the punch again, this time with the die’s dished side uppermost, to rivet the two halves of the eyelet together.
Credit: Rupert Holmes
6. The finished eyelet looks pretty neat.
Credit: Rupert Holmes
7. Plastic luff slides simply clip through the eyelet. 8. The hooks on bronze piston hanks for a headsail will need to be hammered closed.

Luff slides and fittings: how to pick the best
There are a variety of ways to attach your mainsail luff to the mast. Which option you go for will…
Slab reefing: Guide to sail shape & preventing sail damage
David Pugh explains how to keep in shape for all conditions with a comprehensive guide to slab reefing techniques
Your ultimate checklist to prepare your yacht’s systems for an ocean crossing
Completing an ocean crossing, such as the traditional transatlantic passage from the Canaries to the Caribbean, is a bucket list…

How to reef – expert advice from PBO Sail Clinic
How do you ensure an efficient reef with a roller-reefing headsail and slab-reefing mainsail? David Harding explains
Want to read more articles like Fitting reefing points and luff slides to a sail?

A subscription to Practical Boat Owner magazine costs around 40% less than the cover price.
Print and digital editions are available through Magazines Direct – where you can also find the latest deals.
PBO is packed with information to help you get the most from boat ownership – whether sail or power.
-
-
-
- Take your DIY skills to the next level with trusted advice on boat maintenance and repairs
- Impartial, in-depth gear reviews
- Practical cruising tips for making the most of your time afloat
-
-
Follow us on Facebook, Instagram, TikTok and Twitter