
Ben Meakins tries out some useful temporary sail repair methods that will tide you over until you can get to a sailmaker

Most of us spend much more time servicing our engines than we do our sails, which is a shame, given that the sails are the main motive power for most sailing boats. They have a hard life, being flogged, flapped and dragged around obstacles every time they go up. It’s surprising that they last as well as they do!
Day and weekend sailors don’t experience sail damage so often, with most sails spending most of their lives under sail covers: but talk to anyone who has undertaken a longer passage and you’ll find many a tale of tearing sailcloth and days on end spent stitching in a repair to a relatively new sail while running down the trade wind routes to the Caribbean and Pacific cruising grounds.
Modern sailcloth materials are impressive, with better strength and longevity, resistance to tearing and UV damage than traditional sails – but they still tear and chafe. If your sails are damaged during a day-sail, cruise or longer passage, you need to be able to fix them – or make a repair strong enough to get you home and to a sailmaker.
This article will focus on the kit and some basic techniques that will allow you to get home with all canvas flying – but it’s a good idea to get the sail to a sailmaker as soon as you get home for a proper repair to be carried out.
 Essential bare minimum repair kit:
Palm
To push needles through sailcloth without damaging
your hands
Needles
A selection of sailmaker’s needles in various sizes
Twine
To stitch up any sails – and also useful for whipping lines
Sticky-backed Dacron
To patch tears and holes
Fully featured sail repair kit
 Needles
A selection of sailmaker’s needles in various sizes
Palm
A well-fitting, good quality palm will make things much easier
Awl
For making holes, an awl – along with a chopping board – is ideal
Quick-unpick
For quick and easy undoing of old stitching – and undoing any mistakes!
Sticky-backed Dacron
As much of this stuff as you can carry will make repairs more effective
Spinnaker repair tape
Ideally in all the colours of the spinnakers you have on board
Double-sided tape
A good-quality double-sided tape will help to repair seams and other areas by holding two bits of cloth together while you sew it
Leech tape (folded)
A length of leech tape will let you cover frayed or damaged edges of sails for repair and cover the sticky Dacron
Pliers
To pull needles through sailcloth when a palm won’t do the job
Candle stub to wax needles
Either candle wax or silicone spray will help get the needle through, especially if you’re using double-sided tape to
hold the seam together
Wet/dry paper
Useful for polishing and de-rusting needles
Waxed twine
Some sort of waxed twine will make your repairs much easier – it glides through holes
Duck tape
A useful standby when nothing else is available
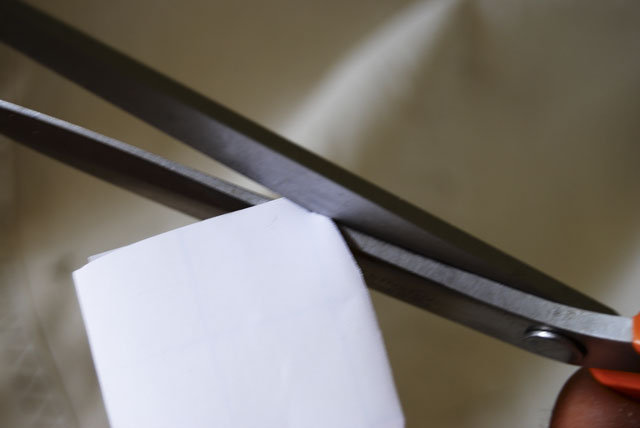
Good scissors
The best-quality scissors you can fit in will make life much easier
Acetone
Although difficult to store, acetone does the job like nothing else when you’re trying to decontaminate an area of a sail prior to sticking
Length of webbing
Webbing is useful for repairing leeches and chafed areas
Dacron Sails: Mending seams
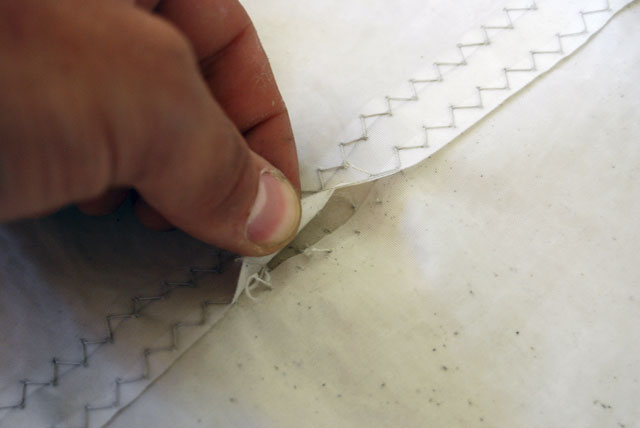 Seams are liable to come apart when the stitching has become degraded by UV light and breaks up. This often happens where the seam has also been rubbing against a shroud or line. It’s easiest to repair before it breaks, so a regular inspection for loose and rotten threads is worth your while, but if you don’t catch it in time…

1. First, remove all damaged stitching on both sides of the sail using a knife, scissors or, ideally, a quick-unpick thread cutter.

2. With the rotten or damaged section removed, it’s helpful to stick the seam back together. Double-sided tape is ideal to avoid the seam shifting.
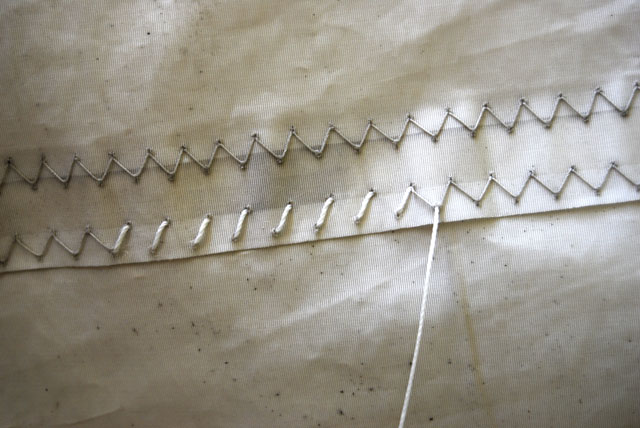
3. With the seam stuck together, you can stitch it. In heavy cloth and to help pass through the double-sided tape it can help to make holes withan awl. Stitch one half of the zigzag first…

4. …and then go back on yourself, stitching the other half of the zigzag. Use the same holes where possible and try to keep your stitches and the tension in the twine even.

5. Finish by tying the line off with a knot. Melting it a little with a lighter can help everything stay attached.
Dacron Sails: Holes and tears
Tears in the fabric of the sail, as opposed to failed seams, are harder to repair. Here, sail repair cloth is essential. Unfortunately, you’ll need the sail to be dry for it to stick.

1. Rinse the sail with fresh water to remove salt, and dry it in the sun or in front of a heater if possible.

2. For small tears, a small amount of fabric will suffice. Cut the sail repair cloth to size, one for each side, and round off the corners to avoid it lifting. Stick it down well, pressing out all bubbles and creases.

3. For bigger repairs, consider using a few layers, with the first layer narrow and used to ‘stitch’ the sail together…

4. …and the later layers increasing in size to reinforce the repair and ensure the edges of the tear stay aligned.

5. This repair is finished off with a large sheet of sticky-backed Dacron, stuck on both sides and around the luff of the sail to keep everything together and spread the load.

6. If the cloth isn’t sticking properly it may help to sew around the edge of the repair to secure it: although, to avoid weakening the remaining material, this is only worth doing on big repairs where you won’t find a sailmaker for some time.
Leech repairs

Webbing can be useful here, in order to sew a strong edge onto a damaged leech or to add extra strength to a batten pocket repair. Alternatively, a length of folded leech tape will help to finish off any edge repairs.
Sliders

Here again, Dacron cloth is your friend. If an eyelet has pulled out, you’re best off removing it completely and putting a layer of cloth on each side. If you can’t avoid using the sail, the plastic ‘snap-on’-type eyelets are useful as a temporary low-load repair. It’s also worth keeping spare plastic shackles and sail slides in your repair kit for easy replacement and repairs.
Spinnakers

With the lightweight nylons used for spinnakers, it’s best to avoid sewing through the sail if at all possible as this may affect the spinnaker’s shape. For small tears it’s best to use a single layer of repair tape, but bigger repairs require a layer on each side of the sail. If the repairs are too big, however, it may be best to not use the sail until it can be properly repaired by a sailmaker.
Modern laminate sails

Dr Sails is an adhesive designed to stick laminate sails back together, amongst other thing
Laminate sails are similar to repair to Dacron – except that they generally don’t respond well to stitching, especially when they reach a certain age. That means you’ll need some serious
tapes – and the sail will need to be dry for them to stick. Recently, new products have been introduced which offer some serious adhesive power. One of these is Dr Sails, a two-component
epoxy base adhesive designed for use on sailcloth, which cures in 30 minutes. It’s worth patching laminate sails as soon as you start to notice any degradation or tears in the weave to avoid the laminate breaking down.
Eight tips for effective repairs

1: Keep it flat When stretching out a sail for repair, use a table or pontoon: but if you’re on board a small boat and struggling for space, a floorboard or washboard will give you a portable flat surface.

2: Patch both sides
For tears, patching both sides is the only way to avoid snags, and it gives the repair a much better chance of staying in place. Here you can see a nick in the sailcloth is secured by a repair on one side, with another to go.

3: Avoid puckering the sail
When repairing spinnakers, make sure the edges of the repair line up and you’re not inducing any creases into the sail – it’ll add stress and lead to an early failure of the repair.

4: Remove rust from needles
Rust can add a surprising amount of resistance to a needle as it passes through a sail – use wet/dry sandpaper to polish a needle if you don’t have a shiny new one.
5: Round the edges of patches
Don’t forget to round off the edges of any patches to avoid them snagging and taking the whole repair with them.

6: Heavy-duty repairs
For repairs in heavy cloth or that require lots of strength, double up the twine. This effectively doubles the strength of the
repair for little extra work.

7: Check the rest
If a seam comes apart, check the remainder with an awl or a screwdriver to ensure that the rest won’t come loose.

8: Keep it moving!
Use silicone spray or beeswax to keep the needle lubricated: it will help to keep the adhesive from the double-sided tape off the needle.
Preventative maintenance
There are some things you can do to keep your sails in a condition where they won’t tear.
Remove them when not using them
Take your sails down off the furler and put the sail covers on as soon as you get in to avoid unnecessary UV damage.
Chafe patches
Adding chafe patches to high-wear areas of your sails can pay dividends. Adding webbing reinforcement to headboards that chafe on the backstay, or leather patches to areas where sails chafe on stanchions or shrouds, can prolong their life and reduce the chance of having to make a repair.
Boats heading off on downwind ocean passages often tape pipe lagging to their spreaders to avoid chafe on the mainsail.
Rotten stitching
Regular checks for rotten stitching are a good way to ensure your sail’s seams will stay intact.
UV strips – designed to be replaceable
If your UV strip is degrading, don’t worry – they can be discarded. Drop the sail off at the sailmaker for a new one to be fitted before it starts to fray or tear.