
Having your boat prepared to take the ground can open up new cruising opportunities - and save you cash! Ben Meakins and PBO experts share their tips for drying out
Many people are nervous about drying out or taking the ground. After all, boats are supposed to float, not sit on the hard, unforgiving seabed. But you can safely take the ground in almost any boat – fin-keeler, long-keeler, centreboarder, catamaran, trimaran or even a motorboat. You just need to know where, when and how.
Taking the ground is a useful trick to have up your sleeve. For cruising, it opens up legions of new, tidal places to explore. Even at home, it lets you carry out below-waterline maintenance at a fraction of the cost of a boatyard lift-out. This article aims to give you the confidence to try it out for yourself.
Is your boat suitable for drying out?
Lifting keels: Most centreboard and lifting-keel boats are designed to sail in shoal water – which also entails taking the ground. Some have twin rudders to help them stay upright, while others, which have a drop-plate and shallow keel, may sit at an angle on the mud. You can add legs to stop this, or make sure you dry out on soft mud.
Long keels: Long-keeled boats will fall over on a hard surface, but can sit very happily in soft mud with no other support. You’ll often see them with legs, and dried out alongside walls. Some may ‘kneel’ due to a cutaway forefoot, but most are stable when dried out.
Fin keels: Fin-keeled boats are rarely seen dried out – but that’s not to say they can’t. Deep-fin boats are restricted to drying out against a wall or piles. With the addition of legs, they can use hard surfaces, too. Shallow-finned boats can sit quite happily in soft mud, and some, with wide ‘wings’ on their keels, will dry out quite happily with no visible means of support. Some racing boats either have an unsuitable keel shape or insufficient strength to support their weight on the keel, so it’s worth checking with the boat’s designer if you’re unsure.
Multiple keels: Twin and bilge-keeled boats are designed to dry out – it’s why their designers put up with the reduced performance that such a design entails.
Locations for drying out
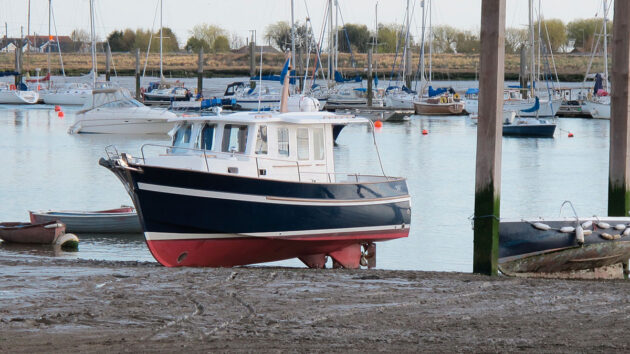
Drying harbours: Drying harbours offer opportunities to most types of boat. There are often drying moorings for shoal draught boats as well as harbour walls for visiting deep-keelers. Pay attention to the weather forecast and be prepared to clear out at the first sign of trouble.
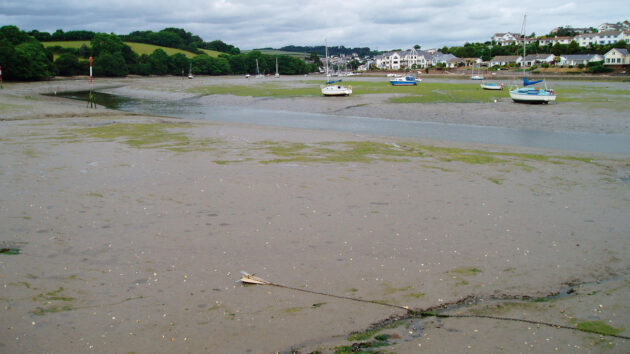
Rivers and estuaries: There are often many places on tidal rivers. Drying moorings are usually much cheaper than deep-water ones. A shoal-water anchorage will keep you clear of a main channel, and allow you easier access to the shore.
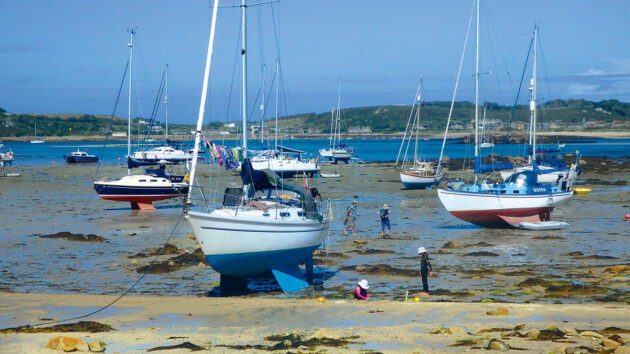
Archipelago cruising: Low-tide sandbanks can make great places to stop, especially with children – and mean you’ll avoid busy beaches thronged with holidaymakers.
Walls and piles: Many drying harbour walls are suitable to take the ground against. And where walls are not available, piles can do the same job – although piles rarely offer the opportunity to step ashore.
Choosing your spot
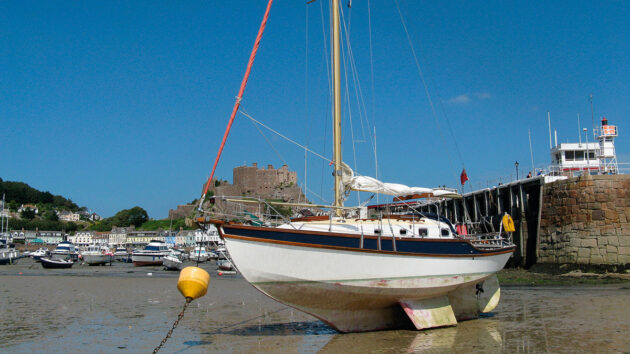
An idyllic ground-taking situation? Be aware that changing weather can turn a dream drying anchorage into a nightmare. Credit: Richard Hare
Don’t be lulled into a false sense of security by the apparent serenity of the surroundings, warns Richard Hare. What should we be taking into consideration when planning to visit somewhere we’ll need to dry out? For a start it’s important not to be lulled into a false sense of security.
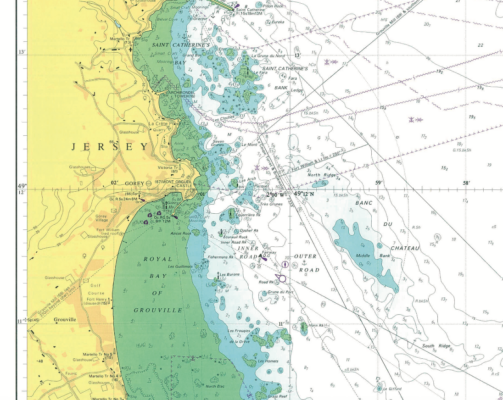
The photo (above) shows an idyllic ground-taking situation in Gorey Harbour, Jersey… or does it? The previous tide lowered my Golden Hind 31 Keppel gently onto the firm sand, and did the same when she was raised by the making tide. But as wind increased during the night we were woken with a horrible crash landing – although this was nothing compared to lift-off the following morning, when a south-easterly Force 6 was blowing rollers straight into the harbour!
It was time to make a dash for open sea. In contrast, had the harbour been sheltered from the prevailing wind all would have been fine, as it is in sheltered creeks and rivers. Soft mud would have made all the difference too.
Heed the warnings
So this means that, if you’re planning on taking the ground, you’ll need to pay more attention than usual to the warnings in pilot books about swell and exposure. Check the chart carefully, too, and make sure you pay attention to the material that makes up the bottom. You should also look for a gently shoaling bottom.
Check the chart and pay attention to drying heights, shelving and rocks. If possible, reconnoitre your chosen spot beforehand, when the tide is out, so
you can have a proper look at the drying surface
In a choppy sea, taking the ground on firm mud or sand is a harrowing experience as the boat is bumped from one keel to the other until it settles fully, and re-floating is even worse. It can often pay to make a phone call to the harbour master so he can tell you what to expect on the bottom.
Weather
Study the chart and weather forecast carefully, and avoid anything that has the potential to become a lee shore. If the weather turns while you’re beached, it can help to lay out an extra anchor in the direction of the expected wind or swell, to enable you to haul yourself off.
Making your approach
The first rule of taking the ground is not to do it if you’re in a hurry. As they say, time and tide wait for no man.
- Check the tidal height for the next few days and take account of it. You don’t want to get neaped and have to wait a week for sufficient tide to return to float you off.
- Remember that atmospheric pressure has an effect on water levels. Base level in the UK is considered 1013mb. High pressure will reduce the tidal height by 1cm per 1mb, so a high pressure area of 1023mb will reduce the tidal level by 10cm – enough to make all the difference!
- It’s best to approach on the last of the flood tide – that way there will be enough to float you off if you ground accidentally short of your destination. Aim to be ready for the ground before the tide begins to fall, to give yourself plenty of time to get settled.
Beaching a shoal draught boat
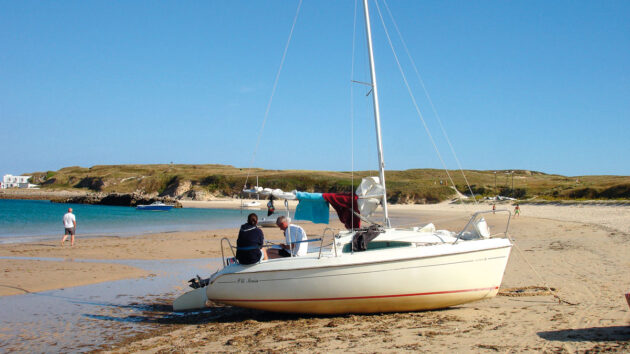
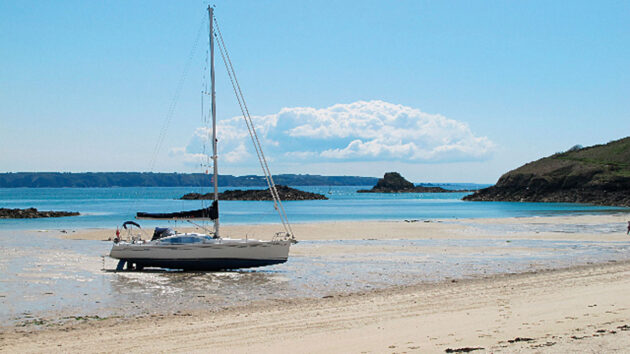
The trick to drying out is to know when, where and how – this is the Île de Houat in South Britanny. Credit: Sarah Norbury
It’s not rocket science: a few tips are all that’s required, writes Richard Hare.
Shoal draught boats, whether they have bilge, triple, lifting keels or centreboards, give you the freedom to explore shallow rivers and creeks, drying out as the tide recedes. It’s not hard: you just need to bear in mind a few seamanship tips.
Hailing from the vast drying expanses of the Essex coast, it’s inevitable that I’m a fan of taking the ground. Hot sunny days and the pop-pop-popping of ragworm as the sparkling water recedes are part and parcel of the pleasure of bilge, twin-keeler and centreboard boat ownership.
What’s the point in having a shoal draught boat if you’re not going to take a few calculated risks now and again? The trick is to know when – and how – to dry out.
Take soundings
When preparing to take the ground in unknown territory it helps to build up a profile of the bottom before we’re committed to it. Will it be sloping and, if so, how steep is it? Is there a gully?
In this situation a mono-keel hull can be careened into the up-facing slope of a gully, thereby presenting the hull more safely to the tide when it returns. A twin or bilge-keeler will be disadvantaged here because it will have no alternative but to lean over the creek, its downhill keel taking all the weight and thus digging itself in further. The result is a dangerously low side deck presented to the returning tide.
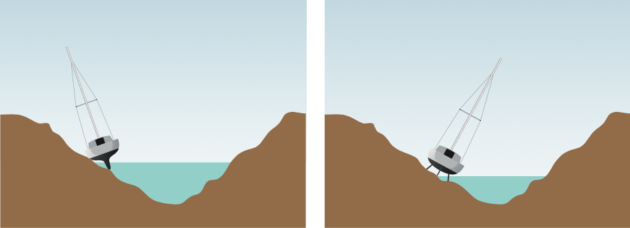
If caught in a gully, a twin- or bilge-keeler is at a disadvantage
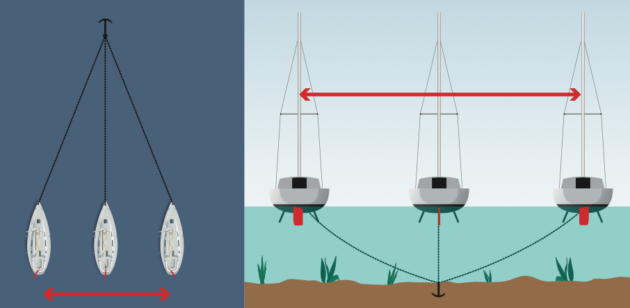
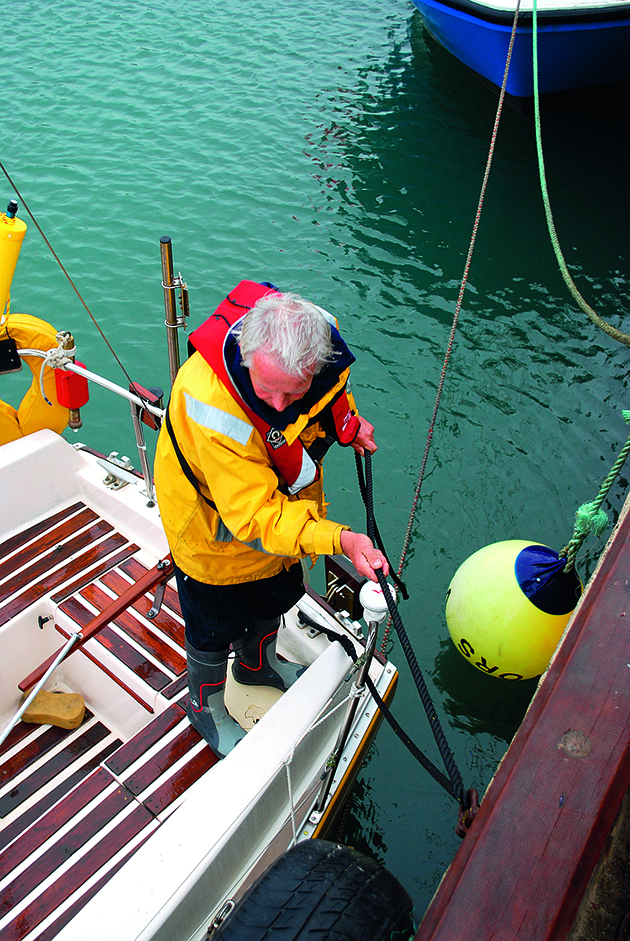
To find out what’s down there before it’s too late, all you need is a decent scope on the anchor chain and an echo sounder.
Here’s how it goes. About 20 minutes before touchdown, and assuming that the hull is lying fairly steady in the tide, we should already have at least 3x HW depth of anchor chain paid out. With the echo sounder switched on, we push the helm over to one side and hold it there until the hull won’t go any further. While doing this, observe any changes of depth reading. Now put the helm over to the other side and do likewise. In total the hull will have swung sideways across approximately its own length, quite possibly more.
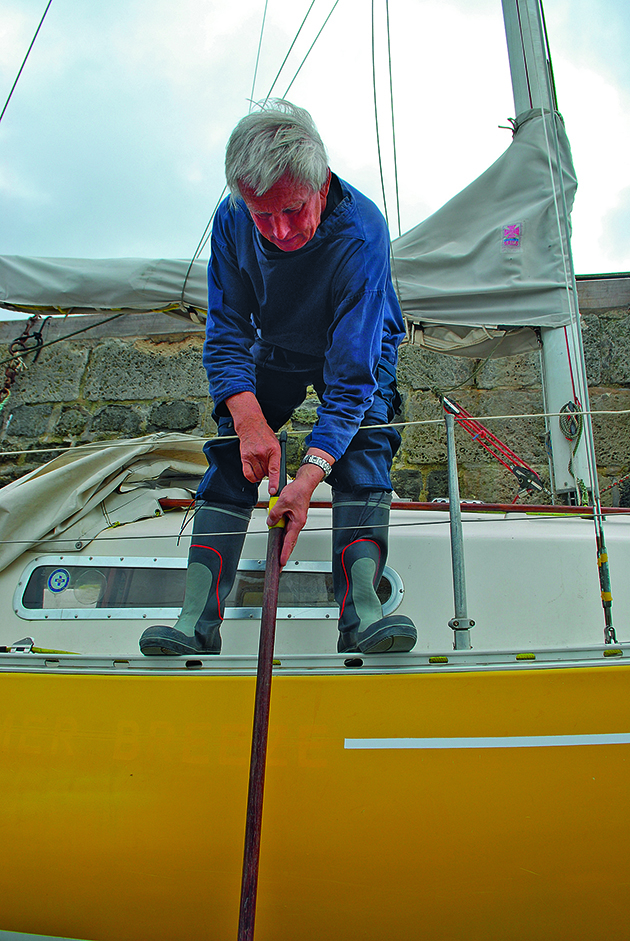
It depends on the tide strength. If there are any nasty gullies down there, they will show up on the sounder, identified safely in advance. Next, in the final minutes before touchdown, use a boathook, whisker pole or spinnaker pole to test the bottom. It really doesn’t matter if it’s firm or soft so long as it’s roughly the same both sides.
Some people use an anchor to positively haul themselves further onto the bottom and stop the bump and grind as soon as it starts.
Do a survey/use your eyes
A survey is well worthwhile if it’s practicable. To avoid a nasty cost that we hadn’t anticipated we need to know if we’re about to be lowered onto something damaging.
In murky water there’s no option other than to visit the site by dinghy beforehand and, assuming the ground is safe to walk on, we can check it out. Armed with this information we can move our boat up on the next tide without worries of landing on a disused oyster frame or rocky outcrop.
Surveying the seabed by helm and echo sounder
In clear water it pays to be vigilant as the tide drops, especially in areas where the range is large. Anchored on the edge of Le Kerpont channel, off Britanny’s Île de Bréhat, in a depth that was calculated to keep us afloat at LW, I spotted something lighter in colour immediately off Keppel’s beam. With mask and snorkel I was able to see that it was a jagged rock, proud of the bottom, one with the potential to cause all sorts of mayhem if Keppel’s bilge keel became ensnared.
Drying out using legs
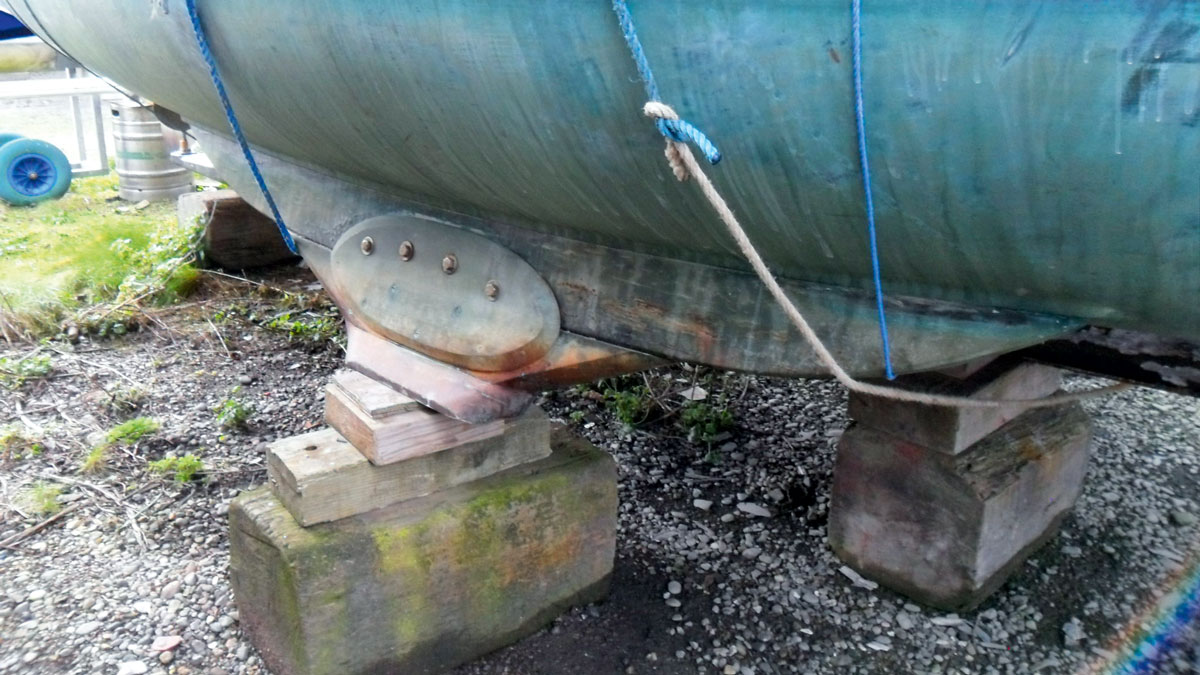
Straitshooter with Yacht Legs attached: the length of the legs is variable via a wheel driving a lead screw. Credit: Vyv Cox
Just because you may have you can’t join in the fun of taking the ground, writes Vyv Cox. All a fin-keeler needs is something to prop herself up with. I found the ideal accessory for my Sadler 34, Straitshooter – legs!
We bought Straitshooter in 1994 and immediately installed Yacht Legs. With a tidal range varying from 6m to 10m in the sheltered but drying bays of the Welsh coast, cruising is greatly enhanced by the ability to dry. We decided upon the fully adjustable version of Yacht Legs’ product.
The length of the legs is infinitely variable via a wheel driving a lead screw, which helps to hold the boat upright no matter what the shape of the bottom. Once we have settled it is simple to adjust each leg a little at a time. Our next decision was where to site the leg sockets. A fore-and-aft position somewhere around the middle of the lower edge of the keel seemed about right, with a vertical position on the least curved part of the topsides, avoiding any bulkheads or locker sides.
You need a substantial backing pad inside the hull to spread the load of the legs, normally thick plywood but I had some 25mm Tufnol, immensely strong and impervious to water, so I used pieces of around 25 x 20cm. I shaped these to fit the curvature of the topsides, using a grinder.
Having taken the irreversible step of drilling through the topsides to accept the socket bolts, I cut away a rectangle from the inner skin and foam of the Sadler to accept the pads, drilled through them and bolted up with sealant between pads and hull.
Coincidentally the pads were the same thickness as the foam, which meant that the inner skin fitted perfectly on top of them. Seventeen years later, they remain undisturbed.
For our first attempt at drying upright we visited Traeth Coch, a well-sheltered bay on the east coast of Anglesey, where the bottom is hard, smooth sand. We were able to use fore-and-aft mooring buoys, which we picked up well before the ebb.
The experience was something of an anticlimax, as we thought we were still afloat until told by the occupants of a passing dinghy that they could see the top of our keel! We had dried perfectly upright with no bumping, sheering, toppling over, nor any of the other experiences we had been promised by doubting club members.
To put to rest any further concerns we gathered volunteers and assembled four people as far forward as possible on the bow, but the boat never moved. Later we met a man who kept a long-keeled motor-sailer on these moorings, also on legs. His advice was to always leave the legs about 15cm higher than the keel, preventing ‘tripping over’ the legs as the boat sheers in the swirling ebb.
Later that first season we dried at North West Venturers YC in Beaumaris to scrub the bottom before a cruise to the Isle of Man. The beach in front of the clubhouse slopes quite steeply, which was a little worrying.
The technique we used here was to have the legs ready-assembled on deck, drop a stern anchor while motoring in, then run the keel gently into the shingle, lowering and fixing the legs immediately. Once dry we took a line ashore, fastening it to the wire basket shore defences, which are excellent for the purpose. Our fears over the slope were groundless: the boat sat perfectly, with perhaps a little weight on the rudder.
Since then we have used the legs all around the Welsh coast, and when we moved to Holland the boat was over-wintered twice on legs alone. Hull work was made far easier with the boat standing on legs, rather than in a cradle. Apart from the improved ability to move around without stepping over and around the cradle we were able to avoid the tedium of lowering pads one at a time to paint beneath.
After I retired legs came in useful around the coast of Brittany, especially so in the Morbihan, where we accidentally ran aground on a shingle bank in a fast-falling tide. We moved fast enough to assemble and fit the legs before the boat lay on its side, saving some embarrassment. At Sauzon on Belle Île we could enter and dry in the inner harbour rather than pick up a mooring in the outer one, where swell makes life quite uncomfortable.
Our final use of the legs was in Boatyard Palma in Mallorca, where we used them to do the antifouling. The staff were horrified, and we were required to sign a disclaimer in case the boat fell over! Needless to say, it didn’t.
Drying out against a wall
Time to talk to the experts to see how it’s done, writes Ben Meakin. I headed west to Lyme Regis – a place where the water disappears from the harbour for half the day and the locals are well used to taking the ground. The harbour is well sheltered from anything but easterlies, when the visitors’ moorings become uncomfortable and dangerous.
Andrew Truscott and his wife, Liz, own a Westerly Konsort, while their friend Colin MacNeall keeps his Sadler 25, Summer Breeze, on a drying mooring mid-harbour. We all headed out to sea on a rising tide, before doing a U-turn and heading slowly back in.
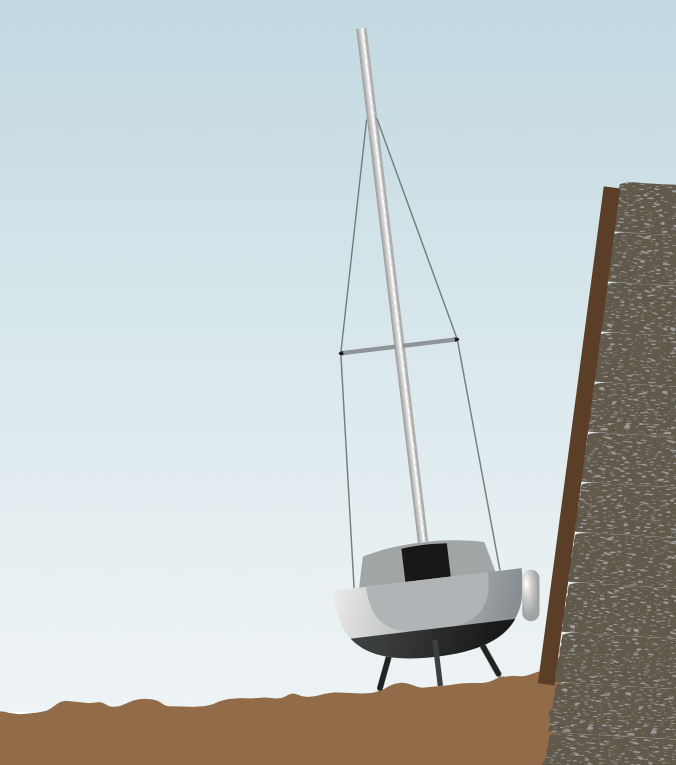
The groundtaker’s drying angle is governed by the slope of the seabed
Most people sail past Lyme, but it has a good range of visitors’ moorings and facilities, and is a great place to stop off and break up the haul up – or down-Channel.
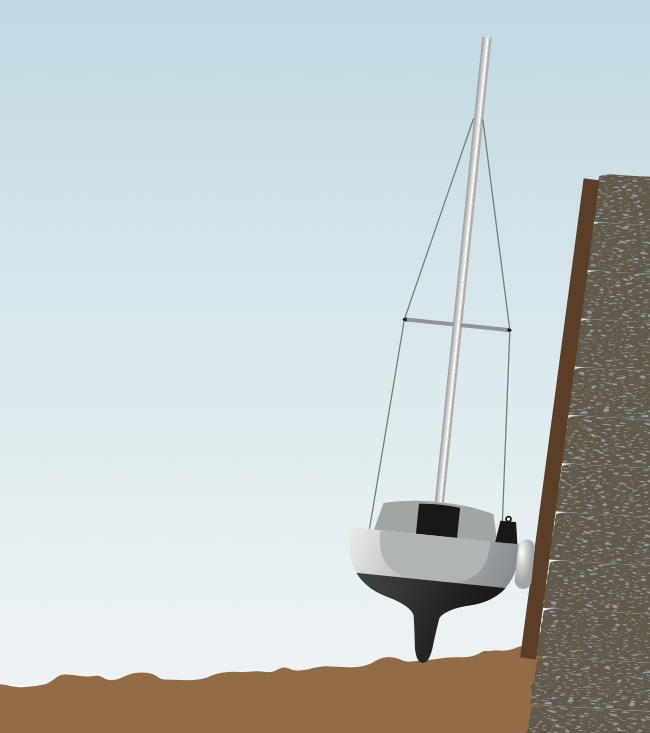
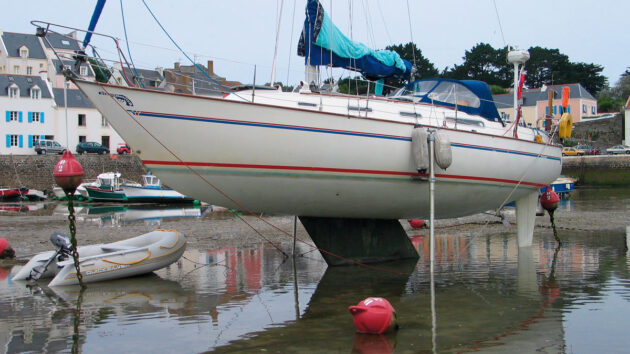
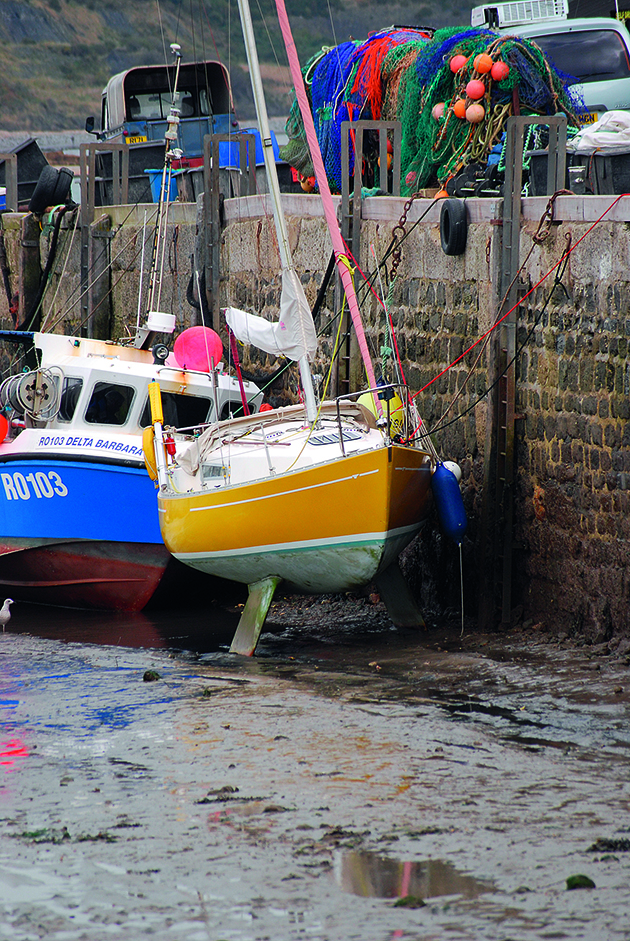
Fin and long-keelers can be tended to lean against the wall
Lyme’s harbour is sand with a covering of sticky mud: the sand is hard and ideal for drying out on, and the mud makes for a softer landing – though it is messy for walking ashore.
Drying out against a wall: a step-by-step guide
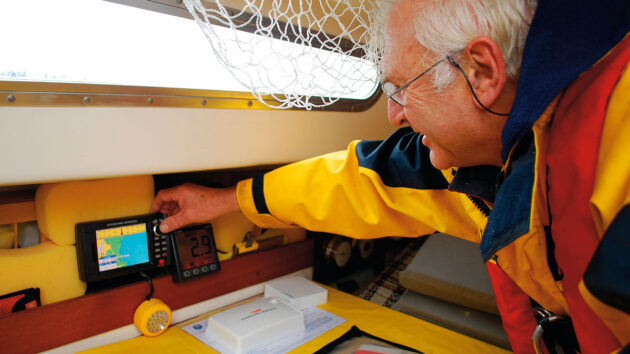
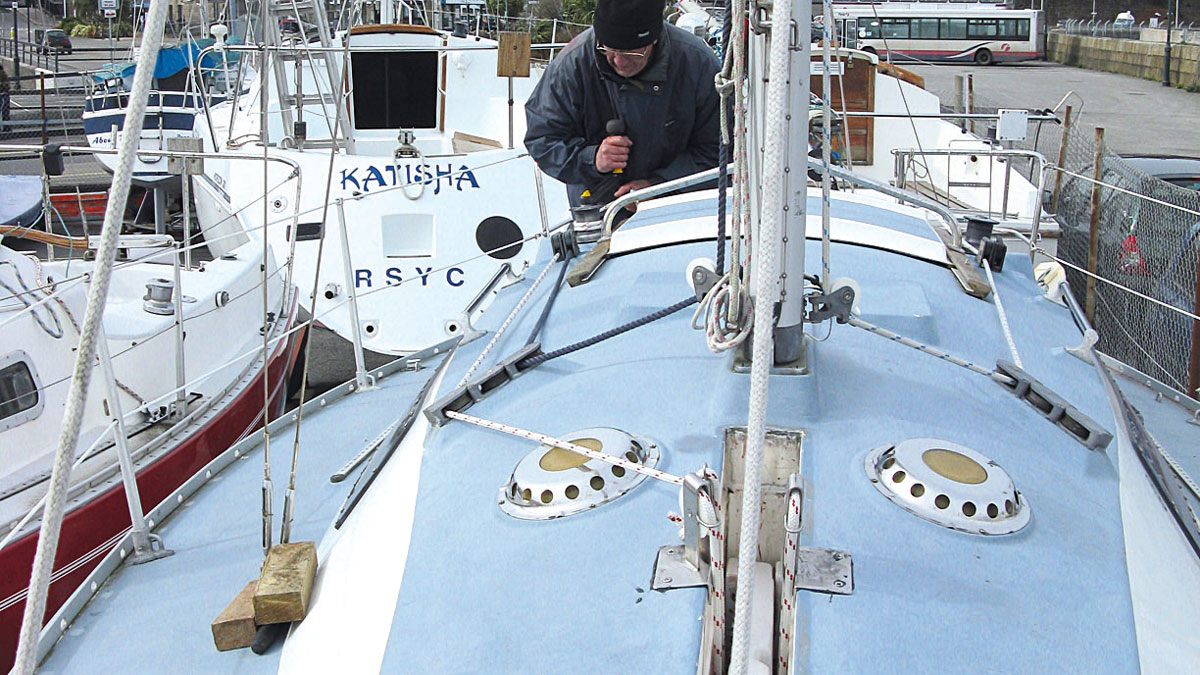
1. Andrew double-checks the depth sounder and the chartplotter carefully.
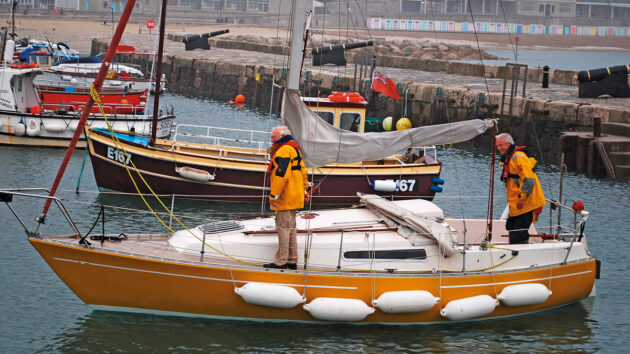
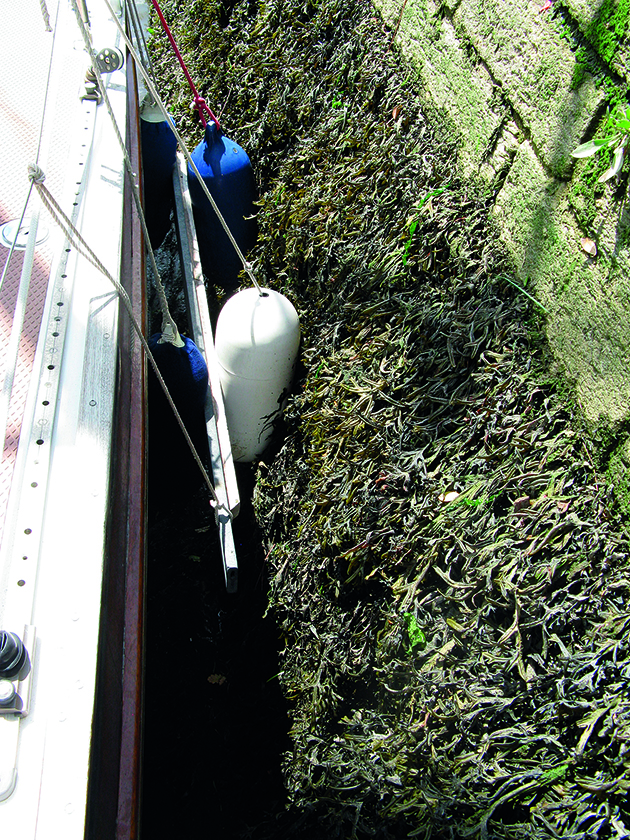
2. Colin and Andrew string Summer Breeze’s fenders fore-and-aft along the hull to stop them popping out either side of a pile. You may need a fender board to keep your topsides clear of protruding snags on the wall.
3. Andrew rigs long lines at the bow and stern. Long lines allow the boat to rise and fall while still being held securely alongside.
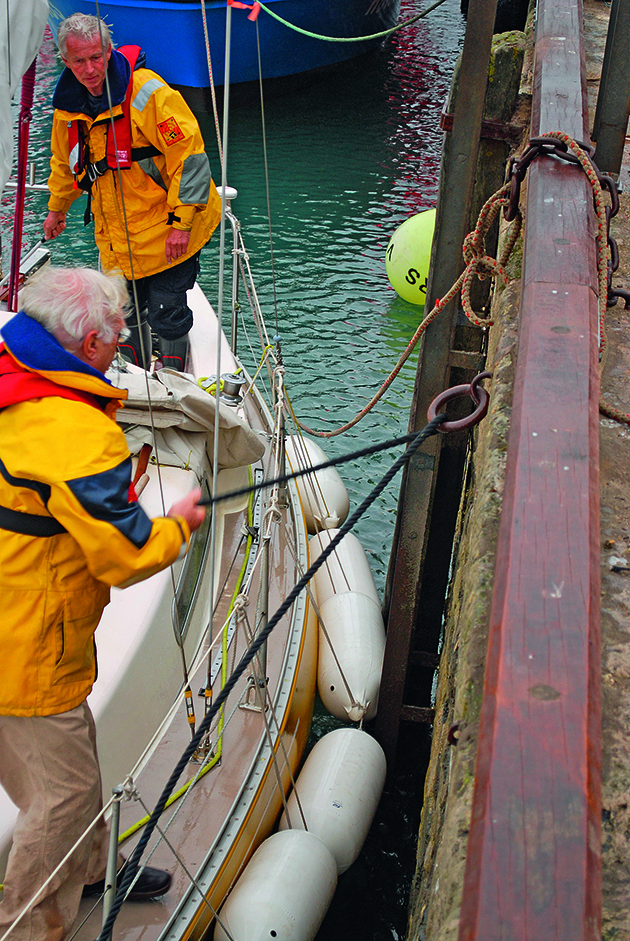
4. Colin approaches the wall, aiming to come alongside a ladder. He threads the stern-line through a ring, while Andrew does the bow line.
5. With the boat secured alongside, Colin checks the depth with a boathook to make sure it is even and there are no troughs left by earlier boats.
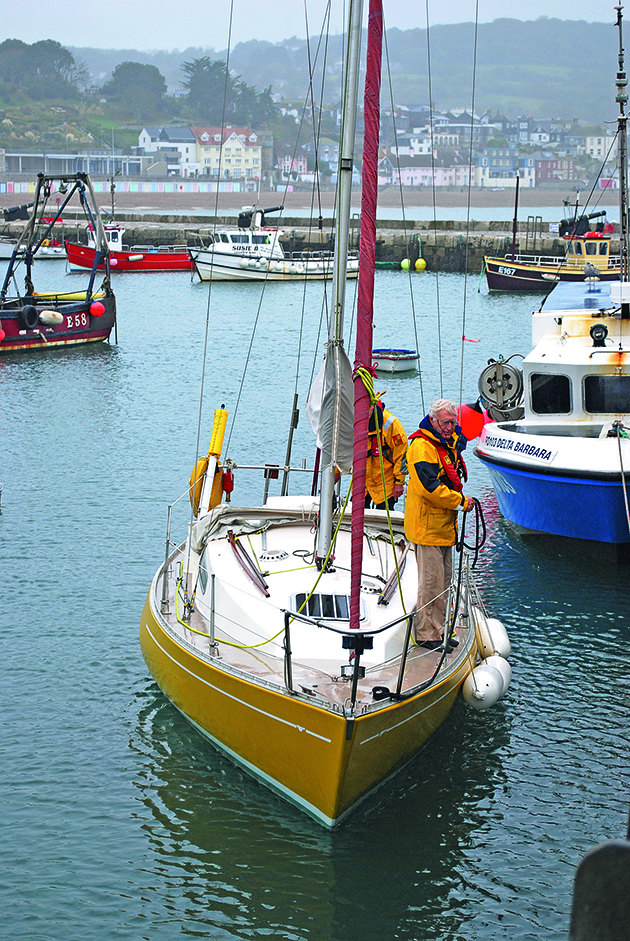
6. Andrew adds springs to counter the tidal stream and keep the boat from moving around too much. On a fin-keeper, you may need to take a halyard ashore or put some weight on the wall side of the boat to make sure she heels slightly towards the wall.
7. With long lines (red in the picture), you shouldn’t need to do anything as the tide drops. But if you’re using breast lines, you will need to adjust them every minute to avoid the boat hanging from her cleats.
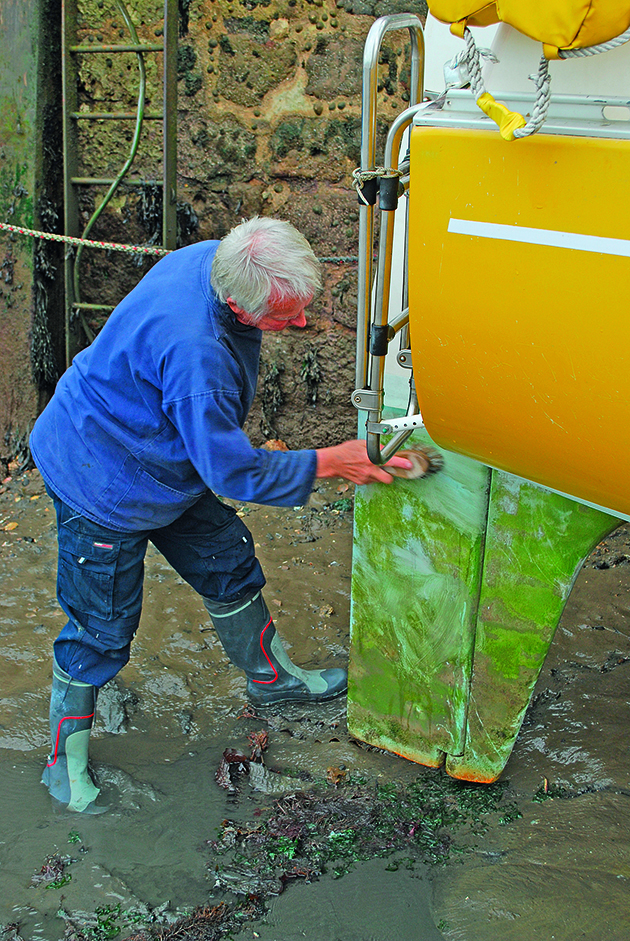
8. Once she’s taken the ground, you can relax, head ashore or get the scrubbing brush out, ready for the water to recede enough to get to work.
Protruding quays
Difficulties can arise when a quay wall has a protruding base. This is unlikely to present a problem to a mono-keeper, but could deliver a nasty shock to a bilge- or twin-keeled if one of the keels catches on it. This applies to catamaran rudders too, and modern centre-boarders with twin rudders.
A protrusion at the base of a wall can spell trouble for a groundtaker. A fenderboard saves the day. Credit: Richard Hare
Assuming the protrusion is not too big, it can be dealt with by a combination of a fender-board and extra fenders. A fender-board rigged outside a midships cluster of fenders means that we can then deploy more outside it, thereby doubling the distance of the hull from the quay.
The plumper the fenders, the more the distance. And if this doesn’t hold us away far enough then the deployment of a spinnaker pole, used as a second fender-board, can work wonders.
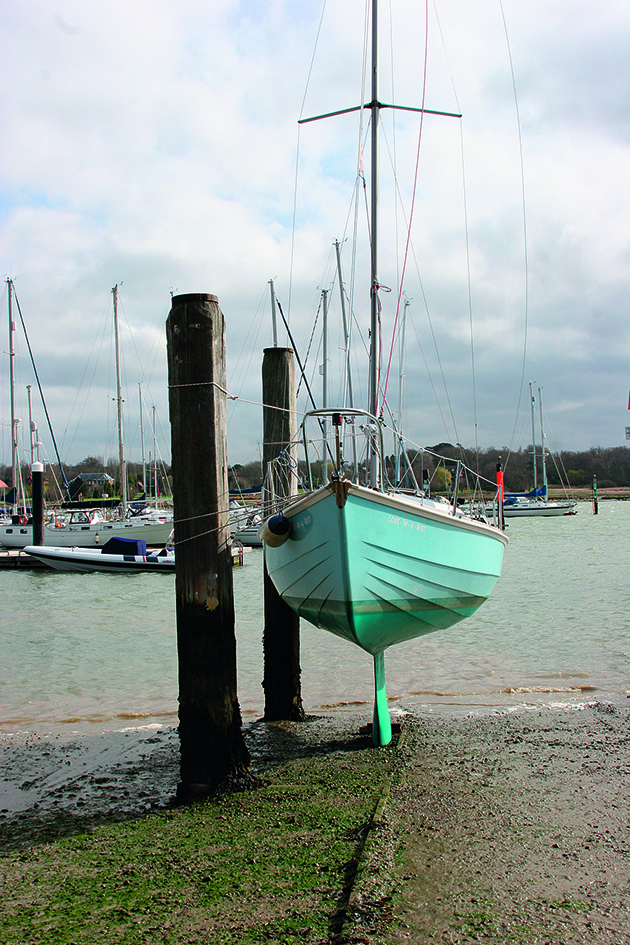
Drying out against piles
They might be becoming less common around our coast, but drying out on a scrubbing grid is a cheap way of cleaning the boat’s bottom or carrying out repairs, writes Ben Meakins.
Using them is not that different to drying out alongside a wall – but as all grids differ, it is worth bearing in mind some of the general principles. Ideally, you want to come alongside two piles to spread the load, but one will do.

Scrubbing or hosing off against piles is cheaper than a lift-out
Try to line the mast up with a pile – it’s a good position, usually directly over the keel and therefore the boat’s pivot point, to lash the pile to. Springs are important – pay particular attention to the angle of the adjacent slipway if there is one, and make sure the relevant spring is up to the job.
It is important to get the angle of heel right – and it can help to take a halyard ashore or put some weight on the sidedeck. Once she is settled, you can relax and get ready to scrub.

Best bilge keel yachts and twin keel yachts for drying out ashore
Back in the late 1970s, I found myself on the horns of a dilemma. For the last decade or so…

How to pick up a pile mooring
Picking up a pile mooring can be a challenge – especially in a tidal harbour. David Harding explains how it’s…
How to make boat feet to keep you level
Charles Beddingfield finds a way to stay level on a drying mud mooring
Making a lifting keel easier to raise
After struggling with a heavy lifting keel, Brian Johnson builds a simple tackle to make light of the problem
What to read more seamanship articles like Drying out: how to safely take the ground?
A subscription to Practical Boat Owner magazine costs around 40% less than the cover price.
Print and digital editions are available through Magazines Direct – where you can also find the latest deals.
PBO is packed with information to help you get the most from boat ownership – whether sail or power.
-
-
-
- Take your DIY skills to the next level with trusted advice on boat maintenance and repairs
- Impartial, in-depth gear reviews
- Practical cruising tips for making the most of your time afloat
-
-
Follow us on Facebook, Instagram, TikTok and X