
If you have a tiller-steered boat and would rather have a wheel, how would you go about converting it? David Harding sees how it’s done to a Hanse 315

To many traditionalists and dyed-in-the-wool dinghy sailors, a wheel is something you only have when a boat becomes too big for a tiller.
Tillers are simple and direct: they give the best feel and precision, combined with an instant indication of how much helm the boat’s carrying.
Time was when tillers were the norm. A wheel would be fitted if the owner or builder preferred it or, more commonly, where the size or layout of the boat made a tiller impractical.
If, for example, you have a long, narrow-beamed boat, the tiller might take up a lot of length and the beam be insufficient to accommodate its arc.
Otherwise, why fit a wheel?
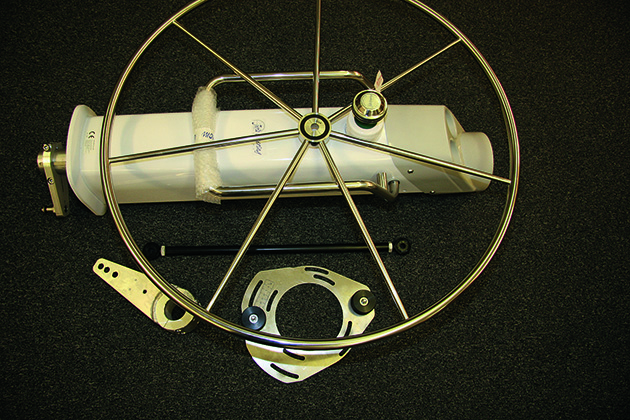
Tiller to wheel conversion kits are available and include the wheel, pedestal assembly (here with the output lever attached to the drive tube that runs down the middle of the pedestal), drag-link bar and stop-ring. Credit: David Harding
Why be stuck in the stern, away from the sheets and winches, far from the protection of the sprayhood and with a limited range of steering positions when, with a tiller, you can move around so much more easily, sit further forward and outboard more comfortably and have a better view of where you’re going?
In recent decades, however, tillers have fallen from favour.
An increasing number of people have started sailing in cruisers without having worked their way up from dinghies or keelboats.
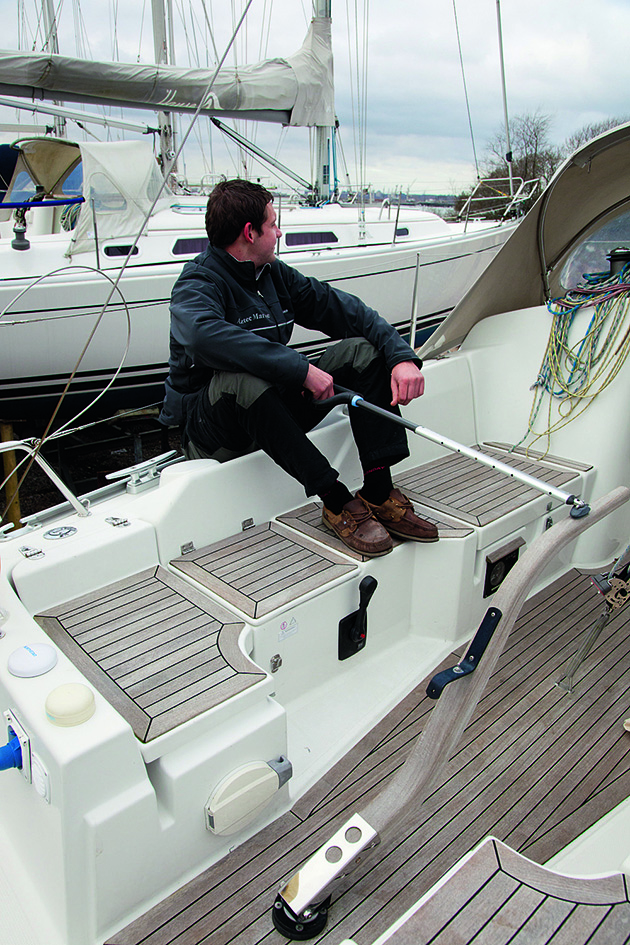
Designed originally with tiller steering as standard, the Hanse 315 has a coaming that’s angled to give the helmsman a comfortable perch when the boat heels…
To many of them, a yacht isn’t a proper yacht unless it has a wheel. Besides, a wheel is easier to understand: turn it right to turn right.
That said, some performance yachts that could fit tillers choose to use wheels, and even some dinghy sailors like them. There are arguments both ways.
Whatever the reasons, the fact is that wheels are now being fitted to ever-smaller boats.
Any broker will tell you that some prospective customers won’t buy a second-hand boat over 30ft (9m) or so unless it has a wheel.
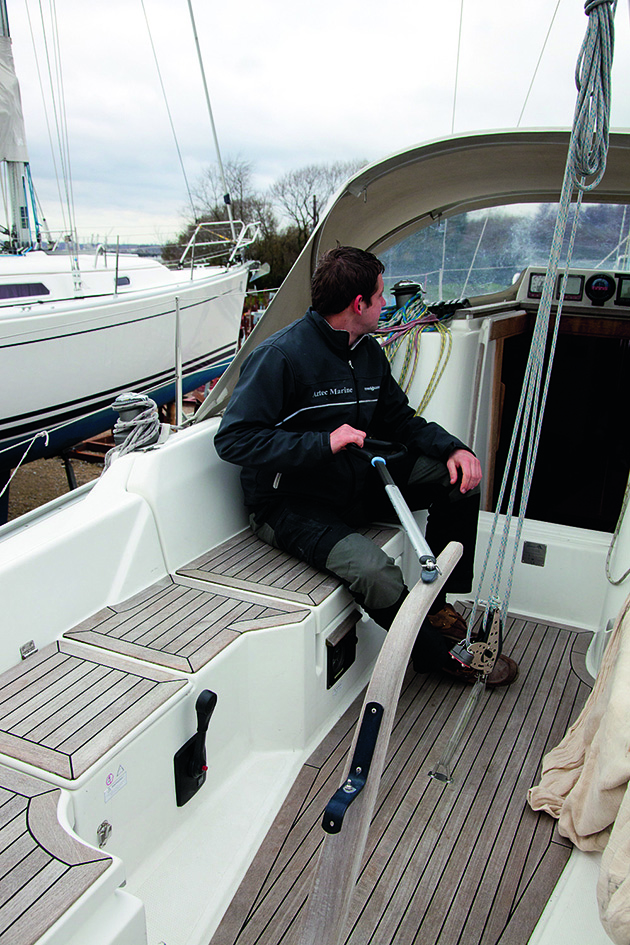
… while the tiller also allows him to sit well forward, close to the mainsheet and protected by the sprayhood. Credit: David Harding
Let’s take the Hanse 315 as an example to illustrate this trend.
When she was launched as the Hanse 311 in 2002, tiller steering came as standard. Only around 5% of buyers chose the optional wheel.
By the time the 311 was relaunched as the 315 a year or so later, the tiller/wheel split was 50/50.
Now, on the 325, it’s wheel only. That’s how dramatic the shift has been.
This insistence on wheels has presented a new challenge to brokers and those selling tiller-steered yachts of the size and type that are now built with wheels as standard: sometimes people won’t buy them unless they have a wheel.
Is your boat suitable for tiller to wheel conversion?
Not every boat lends itself to conversion. Jefa offers some useful guidance and measurements before you start.
These are for a rack-and-pinion steering system, which gives the most direct linkage.
If it won’t fit, you might be able to use cable steering with a quadrant.
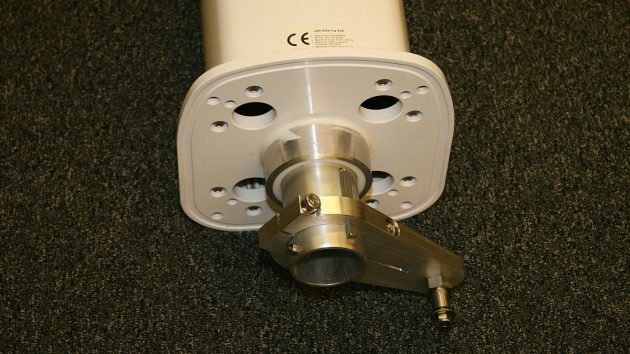
Here’s a close-up of the output lever on the bottom of the drive tube, which is part of the tiller to wheel conversion kit. It will have to be removed and refitted later. Credit: David Harding
First, you need enough space between the cockpit seats for a wheel (whose centre will be 710mm/28in above the sole).
You will need at least 350mm (14in) of clear space abaft the wheel for the helm, and to allow another 180mm (7in) to the centre of the pedestal to get an idea of where it will go.
Beneath the cockpit sole – in the aft cabin or cockpit locker, for example – you need a depth of about 10-12cm (4-5in) and lateral space of 25cm (10in) to port or starboard of the centre of the pedestal.
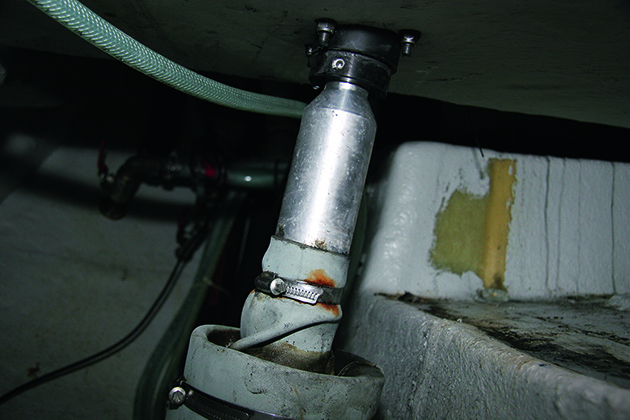
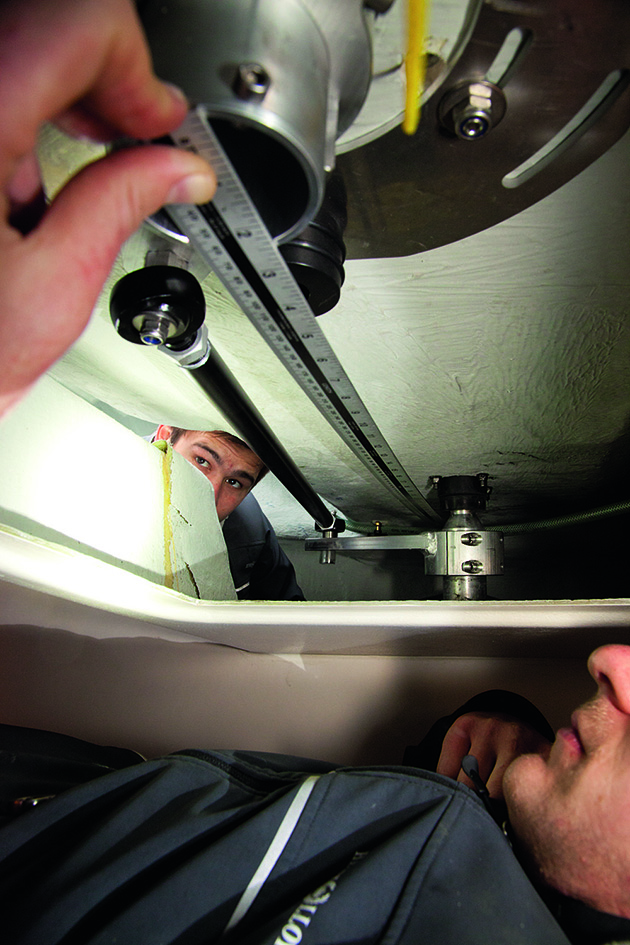
The rudder tube only extends part way up, giving easy access to the stock. Credit: David Harding
You will also need to be able to fit the drag-link (link bar) between the rudder stock and the output lever that attaches beneath the pedestal.
Also check the rudder stock.
It needs to be accessible and, if it runs in a tube all the way up, you will have to drop the rudder, cut the tube and fit a splash- preventing gaiter because the tiller arm has to fit directly to the rudder stock.
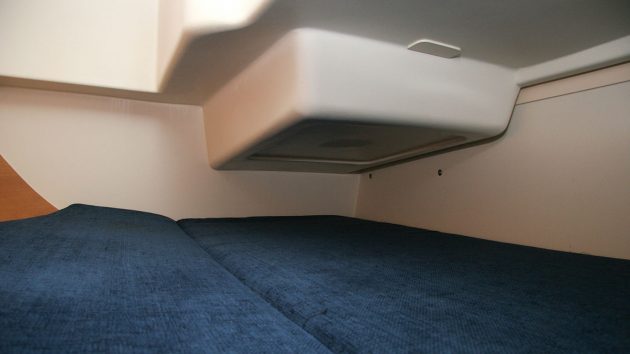
The aft cabin of the Hanse 315 before the tiller to wheel conversaion began. Note the box moulded into the headliner to accommodate the wheel-steering conversion. Credit: David Harding
If you have a row of ticks in the appropriate boxes you should be able to go ahead.
On the Hanse 315 it was a straightforward job because the boat had been built to accept the conversion, as are a lot of boats built in the past 15 years or so.
The rudder tube stopped part way up the stock, the cockpit sole was reinforced and access presented no problems.
Tiller to wheel conversion: Marking and cutting
Credit: David Harding
1. The first job is to remove the now-redundant tiller.
Credit: David Harding
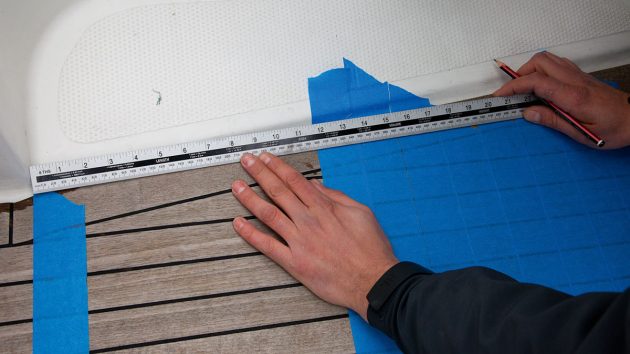
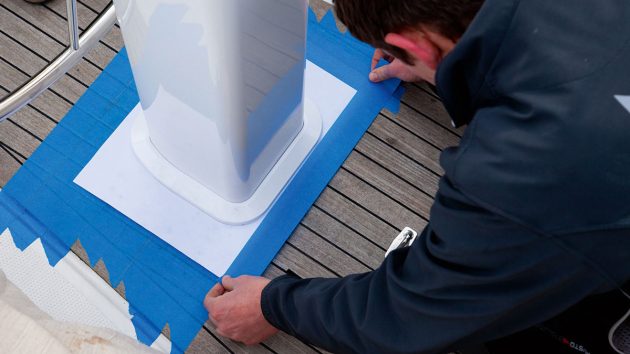
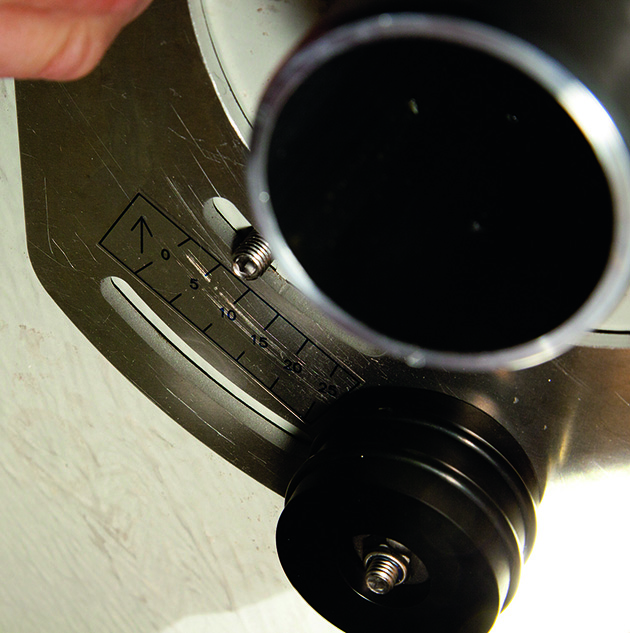
2. Then it’s time for lots of measuring and masking. The aftermost blue tape marks the forward end of the stern seat…
Credit: David Harding
3… from where 350mm is measured. That’s where the aft end of the wheel will be.
Credit: David Harding
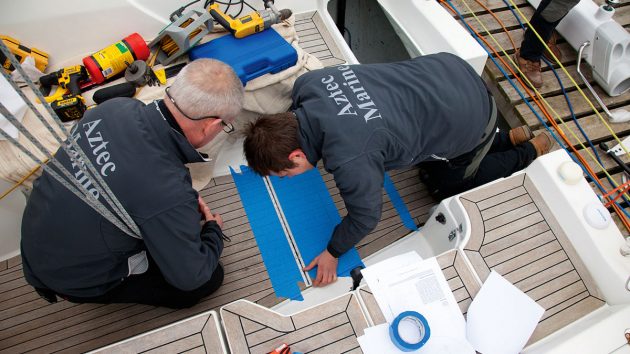
4. After more measuring and checking to make sure everything’s square and central…
Credit: David Harding
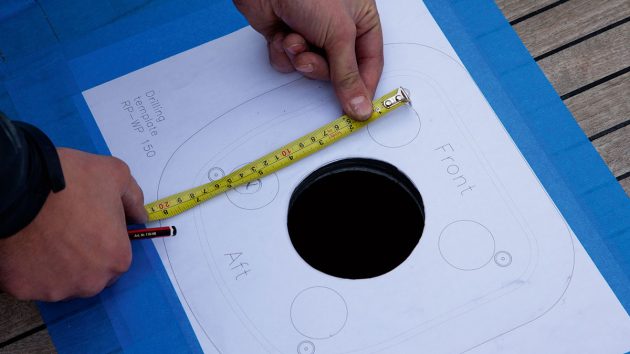
5… the template for the holes to secure the pedestal is positioned temporarily and the holes are marked.
Credit: David Harding
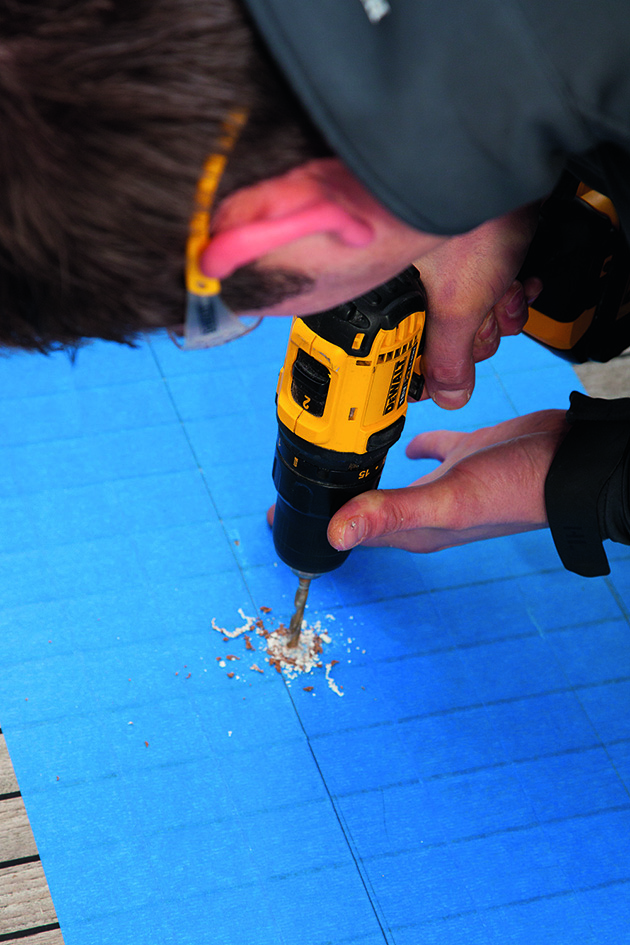
6. Time to start drilling – this is just a pilot hole for the centre of the pedestal…
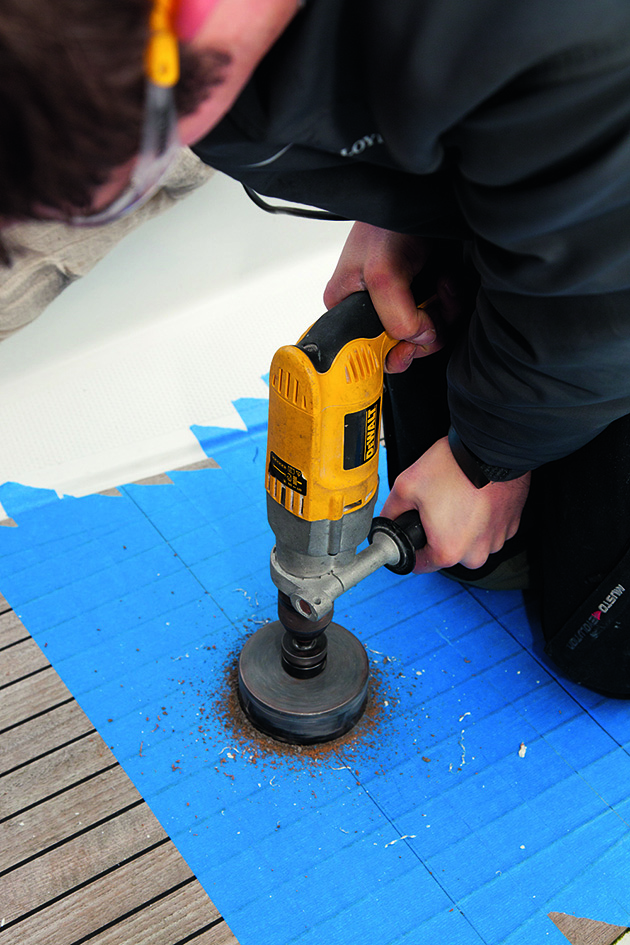
Credit: David Harding
7…before the 105mm (4in) hole saw is brought into action.
Credit: David Harding
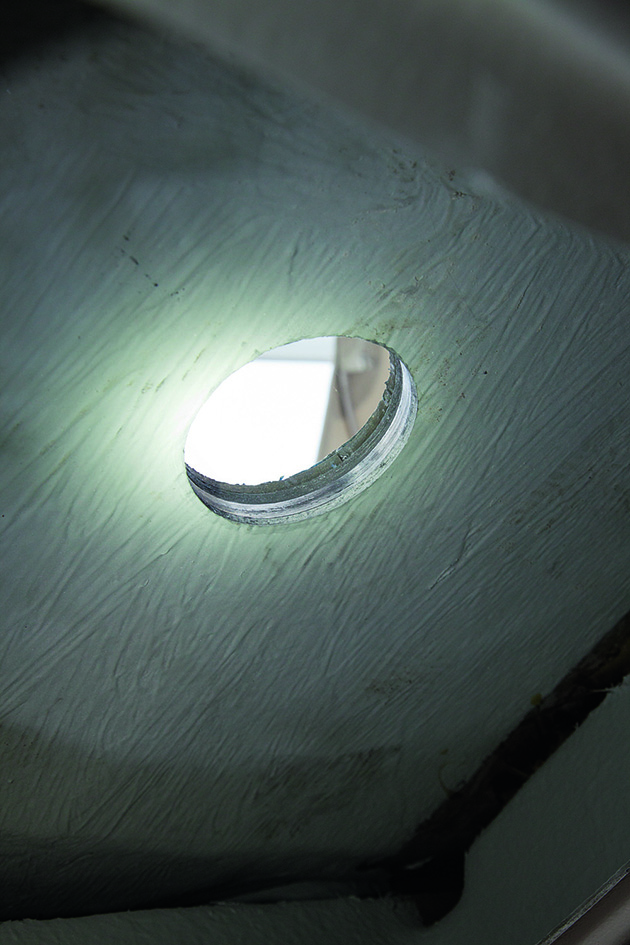
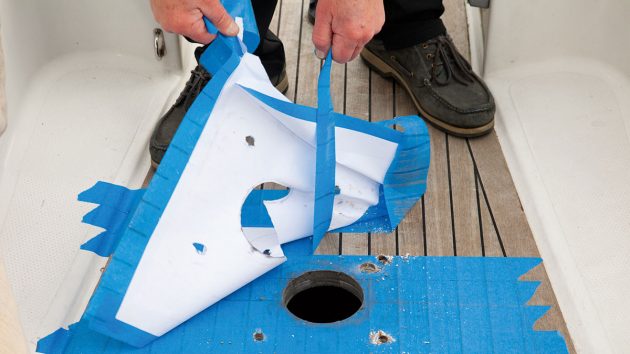
8. The panel has been cut out in the aft cabin and the hole in the cockpit sole appears
Credit: David Harding
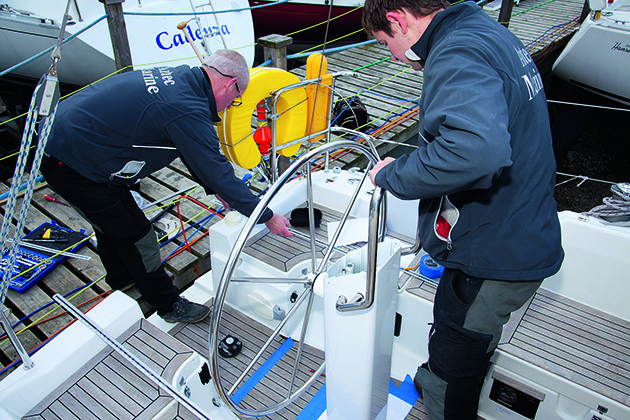
9. With the wheel fitted and the binnacle moulding removed from the top, the pedestal is put into position…
Credit: David Harding
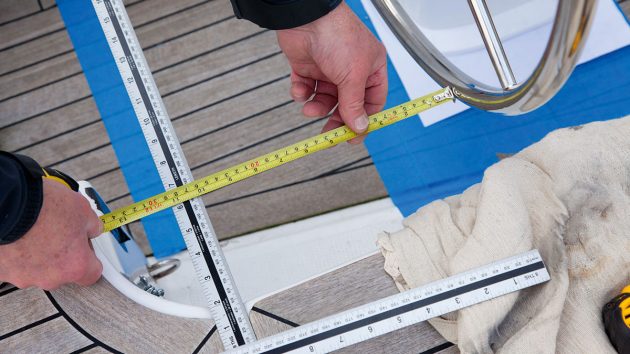
10… and lots more measurements are taken, checked and rechecked.
Credit: David Harding
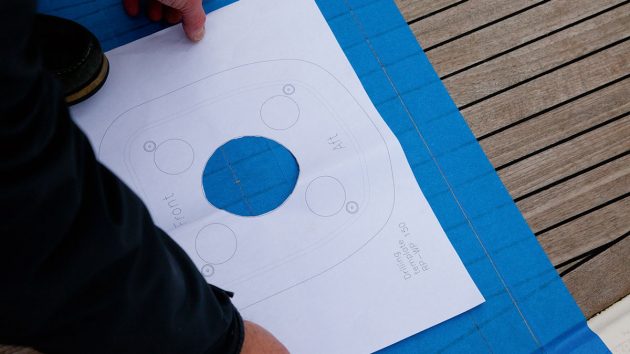
11. With the measurements confirmed as accurate, the template is taped into position on the cockpit sole.
Credit: David Harding
12. With the pedestal removed, a few more measurements are triple-checked…

Credit: David Harding
13… before the fixing holes for the pedestal are drilled
Credit: David Harding
14. Thread-locking compound is used in the securing studs as they’re wound into the base of the pedestal…
Credit: David Harding
15…which is placed into position for a moment to make sure everything fits.
Credit: David Harding
16. The template and masking tape have done their job and can now be removed.
Fitting the pedestal
Credit: David Harding
1. A mousing line is threaded through the conduit for the electrical cable that runs down inside the pedestal. Here we’re looking at the top.
Credit: David Harding
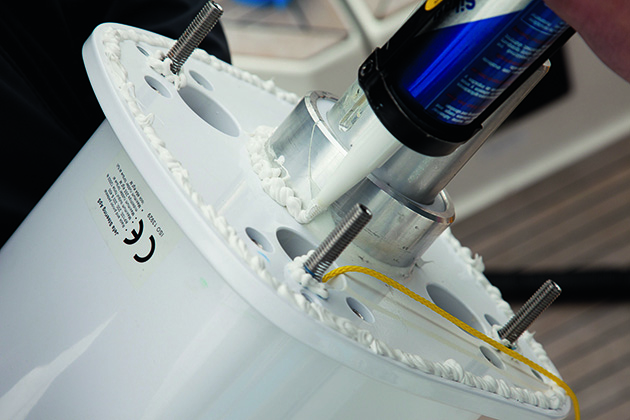
2. Plenty of sealing compound is applied around the base and the fixing studs…

Credit: David Harding
3… and then the pedestal, minus the wheel for ease of handling, is lowered into place for what should be the final time.
Credit: David Harding
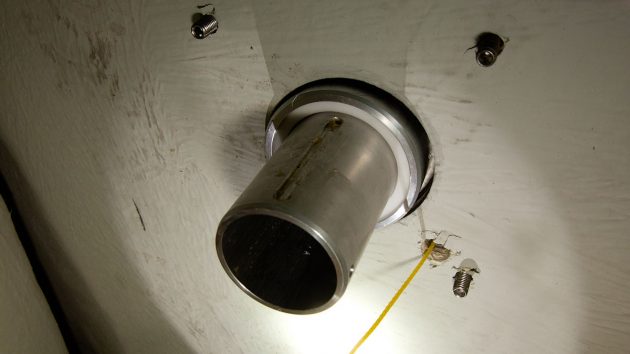
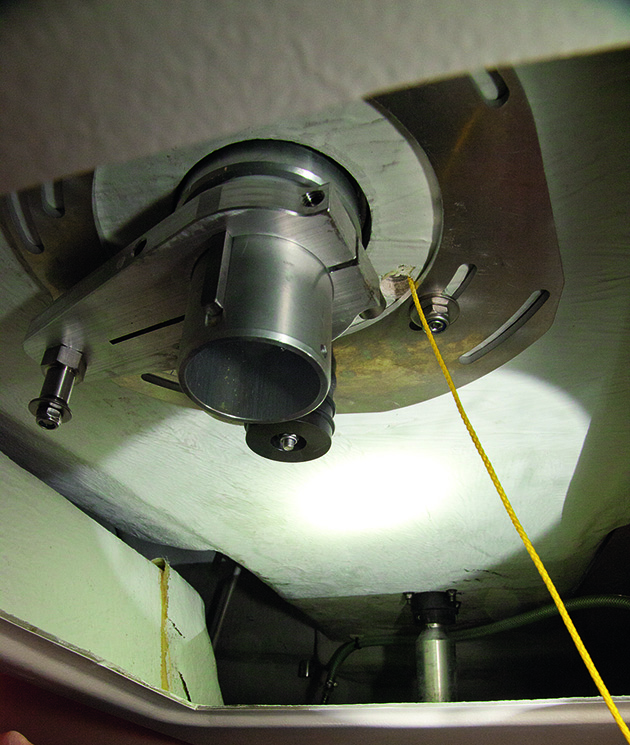
4. This is what it looks like from the aft cabin, with the drive tube protruding and the mousing line threaded through.

Credit: David Harding
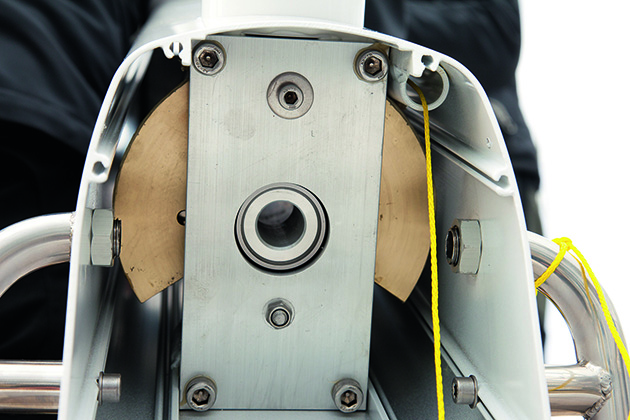
5. Next comes the stop-ring – a plate that incorporates the rudder stops…
Credit: David Harding
6… and a degree scale so the correct offset angle can be achieved. This is to make sure the output lever (to be fitted on the bottom of the drive tube) and the tiller arm are set at the angle that gives the best mechanical advantage when they’re connected by the drag-link bar.
Credit: David Harding
7. With the length of drag-link used here, the angle is 8°, so the ring is rotated accordingly before being tightened.
Credit: David Harding
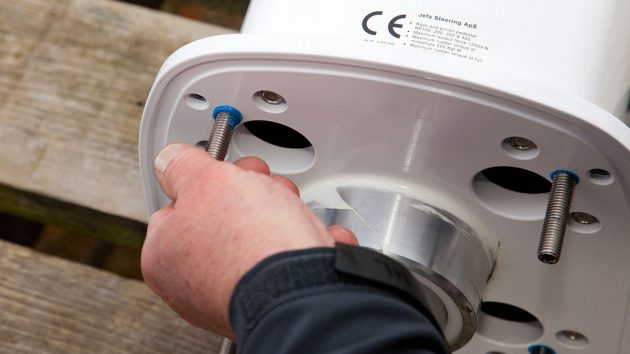
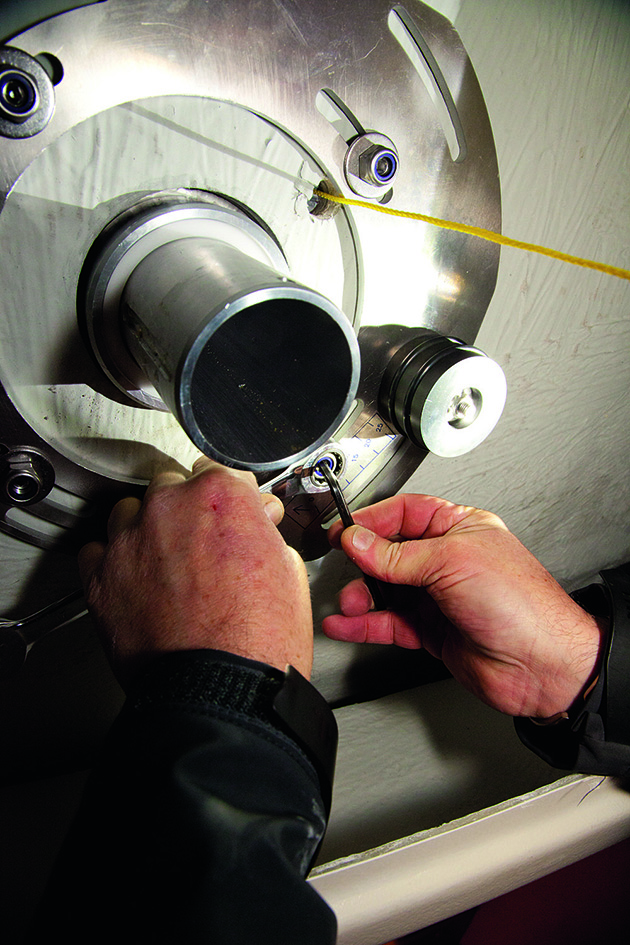
8. Now the output lever is fitted over the drive tube with the keyway.
Credit: David Harding
9. Here the output lever is in its working position on the starboard side as we look aft to the rudder stock.
Credit: David Harding
10. Fixing the drag-link to the output lever.
Credit: David Harding
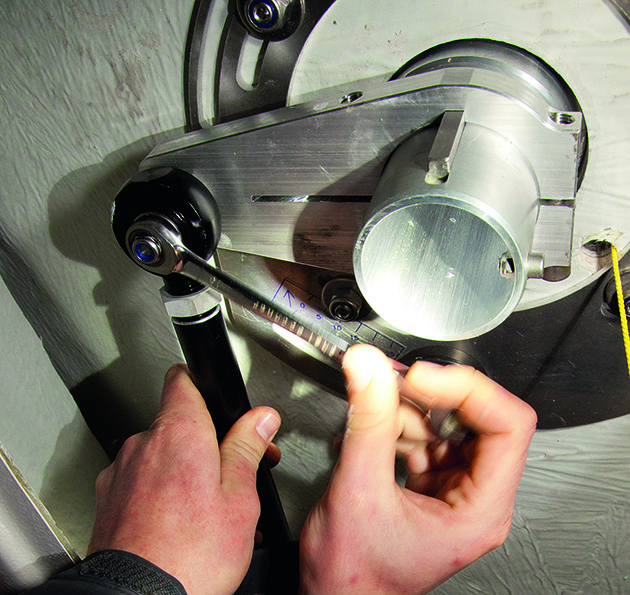
11. Its length adjusted (there’s about 100mm of adjustment), the drag-link is secured to the tiller arm.
Credit: David Harding
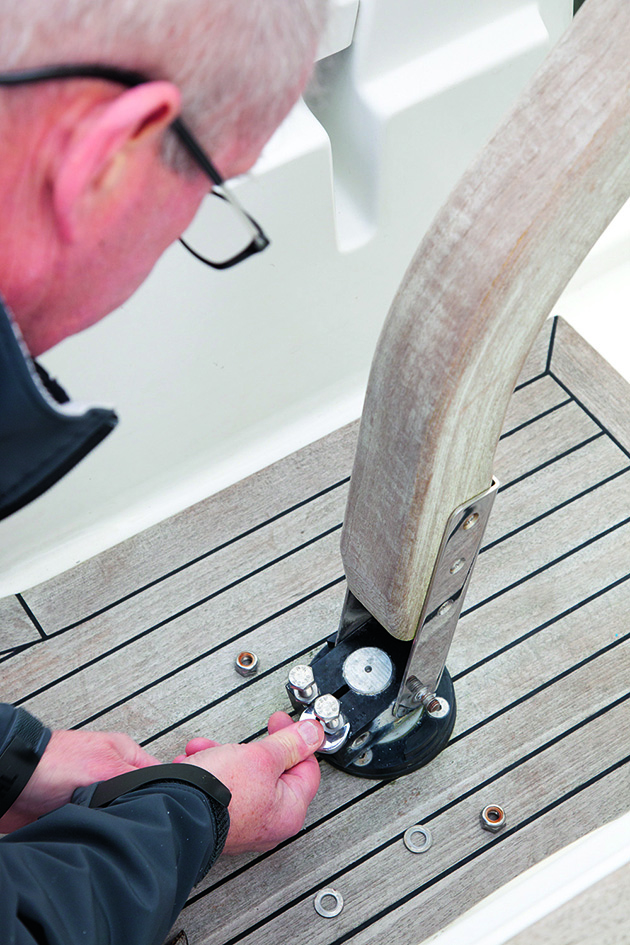
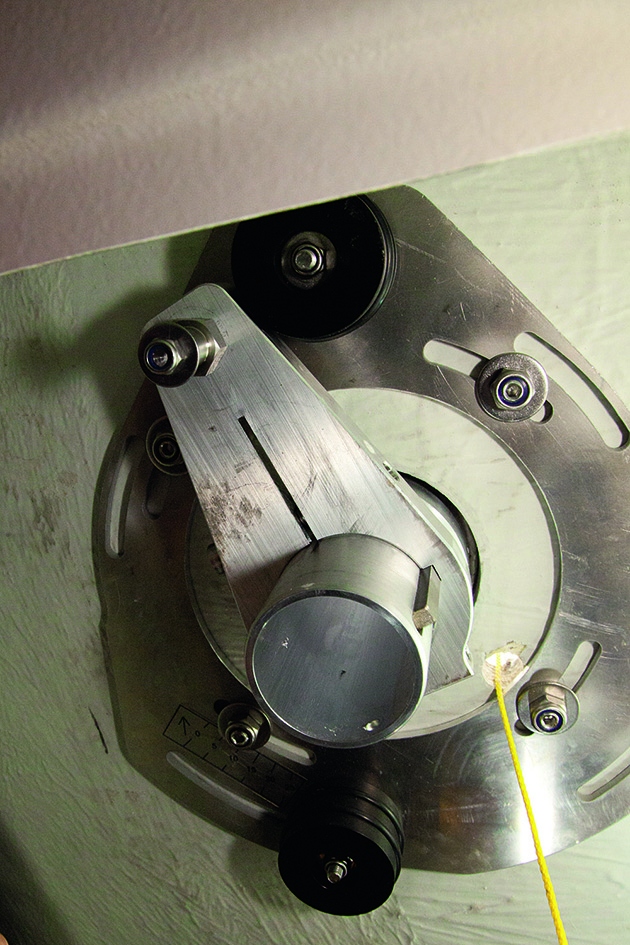
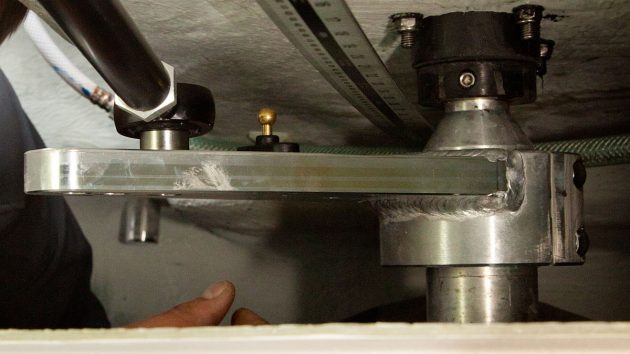
12. The tiller arm, here secured to the rudder stock with pinch-bolts, has an inboard and an outboard position for the drag-link.

The tiller arm (left) on the rudder stock is longer than the output lever on the drive tube (right). Combined with the offset angle (B), this maximises mechanical advantage when the rudder is on full lock
Outboard gives lower gearing – more turns of the wheel to move the rudder.
Moving it in towards the stock gives higher gearing.
Credit: David Harding
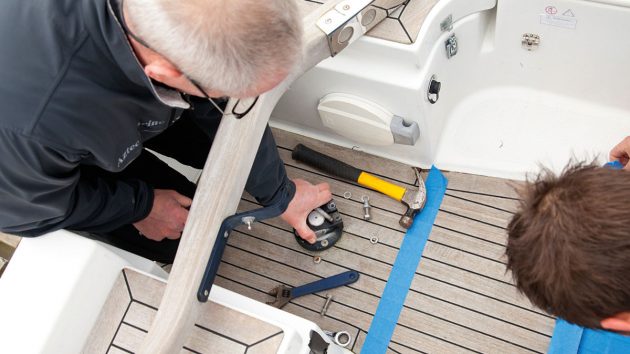
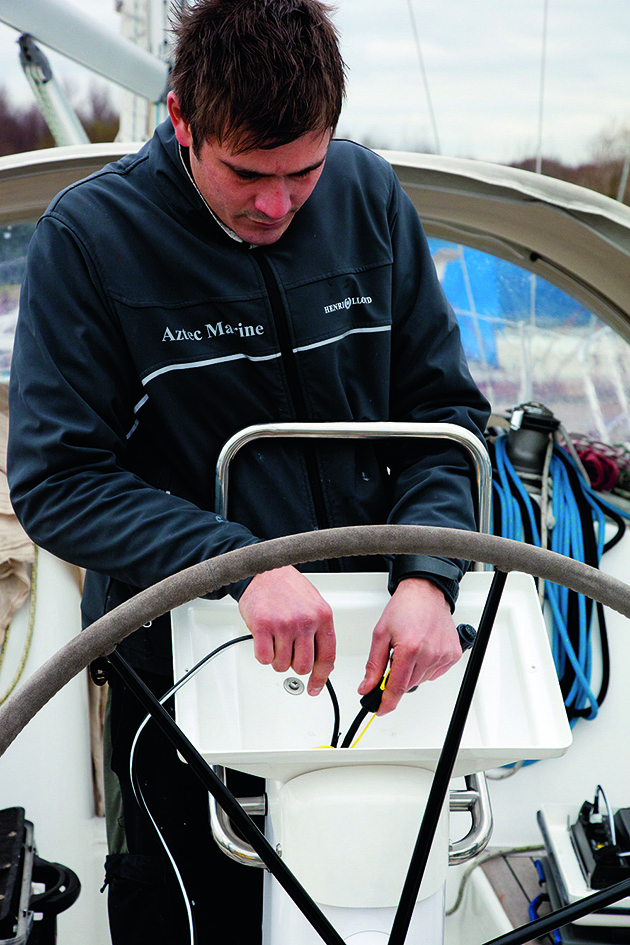
13. Back on deck, the electrical cabling can now be fed down through the conduit
Is tiller to wheel conversion a job for a practical boat owner?
On boats that, like the Hanse, were built with wheel steering in mind, conversion shouldn’t be a difficult job.
Most important is to measure, check and measure again before cutting or drilling.
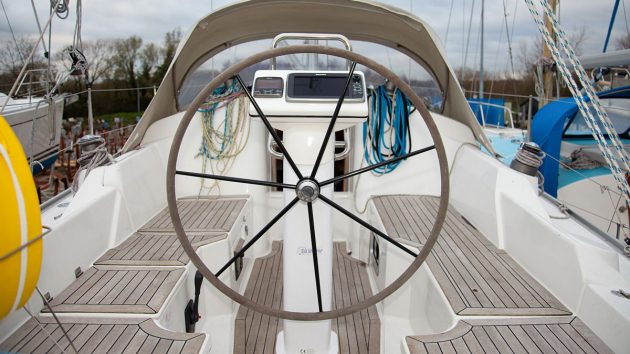
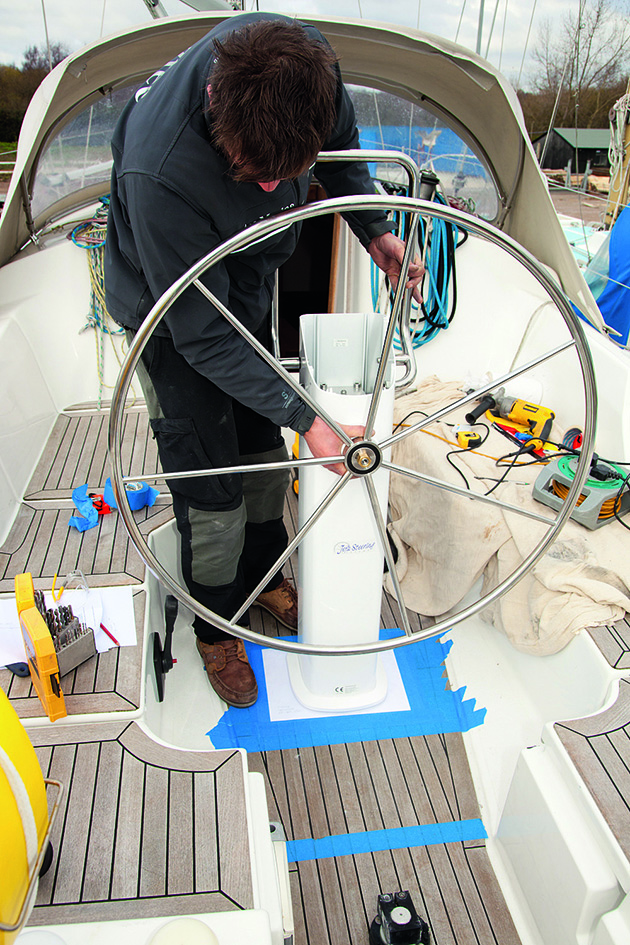
With the instruments installed and a smart new wheel fitted the tiller to wheel conversion is complete. Credit: David Harding
Two pairs of hands make life much easier than just one: three is better still.
Continues below…

Boat modifications: how to design changes for your yacht
Yacht designer Ian Nicolson explains how to make changes to living space on board

Rebuilding a damaged mast step
Rupert Holmes repairs a compressed water-damaged mast step – a common problem for boats with a deck-stepped mast - and

How to build a rudder for your boat
Hitting a submerged object destroyed Mike Gudmunsen’s rudder...so he set about making a new one

Gelcoat repair: How to make an invisible repair
Everything you need to know to make an invisible gelcoat repair, from preparation and filling to topcoat and polishing
If you’re converting a boat that wasn’t designed to have a wheel it’s going to be more complicated, but the suppliers of the steering system you choose should be able to offer advice and support for a DIY installation.
Facts and figures:
- Cost of the conversion kit: Around £3,433
- Tools needed: drills, hole saw (105mm/4in) spanners, Allen key, sealant, thread-lock, rulers, pencil, masking tape, tape measures, lights/torches
- Time taken: three hours for three people, plus the time to clear the cockpit locker and cut out the panel in the headliner.
Enjoyed reading this article? 
A subscription to Practical Boat Owner magazine costs around 40% less than the cover price.
Print and digital editions are available through Magazines Direct – where you can also find the latest deals.
PBO is packed with information to help you get the most from boat ownership – whether sail or power.
-
-
-
- Take your DIY skills to the next level with trusted advice on boat maintenance and repairs
- Impartial in-depth gear reviews
- Practical cruising tips for making the most of your time afloat
-
-