
Rupert Holmes repairs a compressed water-damaged mast step – a common problem for boats with a deck-stepped mast - and saves £700

The problem with the mast step of Ammos, my 9m (30ft) Discovery 3000, was a surprisingly common one – water penetration into the wooden block sandwiched within the deck moulding under the deck-stepped mast.
It was my own fault, really – not replacing dodgy deck glands for the mast wiring that had already been gunked up with silicone by a previous owner.
Most boats with deck-stepped rigs have such a block of timber sandwiched inside the deck moulding under the plinth for the mast step.
The best builders use hardwood for this purpose as it resists water ingress for longer.
However, many are plywood, and even the best marine grades eventually lose structural strength on getting wet.
Why didn’t I wake up to the fact that old deck glands gunked with silicone were bound to cause problems eventually? Credit: Rupert Holmes
Identifying the problem is generally easy – the mast plinth becomes visibly dished, the rigging slackens and tensioning the rig just drives the mast heel progressively further into the deck.
Before starting work in earnest I also needed to check for problems associated with the compression post that transfers loads from the rig to the keel.
If the lower end of the post is semi-permanently immersed in bilge water, problems here are also commonplace.
Fortunately the compression post on Ammos, an oversized aluminium tube, showed no sign of degradation or movement.
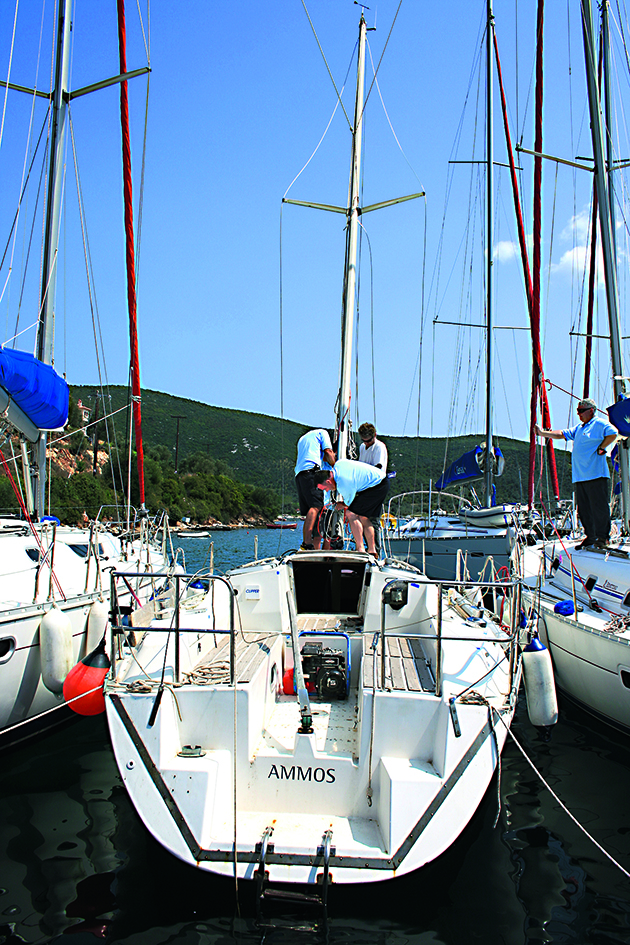
The next stage was to lower the mast, which we were able to do with help from a couple of friends with boats, using halyards from the top of their rigs to lift, support and lower the mast, and thereby avoid cranage costs.
With the rig removed we could clear away the old mast step and cable glands, ready to start work in earnest.
Away with the old mast step
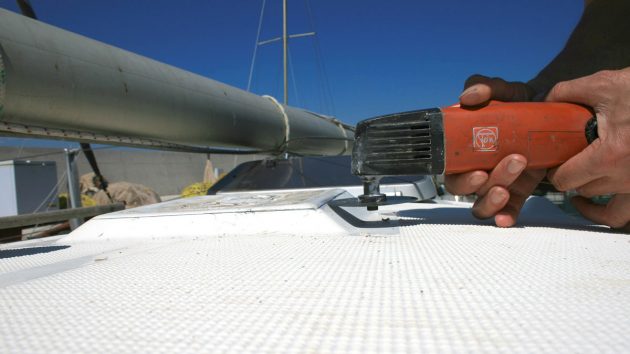
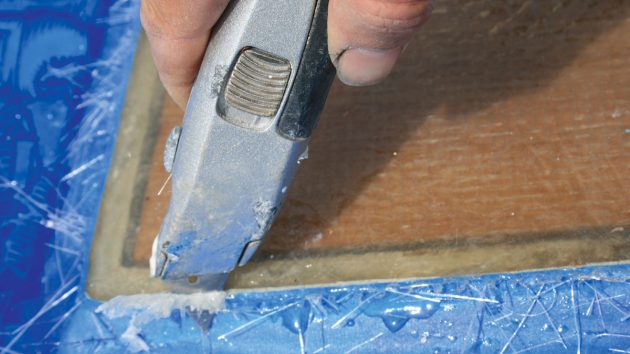
The first step was to remove the top layer of glassfibre laminate from above the mast plinth, but before I could do that I needed a line to which I could work.
I figured the thickness of the laminate here would be roughly the thickness of a pencil, so I placed a wooden board over the plinth and drew round it to give a line to work to.
In the past I would have used an angle grinder at this stage, even though it’s unpleasant, messy and difficult to work to an accurate line.
However, this time I used a saw blade in an oscillating multi-tool. Although the initial progress was slower than with a grinder, the tool made it easy to work to an accurate line.
In less than half an hour I was through this stage of the job, with virtually no clearing up or making good to do.
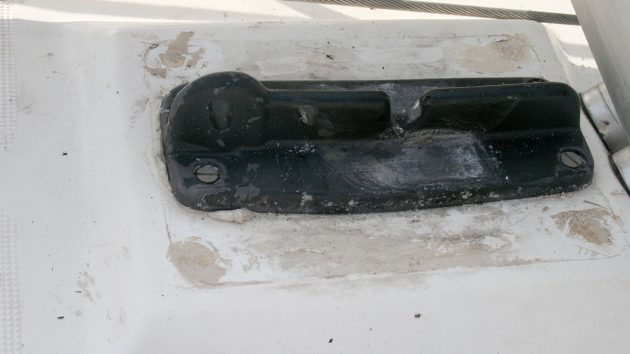
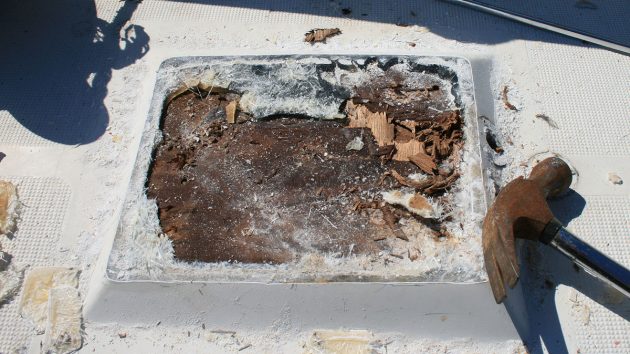
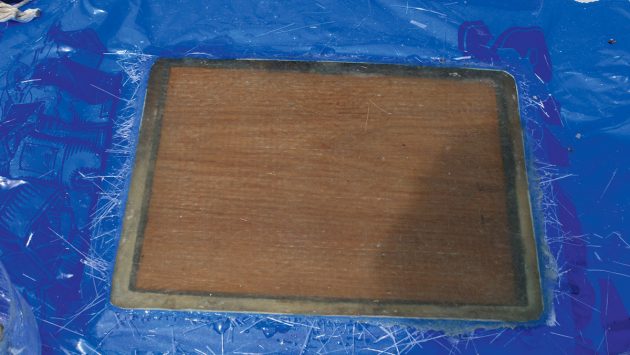
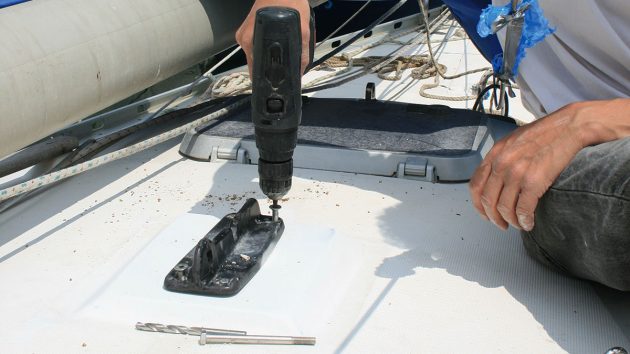
The old mast step – it didn’t look good. Credit: Rupert Holmes
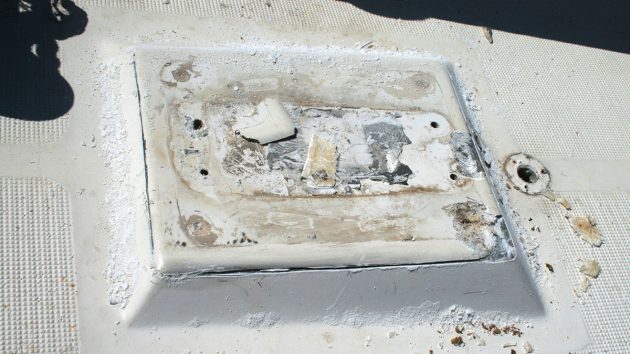
Next it was a case of chiselling the top section of glassfibre off the plinth to lever the laminate away.
It turned out that I hadn’t quite made the saw cut sufficiently low down, but it still only took five minutes to peel the lid off the plinth.
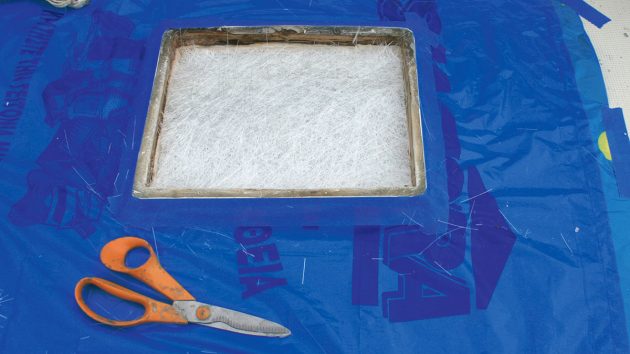
At first sight the plywood looked in better condition than I had expected, but it was obviously damp – and when prodded with a screwdriver, there was almost no resistance. It therefore had no hope of standing up to the considerable loads imposed by the rig.
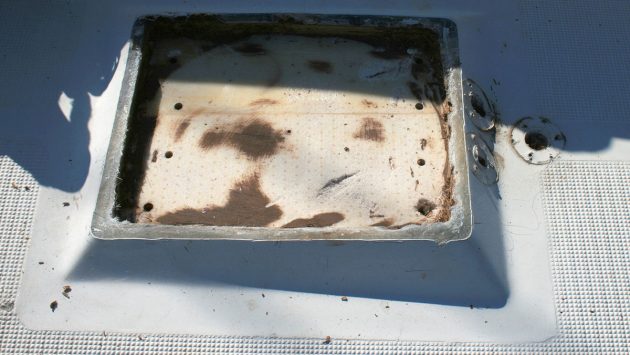
The ply was easily removed and the area quickly cleaned up.
This, rather surprisingly, revealed that the deck’s foam core had not been removed from under the mast step when the boat was built.
It’s a type of foam that clearly absorbs resin, so it was well wetted out and did not appear to have compressed.
However, I felt that leaving it in place would risk storing up future problems, so I removed it using a large chisel.
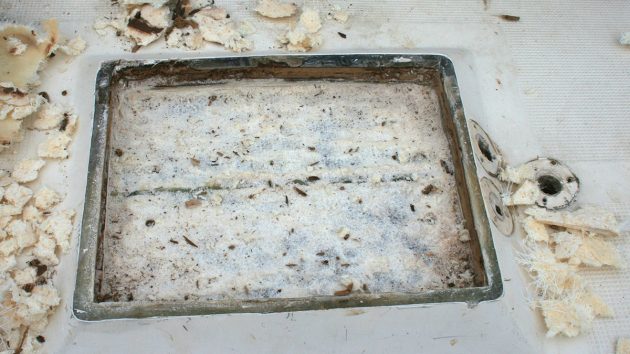
I then cleaned up the area ready to receive a well-seasoned block of oak that would both replace the original plywood and make up for the thickness of the foam core.
Removing the old mast step: step-by-step
Credit: Rupert Holmes
1. The oscillating multi-tool saw was much better for the job than an angle grinder
Credit: Rupert Holmes
2. It was easy to work to an accurate line and created very little dust
Credit: Rupert Holmes
3. After levering the top of the plinth away, the wet plywood block was revealed
Credit: Rupert Holmes
4. I was surprised to discover the foam core from the deck moulding under the mast step – it is normally removed under highly loaded fittings when a boat is built
Credit: Rupert Holmes
5. Work in progress with most of the plywood and foam core removed
Credit: Rupert Holmes
6. Masked up and ready for the glassfibre work to start
Ready to laminate
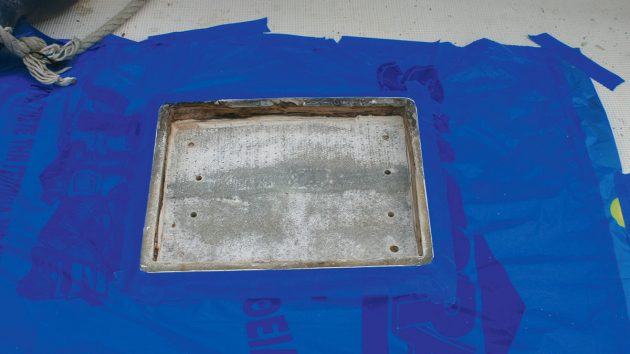
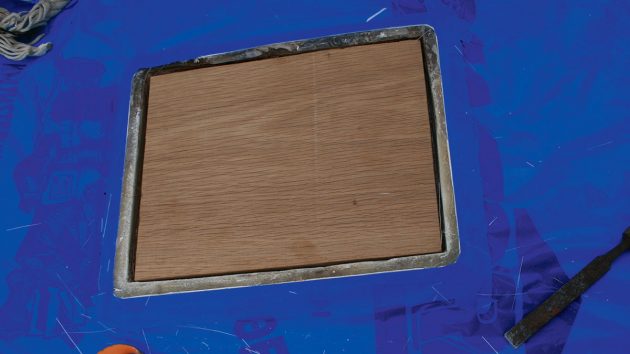
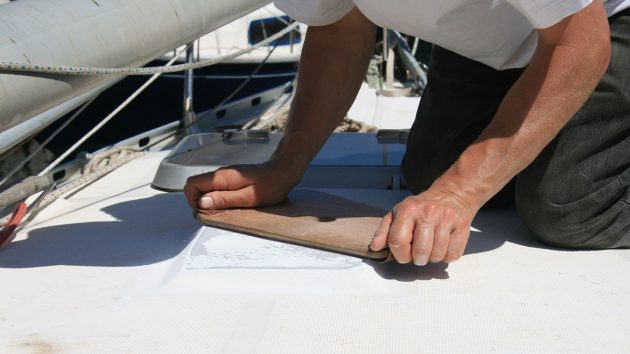
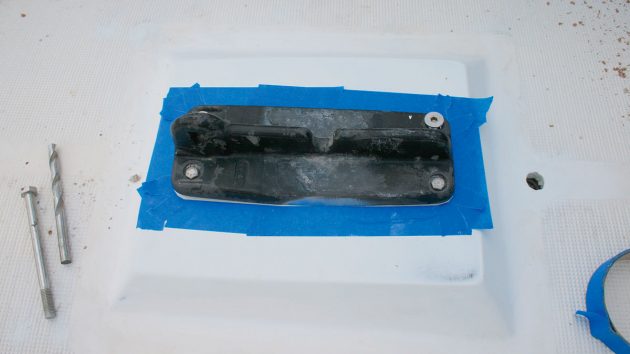
After confirming that the oak block was exactly the right size we were ready to start laminating.
First we masked the undamaged gelcoat around the plinth – five minutes spent at this stage saved hours of tidying up at the end of the job.
We started by laminating three layers of chopped strand mat below where the oak block would go.
Next we mixed a filler of resin, glass fibres cut into very short lengths and enough colloidal silica to give the mix a consistency that would enable it to stand in peaks like a meringue.
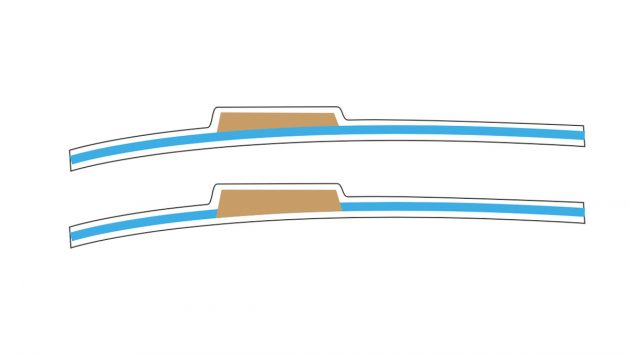
A cross-section of the coachroof showing (above) the (old) mast step, laminate, foam (blue) and plywood, with the plywood (in brown) sitting on top of the foam core and (below) the new mast step, laminate, foam but with only the tapered oak block (brown), the foam having been removed in the way of the mast step
This was then laid into the bottom of the mast step, with the oak block placed on top.
As well as bonding the oak to the glassfibre underneath, this also filled any voids within the plinth, confirmed by the fact that we had to clean excess away from the top, all the way around the oak block.
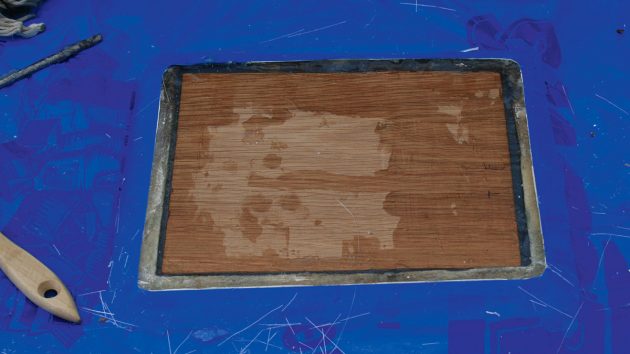
The final stage of the structural work was to rebuild the thickness of glass on the top of the plinth.
We used both chopped strand mat and woven rovings to restore the original strength, taking care to ensure each piece was cut to the correct size so as to avoid unnecessary work when tidying up later.
Once the resin on this was set, but before it was fully cured, a sharp knife was all that was needed to trim excess fibres away from the sides of the repair, leaving a minimal amount of refinishing to do on the sides of the plinth.
Getting ready to laminate: step-by-step
Credit: Rupert Holmes
1. First, we laminated three layers of chopped strand mat into the bottom of the mast base
Credit: Rupert Holmes
2. The oak block was checked for size before gluing it in place
Credit: Rupert Holmes
3. The block after being laid in place on top of the filler–the excess has already been removed
Credit: Rupert Holmes
4. With the new glassfibre laminated on top
Credit: Rupert Holmes
5. Trimming the excess laminate off the edges
Credit: Rupert Holmes
6. With the masking removed, there was minimal tidying up to do at the edges
Cosmetic finishing
With the structural work completed, we could turn our attention to replacing the gelcoat.
At this stage, readers might get the impression that the job was mostly done: but cosmetic refinishing can easily take as long as both the preparation and the structural work.
Before applying gelcoat we sanded the top of the new plinth with a coarse grade of sandpaper to knock off any high spots in the new laminate, reducing the amount of filling and fairing needed to achieve a smooth finish.
A stiff plywood board proved ideal for this, ensuring the entire area was sanded evenly.
An electric sander might have been marginally quicker at this stage, but would have required a greater level of skill to achieve a perfectly level result.
The single most skilled part of such a project is arguably to colour-match the gelcoat.
Continues below…

Gelcoat repair: How to make an invisible repair
Everything you need to know to make an invisible gelcoat repair, from preparation and filling to topcoat and polishing

Installing mast steps with rivetnuts
When we first launched our Leisure 27, Windrush, we noticed that the anemometer cups were missing. A few weeks later…
How to trace tricky boat leaks
Boat leaks are the bane of a sailor’s life, but with patience their source can be traced. Here are some…

Maintenance on a boat: 71-point skipper’s checklist
Make sure your boat is ready to go back in the water with Practical Boat Owner's comprehensive guide
First, the original shade of the gelcoat needs to be exposed by cleaning and polishing an area to remove the oxidised, sun-damaged surface.
This will probably appear to be a different shade to the rest of the moulding.
Fortunately, in our case only the top of the plinth needed to be coated in gelcoat, so a slight mismatch would not show as clearly as a repair in the middle of a large expanse of glassfibre.
We were able to get a tolerably close match to the original by adding a few drops of ochre, grey and red to white gelcoat.
It’s best to mix up a reasonable amount of gel of the correct colour, rather than attempting to colour-match each batch to which you add hardener.
We used flowing (liquid) gelcoat for this, rather than the tubes of gelcoat filler sold by chandlers, which are usually a different type of product and therefore not a true gelcoat.
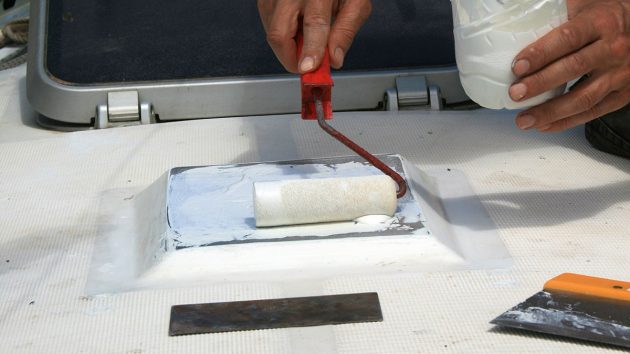
The first application of this was mixed with colloidal silica – again adding enough to enable the mix to stand in peaks like meringue.
The secret to an efficient fairing job is to apply a minimal amount of filler so that only the bare minimum of sanding needs to be done.
We applied the filler with an 8in-wide plasterer’s taping knife, which proved ideal for the purpose.
After another sanding with coarse paper, further layers of filler were applied and sanded until the top of the plinth was absolutely smooth.
Final finishing
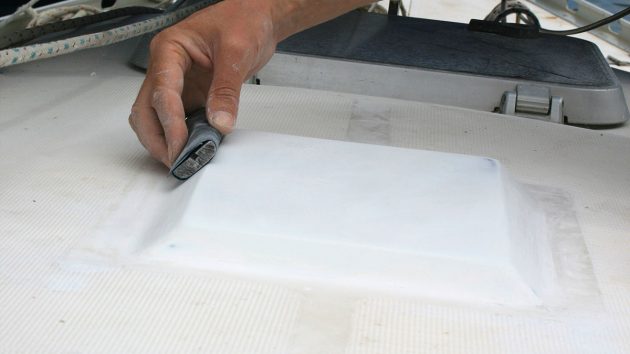
The next stage was to start painting on plain gelcoat without filler. We used a roller for this, putting on half a dozen coats.
At the same time, the colour-matched gelcoat was also used to fill a number of other nicks and dings in the deck moulding, including two of the old holes that had been cut for deck glands.
Then it was back to sanding, initially with 240-grit paper, before gradually working through to 1,200-grade wet and dry.
This is sufficiently fine for the gelcoat to be polished afterwards.
Back on a solid footing – the mast stepped, with halyards to the running rigging re-reeved and wiring running through the deck gland, which was repositioned to be clear of the timber block in the mast step. Credit: Rupert Holmes
Normally, after polishing, two coats of wax should be applied to prevent the surface fading and oxidising: however, unless the surrounding area is polished back to its original finish, delaying the waxing stage will accelerate the rate at which the new material fades towards the shade of the rest of the deck.
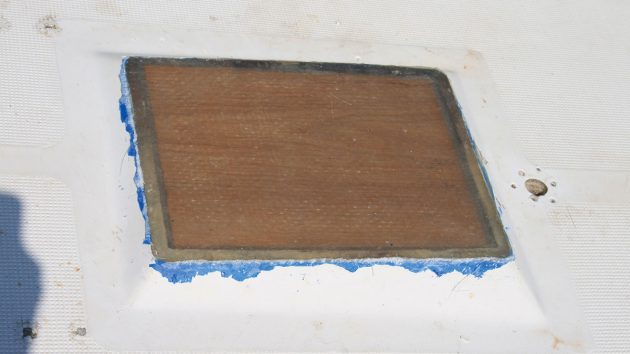
With the cosmetic work finished, the new mast step was fitted, bedding it down on Sikaflex 291 polyurethane adhesive sealant to ensure a long-lasting seal.
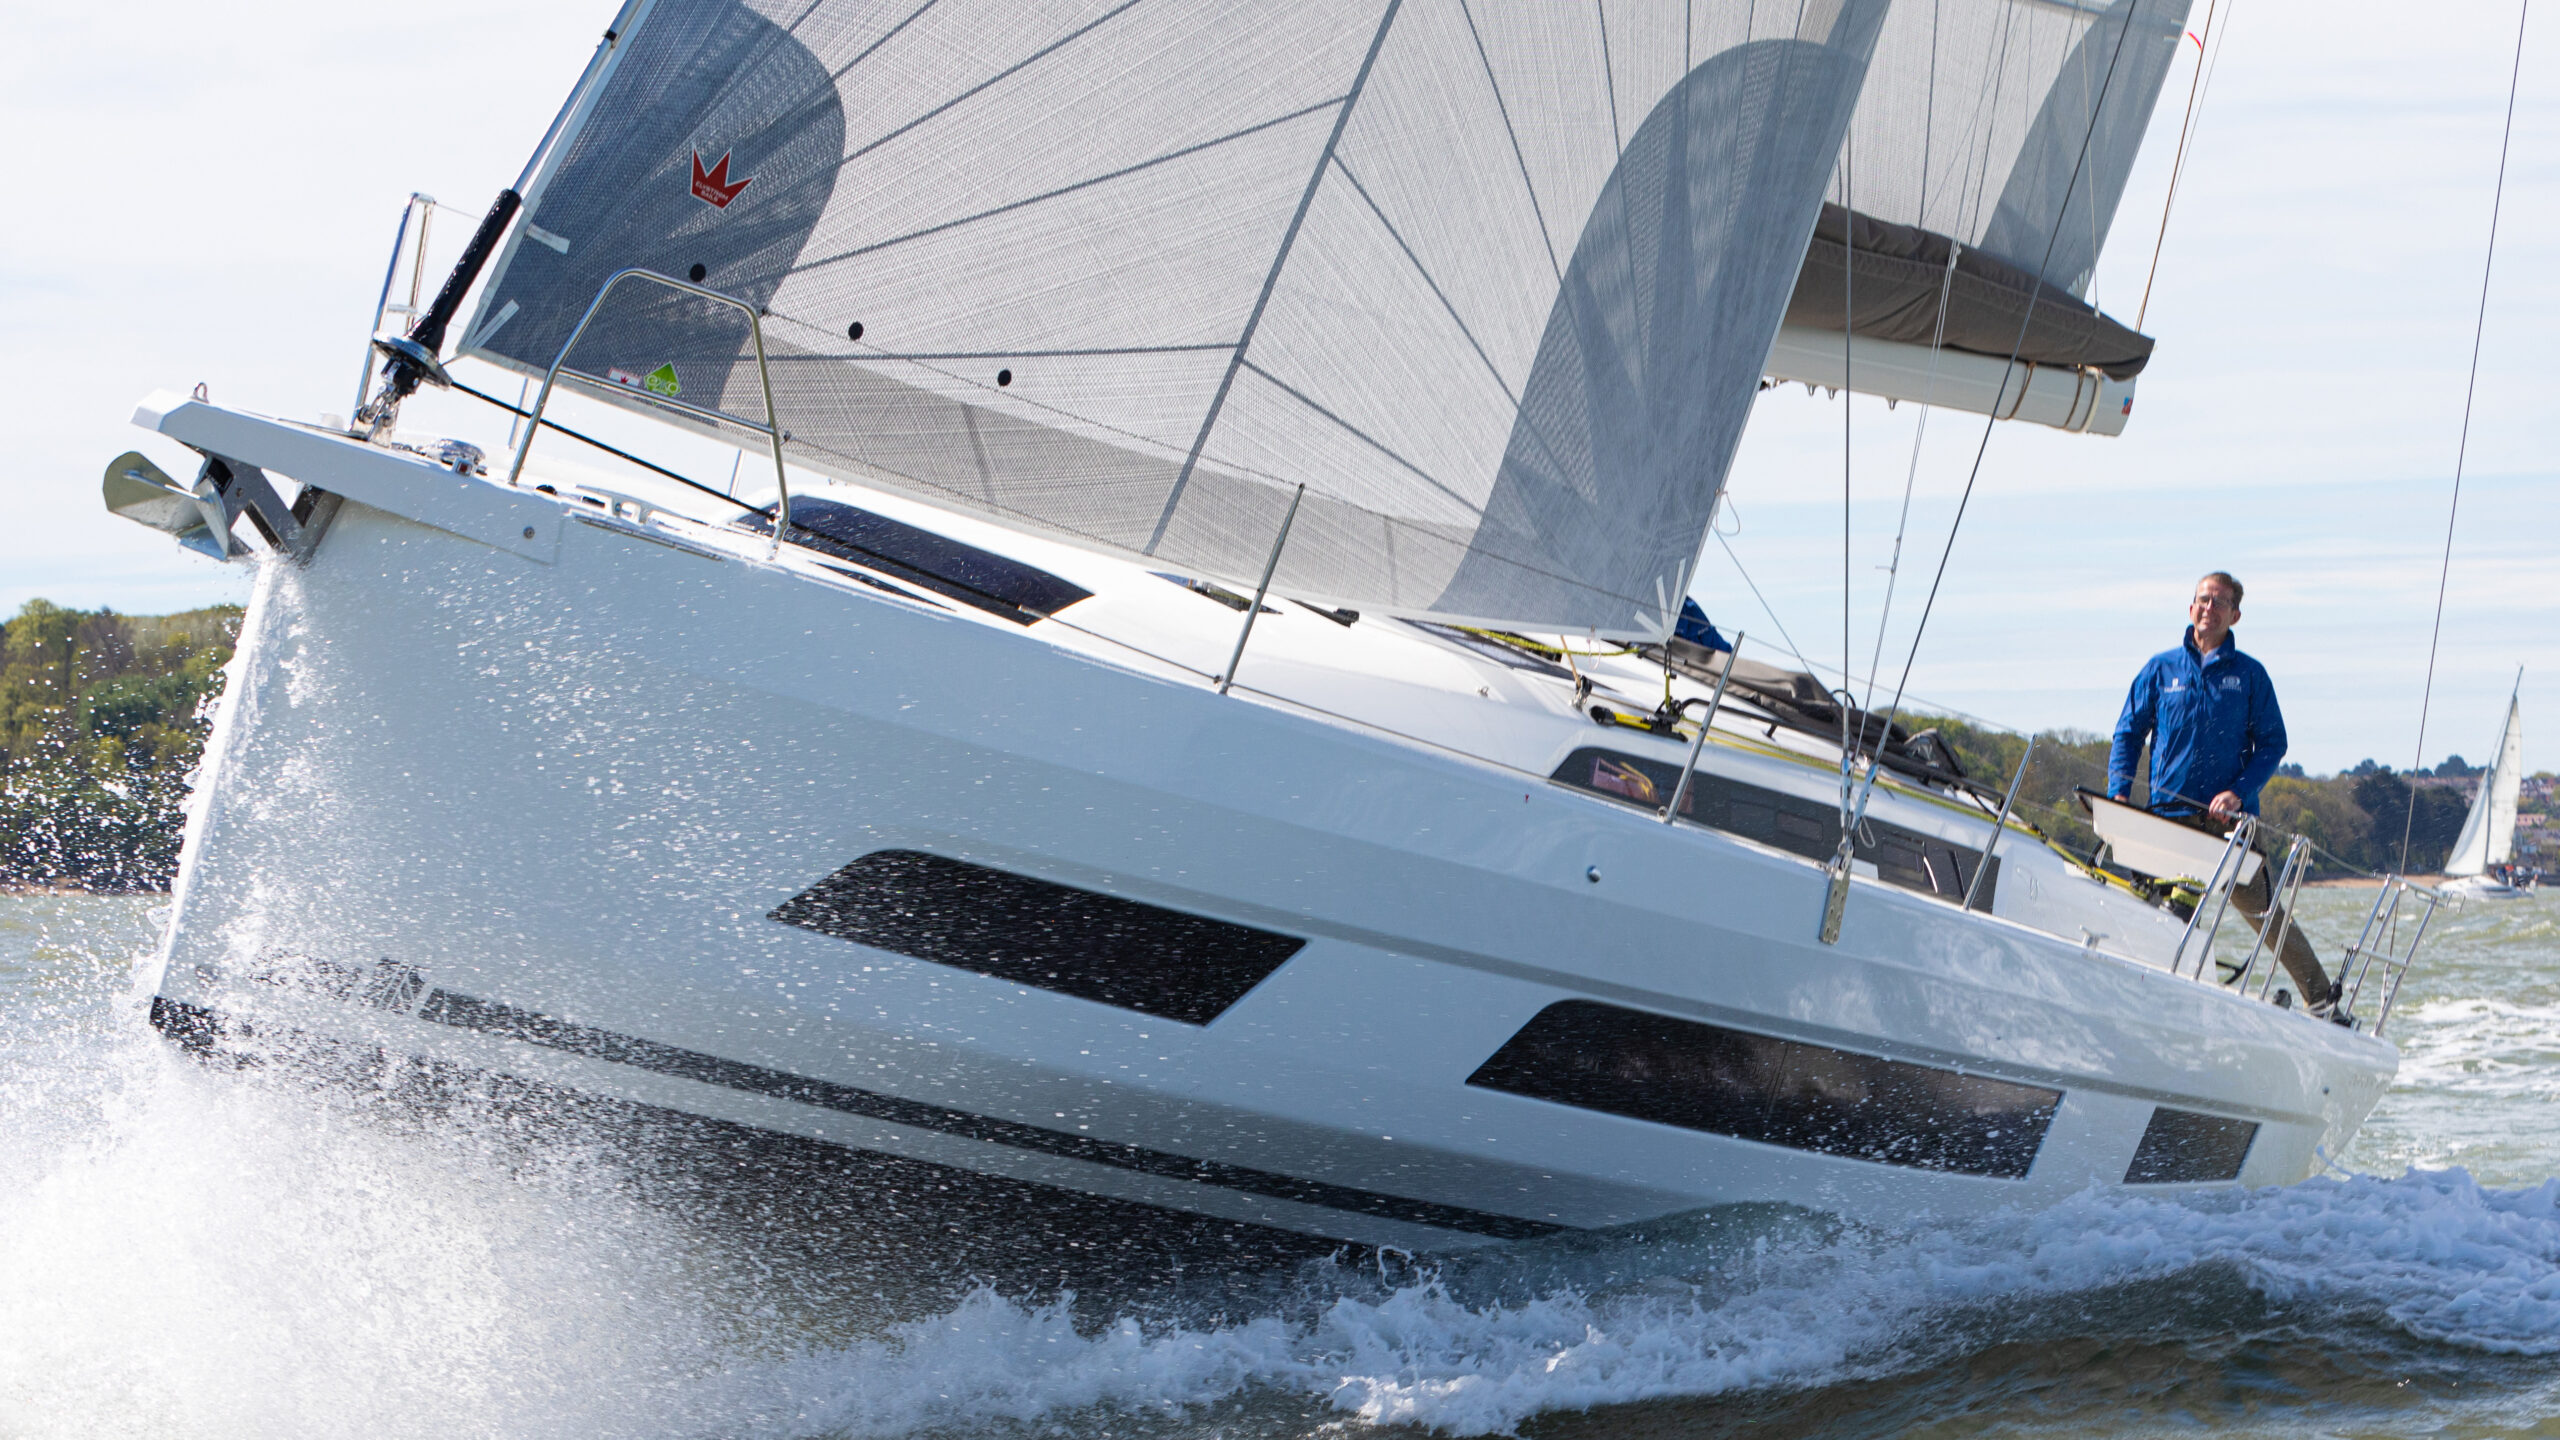
Then all that was left was to restep the mast, for which we again enlisted the help of friends in a reversal of the procedure for lowering the rig.
The end result is a better job than the foam and plywood core Ammos was built with – and should last longer than the 18 years the original managed.
Since carrying out the work we’ve sailed more than 4,000 miles, including a significant distance upwind in more than 25 knots of breeze, with no sign of movement or other problems.
Cosmetic/final finishing: step-by-step
Credit: Rupert Holmes
1. Sanding the gelcoat filler mix using a stiff plywood board
Credit: Rupert Holmes
2. Applying the first gelcoat layer with a roller – we put on six coats in all

Credit: Rupert Holmes
3. The mast step plinth with the new gelcoat, but before sanding
Credit: Rupert Holmes
4. Sanding was a painstaking process, working through many grades of abrasive paper
Credit: Rupert Holmes
5. Fitting the new mast step – it was bedded down on a marine-grade PU adhesive sealant to prevent future problems
Credit: Rupert Holmes
6. The new mast step, completed and in situ on Ammos, is now ready to accept the mast
Lowering the rig
Given a couple of willing friends with boats, and careful coordination, it’s possible to lower the mast without a crane.
Start by rafting the three boats together, with yours in the middle, then tie a halyard from each of the boats under your spreaders.
Also, securely tie a guide rope around the mast foot – this is used to control the heel of the rig as it’s lifted.
Lowering the rig. Credit: Rupert Holmes
Tension the halyards to support the rig and disconnect the standing rigging.
The critical part of the operation is when the rig lifts off the mast step, as the mast heel will start to swing immediately.
When raising the rig, locating the mast on its step is the most precise stage of the operation, requiring good communication between the crews on each boat.
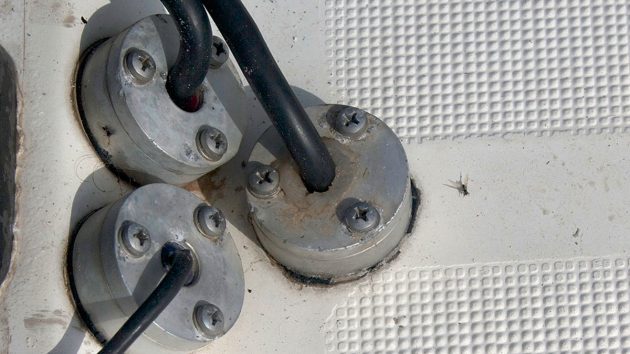
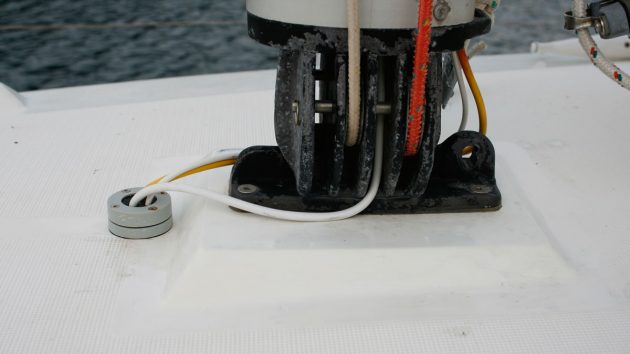
Deck Glands
Creating an effective seal at the point at which cables pass through the deck can be a perennial problem with deck-stepped masts, so these are the most likely sources of water getting into the mast step.
Combining all the cables into a single loom and passing them through a sealed swan neck fitting is perhaps the best permanent solution.
This will allow the cables to pass through the deck without hindrance and without water getting below.
However, they are difficult to source, and I was unable to find one of an appropriate size for Ammos.
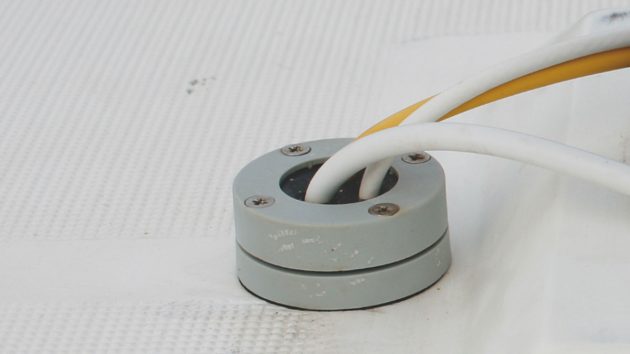
Deck glands provide seals for cables. Credit: Rupert Holmes
Deck glands with a tapered body and seal, such as those from Index Marine, will produce a good seal around the wire.
However, the rubber will degrade over time due to ultraviolet exposure, so the gland needs to be replaced periodically.
Damage is accelerated each time the wire is pulled through the rubber part of the gland, so it’s worth replacing this each time the mast comes down – the cost and the time involved in doing so is minimal compared to remedial work on the mast step.
Enjoyed reading Rebuilding a damaged mast step? 
A subscription to Practical Boat Owner magazine costs around 40% less than the cover price.
Print and digital editions are available through Magazines Direct – where you can also find the latest deals.
PBO is packed with information to help you get the most from boat ownership – whether sail or power.
-
-
-
- Take your DIY skills to the next level with trusted advice on boat maintenance and repairs
- Impartial in-depth gear reviews
- Practical cruising tips for making the most of your time afloat
-
-