
Boat leaks are the bane of a sailor’s life, but with patience their source can be traced. Here are some ideas of where to start...

Boat leaks are just a part of boat ownership, right? Wrong! An (almost) leak-proof boat might seem like the Holy Grail – but it is achievable with patience and a thorough approach to problem-solving. Here is a simple procedure to follow should you find boat leaks. We’re not talking huge quantities here – if there’s a big leak you’ll need to make your way to a hoist ASAP – but for smaller boat leaks here’s what to do…
Tackling boat leaks Step 1: Taste it!
Assuming it’s not swimming with oil or diesel (or sewage, which leads straight to the holding tank!), dip your forefinger into the water and give it a quick taste to see if it’s salty or fresh.
Step 2: What kind of sailing have you been doing?
It’s worth reminding yourself of the weather conditions and the use your boat has had since you last looked in the bilges. If she’s been sitting on the mooring and it’s been pouring with rain, then finding fresh water in the bilges might mean that it’s a leak from above decks. If, on the other hand, you’ve been doing some serious sailing with the rail submerged in heavy weather, then the presence of salt water could lead to a leaky deck fitting.
Boat leaks above the waterline
Water tanks
The first thing to check with a freshwater leak is the freshwater tank. Flexible bladders can puncture, hoses can slip off and taps and seacocks can leak, depositing the contents of the tank into the bilge. You should be able to reproduce the leak, if it is the water tank, by baling the bilges and adding more water to the tank with a hose, monitoring the bilge water level while you do so. If it’s not the freshwater tank, you can move on.
Windows
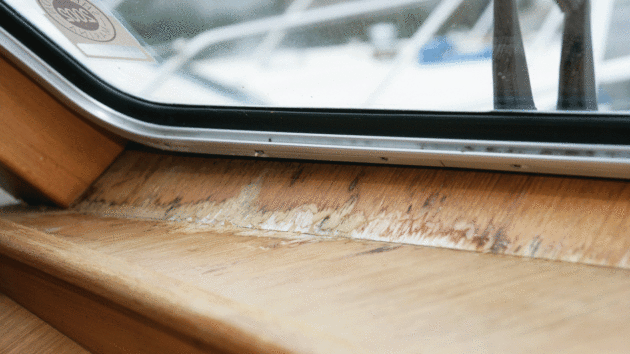
Window fittings are a common source of leaks. Credit: Graham Snook
Windows, especially as boats get older, are a common leak point. Test these with a hose or bucket of water. If you have simple acrylic windows bolted on, you may get away with tightening the fixings. However, other windows, especially those with complex aluminium frames, may need stripping and rebuilding, which is a tricky and time-consuming job. It’s rarely totally successful to attempt to seal these in situ, but it’s worth trying to add extra sealant to areas where it’s sparse, and products such as Captain Tolley’s Creeping Crack Cure can be effective in fixing small cracks and leaks. However, at the end of the day, you’re probably looking at taking them out in the winter.
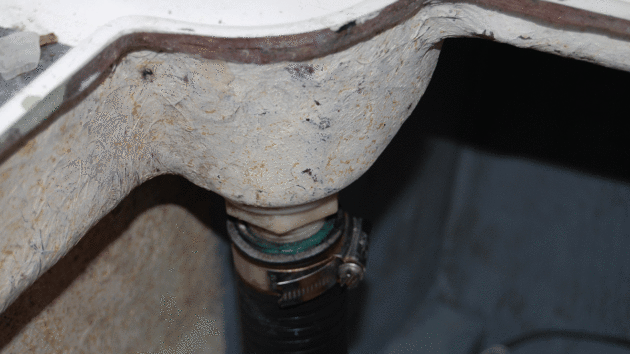
Deck glands
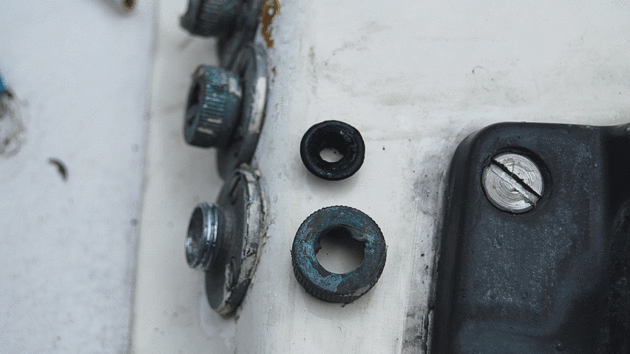
Rubber gaskets can perish over time, allowing water to seep in through deck fittings
The fittings designed to keep water out where wires pass through the deck are another common source of leaks. Check these by pouring a bucket of water over them while someone looks on from down below. Common failures include the rubber gaskets wearing out, or the wires being too small for the gland. You can make a quick fix with Sikaflex or another sealant. Some of the better glands that allow a plug to pass through are of the J-hoop type.
Hull-deck joint
The area where the hull is joined to the deck is also a potential leak point, especially if the boat has been damaged or hit. Check with a hose, but you may have to look behind built-in furniture or lockers. The hull-deck joint can be tricky to reseal, so eliminate all other leak ideas beforehand! Leak sources vary: some joints are through-bolted, so resealing the bolts may fix it. Others are joined with a resin fillet which may have detached and need grinding back and replacing.
Chainplates
Chainplates are another common leak point. This can be serious, especially if they are bolted to a wooden bulkhead which can become rotten and lose much of its strength. That’s why if you suspect a chain plate leak it’s important to remove and check them ASAP. Again, you can test with a hose, but you can carry out a good check by looking for water ingress in the bulkhead’s wood. Any sign of blackened timber suggests a leak. Resealing these with a new set of bolts and some flexible, non-setting sealant will keep the water out.
Deck fittings
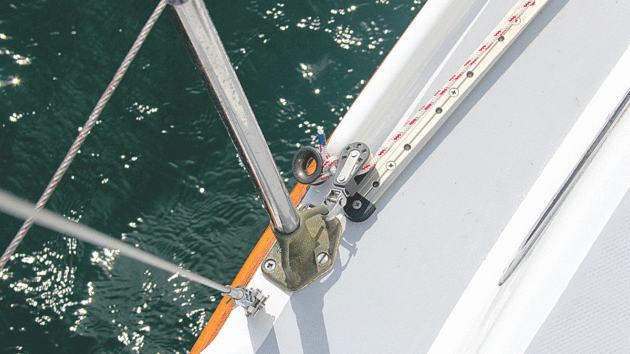
Stanchion bases are subject to heavy loads when people use them to fend off with, and they can shift and crack at the base, causing leaks
If you’ve been sailing the boat hard recently and there is a seawater leak, it’s worth considering all deck fittings as likely suspects. Stanchion bases, for instance, are subject to heavy loads when people use them to fend off with, and they can shift and crack at the base: therefore, checking with a hose for water ingress is sensible. Likewise, jib tracks and winch bases are sometimes submerged on the leeward rail and involve numerous holes in the deck. Toerails are another potential source: some of these only leak when sufficient force is applied (ie heeling under sail), and can be hard to locate.
Steering pedestal
One often-overlooked area for leaks on wheel-steered boats is the steering pedestal. This is subject to large loads, and as a long lever it puts a lot of force on the fixing bolts and layup, which can lead to leaks into the boat. Test with a hose, and get someone to apply pressure to the top of the pedestal to see if there is any movement at the base. Don’t forget the engine control cables too, which can leak where they pass through the deck.
Hatches and vents
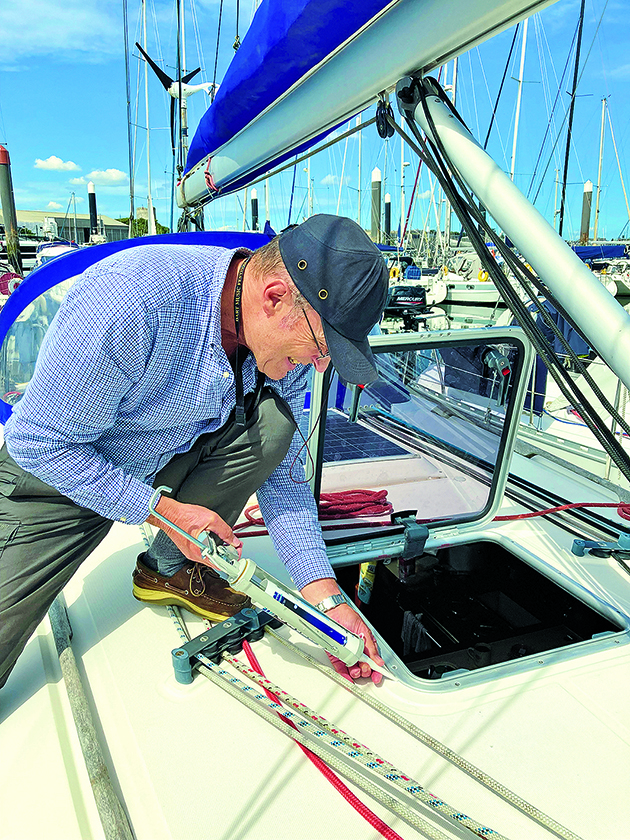
On deck fittings, ensure you seal the fastener head, the actual bolt hole, the shank and threads to prevent water ingress. Credit: Chris Mardon
Similarly, you may find that hatches and vents are liable to leak. If it’s a deck hatch, check the frame for warping – if warped, the seal can sometimes become ineffective. Also, check the seal for splits and damage – you can buy replacement seals for Lewmar and other hatches if this is the case. Test with a hose – you often find that hinges and handles leak once the hatch has reached a certain age. These can be relatively easily removed and resealed. Vents are also potentially leaky. ‘Tannoy’-style vents can be rebuilt as the baffles and plastic components get damaged by the sun. They also need stripping down – sometimes the fixing holes can leak, or the plastic base can crack, rendering the baffles useless. Strip these by removing the stainless ring, which should show the condition of the internals.
Keel-stepped masts
If you have a keel-stepped mast, it’s very common to find water running down inside the mast and ending up in the bilge. New masts have a foam ‘collar’ inside the mast with a drain hole at deck level, allowing any water that enters via cable or halyard holes to run out. As they age, these can break down and allow the water to flow straight down the mast into the bilge. They can be hard to fix, so it’s worth checking all other eventualities before attempting to do anything.
As a first step, check that the mast boot is tight and not allowing water in. Then, check the drain holes at deck level – these can sometimes become blocked. It’s also worth checking that the mast track isn’t letting water through – there should be something blocking it at deck level. If these don’t work, then the plug inside the mast may be leaking. There is little you can do other than remove the mast foot in the winter and explore with a torch. A rigger may be able to assist in making or sourcing a new plug.
Boat leaks below the waterline
Saltwater leaks are more worrying than freshwater as they imply that the sea is getting in! When searching for a salty leak, try working out the frequency with which it occurs; for instance, if it only appears when the engine is running, or perhaps after beating in heavy seas. This will help to identify the cause.
Engine water pump
As engine water pumps age, seals and metal components can wear, especially in silty water, and begin to drip. You can isolate this by placing a bucket or container under the water pump, or try observing it with the engine running. Fixing it is a case of stripping the water pump down and replacing the seals.
Engine hoses
Most diesel engines have a large water pump which shifts a lot of water around the engine at pressure. A hole in a hose, or a fractured spigot, can make it look like you’ve developed a hull leak when in fact it’s the engine, so it’s important to ascertain whether the leak is still there when the engine isn’t running.
Dripping stern gland
Another common cause of leaks is the stern gland. Traditional stuffing-box glands are designed to drip at around one drip per minute, but if you notice a larger influx of water than usual, this may be a sign that the compression nut needs tightening. If this is ineffective, the gland may require repacking, or the shaft may be scored. If a modern ‘dripless’ seal starts to leak, you have a more serious problem as the lip seal may be damaged: or, in other types, the bellows may have developed a leak.
Rudder posts
Similar in design to a stuffing box, rudder posts are liable to leak, especially if they’ve not been repacked for a while. Some boats have tubes which extend to deck level, while others are sealed at the hull, but it’s worth checking any type for leaks and damage or cracks, especially when moving the helm across hard and lock-to-lock. These can be among the trickiest to locate as they are usually in a tight space.
Cockpit drain hoses
Check the cockpit drain. It could have become holed or detached.
If a significant amount of water has made its way below, it could be that a cockpit drain hose has become holed or detached. If the water is fresh it’s likely to be the cockpit end that’s giving trouble. If salty, it could be the skin fitting end, but check the cockpit end too if you’ve been sailing with green water over the deck.
More serious leaks
With the easy suspects eliminated, you may find there is still an unexplained leak…
Holes in the hull
Even more unusual than keel bolt failure, a hole or crack in the hull is a possibility nonetheless. The key is to trace the water to its source (see panel) and keep a record of when the leak seems worst (eg after sailing on port tack in particular) to aid diagnosis.
Keelbolts
Keelbolt leaks are thankfully rare, but it’s worth looking for telltale signs. Rust around the bolts can be one sign, as can any cracking or signs of movement. Dry any water found around the bolts and monitor them carefully. If in any doubt, get the bolts checked out by a surveyor – drawing one can settle any doubt.
Ways to locate leaks
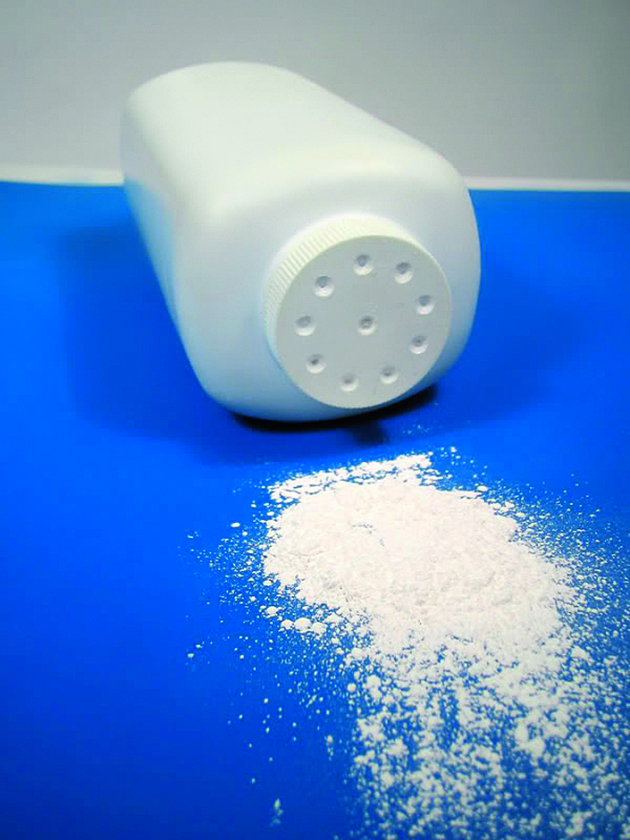
Tracking slow leaks can be aided by dusting an area (for instance, the hull, underneath several fittings) with talcum powder. This will show the tracks taken by a small amount of water.
You can mostly identify leaks with a hose, squirting water over deck fittings and other places mentioned above to find the culprit. However, actually following the track of a leak is surprisingly difficult. Where the water ends up is not necessarily where it entered the boat. Many modern production cruisers are built with an internal ‘matrix’ bonded to the hull: these in particular can distribute water to an area far from its entry point. But there are a few methods to let you discover the water’s route and likely source.
Hose
The first step is a visual check – remove any headlinings from your suspect fittings (checking, of course, for any blackening or discolouration of the plywood panels, which can help) and look at the fixings as someone squirts a hose or throws a bucketful of water over it.
Coloured water
Another method is to use different coloured waters, poured from different locations. Thus, using a red-dyed liquid from one area and a blue from another, you can see that if blue water ends up in the bilge, then you’ve found the leaky fitting. It can take days for water to emerge, so this is a slow process.
Build a dam
You can also isolate fittings, for instance individual keel bolts, using plasticine or Blu-Tack and seeing where the water pools.
Pressure testing
Another solution is to pressurise the inside of the boat by fitting the washboards and taping up any gaps, before gently pressurising the inside with a Hoover set to ‘blow’ or a leaf blower. Better still, if you know the exit of the leak, pressurise it like this with a footpump.
You can then go round any suspect fittings with a solution of soapy water, as you’d check a bike tyre with a pump, to see where air is exiting.
Talcum powder
Tracking slow leaks can be aided by dusting an area (for instance the hull, underneath a number of fittings) with talcum powder. This will show the tracks taken by a small amount of water. Using a sheet of tissue paper is another, less messy way to do this.
This is just a brief overview of some techniques, but we’d be interested to know what has worked for you: let us know! Email pbo@futurenet.com!
Using sawdust to plug leaks on wooden boats
Sawdust can be used to stem leaks between the wooden planks of a boat that’s been out of the water…

Boat hatch repair: how to stop the leaks
Fed up with water dripping into his boat's galley, Jose Molina decides to get out his tool box and fix…

Fixing and avoiding marine engine leaks
There is no need to put up with a leaky, smelly inboard engine. By dealing with small leaks as they…

How to use sealants for fixing leaks – PBO Project Boat restoration
A downpour of rain shows that making PBO Project Boat Maximus watertight is a priority, so Ali Wood gets some…

What to read more practical articles?
A subscription to Practical Boat Owner magazine costs around 40% less than the cover price.
Print and digital editions are available through Magazines Direct – where you can also find the latest deals.
PBO is packed with information to help you get the most from boat ownership – whether sail or power.
-
-
-
- Take your DIY skills to the next level with trusted advice on boat maintenance and repairs
- Impartial, in-depth gear reviews
- Practical cruising tips for making the most of your time afloat
-
-
Follow us on Facebook, Instagram, TikTok and X