
Ann Berry describes how an industrial sewing machine could save you thousands of pounds if your canvaswork is worn out and you want to make your own sprayhood or bimini.

Sun, sea and general weathering had degraded the stitching, attachment points and external canvas work on Aderyn Glas, our Moody Eclipse 33. It was time to replace it all: sprayhood, bimini and bridging piece (that joins the sprayhood and bimini together for use in port) but the cost would run into thousands!
 Instead, I looked into the possibility of doing the job myself.
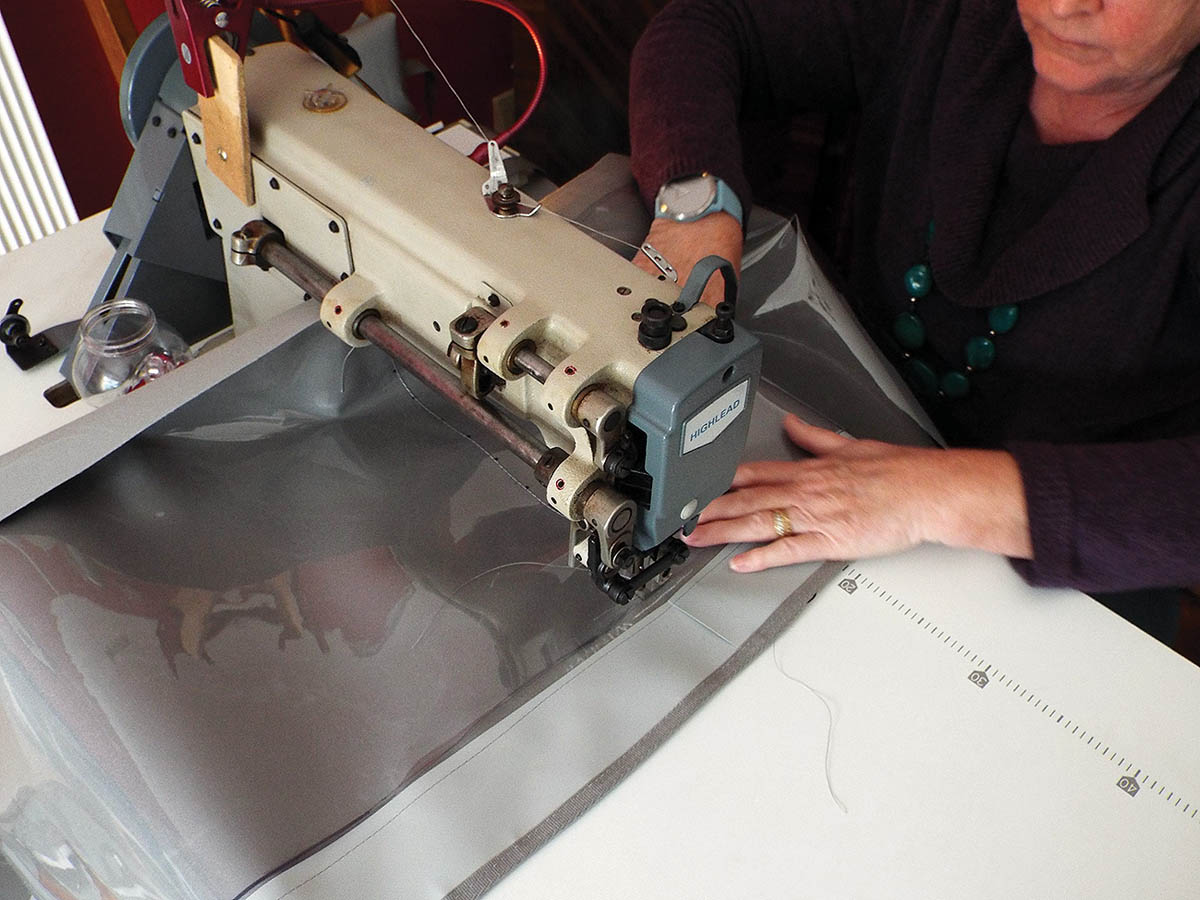
My domestic sewing machine would not have the power or ability to handle the weight and layers of fabric required for items such as a sprayhood or bimini. An industrial machine would be required – they’re much larger, heavier and robust than domestic machines. They have a separate external motor and a metal foot treadle and are set into their own large sewing table, so do take up a lot of room. I store mine in the garage and wheel it into the house when sewing.
The industrial sewing machine has a very large throat compared to a domestic one. This is the space from the sewing needle to the upright control column, allowing for much larger volumes of material, which are also supported by the large table.
The machine I chose was a Highlead: a heavy-duty top and bottom feed lockstitch with a walking foot. A walking foot has teeth on the underside which synchronise with the teeth on the machine gripping both top and bottom layers when sewing. It feeds them evenly through the machine, and is important, for example, with sprayhoods when zips, webbing, Velcro and various edging materials are being sandwiched on or between the canvas layers.

Price was a major factor for me as industrial machines can cost thousands of pounds, even second-hand. Mine cost £500 and was manufactured in 2005 so I felt that I could do the work and even recoup some cost by selling it later if required. Some popular brands are Typical, Brother, Pfaff, Juki and Singer. Machines can be researched through ebay but your local industrial sewing machine company would be a better bet as servicing and backup would be part of the package.
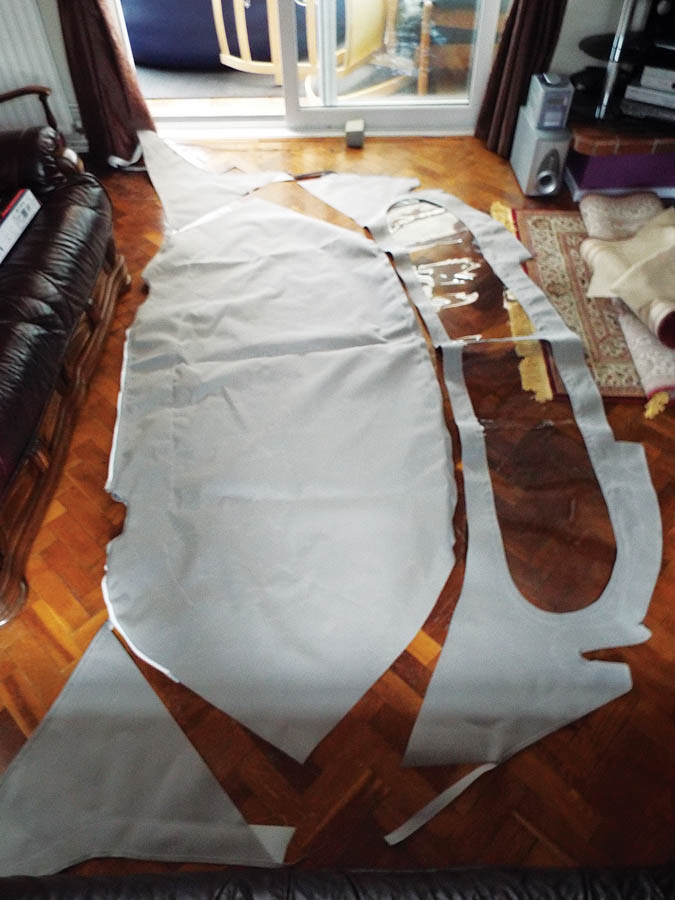
The main items I needed to replace on Aderyn Glas were the dodgers, sprayhood, bimini and bridging piece (this stretches between the sprayhood and bimini to from a solid canopy over the cockpit when in port or anchored, so is fully detachable).
Cost: Sewing machine = £500.
Materials for sprayhood and bimini = £534
See also Ann Berry’s article on making a boom tent cockpit cover.
How much material do you need?
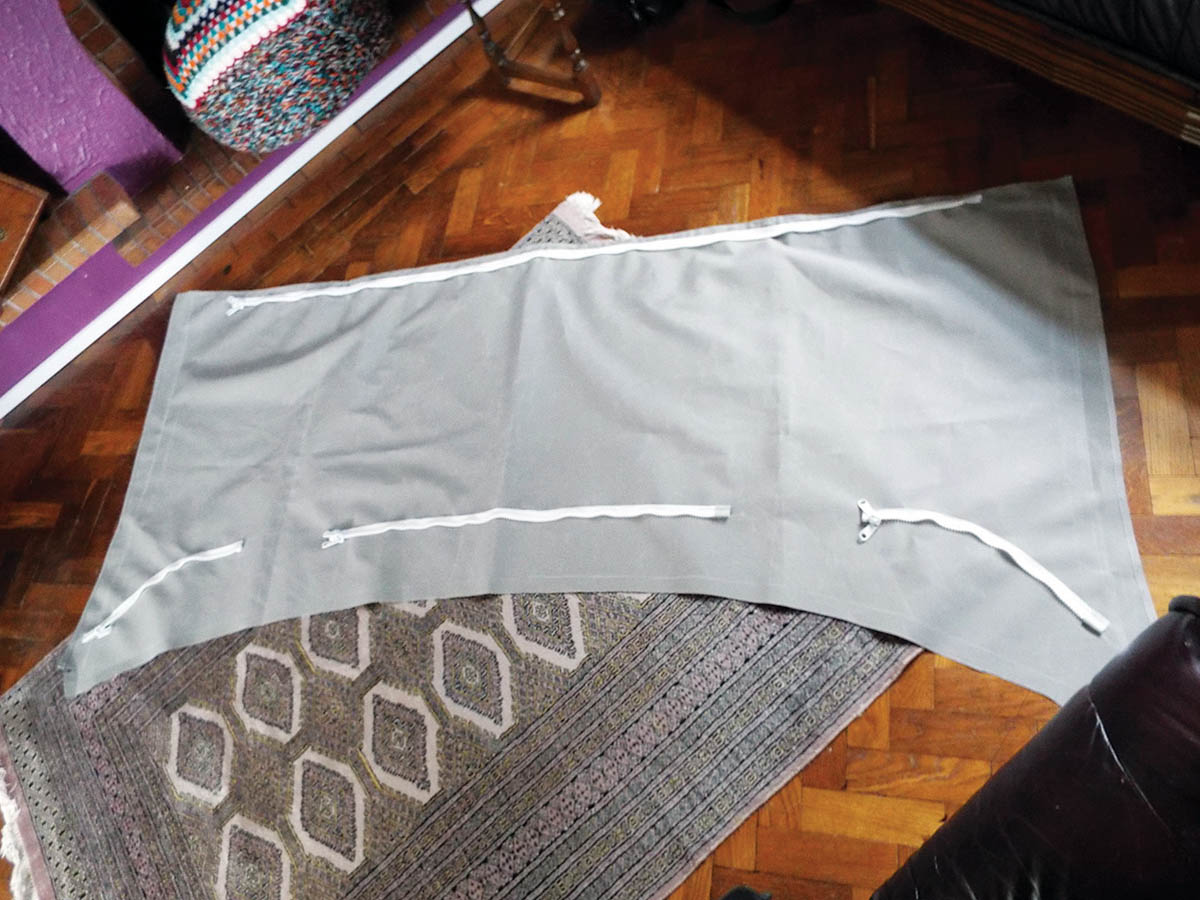
New bimini created by Ann.
The width of most canvas and other fabrics is between 140cm and 150cm. When taking measurements I estimate in metres, and cut along the length of the fabric. For example if the sprayhood is 3.5m wide across the cockpit then I would need a 3.5m length of fabric to cover the cockpit width, and as many pieces of cloth as necessary for the cockpit length.
A sprayhood is typically made of several different sections: the roof, the front section with the windows, and two side panels usually with webbing straps. In a wide cockpit the width of the roof section will take up most of the width of the canvas so I would not be able to get the window section out of one piece. I’d need an additional 3.5m of fabric.
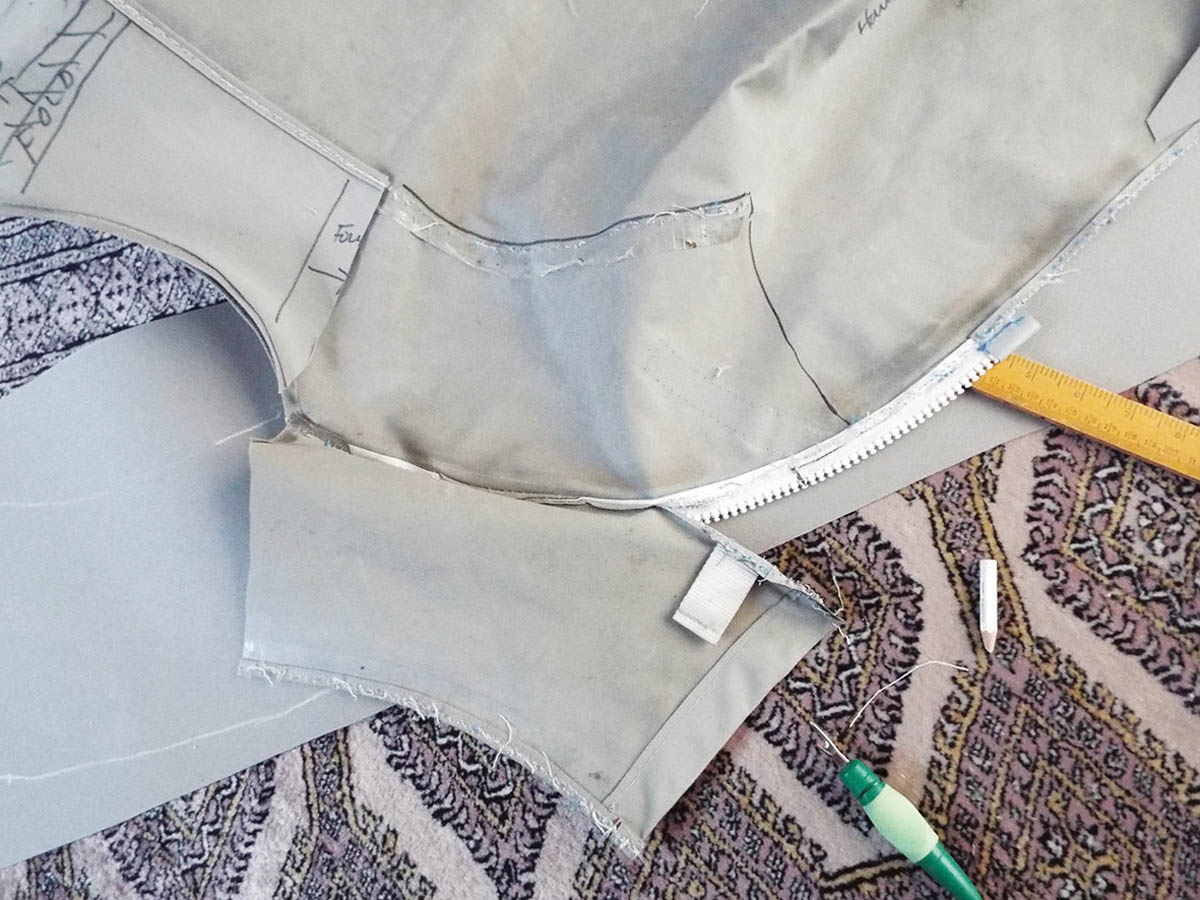
I measured the canvas zip channels and Velcro channels inside the old sprayhood, which attach it to the stainless steel frame and then the side sections.
On squared paper I checked that they could be cut from the spare width material left from the window or roof section. If so, 7m of canvas was required for my sprayhood; if not, I would calculate the extra length required. When I’d worked out the length and widths of all the major pieces and their component parts I added an extra metre or so to allow for any errors in measuring.
Extra fabric can always be used on smaller projects around the boat, and as coloured canvas is dyed, another batch might not be the same.
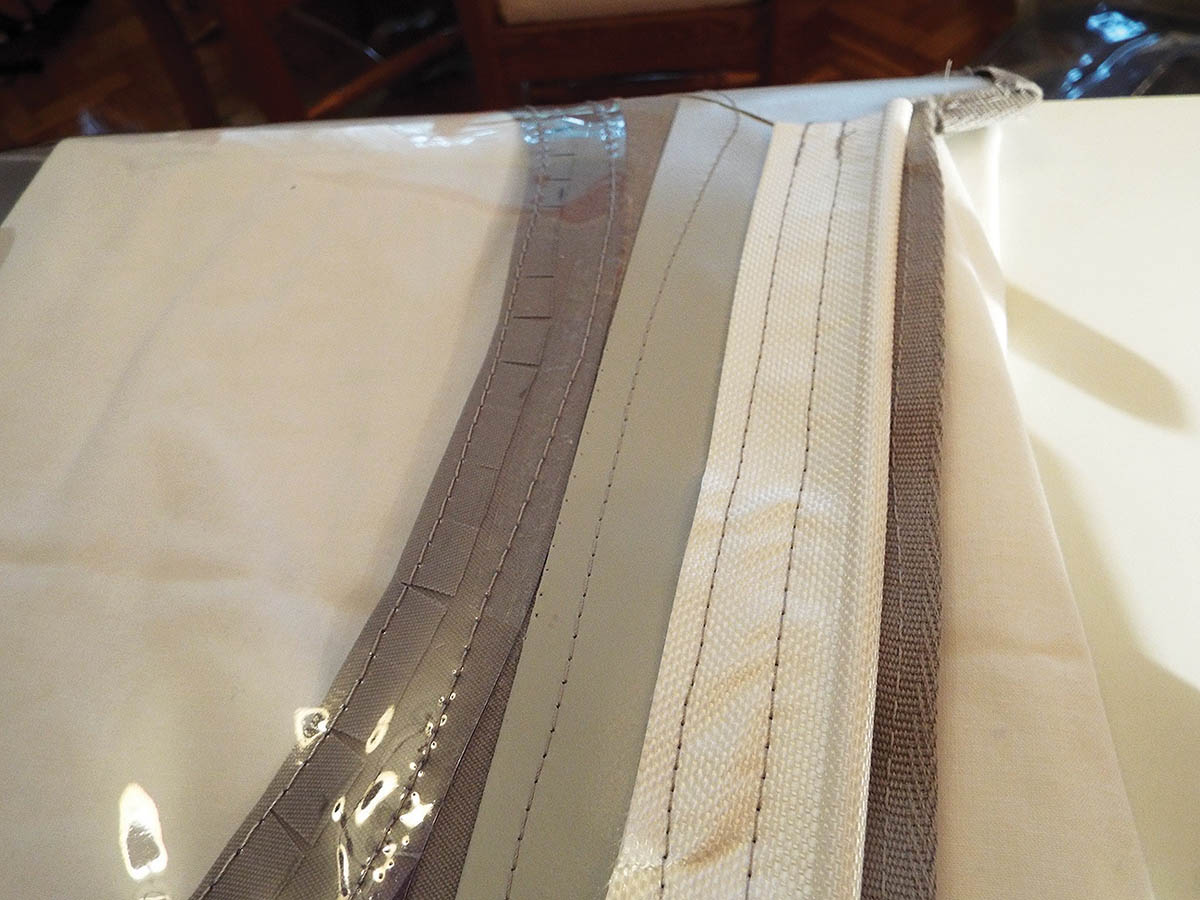
Edging material, Velcro, plastic lining and webbing are measured directly along their lengths and the total length added up from each major piece being made. Zips are measured exactly, as they only come in specific lengths and will need to be shortened to fit if they are too long.
I always replace any plastic fittings associated with the canvas work. If the canvas stitching has degraded then they will have too.

What else can you make with an industrial sewing machine?

Investing in a machine has been very worthwhile, and though I could resell it to recoup most of the costs, I think I’ll keep it in the short term. I’m having great fun, the boat is benefiting and I’m enjoying my purchase.
The industrial sewing machine has many advantages over my lighter domestic machine. The ability to sew heavier, treated canvas, leather and a wider range of upholstery fabrics opens up a greater range of projects. Here’s what else I’ve made:
- A canvas cover for the forepeak of Aderyn Glas. We store the dinghy under here over the winter. A simple project like that is a good way to become familiar with the industrial machine.
- New dodgers
- A cover for the solar panels
- Covers for the tail of the sail and gooseneck
- Padded seat backs for the cockpit (I plan to make new cockpit seats too)
- A variety of canvas bags, pockets, winch covers and other things I did not even know the boat needed until I let my mind wander while enjoying the sunshine in the cockpit!
- My husband, David, made a cover for our wooden garden seat last autumn out of the spare canvas I’d acquired.
Equipment and experience you will need before you start
To make a new sprayhood you’ll need to have had some sewing practice, experience of measuring, estimating fabric quantities and handling different materials, as they move and slip against one another.
YouTube has many tutorials, and though not necessarily marine-based, they’re still helpful.
There are lots of local sewing courses available, mainly for lightweight dress, household items and quilting, but these are the basic skills you’ll need for any sewing and are fully transferable. If you think you can do it, research it all, ask people for help, take a big breath and go for it!
If you don’t want to invest in an industrial machine, why not start with a domestic machine and take on some projects with lighter-weight fabrics. I’ve successfully made curtains, external shade and window covers, fender socks, a windscoop, re-covered the saloon cushions, and even a dinghy cover (many of these projects have been published in PBO over the years).
Materials you’ll need
- Double-sided tape
- Edging material
- 2m of rope channel
- Pack of chinagraph pencils (I got through three of them!)
- Length of stainless steel tubing (to check fit of tubes in sprayhood)
- 6m of lining plastic
- 14m grey canvas (covers bimini, sprayhood, bridging piece and dodgers)
- 2m clear plastic
- 10 x plastic zips: 4 x 90cm, 2 x 180cm, 2 x 45cm and 2 x 20cm
- Velcro: 10m x 2.5cm, loop and hook separate lengths.
- Metal and plastic fittings: 8 x lift-the-dot fasteners, 4 x canvas to canvas press studs, 2 x webbing strap tensioners.
- Polyester cotton: 1 x large spool 5,000m (plenty left for other projects)
Zips, edging tapes, Velcro, thread and some of the other sundries you’ll need to make a sprayhood
Suppliers
Josh Brown of Severn Sails is a sailmaker and canvas work professional. I gave him a list and he sourced most of my materials. He also gave me some useful pointers and guidance before I started my projects. You can also source these yourself online via kayospruce.com. Fixtures and fittings can be bought from chandleries.Time to make
I only work a few hours a day when I am sewing so I would say it took me about 16 hours (four days) for the bimini from start to finish and 20 hours (five days) for the sprayhood. I do spend a lot of time measuring and checking what I am doing at every stage so work quite slowly.

Recreating the bimini – step by step
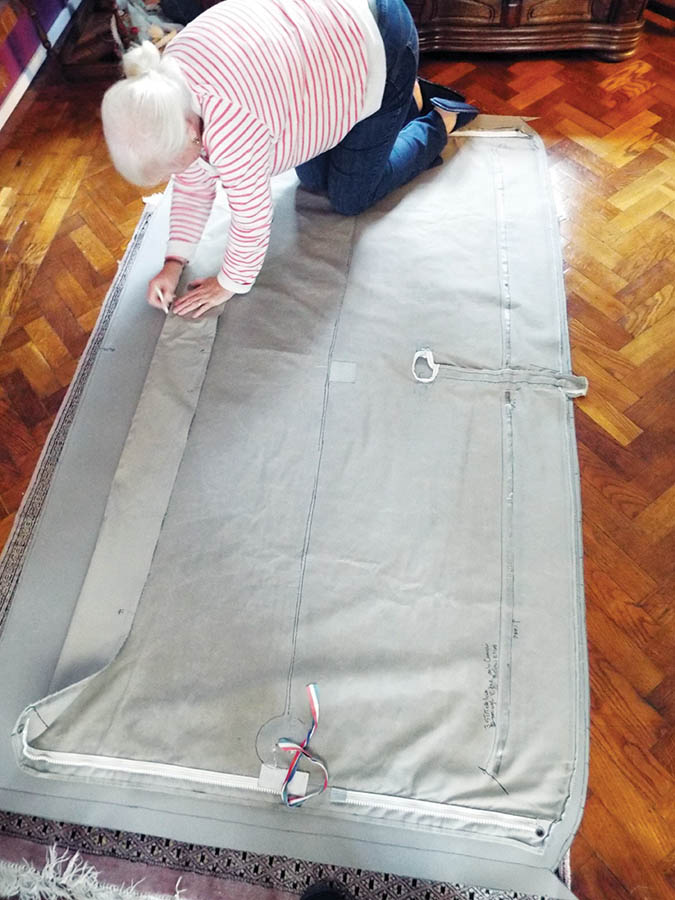
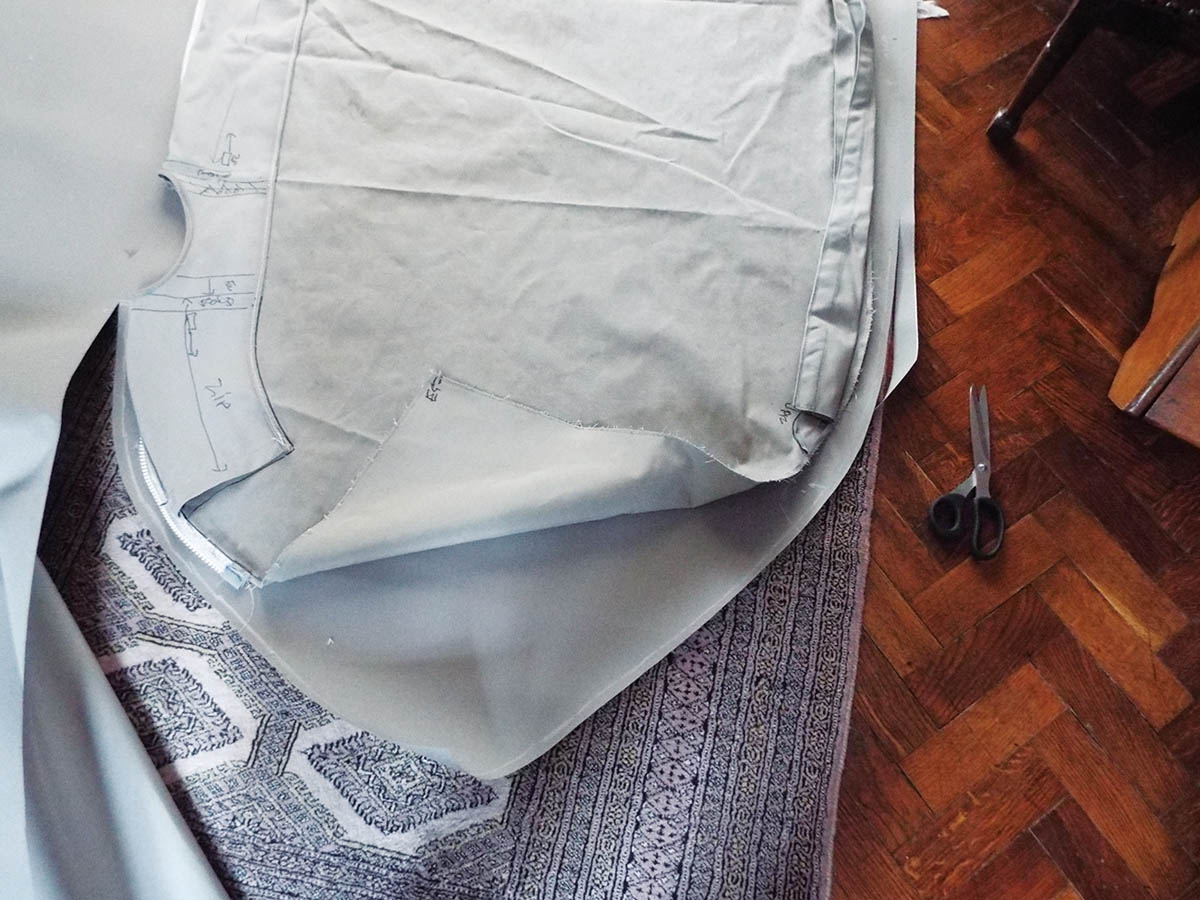
Accurate measurement is essential. To ensure that every part of the bimini would match up I drew in permanent ink on the old canvas to identify where each element fitted but transferred marks to the new canvas with a white chinagraph pencil which would rub off later.
I used the individual pieces of the bimini, once deconstructed, to draw around and copy the image directly onto the new canvas. I took care to flatten out or straighten out each individual piece. Curved pieces when flattened out take up a greater length.
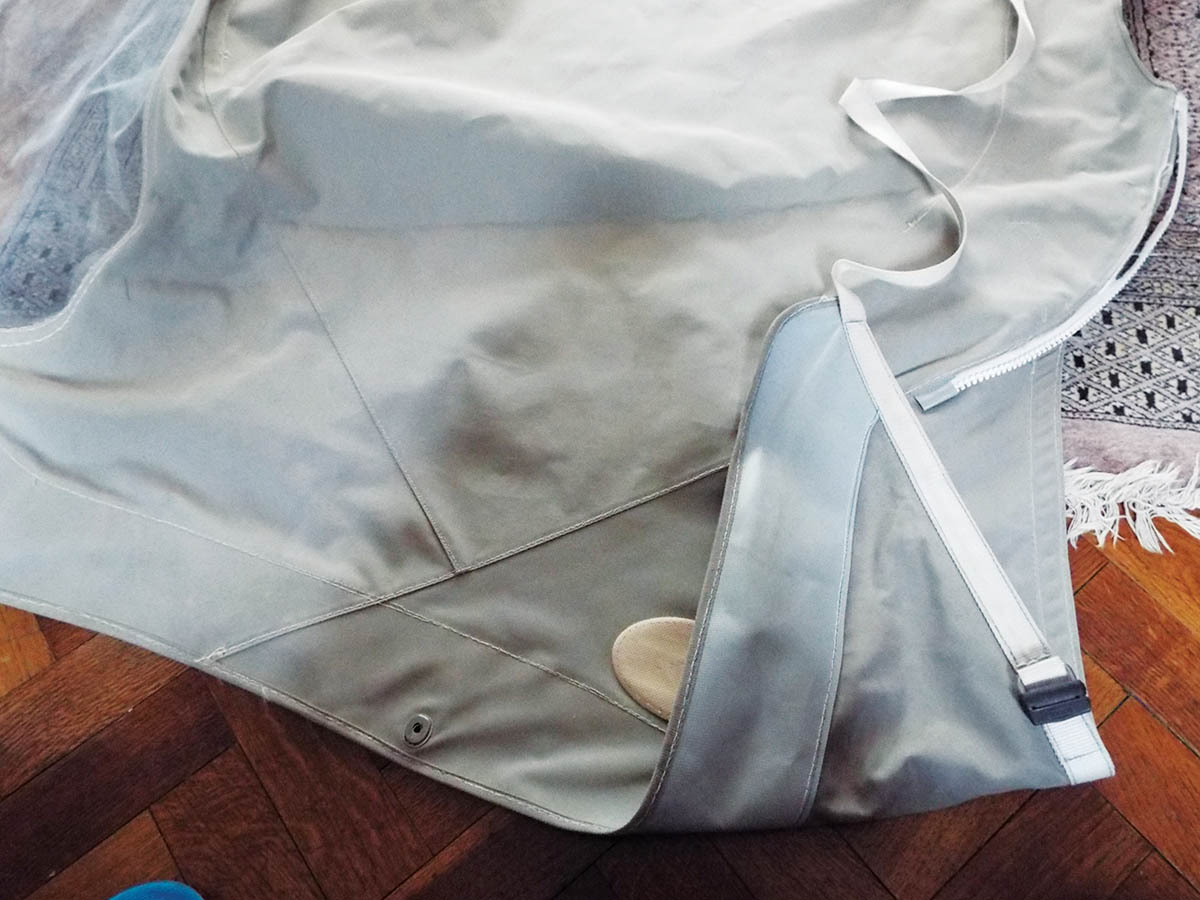
The bimini has three zipped channels, one central Velcro channel and a Velcro back flap to go around the back stay. This design also has a zip inserted along the whole front face to link to my bridging piece.
When you transfer dimensions from old to new material it’s best to work from a datum. In my case I established a centre line on each piece and worked from there.
1. Place the original bimini right side down onto the new canvas and draw around it. With a white chinagraph pencil, mark the centreline, and the position of the Velcro and zip channels and the backstay opening.
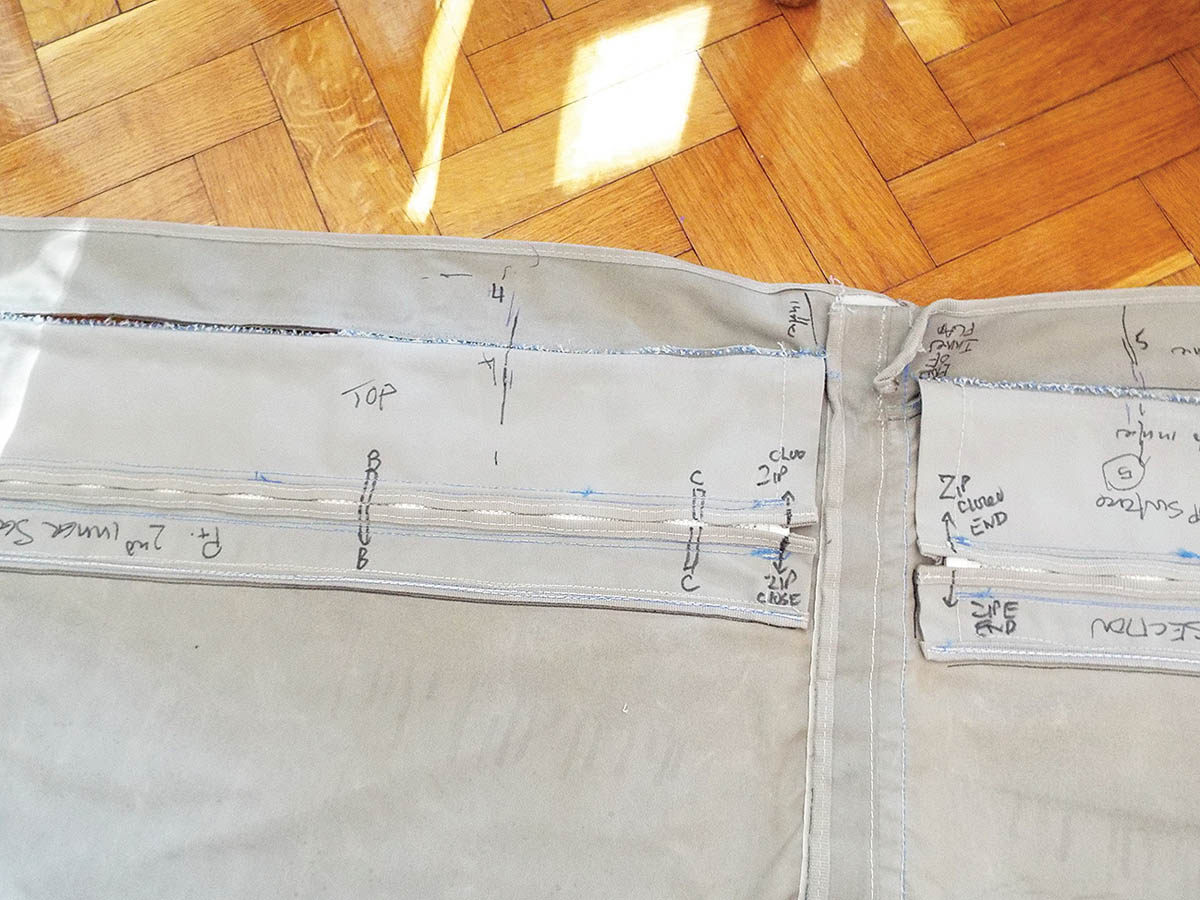
2. Remove each zip and Velcro channel from the old bimini after marking their original positions. You can then measure and compare between original and new before you sew the new ones in place. Take the detached pieces (eg, the zip, seen above) and sketch the position of the individual elements (such as the zip open and closed ends). Draw around these individual pieces on the new canvas.
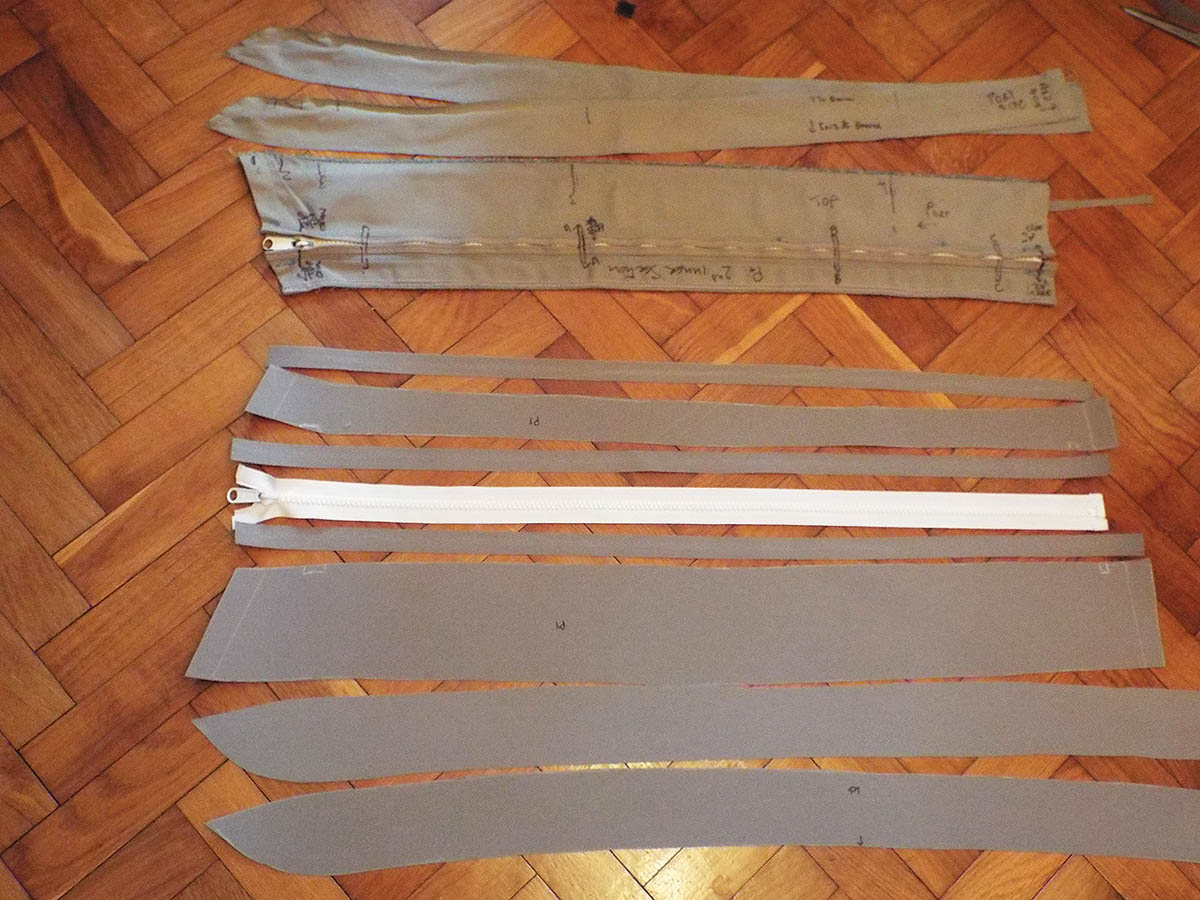
3. Amazingly, all eight elements at the bottom of this photo are needed to make the rear starboard zip channel and back flap of the bimini (the original three pieces at the top). Once sewn back together (see steps below) you’ll need to repeat the process for the other two roof zip channels, and the port side flap and zip channel.
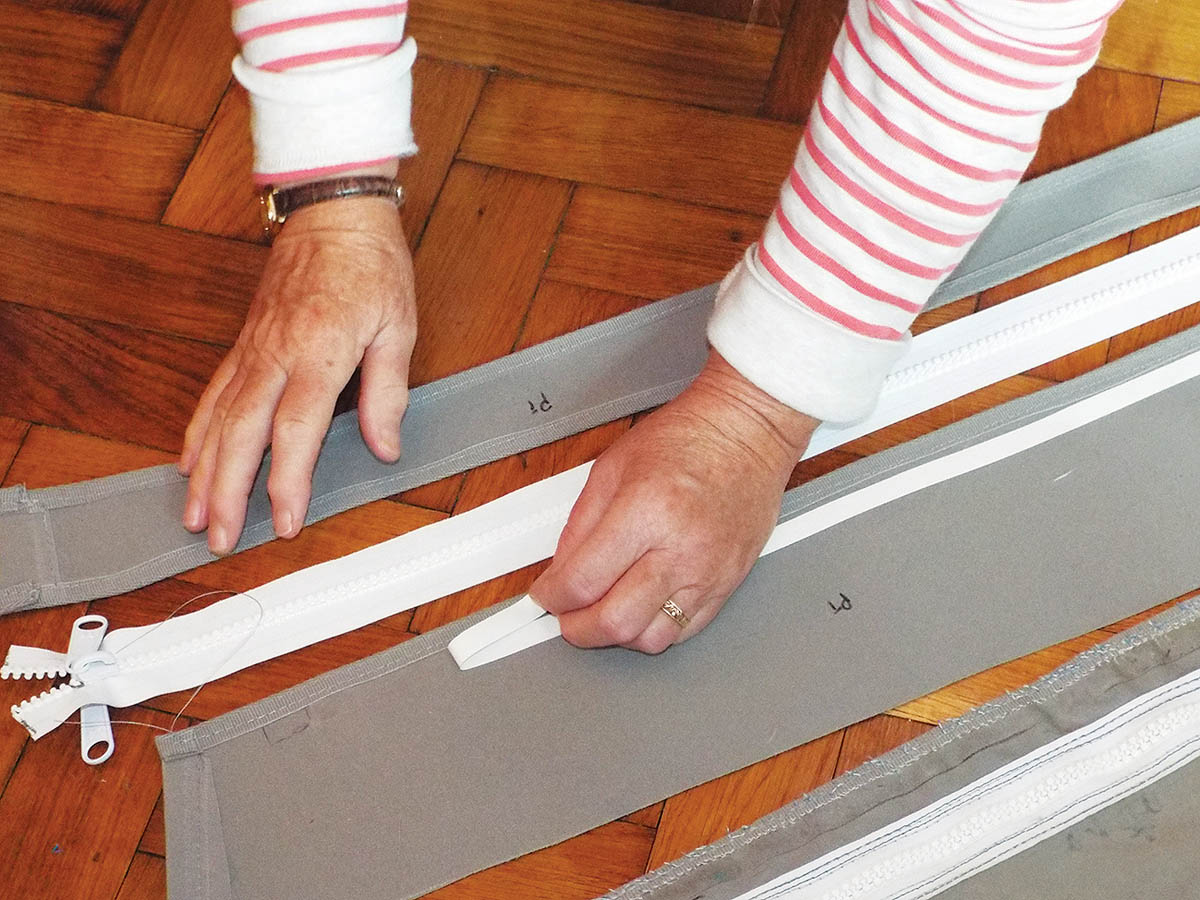
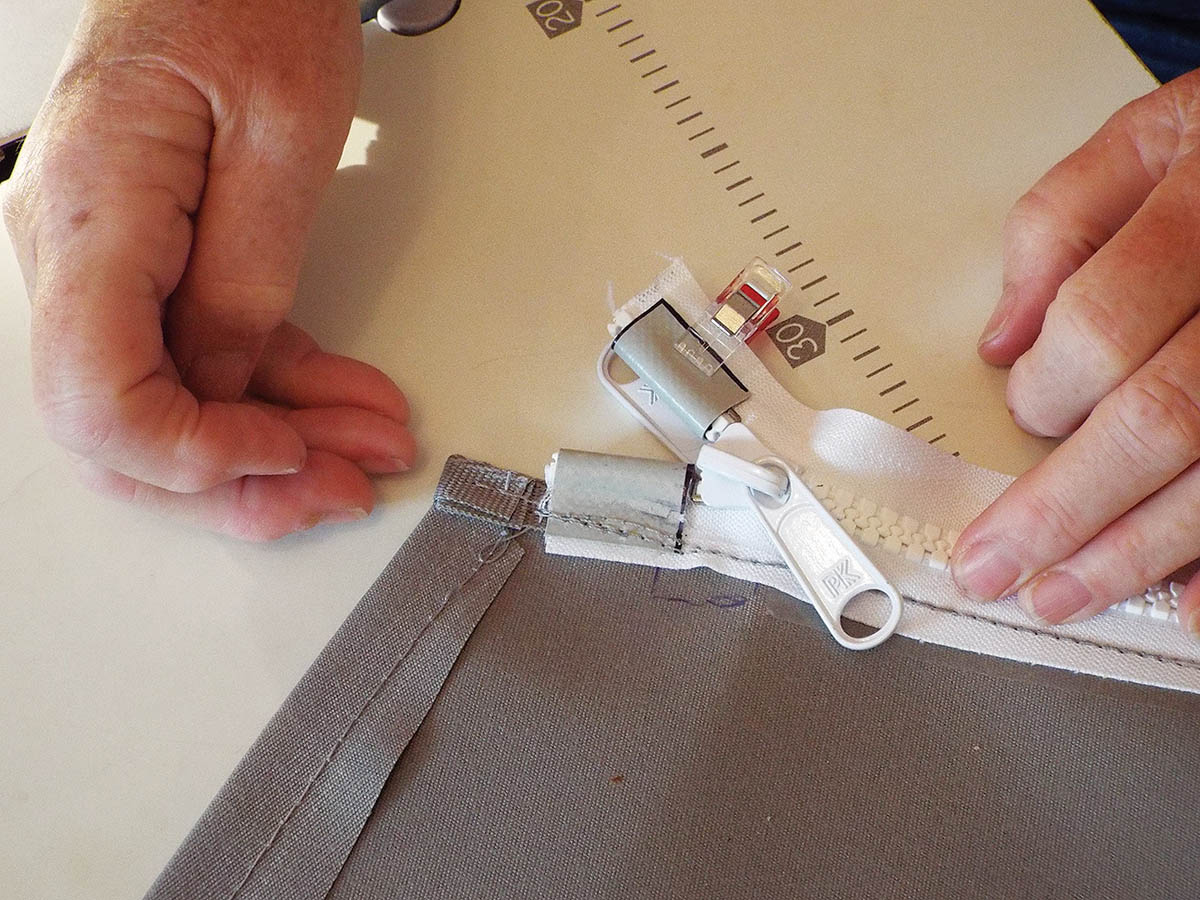
4. Edge each piece of canvas with matching grey fabric tape which will protect and neaten the raw edges of the fabric/canvas. Then use double-sided sticky tape to hold the zip in place when sewing it in. This stops adjacent layers slipping during sewing with the machine.
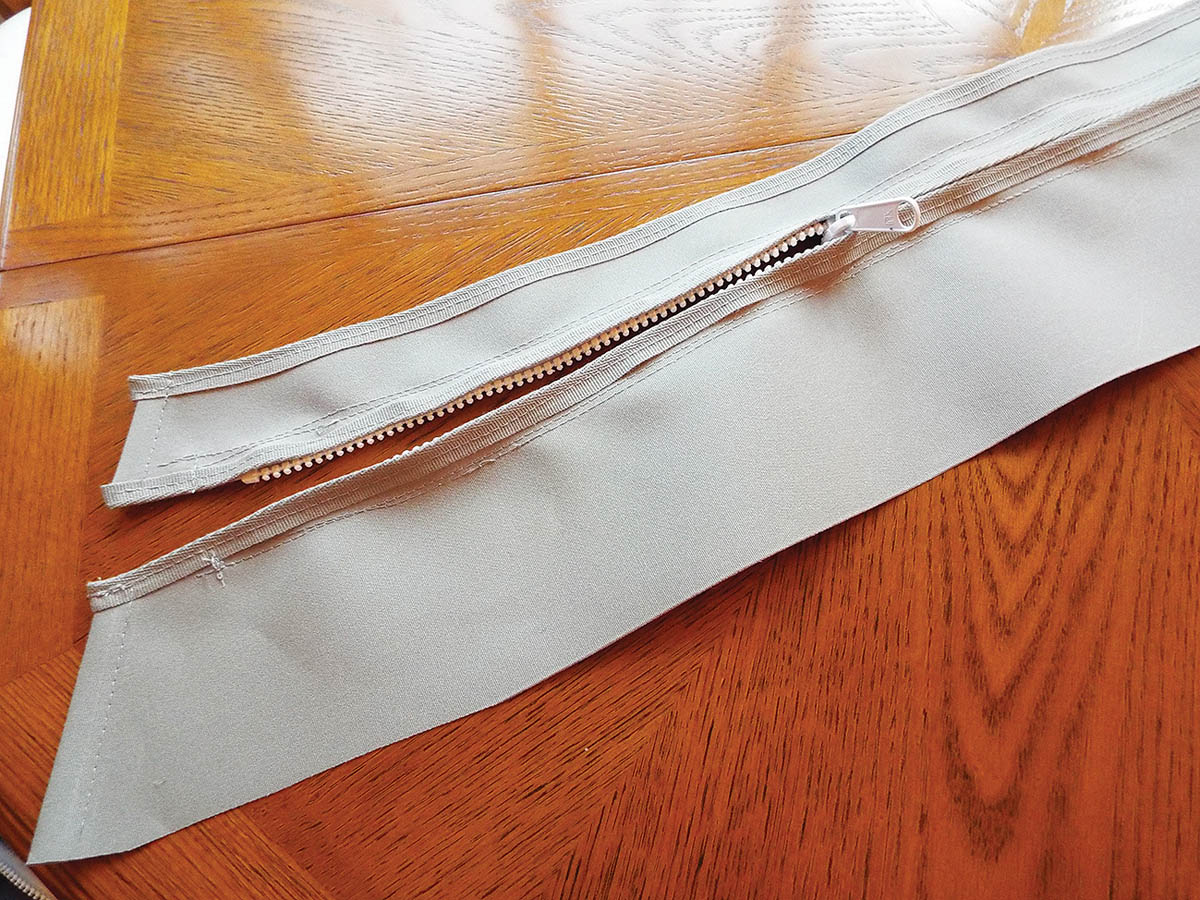
5. A finished zip channel. Complete all the zip channels in the same manner. Use a piece of stainless tubing (the same diameter as your bimini frame) to check the newly cut zip and Velcro sections will have sufficient width to wrap or enclose the tubes.
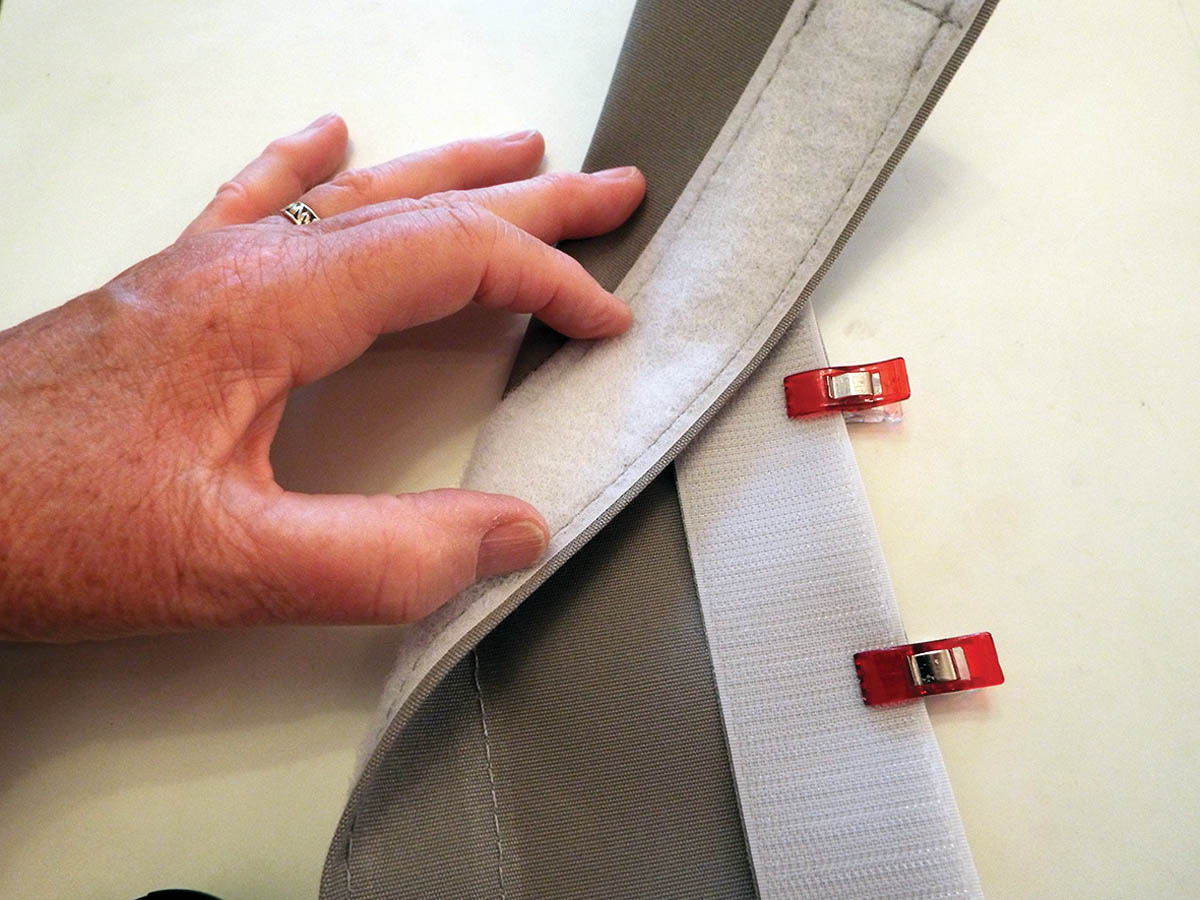
6. The bimini’s central Velcro channel has Velcro stitched onto the reverse and right sides to allow the canvas to curl around and encase the stainless steel frame. Draw around the canvas strips, cut them to length then stitch the Velcro in place. Here I used quilting clips to hold the Velcro while sewing.
Making the bimini backstay slot
The rear of the bimini has a hole to allow the backstay to pass through it. The canvas in this section has to be cut and Velcro is used to close the gap.

7. Measure the original and cut new pieces to form the Velcro closure.

8. Mark the centre opening on the new canvas for the backstay flap and around the hole. Cut the opening and sew a Velcro flap on to each side – hooks on the lower surface and loops on the upper.
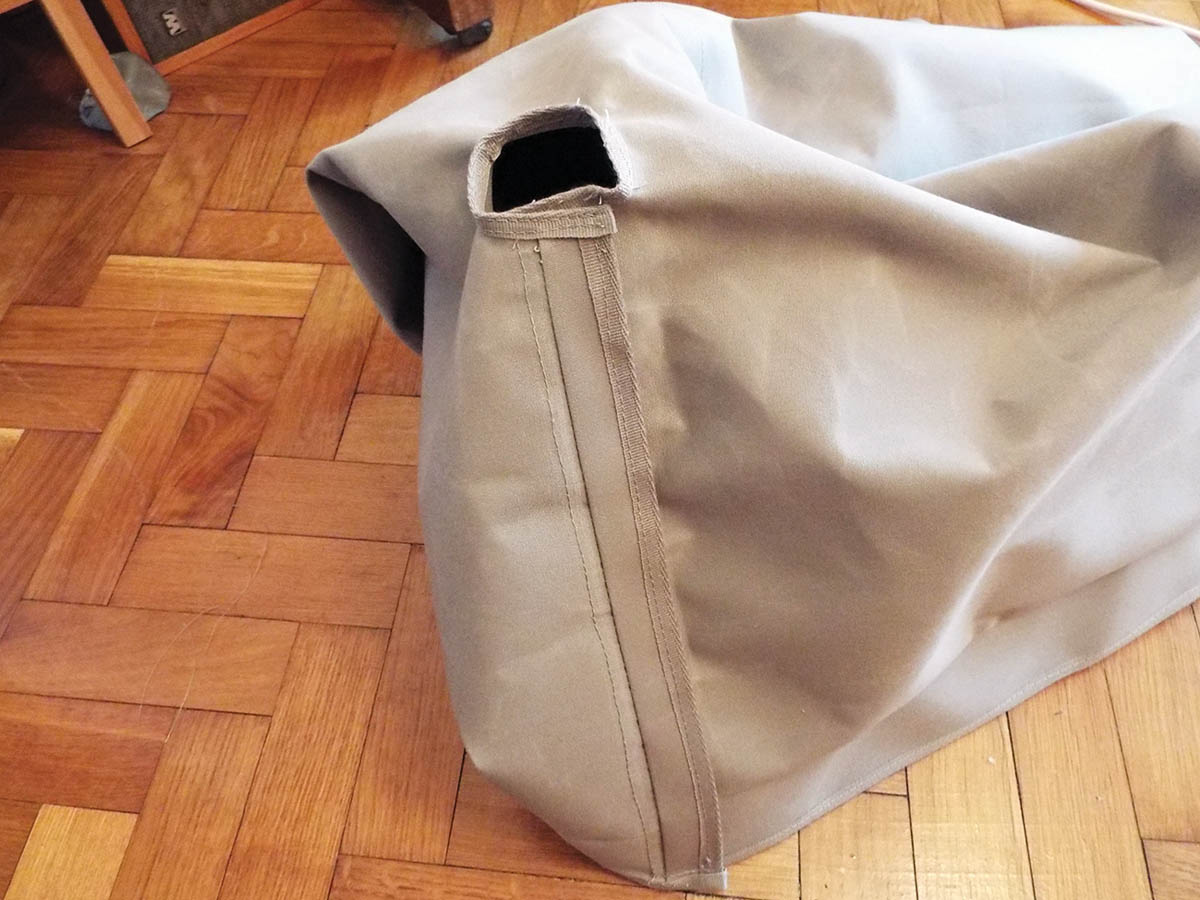
9. Edge the backstay opening and all of the outer edges of the bimini with grey tape for neatness and strength.
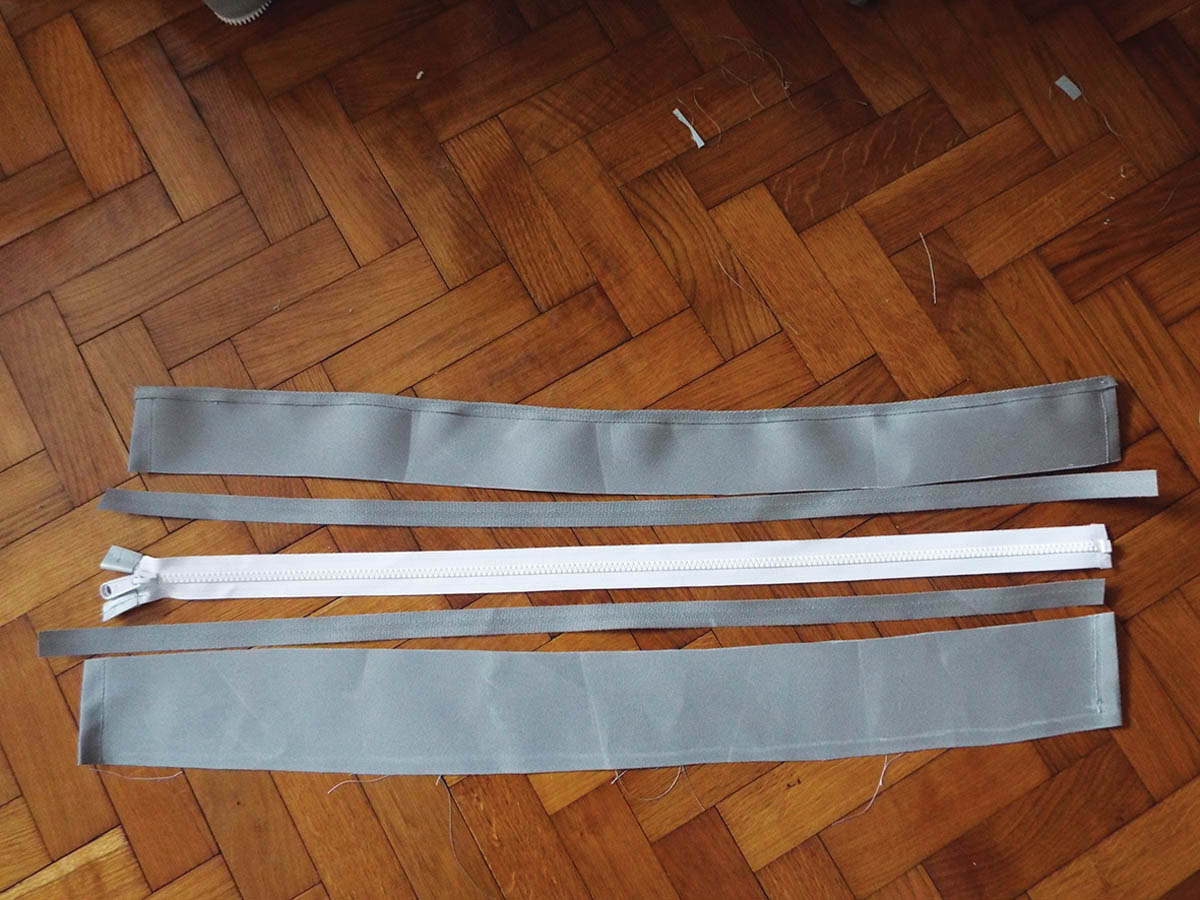
How to shorten zips
Choose zips with plastic teeth, as metal will rust in a marine environment. Use the original zip to measure the exact length required, including the end tapes. For the sprayhood, if you’re making new channels, measure the length of gap in which to insert the new zip. This will be from the base of the zip to the top. Mark the final length with a pen, and where to cut.
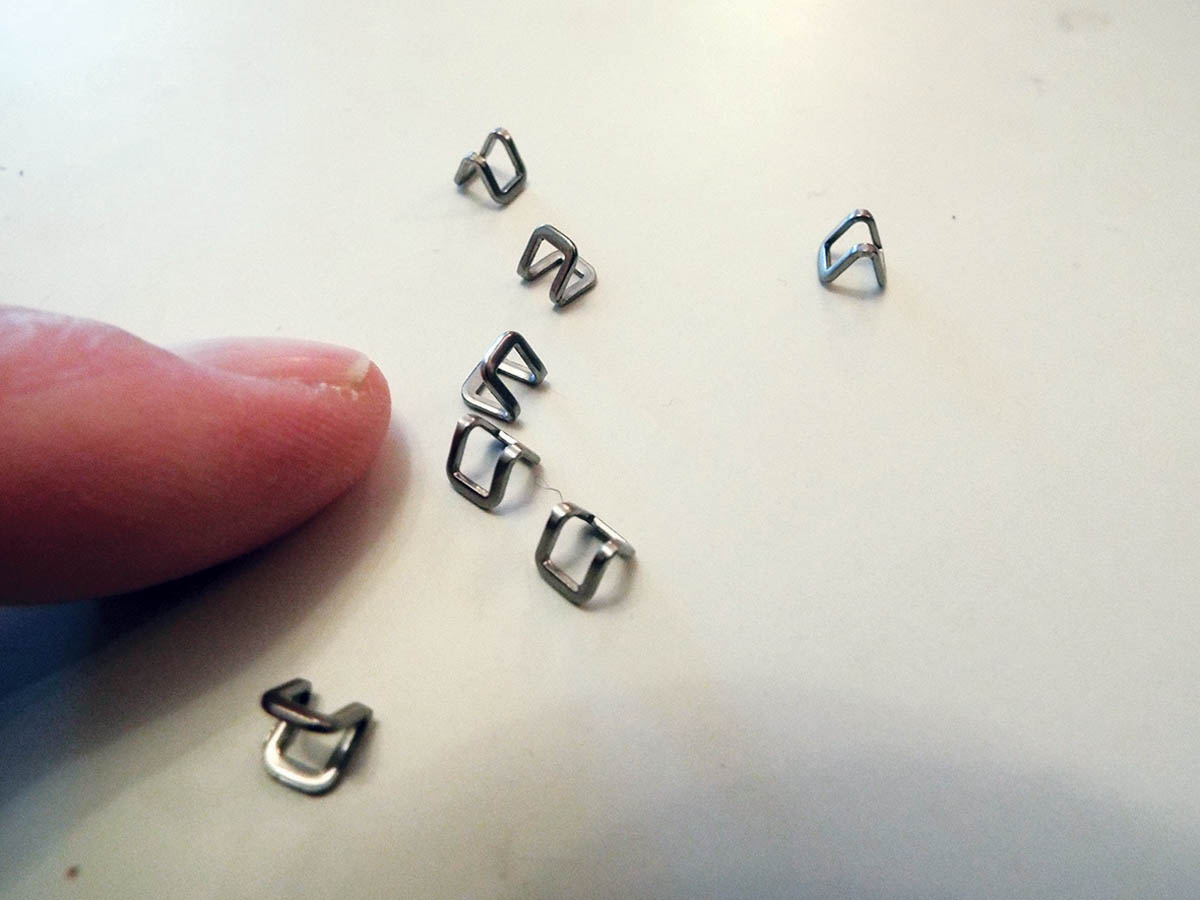
1. These stainless steel zipper top stops are used to create the end of travel of the zip slider when done up.

2. Use pliers to squeeze the metal clips closed between the teeth on both sides of the zip.
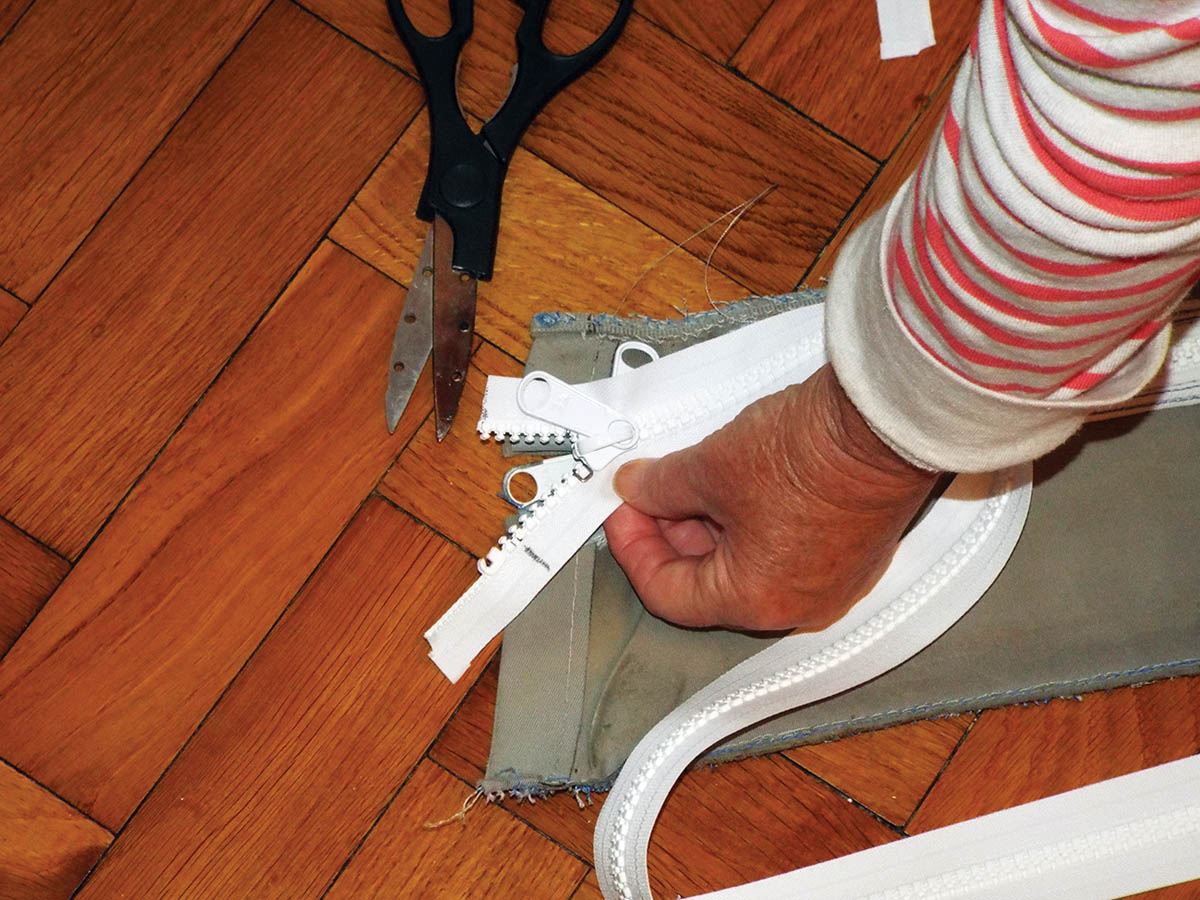
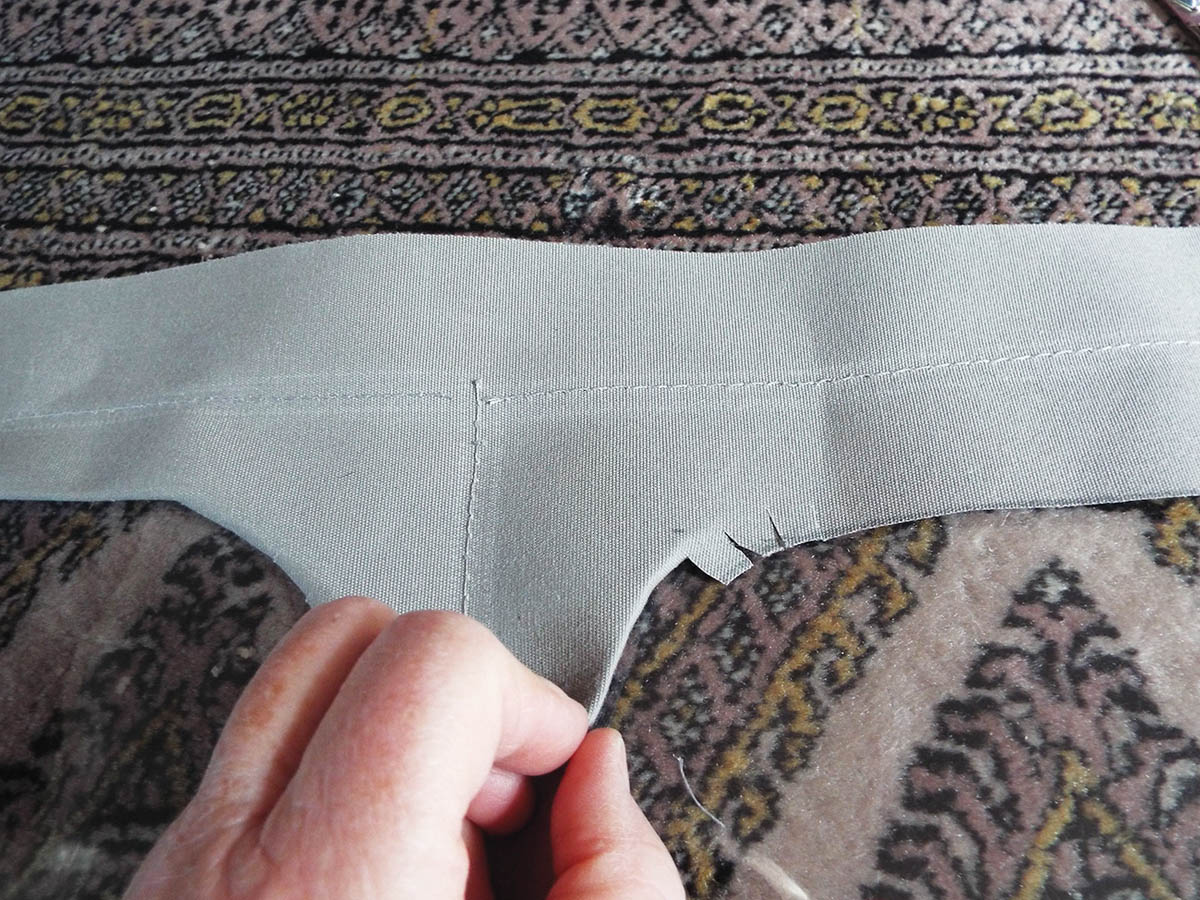
3. Cut away the excess length of zip, above the mark (on both sides), being sure to leave a bit extra to form new tape ends for attachment to the canvas.
4. Use small pieces of plastic material to cover and reinforce the unused exposed teeth of the zip. For additional strength, over-sew the zip end two or three times and double-stitch all zips along their length.
How to make a sprayhood
My sprayhood is a three-dimensional structure fitting over a demountable stainless steel frame. Before disassembly I took lots of photographs to show how the different sections are attached, and labelled each one. The four main component parts are the roof, front window section and two side panels.
The rear section had a continuous canvas tube, with scalloped handhold gaps, into which one of the stainless bars is threaded when the sprayhood is erected each season. I wanted to replace this with zipped channels so the stainless frame did not need to be dismantled to take the sprayhood off – but at the same time I wanted to retain the handholds.
1. The original sprayhood showing the port side panel, with webbing straps, joined onto the roof and window panels, prior to deconstruction. You can see the UV damage to the torn zip.
2. Lay the old roof, right sides together, onto the new canvas and draw around the entire shape. Transfer all channels, zips and handhold positions to the new canvas, allowing for a 5mm seam. Repeat for the front window panel and the two side panels.
3. To make the new zip channels I drew around the originals on the rear of the new sprayhood roof. I cut off the flaps to form the patterns for the separate zip channels, then cut along the centre length of each flap to form a pattern for the new zip opening.
4. These are the component parts that form the central zip channel and there’s a similar set for each of the two smaller curved channels.

5. The two smaller side zip channels, ready to sew back onto the new roof section.
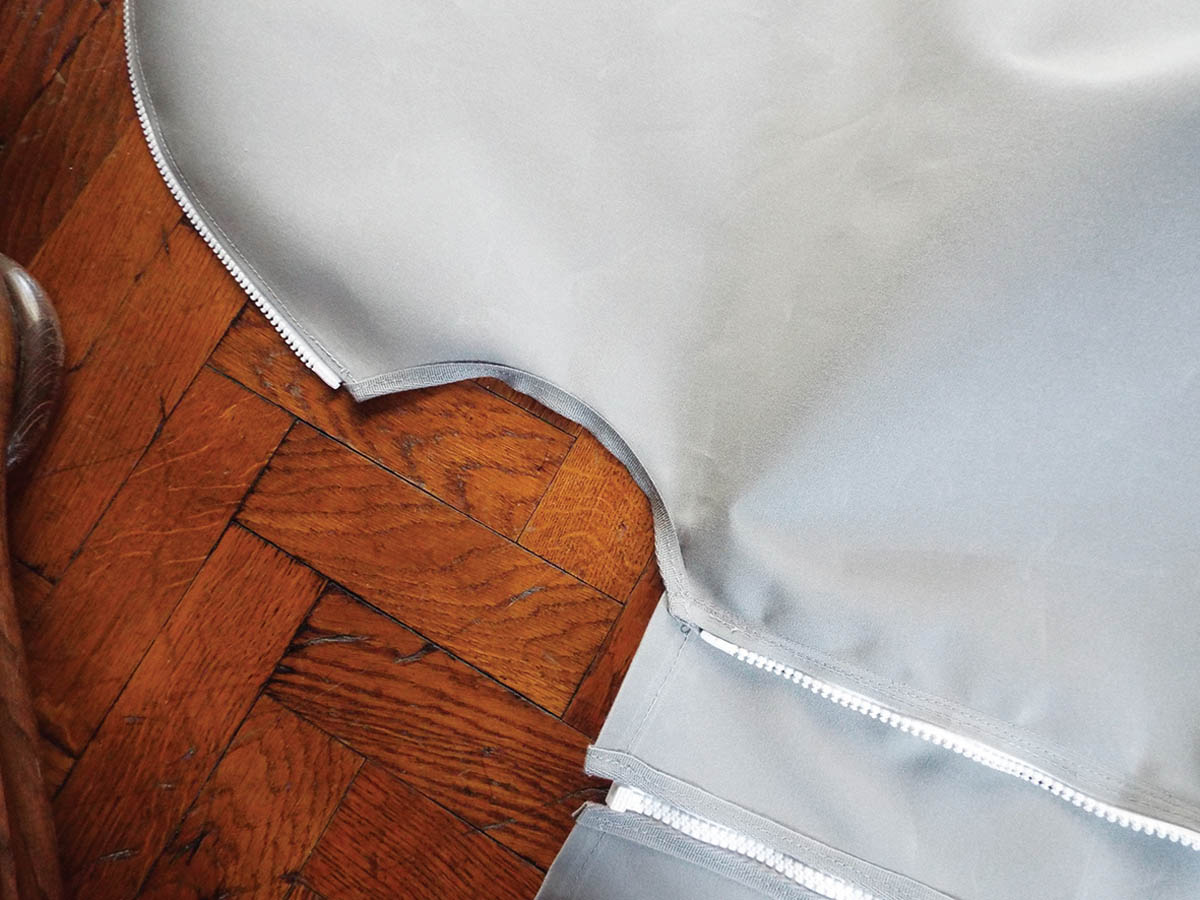
6. The rear of the roof section with the bridging piece zips inserted and the central zip channel attached. The handhold gaps have also been edged.
Fitting the windows
Fitting the plastic window panel into the canvas is tricky, as both materials are slippery and the window can easily become distorted when stitching.
To overcome this, place the old, intact window panel over the new plastic sheet and draw around the outer edge before cutting it out.
Now lay the new plastic window directly onto the underside, or wrong side, of the new, uncut canvas panel. Use double-sided tape to hold it in place while you sew them together.
Only carefully cut out the canvas aperture once the plastic is in place.
1. Sew the new window onto the reverse side of the panel. It’ll help with the next step to first cut a small guide hole in the centre of each window panel.
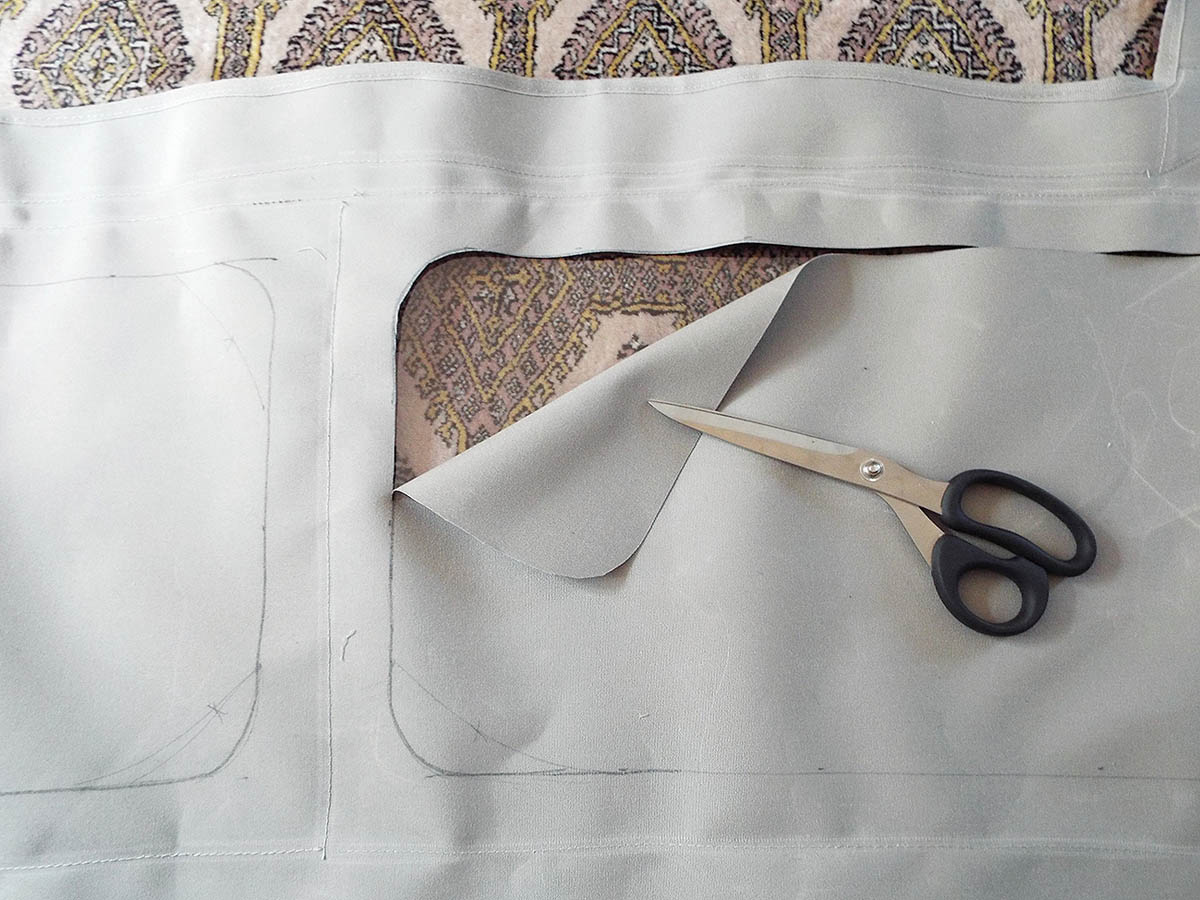
2. Having marked the window aperture (allowing for a seam), the small hole now gives access to cut around the canvas to reveal the window underneath.
3. Cut small nicks in the canvas around all the curves in the windows then fold the material back underneath to form a neat edge. Hold the fabric flat against the plastic.
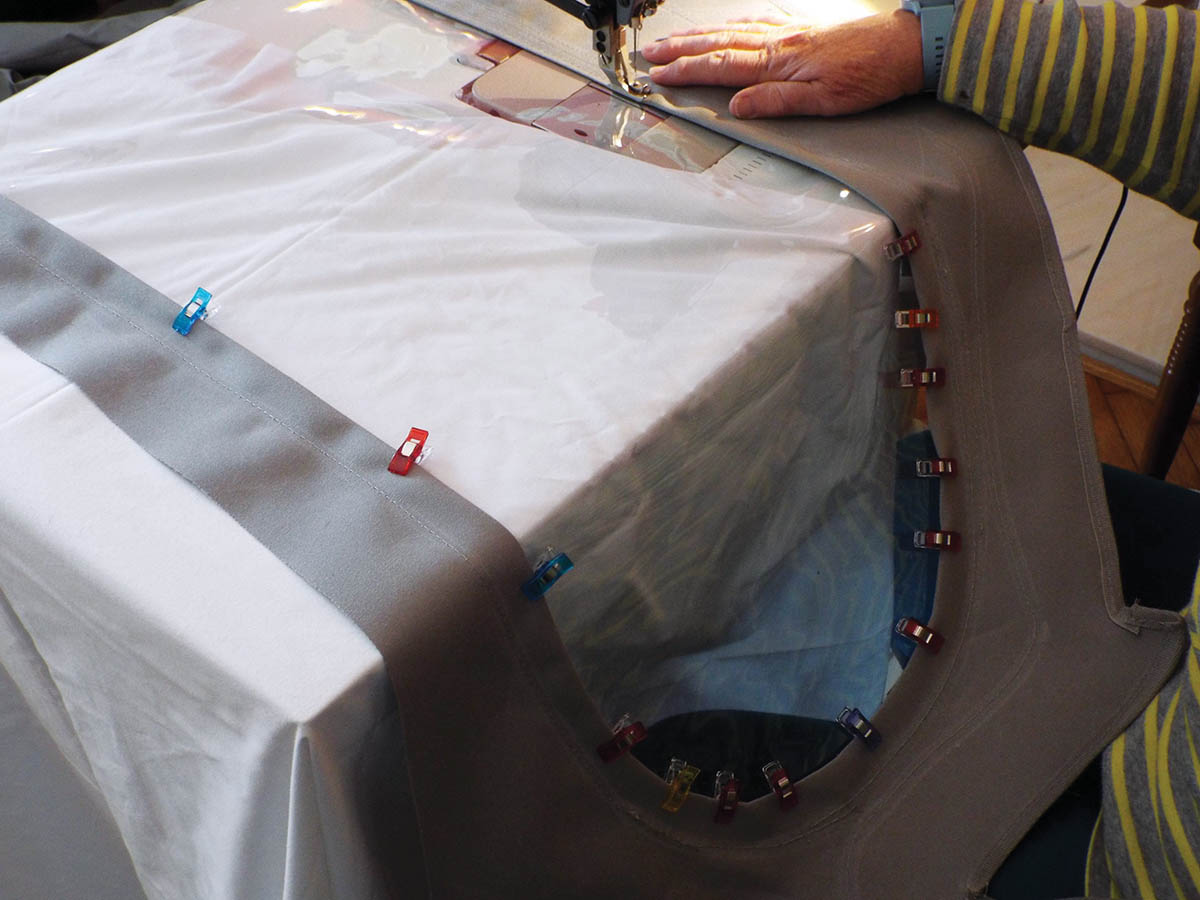
4. Sew around the whole of the window sections, from the front, to firmly attach the plastic into the window cut outs. I used quilting clips to hold the backfolded edge in place while machining.
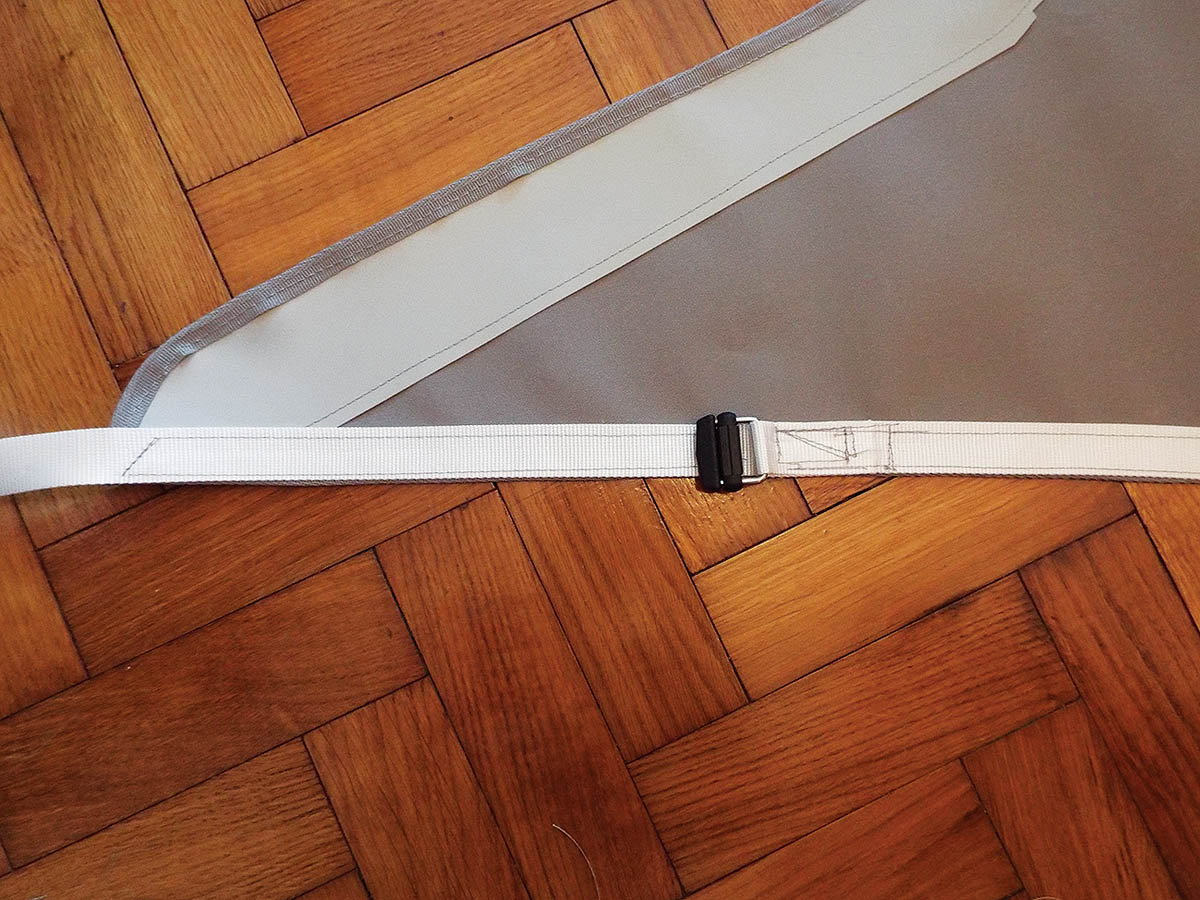
5. I lined the front lower edges of the sprayhood with plastic material to prevent wear to the canvas from rubbing on the coachroof, then attached the new webbing strips (not forgetting to incorporate the clips before sewing).
6. Here are the four sections of the sprayhood prior to being joined back into one three dimensional structure.

7. Sew the sections, right sides together, with a single seam, and then over-sew a second layer of stitching on the right (or outside) of the canvas for additional strength.
8. The final sewing task is to secure the prefabricated bolt rope tape into the base and sides of the front window panel. The bolt rope slides into a permanent plastic fitting on the coachroof and holds the sprayhood down at the front of the cockpit.
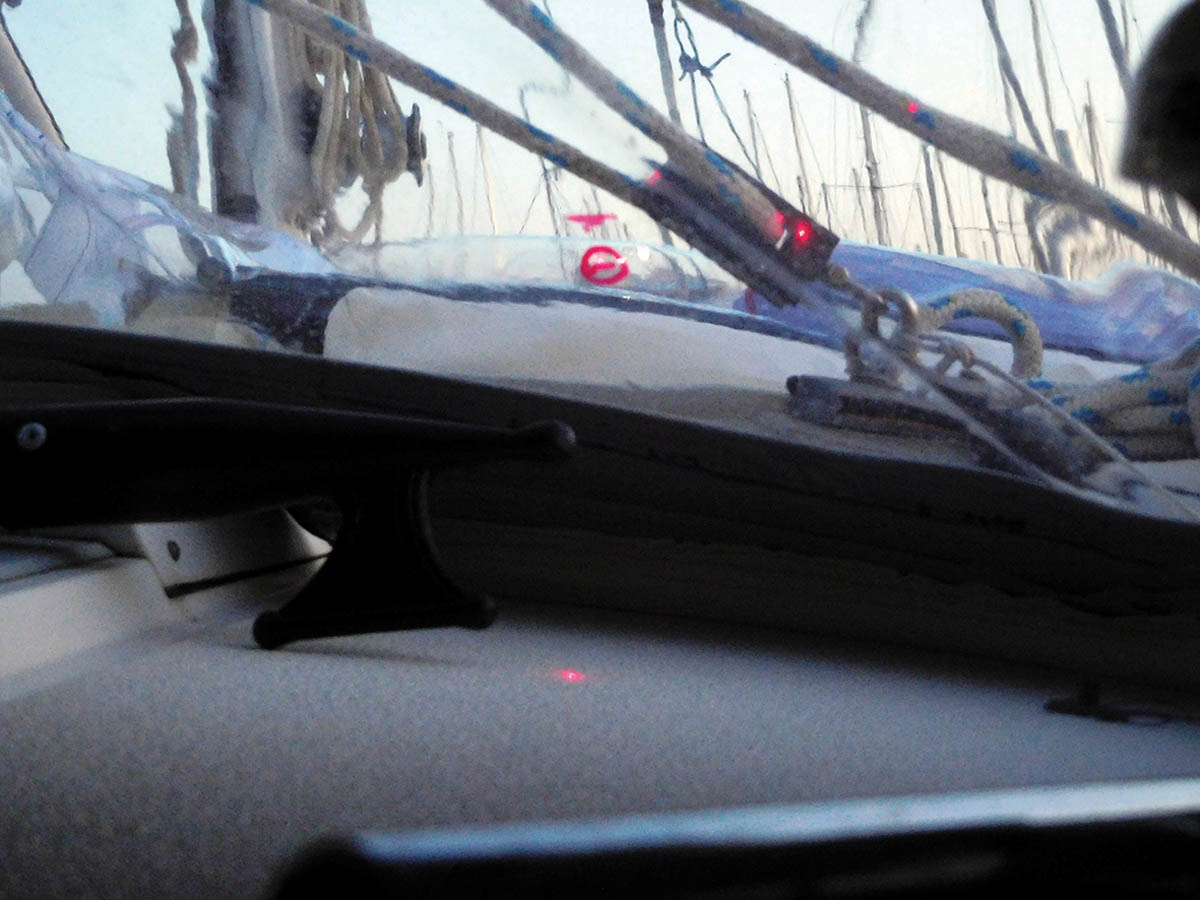
9. Reassemble the sprayhood on the boat before making a hole for the mainsheet. A laser pointer from the pulley block to the winch accurately positions it.
Sprayhood – bimini bridge
To cover the gap between the sprayhood and bimini when we are not sailing we have a bridging piece, which is attached with zips.
My detachable bridging piece joins to the sprayhood by the three front zips (the gaps are where the sprayhood handhold are) and then to the bimini by the one long rear zip
Originally published in PBO Aug19