
Gilbert Park refurbishes a pitted starboard propeller on his Seaward 29 motor cruiser and gets some advice on how to refit it

Having not used my boat for a while, and given that I was planning a trip of around 300 miles, I decided to give the Seaward 29’s bottom and stern gear a quick clean before leaving.
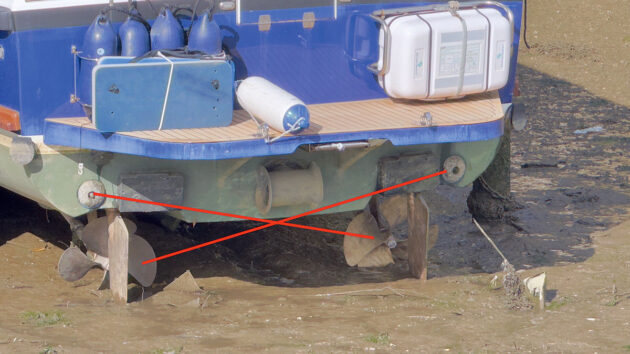
Although my mooring dries, there is a lot of mud so my neighbour, Dave, let me use his, which is less muddy. Once the boat was there and cleaned off, I could see multiple pits in the starboard propeller, while the port one had none. I decided to remove the prop and get it repaired.
At low tide, we bent back the tab washer and removed the nut. The prop was reluctant to come off, despite being hit with a wood block and a hammer, even after heating.
Realising we could do a lot more damage using chains and wedges, a proper puller was needed. There are several different sorts of prop pullers. The common one has a collar that goes around the prop shaft, but these need a clearance of about 20mm to 25mm between the prop and P-bracket. They’re also difficult to hire and expensive to buy.
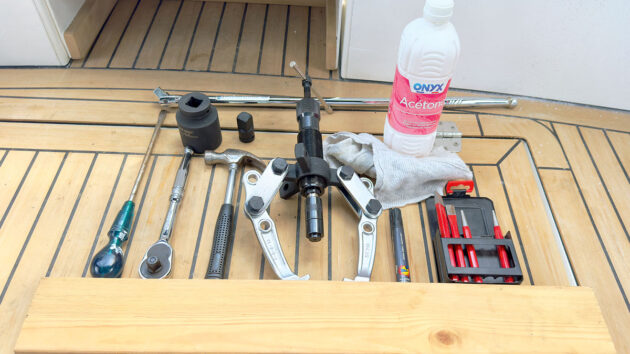
Various tools are needed to do the job, plus acetone and a lump of wood to wedge the prop so the nut can be undone and later tightened. Credit: Gilbert Park
I eventually rented a puller from a local technician. These can remove three- and four-bladed props and do the job perfectly.
When using any puller, do not take the prop nut off completely; when the prop is released, there’s a risk it can drop onto your toes which, I’m told, hurts a lot! Using this two-pronged puller needs two people to hold it until the legs grip.
Schooled in propeller installation
Once the prop was off, I visited Hamble Propellers to see if I needed a new one or if it could be repaired. Fortunately for me, I’d caught the damage in time, and it could be repaired – and what’s more, the work was done in three days at a very reasonable cost.
When picking it up, I explained how I was going to reinstall the propeller:
- A dab of grease
- Keyway in
- Prop on
- Bend the tab washer into the keyway slot
- Loctite on the thread
- Tighten up the nut using a torque wrench
- Flatten tab washer
- Job done!
As I found out, this was completely the wrong way to do it! Hamble Propellers advised me that no grease should be put onto the prop shaft; indeed, it should be cleaned off. Even waterproof grease will eventually be washed out, leaving the prop loose on the shaft.
After cleaning, the prop should be placed on the shaft without the key in the keyway, and the nut tightened. The thread should then be marked with a marker pen or the back of the prop scribed onto the prop shaft so you know where it should rest. The prop is then removed and the key inserted, and the prop reinstalled.
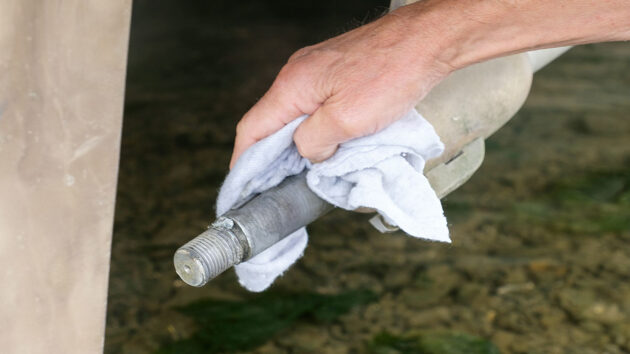
Cleaning the shaft with acetone to remove grease that may have been there, and also to clean the threads. Credit: Gilbert Park
The key may obstruct the prop. If possible, look along the keyway in the prop, and you should be able to see daylight. The mark should show that the prop is properly on and not obstructed by the key. Again, the nut should be fully tightened.

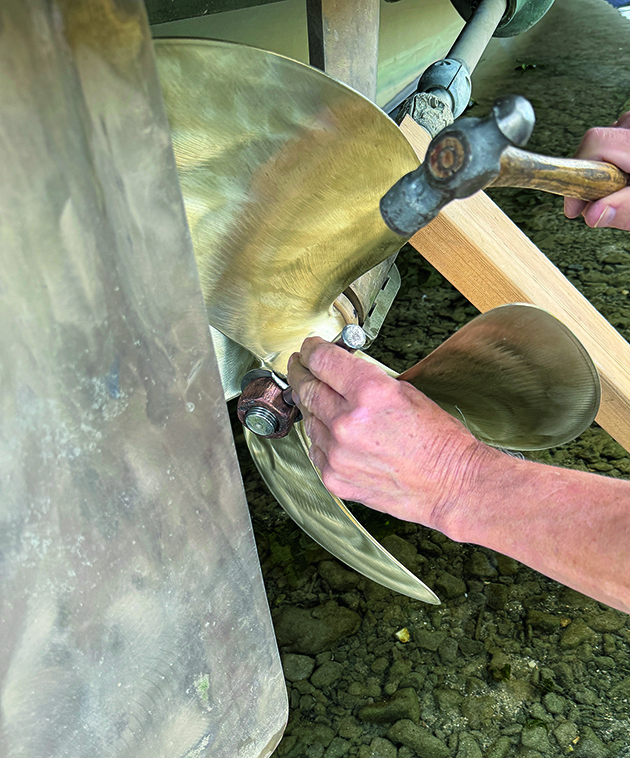
The nut is removed, and the tab that goes into the keyway is tapped into place. Credit: Gilbert Park
The nut is then removed, and the tab washer is inserted into the keyway and bent into place. The reason the nut was fitted, tightened and removed is so that the washer is moved as little as possible during the final tightening. Tightening a loose prop risks stripping off the keyway tab as the prop nut is tightened.
Once the nut is tight, the tab washer is bent onto two flats of the nut. Credit: Gilbert Park
Next, the nut is put back on and fully tightened. Note that no Loctite or torque wrench is needed; it just needs to be fully tightened. Finally, the tab washer was then bent on two sides. Job done… this time prop…erly.
Problem solving
Having restored the prop, I needed to resolve what was causing the problem. When I bought the boat a few months ago, the survey did not flag up any problems with the propellers.
However, the shaft anodes needed replacing. Two new ones were fitted, and on the unaffected (port) side, the old anode was left in place. On the affected (starboard) side, the old one was loose and removed.
At first, I thought it was something to do with only having one anode, so I fitted a second one. However, Hamble Propellers correctly identified that the most likely cause was that there was no grounding between the shaft and the gearbox because of the flexible coupling.
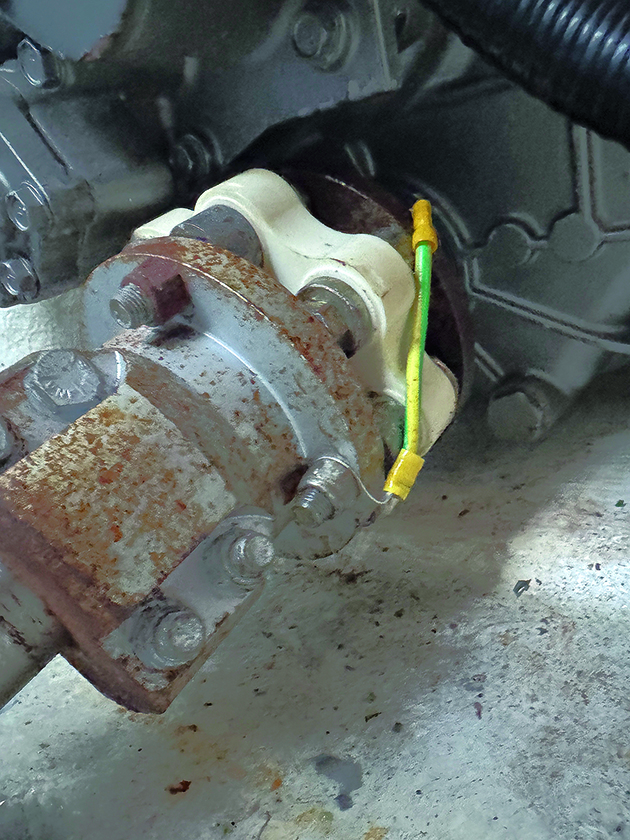
The link wire Gilbert fitted. Credit: Gilbert Park
A continuity test revealed no grounding on the affected (starboard) side and full continuity on the unaffected (port) side. The solution is to put a link wire across the coupling or take the coupling apart and see if the connecting strip has corroded away. I opted for the simpler solution of putting a wire across the coupling, which only involved undoing two nuts and making a jumper.
Other solutions are available, such as drilling and bending a piece of copper to fit or even using a piece of solid, domestic wire and twisting it in place between two nuts (but this won’t last long), or using a flexible strap made to the exact dimensions.
The final part of prevention is, from time to time, to test continuity. This can only be done when the boat is on the hard or dried out. You can’t do this when the boat is in the water – even with a mask and snorkel, nor from the connections inside, because the water will act as a conductor.
To test continuity of the props, use some long leads on a meter and check between the outside anodes and the props. CreditL Gilbert Park
Connect a multimeter from the prop to the outside anode. It should read less than one Ohm. So the next time I wash the bottom of the boat, this is one of the jobs I need to do.
I’m grateful to the many skilled technicians at Emsworth Marina who have helped me with this article; in particular, Adam of ACM, Nick of Nick Gates & Co and Luke of Cutler Marine. I also have to express my thanks to Paul and David of Hamble Propellers for fixing my propeller and providing me with the information on correct propeller installation. And finally, thanks to my neighbour, Dave, for his drying mooring and his invaluable help with this and several other projects.

Propeller care: everything you need to know
Stu Davies has valuable tips on how to maintain your prop – and explains how this vital bit of kit…

How I achieved optimal propeller pitch
Correct propeller size and pitch offer smooth and economical progress under engine. Peter Hawkins explains how he calculated the best…

Fouled propeller fix: top tips for solving the problem at sea
What should you do when you catch a line or fishing net and your prop becomes fouled? Ali Wood looks…

Boat propeller: How to choose the right one for your boat
The correct prop can have a dramatic effect on your boat's performance. Ali Wood learns how you can save fuel,…
What to read more practical articles like Propeller installation: tips from the experts?
A subscription to Practical Boat Owner magazine costs around 40% less than the cover price.
Print and digital editions are available through Magazines Direct – where you can also find the latest deals.
PBO is packed with information to help you get the most from boat ownership – whether sail or power.
-
-
-
- Take your DIY skills to the next level with trusted advice on boat maintenance and repairs
- Impartial, in-depth gear reviews
- Practical cruising tips for making the most of your time afloat
-
-
Follow us on Facebook, Instagram, TikTok and X