


Richard Thomson fitted out his new dinghy with old spares and items found while beachcombing to make it fit for liveaboard life
Often it’s said that if a cruising yacht is your floating home, then the dinghy is your car (or bike), writes Richard Thomson. How people use their tender depends on their type of cruising. Some live in the cockpit locker or forepeak and are only rarely inflated. Others spend most of their lives upside down on the foredeck.
If you only go ashore at the dock, you could almost do without a dinghy and if you have one it likely isn’t kitted out for adventuring. We sail with two dogs and go ashore in our dinghy every day. This generally entails a morning and evening run with the dogs. Depending on the forecast and the passage ahead, the ‘morning’ walk has been as early as 2am!
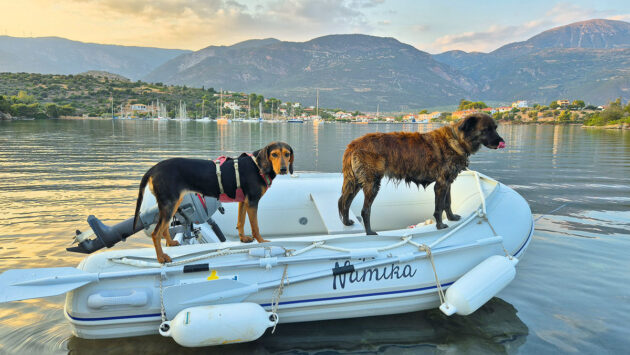
If you cruise with dogs, you are likely to use your tender to go ashore daily. Credit: Richard Thomson
Sailing with dogs has its challenges, but it also forces us ashore and encourages us to go on excursions. We also use the dinghy for provisioning, for topping up water or fuel when not tied to a dock, and for exploring hidden caves, reefs and shipwrecks.
Deciding on a PVC dinghy: Anchor setting
We sometimes anchor the dinghy, and in approaching bad weather have used it to drop and recover second anchors for our Trident Marine Voyager 38, Namika. We have a very strong preference for swinging free in a quiet anchorage and going exploring with the dinghy. One of the ironies of this sort of cruising is that some of our best memories are from the times we were not on board Namika.
For the last few years, our cruising dinghy was a more than 40-year-old Avon Rover R3-10 – incredible going for even a lightly used inflatable boat. More remarkably, the poor thing had a phenomenally tough life, spending nearly two decades in the harsh Mediterranean sun with three sets of dogs jumping in and out of it over the years. It spent another two decades on a Scottish loch where I enjoyed a good chunk of my childhood aboard it. It had been patched multiple times, had seams replaced, received new floorboards, a new bung and new oars.
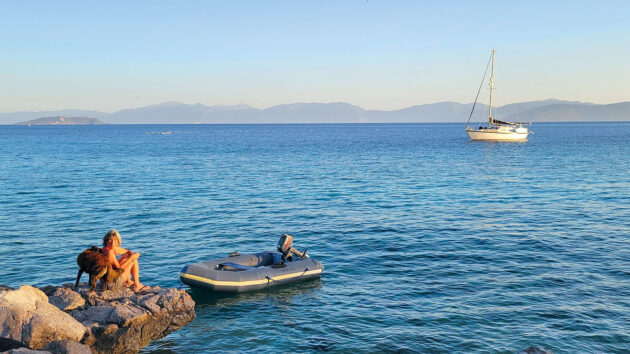
Richard’s Avon Rover had endured 40 years of hard use and much patching before it was no longer cost-effective to repair. Credit: Richard Thomson
Last year, the four lifting handles and the towing eye all pulled off in the space of a few weeks. The floor was leaking in several places, and a complicated patch on the compound curve of the bow was failing so the air needed to be topped up twice a day. The Hypalon – chlorosulfonated polyethylene (CSM) –synthetic rubber was also pretty thin in places. Bringing that Avon back to operational standard would be a major project.
Faced with the choice of spending those hours on a much-loved dinghy and spending them on maintenance and improvements to our much-loved 42-year-old Namika, there was only one answer: we replaced the dinghy. While the Avon had gradually and organically adapted to suit our needs over the years, we modified our shiny new dinghy very quickly to try to protect it from the sort of treatment we knew it would receive, using items we already had or collected while beachcombing. The cost of fitting out the dinghy was therefore nothing, but these modifications should improve its serviceable life.
Choosing our new PVC dinghy
First, a note on the dinghy we chose. This was strictly specific to us and is not really the point of the article, but I mention it to help clarify our decisions and what we were looking to achieve. We chose an inflatable again, and I won’t get into a discussion of hard dinghy versus inflatable. Our budget was limited and the chosen dinghy cost £1,200. False economy though it may be, Hypalon was more expensive than we were comfortable paying at the time, so we stumped for PVC.
PVC is significantly cheaper because it can be manufactured and assembled on a production line, but it suffers more from UV degradation. In short, it’s not going to make it to 40 years, though washing down at the end of the season and off-season storage out of the sun should help significantly – all things we already did with the Avon. Hypalon is the inflatable material of choice, but it is much more expensive, in part because it needs to be assembled by hand.
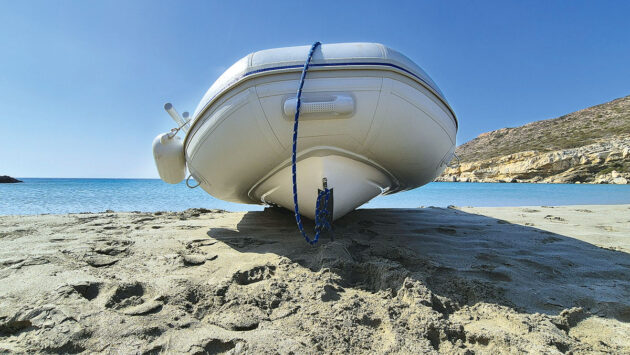
A rubbing strake was essential for the new dinghy. Credit: Richard Thomson
Weight is probably the major factor for us. The two of us regularly lifted the Avon up sand and pebble beaches, even with a little 2-stroke 3hp Yamaha electric outboard attached (big outboard engines are great on the water, but not for lifting). As the Avon’s floor leaked more, we were inevitably lifting water too, and this often resulted in a mix of lifting and dragging which surely worsened the Hypalon floor.
Along with age, this extra weight was also probably among the reasons the lifting handles all started to fail. In our budget and size range (and excluding air decks which we deemed unsuitable for our use), the new cruising dinghies were all heavier than those of yesteryear- at least 40kg. There was no kidding ourselves– with the outboard this would mean dragging or adding transom wheels.
No go for wheels
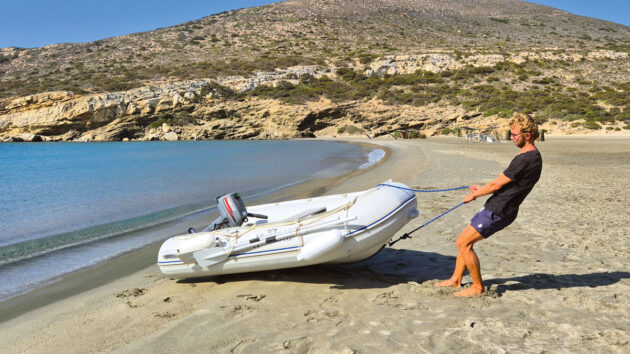
Transom wheels are great for slips or shingle beaches, but that’s generally not our environment and we decided they’d just add weight. We opted instead for a mini-RIB tender with glassfibre boat hull, which we could lift at the stern with the outboard mounted, dragging the bow over the sand so that just the glassfibre and its protective strake made contact with the ground, not the tubes. It’s even possible for one person to pull the dinghy by the painter up a sandy beach without the tubes touching the sand.
The glassfibre floor also provides a stable platform for ourselves and the dogs, and is easy to repair if necessary. Being a RIB tender, the lifting and towing eyes pass through the glassfibre hull so you aren’t relying on glued fabric. With our experience of the old leaking floor and the failed towing eye, this sturdiness was attractive.
To keep weight down, we downsized slightly to 2.5m. And so, to the modifications. First, we transferred the painter (the towing rope) across. It’s a floating rope, which I would recommend for painters. Years ago, when working on yachts in the Caribbean, we wrapped a painter (the sinking kind) around the propeller and stopped the engine in confined quarters. Quick reactions and a dollop of luck allowed us to escape unscathed, but it’s the sort of thing you only do once, and a floating rope is much less likely to wrap around the propeller.
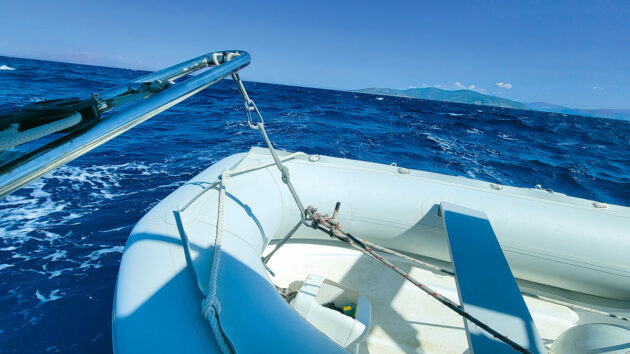
Changing the angle from the forward lifting eye means avoiding chafe against the tubes. Credit: Richard Thomson
Next, we transferred the strops for lifting the PVC dinghy on the davits. Being slightly shorter than the old dinghy, we ran an additional line from the aft lifting eyes to keep the forward strop away from the tubes. Using the good bit of an old halyard, we created a triangle running from the port transom lifting eye forward and under the seat to meet the forward strop, then back and under the seat to the starboard transom lifting eye.
By connecting the forward strop to this rope triangle with some stainless rings and a shackle, we formed a kink in the forward strop so that it is well away from the tubes. Had we not done this, it would have chafed the tubes while on the davits.
Advantages
This rope triangle has other advantages. It provides a connection point for a second painter, which we use in bad weather. It also creates a central point from which we can easily lift the PVC dinghy onto the deck using a halyard. We had some excess at the starboard quarter, which we deliberately left to act as a dock line, as a line ashore when anchoring the dinghy, and to create one half of a triangulating X when on the davits. We tied another length of old rope to the shackle and stainless rings combination just created. This is our backup second painter and the other half of that triangulating X with the dinghy on the davits.
When hoisted, we run this second painter diagonally aft, loop it over the davit, and from there onto the adjacent mooring cleat. The line at the dinghy’s starboard quarter is the mirror image of this, running forward to the opposite davit and from there to its respective mooring cleat. The two ropes cross to form an X. This X shape prevents the PVC dinghy from swaying side to side in a seaway. By looping each arm of the X over the corresponding davit before securing to Namika’s aft mooring cleats, this triangulation is even able to carry the dinghy’s weight alone, meaning any failure of the lifting strop or carabiner will not result in the dinghy dropping into the water.
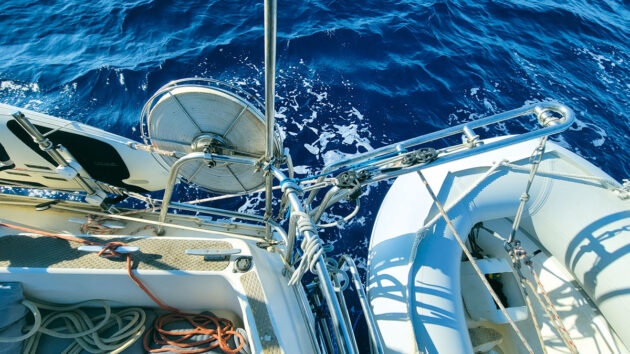
This X also offers redundancy with the lines securing the davits in their upright position, and holding the dinghy tight against the transom. Credit: Richard Thomson
While it hasn’t happened to me personally, I’ve heard a handful of stories of dinghies coming off davits in rough seas, and unless you’re very lucky, the result can be losing the dinghy. Using the second painter as half of this X allows the main painter to remain attached to the yacht, which is safer when releasing the dinghy from the davits. Having two painters forward (one attached inside the dinghy and one outside) and one line at the starboard quarter means they can also easily be used as dock lines. While dinghies have a rubbing strake, this is not always adequate to protect the tubes if waves push the dinghy up and down against the quay.
We use two small found fenders, tied so they hang along the starboard sponson. This enables us to run the dinghy starboard side against a wall; the helmsperson remains with the outboard on approach and can easily grab the dock. Where space allows, we lash the dinghy quite tightly to a ring, bollard or lamppost, with the fenders taking any punishment and not the rubbing strake or tubes.
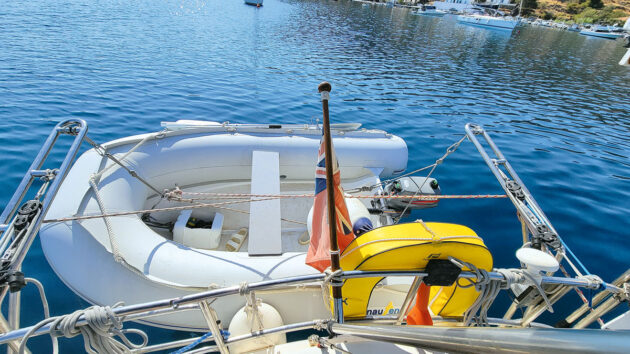
The PVC dinghy secured on the davits, held vertically, as well as laterally with the lines to the aft mooring cleats to form an X. Credit: Richard Thomson
Docking the dinghy tightly like this is especially useful when lifting in groceries, fuel or water cannisters, as the dinghy hardly moves. Where space at a dinghy dock is at a premium, we go stern- or bow- to and use an anchor to keep the tubes off the dock. There are attachment points for the oars on the dinghy, but given our PVC dinghy is short, the plastic blades protrude aft beyond the sponsons, which leaves them quite exposed and vulnerable.
After some experimenting, we added two loops where the fenders are to locate the oars more centrally on the starboard sponson; they stay there under their own weight, but it’s a simple matter to slide them out when needed. The aluminium oar shafts also provide a little extra protection for lowering and raising anchors and chain from the dinghy.
Easy anchoring
That brings us to the dinghy anchor, which we’d found while snorkelling some years ago. Anchoring the PVC dinghy is extremely useful when you can’t pull it up a beach, either because there are too many boulders or when there is no beach where you want to go ashore.
To hold the dinghy anchor and a short length of 6mm chain, we went beachcombing for a sturdy plastic canister. Having found one, we cut a square hole to create a box to store the anchor and chain. This box protects the hull from knocks and rust stains. It also stores dog toys and other odds and ends, and could act as an emergency bailer. Using a container with a handle gave us a handy point for securing the anchor box to the forward lifting eye.
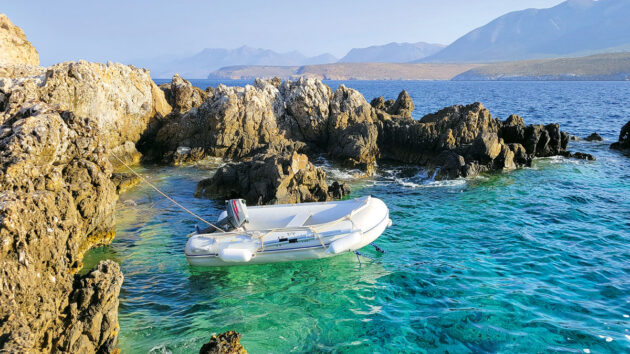
Using an anchor and then tying ashore allows Richard and Maxi to go ashore where cliffs make lifting or dragging a dinghy impossible. Credit: Richard Thomson
Forward is the best place for the anchor as it adds a little weight in the bow to help counteract the helmsperson and the outboard at the stern. To anchor, we tie the painter to the end of the chain and chuck the anchor and chain overboard. Generally, we then tie the aforementioned and much-used line at the starboard quarter to a rock or tree so we can easily recover the dinghy.
While it takes a little practice to become good at judging the distances, tying ashore keeps the bow pointing into any surf or waves and protects the outboard.
Secure ashore
A short length of chain offers one final advantage. If leaving the PVC dinghy somewhere we feel unsure about, we loop the chain through the outboard mounts, round a docking ring on a quay and back on itself, securing it with a padlock. It’s probably harder to cut than steel cable, and will hopefully deter unsavoury intentions.
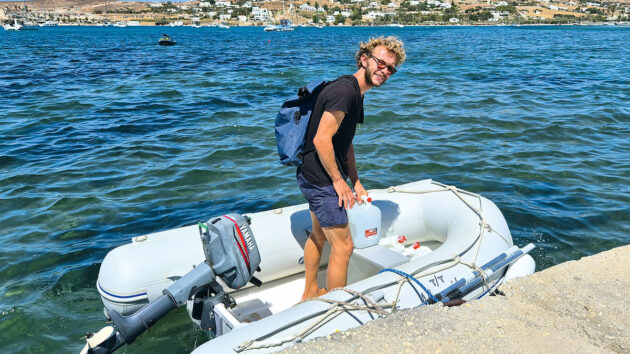
Richard and Maxi can lash the dinghy tight at the dock. Permanently rigged fenders take all the punishment. Editor’s note: It is a good idea to wear a lifejacket when on the water. Credit: Richard Thomson
A few lengths of old rope, a plastic cannister, some old 6mm chain, a folding dinghy anchor and two fenders – all repurposed or found items – and our dinghy is kitted out for pretty much any adventure. We can pull it up a beach, anchor it stern-to or swinging, lift it easily and safely on davits or with a halyard, tie it tight to a wall, and lock it if necessary, all with minimum effort and no cost. Every component has multiple uses.
If your dinghy spends its life in a locker or on the foredeck, perhaps there’s no need for any of this. That said, I’m not convinced that decorating foredecks with dinghies is an improvement aesthetically. Granted, some dinghies on foredecks are used regularly, but I suspect the majority are not.
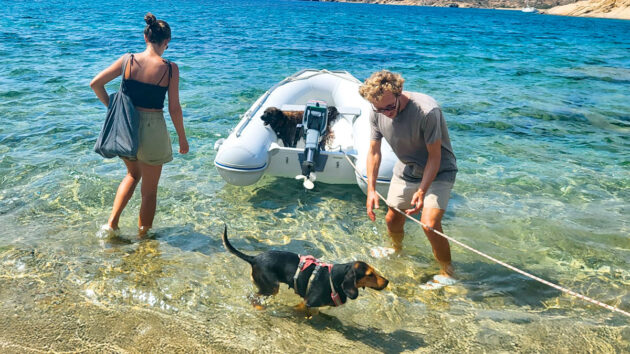
When heading back to Namika, the dogs go in the dinghy first, then the stern line is untied before the anchor is lifted. Editor’s note: It is a good idea to wear a lifejacket when on the water. Credit: Richard Thomson
Dinghies cluttering up lockers, the forepeak or aft berth also seems a strange use of space for the sailing that most of us do, though clearly the requirements for circumnavigators or those on extended, multi-year cruises are different; having a dinghy on deck or on davits is not always sensible offshore. We also see a lot of dinghies scraping against docks in the waves and you can just hear the tubes crying out. We see dinghies dragged roughly up pebble beaches because bigger is not always better, or because the skippers have no means to anchor them.
Our PVC dinghy won’t last four decades, but it will almost certainly be with us longer because of these little modifications. Even better, we adventure more because of them. At the end of the day, those adventures are a big part of why we go bluewater cruising.
How to secure and tow an inflatable tender
Kerry Pears and husband John have rescued many an errant tender in their years afloat, so Kerry has advice to…
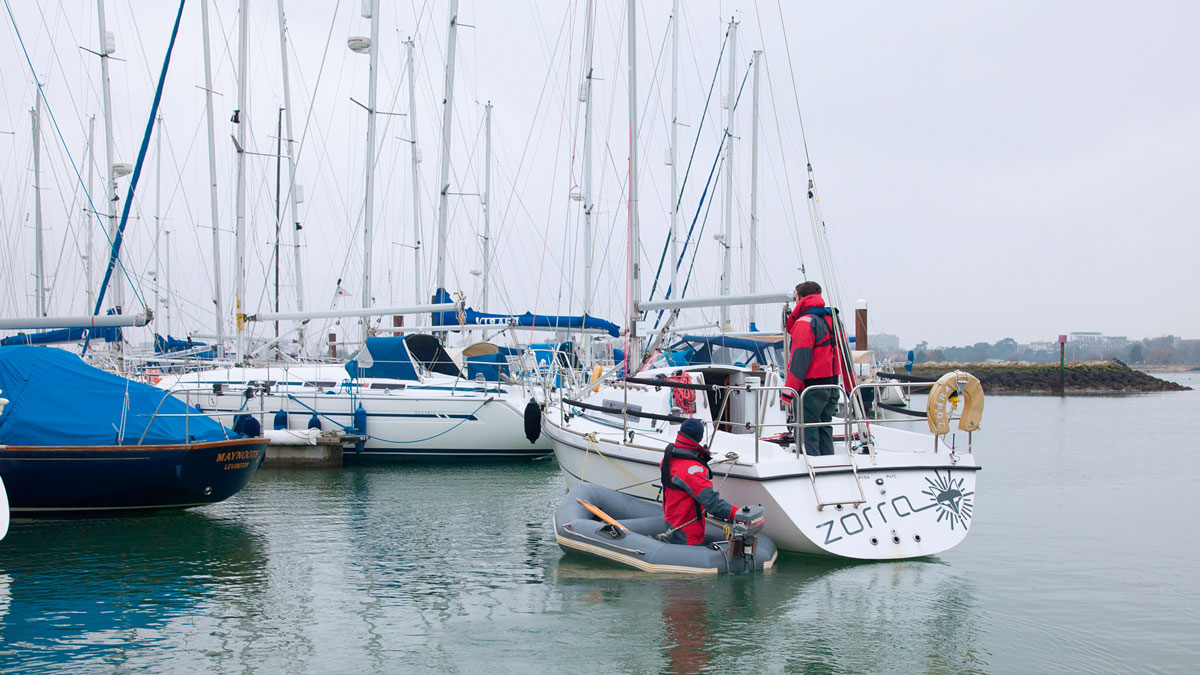
Boat towing and berthing by tender
If your engine fails to start, being able to berth your boat using the tender is an extremely useful skill,…

Best inflatable boat: 9 compact tenders put to the test
Inflatables are everywhere: paddleboards, canoes, kayaks, tents, kites and wings – and inflatable boat technology has long been a practical…

Transom repair for a hard tender: step-by-step
Jake Frith explains how to carry out a transom repair for many more years of trouble free service
Want to read more articles like Love me tender: how a liveaboard crew ‘pimped’ their PVC dinghy for adventure?
A subscription to Practical Boat Owner magazine costs around 40% less than the cover price.
Print and digital editions are available through Magazines Direct – where you can also find the latest deals.
PBO is packed with information to help you get the most from boat ownership – whether sail or power.
-
-
-
- Take your DIY skills to the next level with trusted advice on boat maintenance and repairs
- Impartial, in-depth gear reviews
- Practical cruising tips for making the most of your time afloat
-
-
Follow us on Facebook, Instagram, TikTok and X