
Keep your cabin dry and private with this simple canvas companionway cover project that anyone with a robust sewing machine can tackle. Libby Earle explains
Privacy and keeping out the weather in the saloon can be a bit of a challenge which is why a companionway cover can be the ideal solution.
On our first boat, a venerable shared Moody 333, we often resorted to a towel draped over the hatch rather than going to the trouble of putting in the boards, which also made the saloon dark even in the bright sunshine of Palma Bay. When we got our own Bavaria 32, the washboards were Perspex, but they are still the same ungainly faff to drop in. We also had very welcome air conditioning on board, so we needed a hassle-free way of keeping the Mallorcan heat out (or in, during the winter) and still be able to nip in and out of the companionway easily.
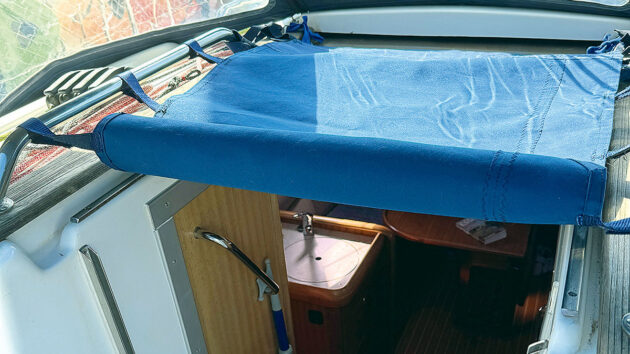
The finished cover in place on the companionway of the Bavaria 34. Velcro straps hold it in place and it can easily be rolled away. Credit: Libby Earle
Luckily, our friend Maureen gave us the idea for a canvas solution. With a bit of careful measuring, a metre of canvas and some ‘window’ vinyl, we made our own really useful companionway cover. Since then it’s been much admired and so I used some spare canvas to make one for a Bavaria 34 owned by our friend, John.
Here’s how to go about it.
What you’ll need:
- A piece of UV-stable canvas at least 1m x 1.5m in size
- A small piece of lightweight clear vinyl – I had an offcut from another job and often suppliers will have similar pieces if you ask
- Double-sided basting tape
- Polyester 2cm seam binding to match the canvas
- 1m of medium lead-weighted curtain tape
- Strong polyester thread
- Ruler, tape measure and tailor’s chalk
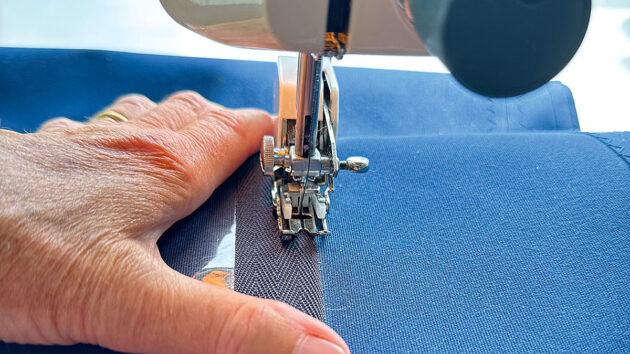
You will also need a robust sewing machine that will manage heavy canvas. It’s a good idea to check first; if your machine will take several layers of tough denim, you should be okay.
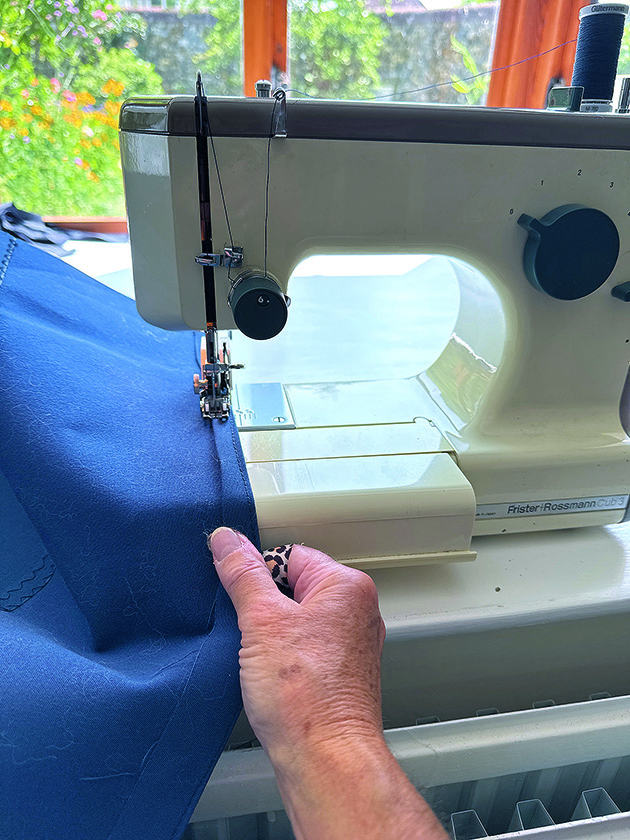
Check first that your sewing machine can cope with sewing heavy canvas. Credit: Libby Earle
My machine is a 50-year-old Frister & Rossman Cub that’s small in size but is very robust with a heavy, all-metal frame.
Measuring up for the companionway cover
Using a steel tape measure, first of all measure the width and length of your hatch opening, the distance between the centres of your handrails, the length of your washboard opening and the width of your washboard opening – top and bottom.
Add an allowance for hems to these measurements. If using heavy acrylic canvas, it’s possible to machine-bind the edges with a zigzag stitch and get away with single-thickness hems. This is kinder to a domestic sewing machine.
Make sure you use canvas that is UV-stable, which means it has been treated with coatings to prevent fading and damage from sunlight. Credit: Libby Earle
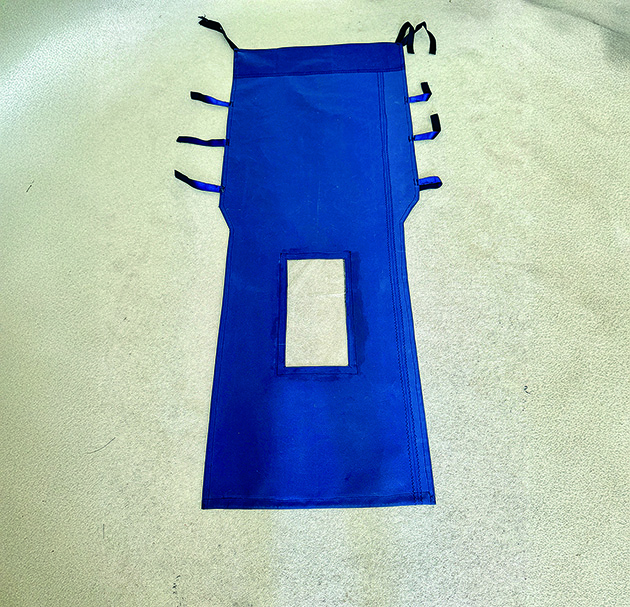
Once you have the measurements, it’s a good move to draw out the shape of your cover on some craft paper or an old sheet. You’ll need to mark a short graduation between the width of the hatch cover and the narrower vertical flap that will cover the washboard opening.
Marking out the position of fixing straps/tapes at this stage is also helpful. If you can, take the template to your boat and check the fit before cutting into expensive canvas; I couldn’t do this with a sewing machine back in the UK and boat in Mallorca, so good measurements and some guesswork did the job.
Companionway cover canvas
I used Sualeda uncoated acrylic marine canvas, which comes in a 150cm width. This wasn’t quite long enough to cover the 165cm total required length of the cover so, having cut out the main piece (using the crosswise width of the 1m piece), I extended it at the top (widest) end using an offcut. Observant readers may notice another lengthwise seam in the pictures – this is because I actually used up two smaller spare canvas pieces to make John’s cover. Piece and sew everything together to make a large enough canvas before you cut out the cover.
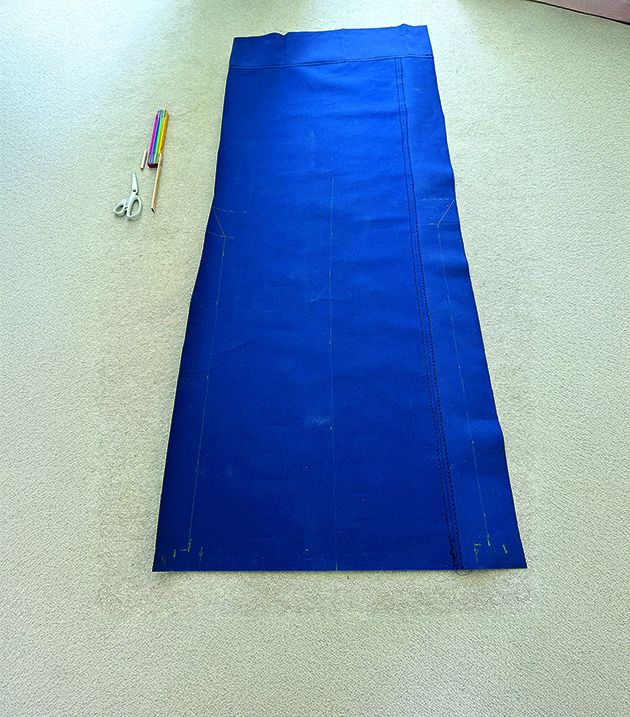
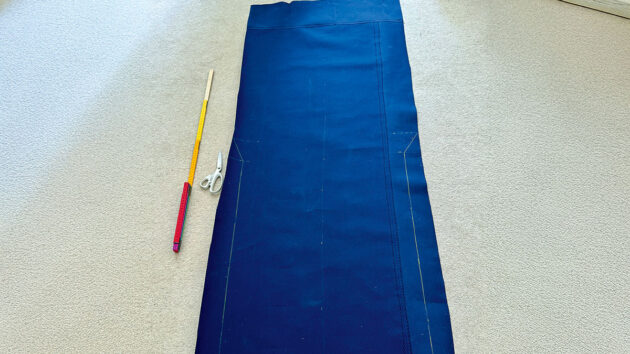
Lying the canvas flat on a clear surface, carefully mark out the pattern using tailor’s chalk and a ruler. Make sure you remember a hem allowance all the way round. I found it best to mark out the actual size and allow for hems in cutting out (3cm extra all the way round as I was using turned-under hems). Mark a line down the centre and also a ‘right side’ clearly in a couple of places. Then cut out the shape.
Sewing
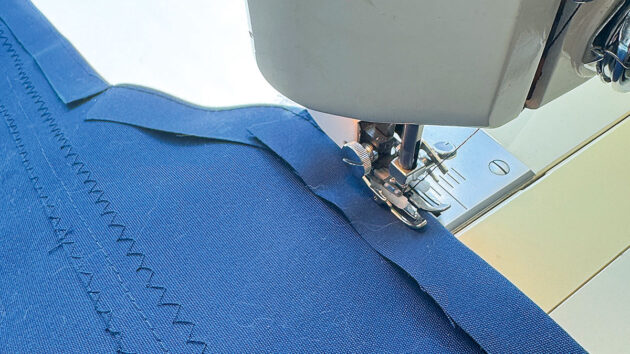
Acrylic canvas is tough and stiff when new, so a bit of planning is needed when feeding it through the sewing machine. Keeping the bulk of the canvas to the left of the sewing machine foot whenever possible and rolling excess that has to go through on the right (rather than trying to scrunch it through the gap) helps. If your machine struggles with hemming several layers of canvas, it’s okay to zigzag over-sew all the edges and just use single-fold hems. Our original cover was sewn like that and is lasting well. Likewise, a single overlap (again with oversewn edges) suffices for any joining of canvas pieces.
If using single-layer hems, use a wide stitch and zigzag setting to stitch round three sides of the cover, leaving the narrow bottom unhemmed for now.
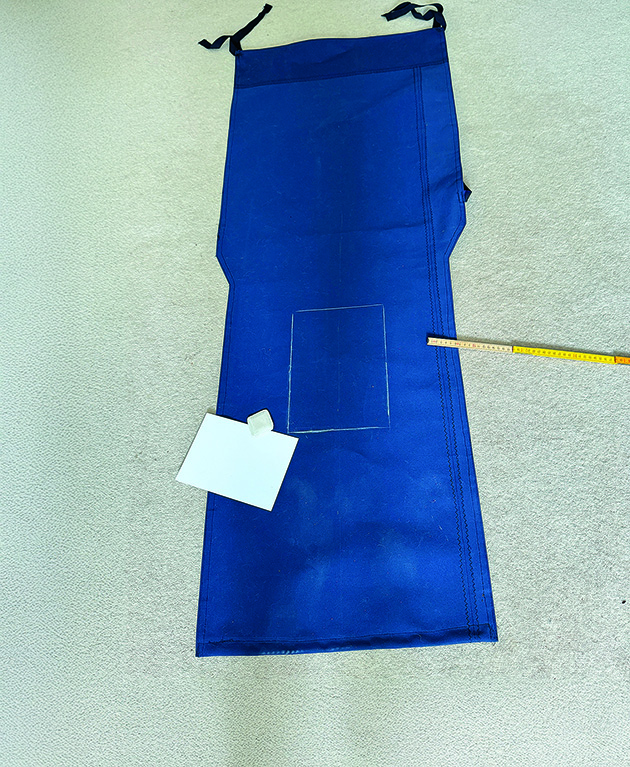
Mark out the window position on the cover. Credit: Libby Earle
Acrylic canvas isn’t prone to fraying and so this finish is fine to use. Turn over your seam allowance all the way round and hem. I found it easier to turn over the allowance and ‘crease’ it in place (rather than trying to use pins) and keep checking against the gauge on the sewing machine foot as I went round.
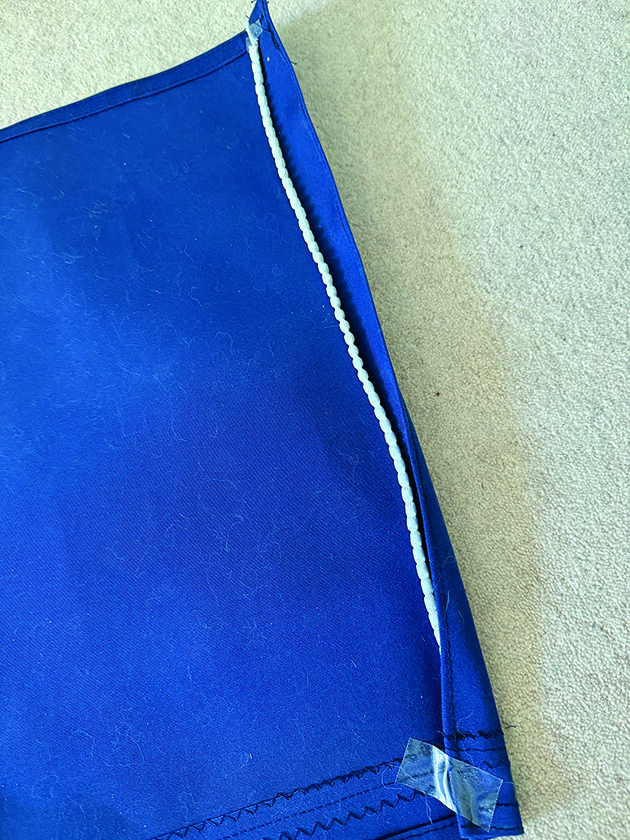
Cut a piece of your weighted tape the width of the bottom end of the cover. It needs to be heavy enough to keep the flap of the cover weighted down in a breeze, so double up the tape if necessary. Hem the bottom edge with the weighted tape inside.
Once the piece has been hemmed all round, you’re ready for the window.
The vinyl window
This sounds daunting the first time you do it, but it’s easy to do once you know how and very rewarding! Sailrite has a great YouTube tutorial to get you started.
Think about the size and position of your window; it should allow some light into the cabin while still providing some privacy. It’s surprising how eyes on the pontoon can be drawn to a cosy-looking saloon!
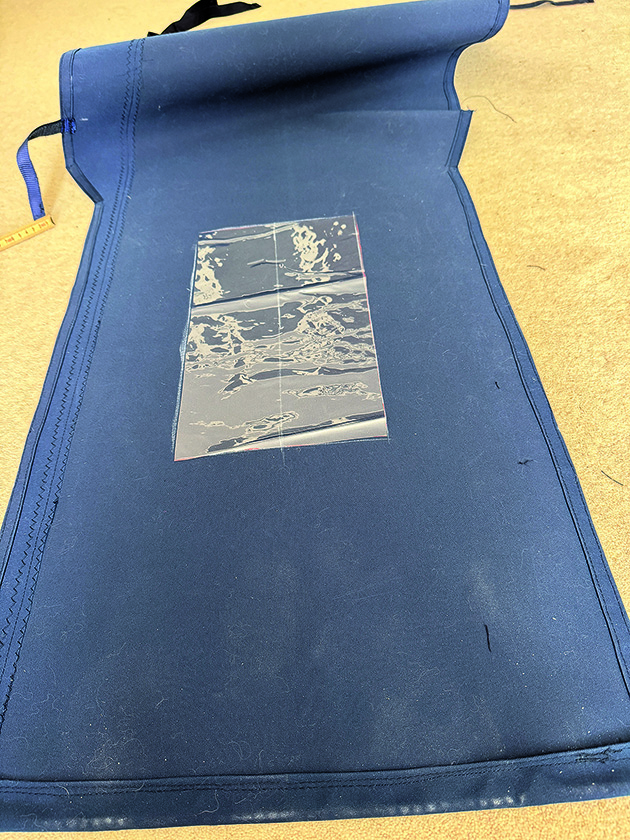
Mark out the window placement on the wrong (hemmed) side of the cover and cut a small hole in the canvas in the centre of where the window will sit. This takes courage – but will make life a lot easier later! Now cut out your window shape from the vinyl. Cut four pieces of binding tape for the edges and stick a strip of basting tape to one edge of each. Fix the inside (basted) edge of each strip to the vinyl, overlapping at the corners. They don’t have to be the exact length; you can trim them later. Turn over the window and fix more basting tape to the vinyl directly over the sticky tape now holding the binding in place on the other side.
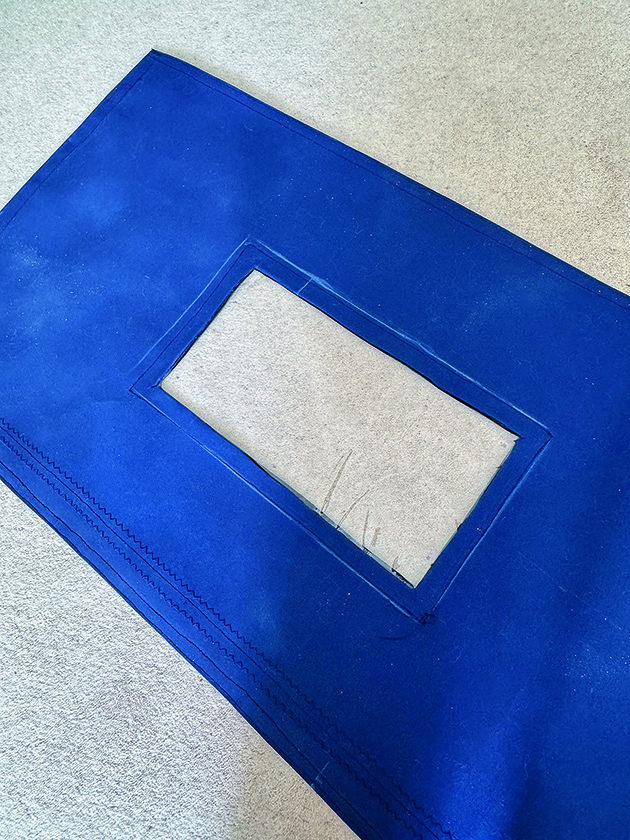
The finished window in place. Credit: Libby Earle
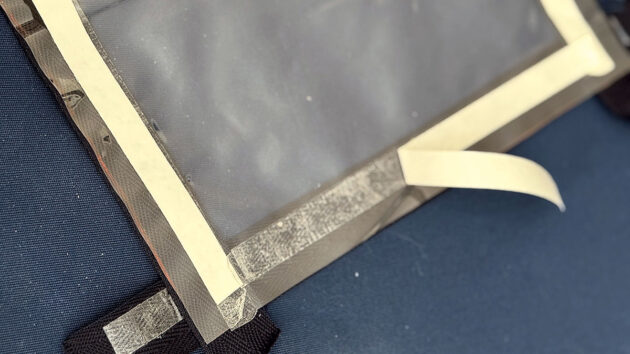
Now, remove the protective paper and stick the window to the ‘wrong’ side of your cover in the marked place. Sew the seam binding to the cover, ie round the edges and not through the vinyl at this stage. Turn the whole thing over and, using the access hole you cut earlier, carefully cut out the surplus canvas on the right side, leaving around 1.5cm as a hem allowance round the edge of the window.
Retaining straps
Now turn this under, using the basting tape on the vinyl to hold it in place. You’ll need to carefully cut the corners to make a neat finish. Sew in place and your window is finished!
The last job is to make and sew fixing straps that’ll hold the cover in place over the companionway hatch. I used 2.5cm webbing and Velcro to fix the cover to these, although a more durable solution would be to use marine press fasteners.
The Bavaria 34 has handy horizontal grab rails on either side of the sliding hatch which allow straps to slide along and push the cover right out of the way when not needed. It’s very quick to drop down and keeps the cabin dry if it rains or when the skipper decides to hose the decks!
How to make a companionway cover: Step-by-step
Credit: Libby Earle
1. Measure and mark out the shape, allowing for hems.
Credit: Libby Earle
2. I sewed single hems, finished with a zigzag stitch to prevent fraying.
Credit: Libby Earle
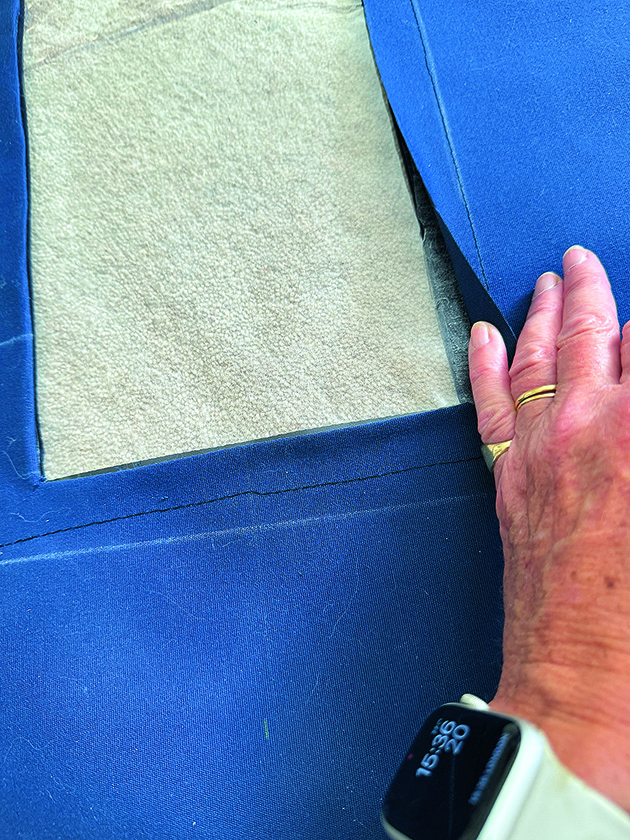
3. Sew the lead-weighted curtain tape into the bottom hem.
Credit: Libby Earle
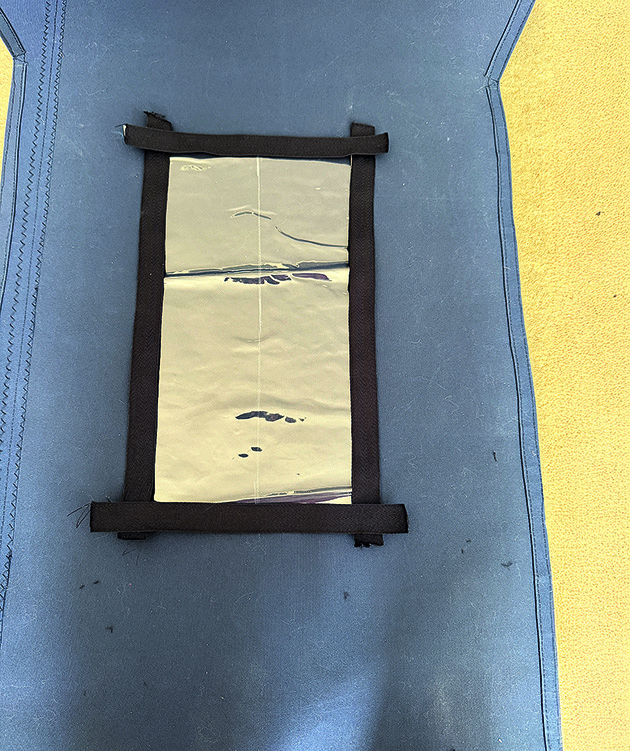
4. Mark out the window position and then cut out the window vinyl a bit larger than the finished window
Credit: Libby Earle
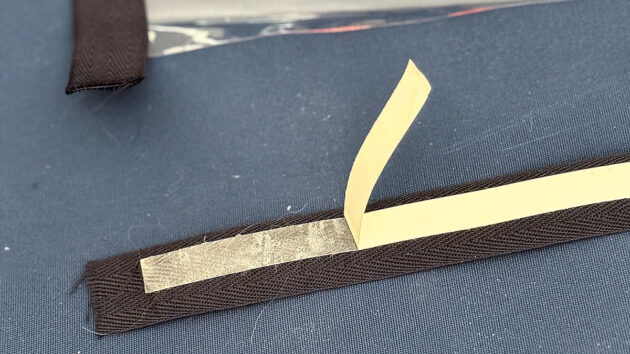
5. Prepare the window binding with basting tape on the inside edge and stick it to the vinyl.
Credit: Libby Earle
6. Fix basting tape on the other side of the vinyl. It should exactly cover the tape holding the binding.
Credit: Libby Earle
7. Stick the prepared window to the inside of the cover in the marked place. Make sure the binding is outward.
Credit: Libby Earle
8. Sew the window to the cover along the outer, untaped edge of the binding at first.
Credit: Libby Earle
9. Turn over the cover and cut out the window shape, then turn under the hem and sew it in place through the vinyl.
Credit: Libby Earle
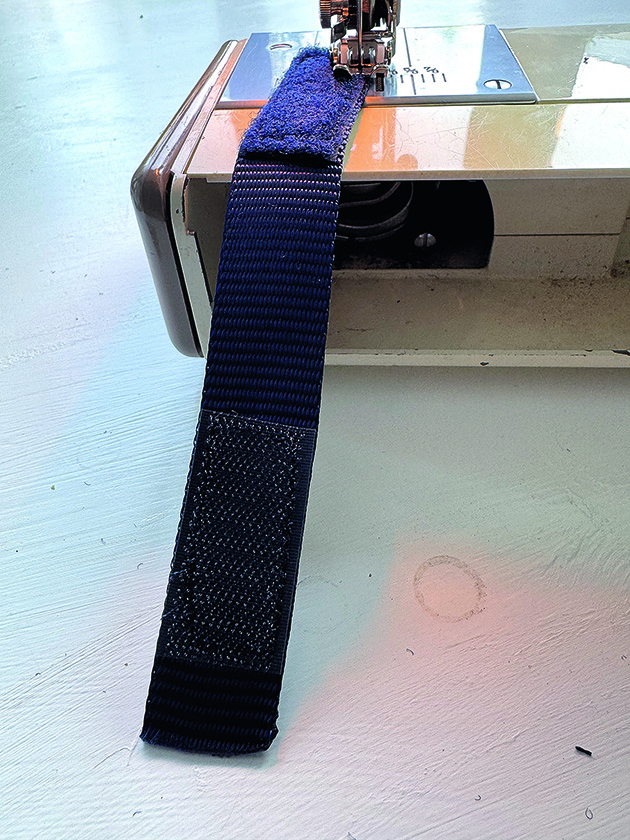
10. Sew Velcro to the fixing straps that’ll hold the cover in place.
Credit: Libby Earle
11. The finished companionway cover.
Credit: Libby Earle
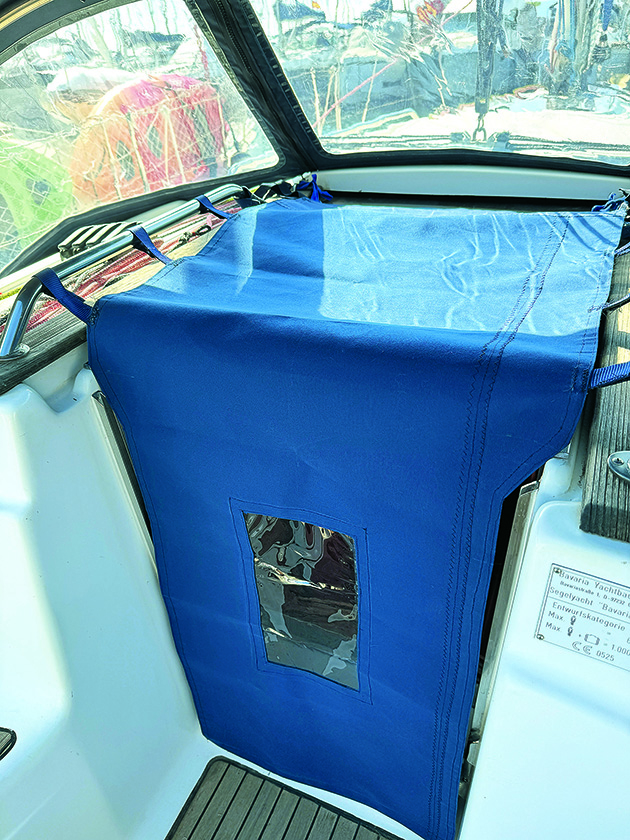
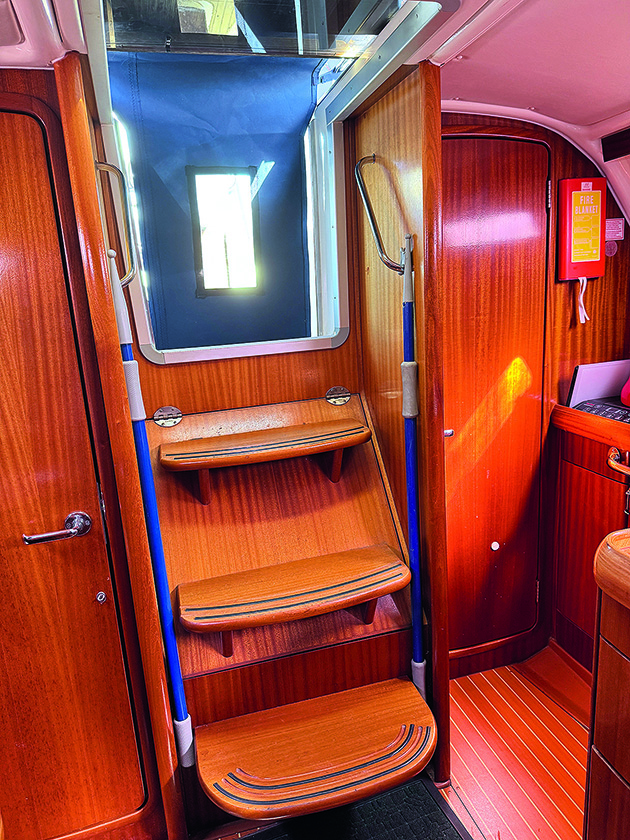
12. The companionway cover in place, seen from inside.

How to make your own canvas bucket
Lin and Larry Pardey's step-by-step guide to producing a durable canvas bucket: from the January 1995 issue of Practical Boat…
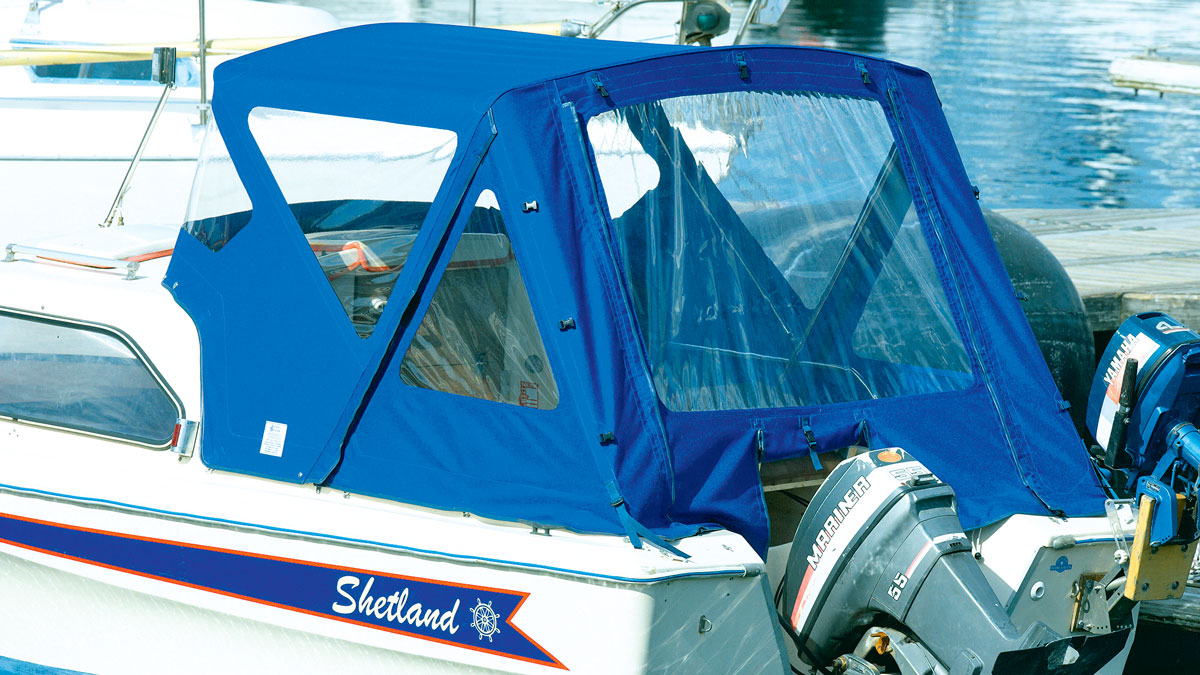
How to revive your boat canopy
If your boat canopy has suffered from sun bleaching, ripped windows, worn stitching or fabric tears, don’t write it off.…
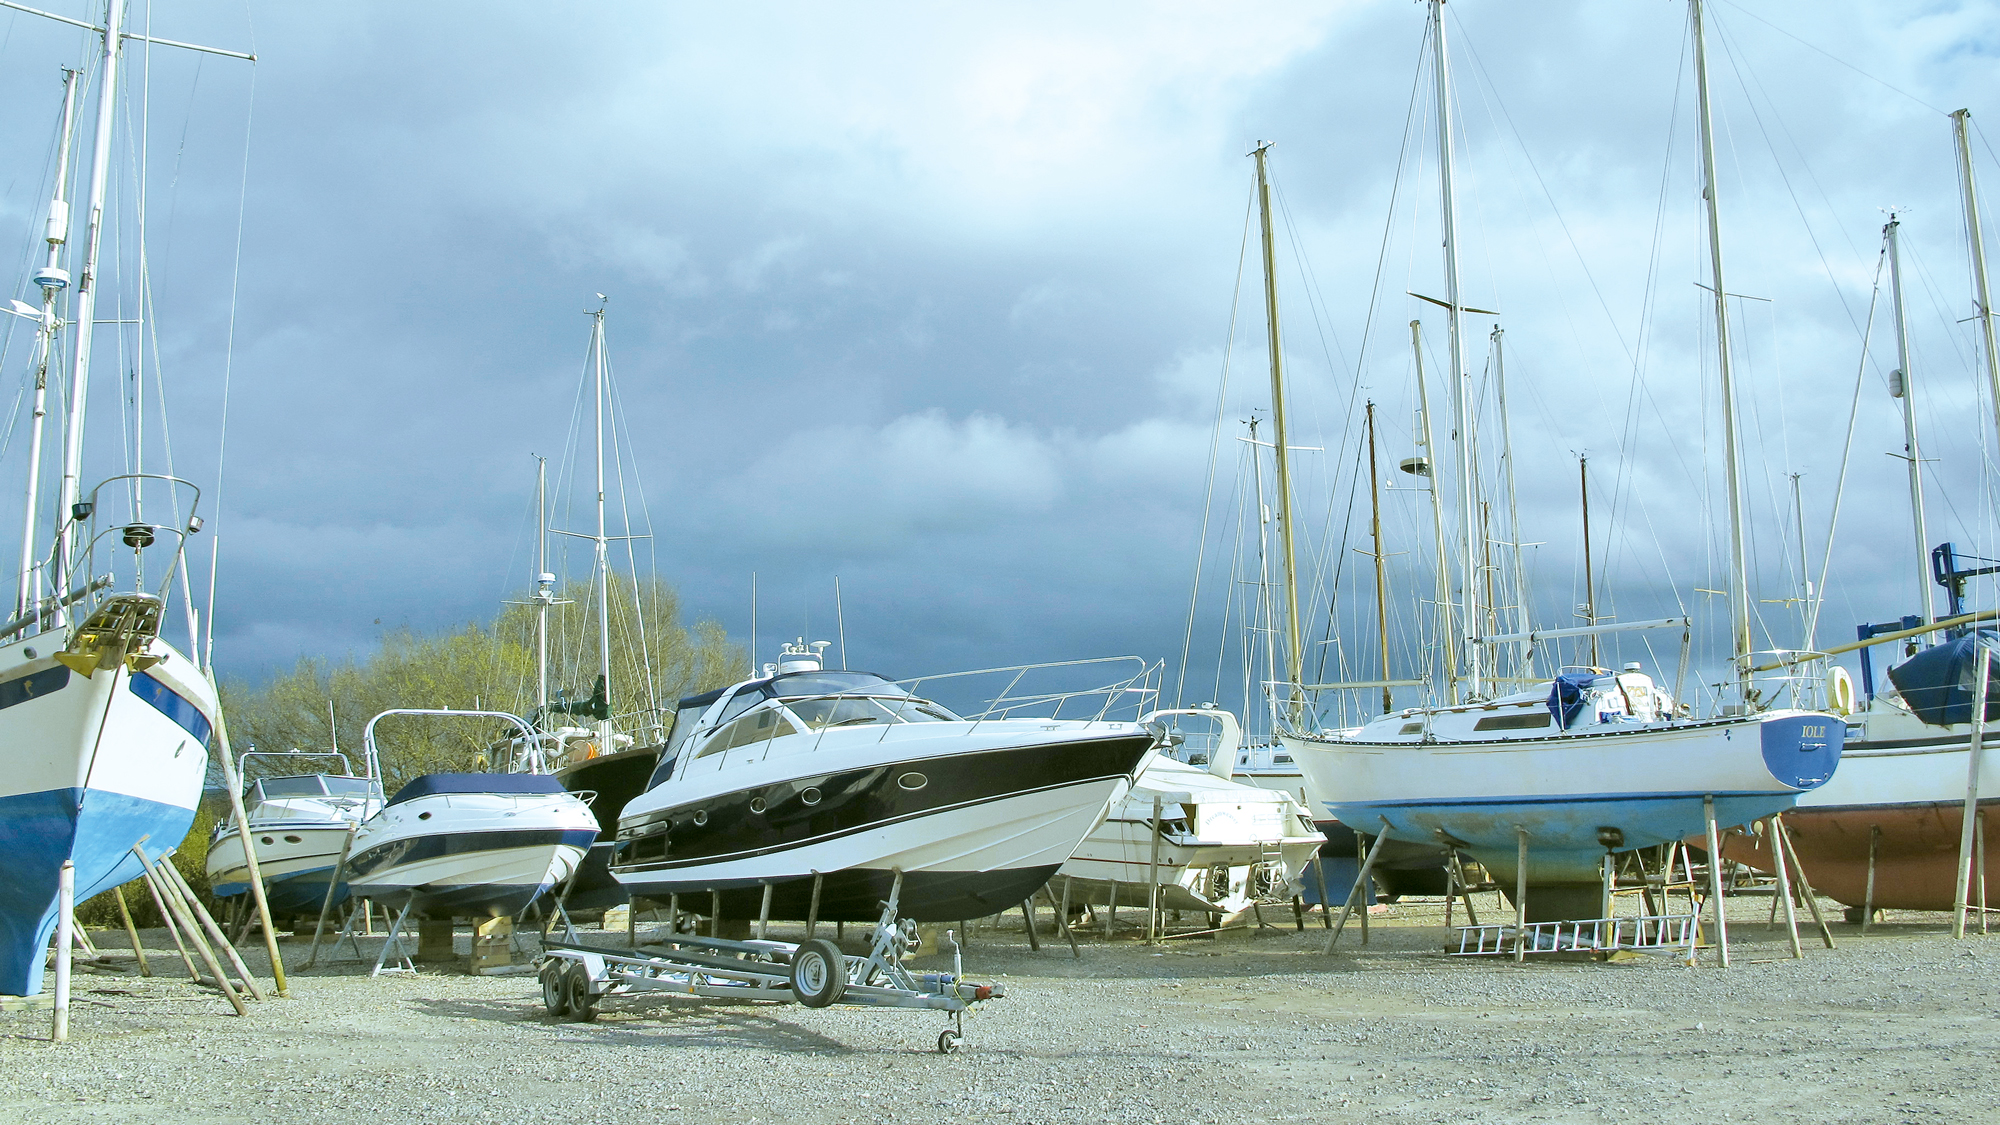
Banish damp from your boat this winter
Ashore or afloat, winter cold and damp can have a detrimental effect. Jake Kavanagh looks at the options for keeping…
Sail cover repair you can do yourself
After 11 years under the harsh Australian sun John Tylor’s mainsail cover was falling apart. Here’s how he brought it…
What boat kit has impressed you the most?

Follow Practical Boat Owner on Facebook, Instagram, TikTok and X