
Tony Davies shows how to fit coaxial plugs and sockets to make a reliable VHF cable joint
How to fit coaxial plugs and sockets
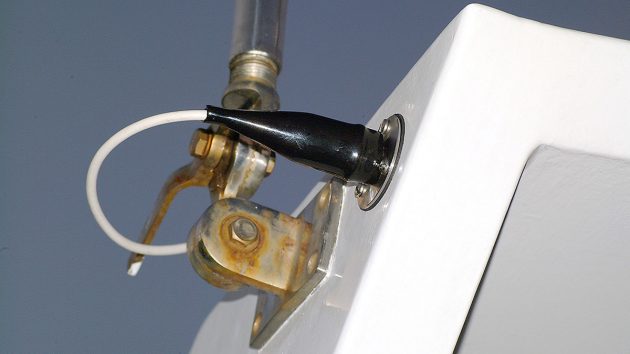
Recently, one of my 2.4m VHF aerials snapped off about a foot above the stainless steel fitting.
Faced with the task of dismantling the panels and headlining throughout the boat I decided to use the original cable and fit a watertight deck plug as is common on yachts.
The broken antenna before the inner cable snapped
It also seemed a good idea to be able to remove the antenna during the winter lay-up for storage to extend its life.
If you’re reading this with a similar job in mind it is important to check the thread type on the antenna mounting to ensure the thread is compatible with the new aerial.
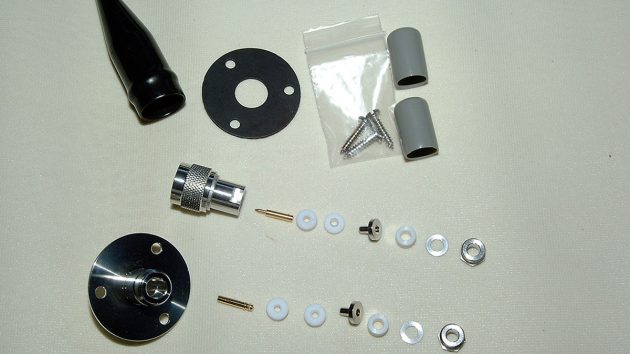
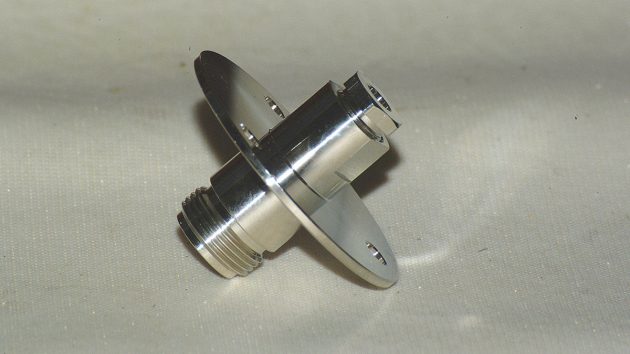
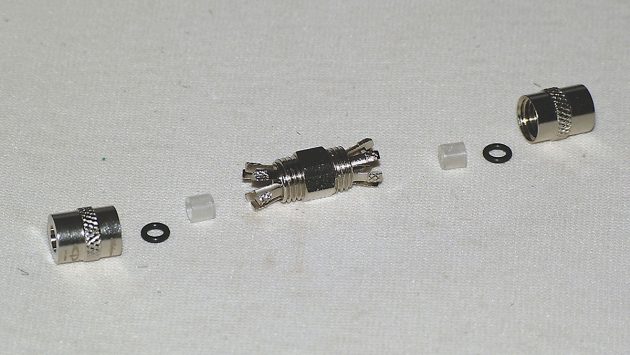
The plug and socket laid out in order. From right to left: backing nut – washer – cable seal – insert – first insulating seal – second insulating seal – pin – body. Note the blanking plugs and watertight cover
This is especially important if your mounts are 15 years old or more as thread types may differ.
How to fit coaxial plugs
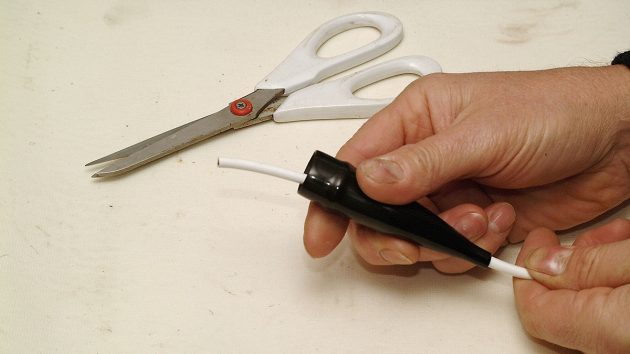
1. Snip the end off the waterproof cover and slide it up the cable out of the way.
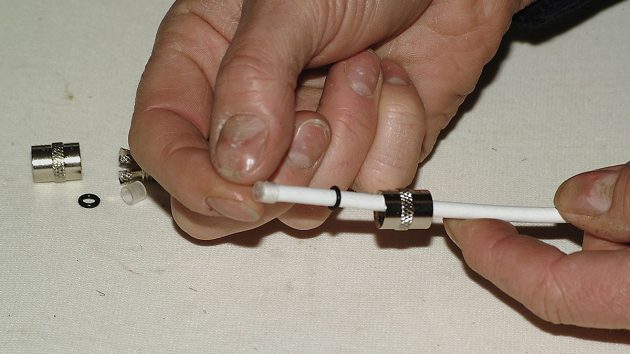
2. Next, slip the backing nut, washer and seal onto the cable.
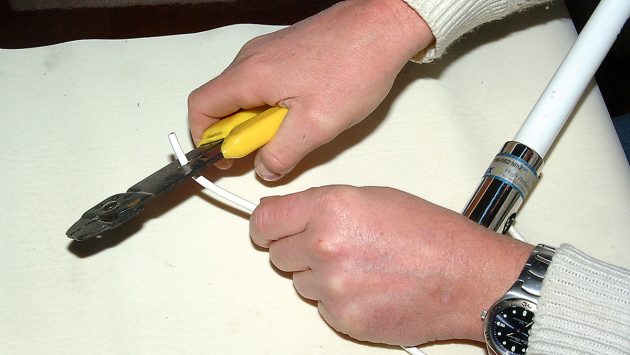
3. Carefully cut the outer insulation without damaging the braid. Ideally, use a wire stripper tool, although a craft knife used carefully works equally well.
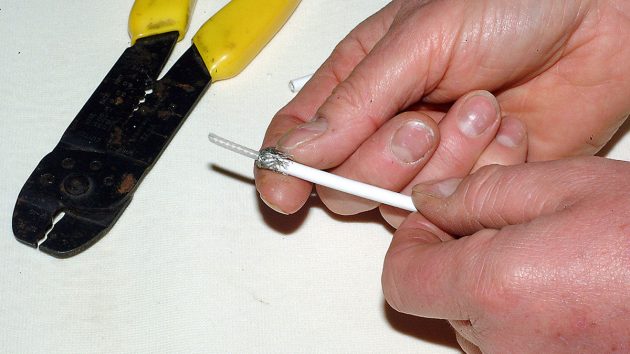
4. Lift off the insulation to reveal the braid and carefully turn the braid back over the remaining outer insulation.
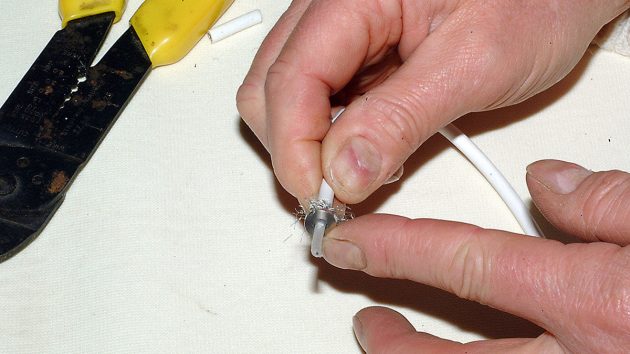
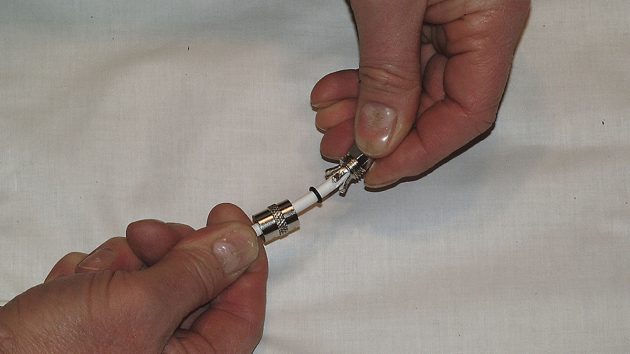
5. Now slide the insert over the inner insulation so that the spigot passes inside the braid until it is up against the braid and outer insulation.
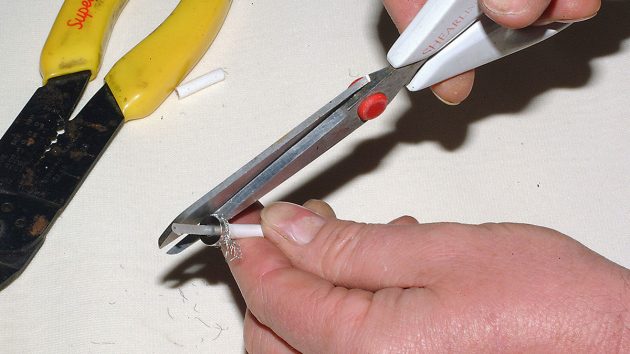
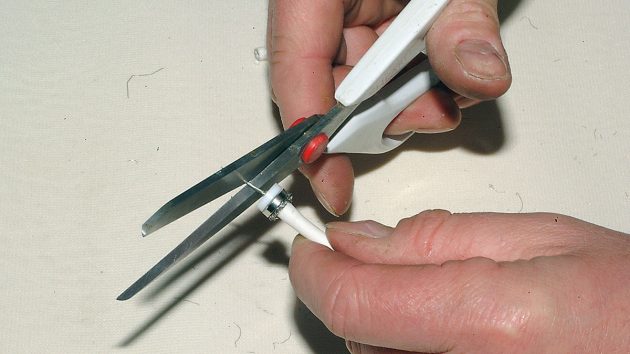
6. Using a pair of scissors, trim the braid until it is flush with the outside edge of the insert.
7. Slide the first insulating washer over the inner insulation and up against the face of the insert.
8. Using the wire strippers, cut the inner insulation flush with the face of the first insulating seal to expose the inner conductor.
9. Cut the inner cable to a length of about 5mm so that it fits right up inside the pin. Test the length by inserting it into the pin before cutting it too short.
10. Now tin the inner cable with electrical resin-cored solder. Keep this to a minimum or the cable will not enter the pin.
11. Fit the pin and solder it into place through the tiny hole in the pin. This may result in blobs of solder on the pin, which can be cleaned off with a damp rag when hot, or with fine glass-paper.

12. Fit the second insulating seal, then push the assembly into the plug body.
13. Slide the cable seal, washer and nut down the cable, then engage and tighten the nut to compress the seals.
That way the easy bit….
…And now exactly the same procedure is followed with the socket part.
This is slightly more difficult as it has to be done outside in a rather more awkward position.
Don’t even bother to attempt this in windy and freezing conditions, as even a commercial-size soldering iron will not be able to maintain sufficient heat outside.
1. The socket is the only different part of the set, and although the work is almost identical, remember to place the rubber backing pad over the cable before starting the assembly. (Or you can do what I did and cut the backing washer to enable it to slip over the cable later on!)
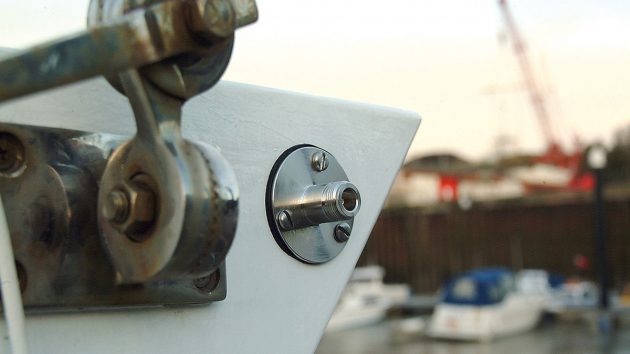
2. Fit the socket in the chosen position and bed it down on a little sealant for extra protection. Especially if you have cut the backing pad!
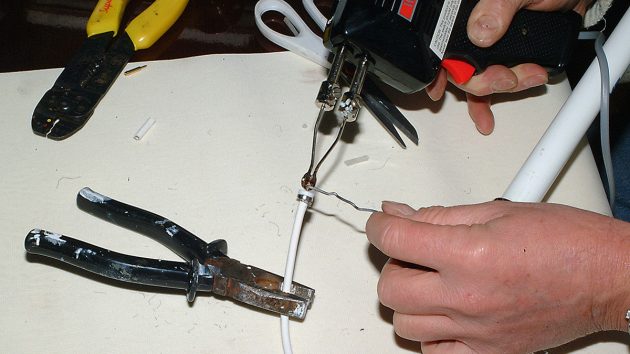
Using a cable splice
The plug and socket are great when you have time to fit them.
What about when you need a quick, reliable and permanent repair without solder? The answer is to use a cable splice.
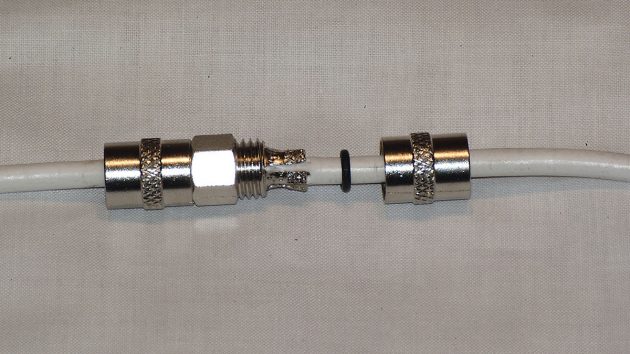
1. Here it is, laid out in order of assembly from left to centre: backing nut–cable seal–insulator–body. There is a pin inside the body that passes into the inner cable when assembled.
2. First, slip the backing nut, seal and insulator onto the cable.
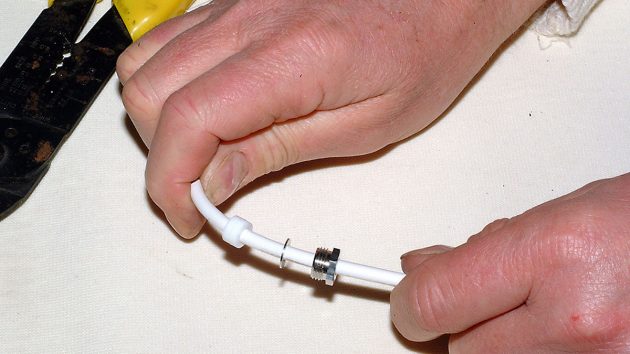
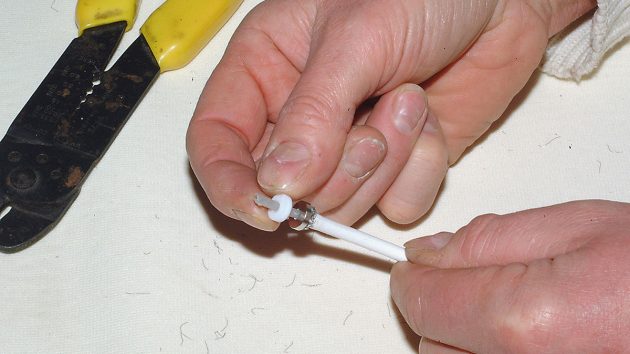
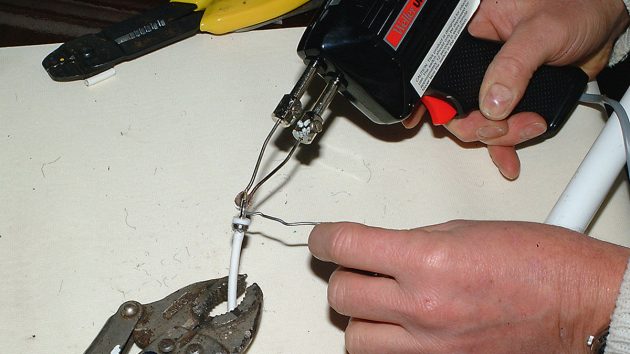
3. Carefully push the cable end into the body of the fitting until it bottoms out. This ensures the internal pin has penetrated the inner cable.
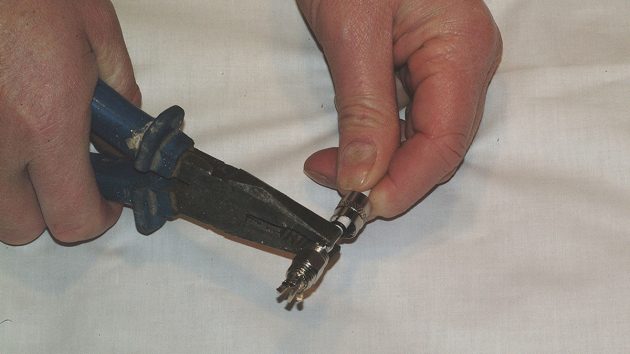
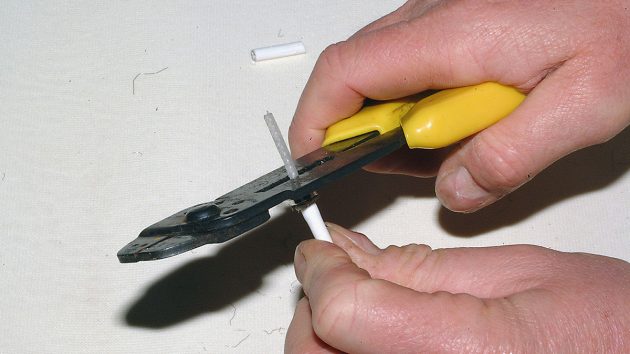
4. Using pliers, squeeze the arms of the fitting so that they pierce the outer insulation and make contact with the braid. It does not need a lot of pressure to satisfactorily pierce the braid.
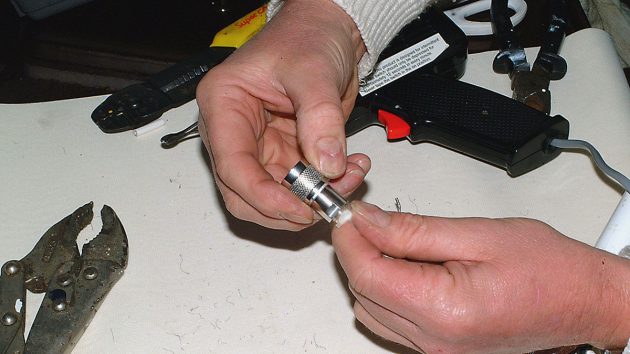
5. Slide the seal up to the body and screw the nut snugly into place. Follow the same procedure for the other end, and the job is completed
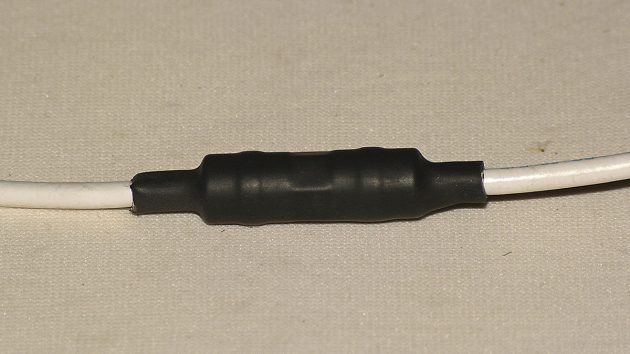
6. For total security, seal the fitting with heat shrink. This is slipped over the fitting and heated gently with a hot air gun until it shrinks tightly against the fitting. A lesser alternative is to use self-amalgamating tape.
Enjoyed reading How to fit coaxial plugs and sockets? 

A subscription to Practical Boat Owner magazine costs around 40% less than the cover price.
Print and digital editions are available through Magazines Direct – where you can also find the latest deals.
PBO is packed with information to help you get the most from boat ownership – whether sail or power.
-
-
-
- Take your DIY skills to the next level with trusted advice on boat maintenance and repairs
- Impartial in-depth gear reviews
- Practical cruising tips for making the most of your time afloat
-
-