
Nic Compton describes his outboard engine adaptation that added a new dimension to his Nigel Irens 14ft rowing and sailing skiff during restoration
In many ways, the 1990s were a good time for me: I had a nice terraced house within commuting distance of London; a great job editing a boating magazine I loved; and I was married with two lovely children. There was one big gap in my life, however: I had no boat.

My wife and I had sold our 32ft double-ender after our first child was born and hadn’t found anything within our price-range to take its place. So when yacht designer Nigel Irens was looking for guinea pigs to build a kit boat he and Ed Burnett had created for a TV series, I jumped at the chance. It might not have been the ocean-going vessel I dreamed of owning, but it would at least get me back on the water. It would also mark a small personal milestone since, despite working as a journeyman shipwright for several years, I had never built a boat from scratch.
Download your own set of free plans today: pbo.co.uk/western_skiff
Browse the complete set of articles in this series online
The Western Skiff, as Nigel christened his new design, was a slender 14ft dinghy intended for rowing; it had an elegantly raked transom to discourage the use of an outboard and a small lug rig to use as auxiliary power. The kit – seven sheets of ply and two sheets of MDF (for the jig), all pre-cut and ready to assemble, along with several gallons of epoxy and various interesting-looking powders – arrived while I was on holiday in Cornwall. My children (Zennor, 8, and Sam, 6) had great fun assembling the building jig, using wedges to lock the tenons in place.
Getting the planks fair proved a bit trickier, but I managed to get the basic structure assembled in time to put it on a trailer and drive the 300 miles to our home just outside Brighton in East Sussex.
It took all my spare time plus two weeks’ holiday spread over four months to complete the skiff, but finally in July 1997 we launched her in the azure waters off Seaford beach. There was a brisk onshore breeze blowing that day which created a small surf, and within minutes the boat was flung into the lap of a friend who had come to help launch her (she still bears a scar from that incident, as no doubt does he!).
But that breeze also showed to me how fast the skiff could go under sail, and I had an exhilarating couple of hours tacking up and down the two-mile long beach. As you might expect of a dinghy primarily designed for rowing, she was extremely tender (read ‘tippy’), and even with her modest 61sq ft of sail, she would capsize in a thrice if you didn’t ease the sheet in time. But that was all part of the excitement, and I immediately felt very comfortable with the boat, as if we had struck a personal rapport.
In truth, I became a Western Skiff owner by chance. Yet, over the years, my appreciation of the boat has deepened and my attachment to her has strengthened. Since I built her, I’ve owned three yachts – ranging from 22ft to 36ft long – but, while the bigger boats have come and gone, my skiff has remained constant, and I’ve never been seriously tempted to sell her. Partly that’s because the investment and overheads are so much lower that there’s never been any great financial incentive to sell, but also it’s because she has proven remarkably adaptable and (mostly) suited to my needs.
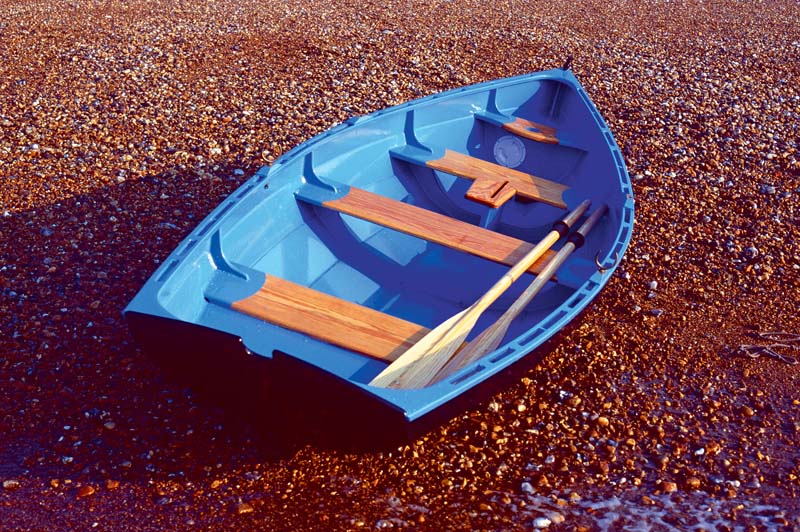
The Western Skiff on her maiden sail at the beach.
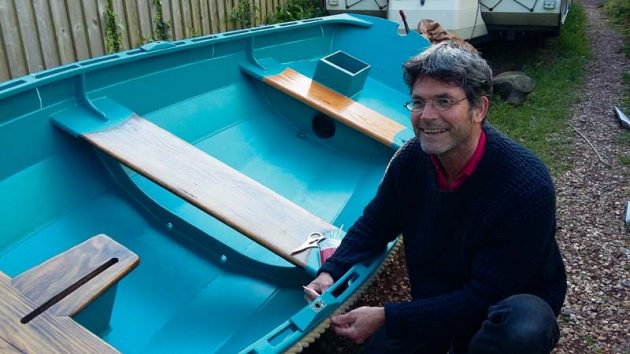
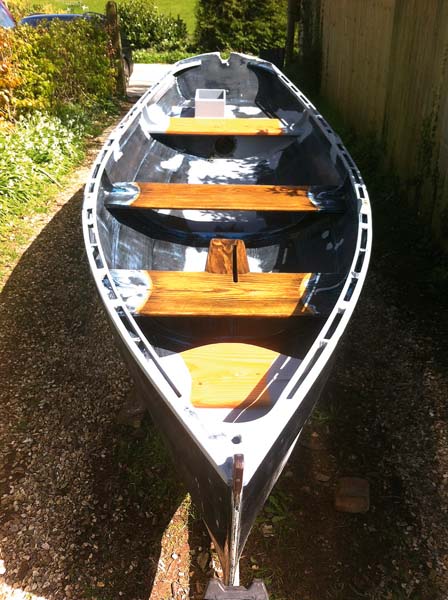
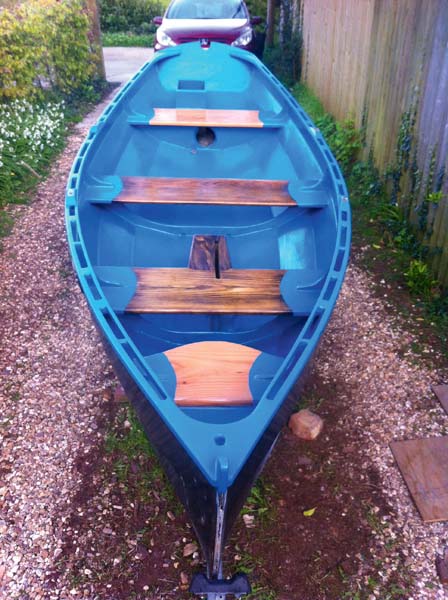
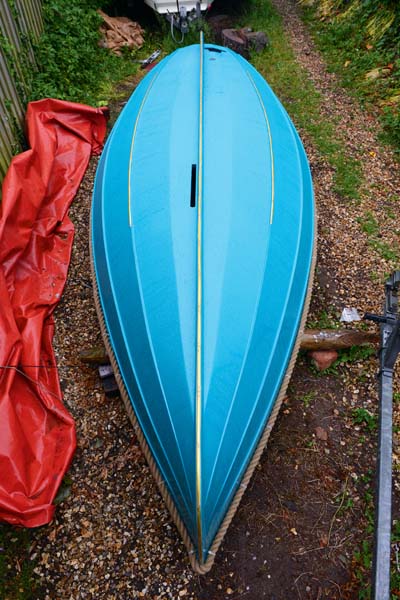
After restoration
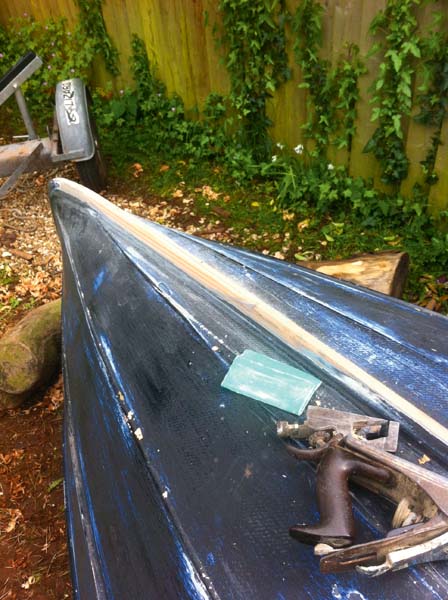
Before restoration
Changing with the times
After the initial sail off Seaford, I kept her on a trailer at a rowing club on the river Ouse, in Sussex, with occasional trips rowing upriver to Hamsey or sailing downriver to Newhaven. My kids loved those forays upstream, and their evident pride as they steered the boat past familiar landmarks made me glad I could pass on a tiny piece of my boating life to them.
On the downstream trips I learned to ‘shoot’ the bridges by lowering the mast on the approach and raising it on the other side – the one time I forgot, the almighty crash of wooden spar against stone wall made sure I never forgot again (miraculously there was no damage).
Despite being only 14ft long, the skiff could be a sociable boat, and the 90-minute trip to Newhaven was an opportunity to cement friendships. On one occasion a friend astonished me by pulling a flask and china cups out of his rucksack and proceeding to pour us both a cup of tea (or was it coffee?). It doesn’t get much more English than that!
Over the years, I tried giving the skiff a proper name (like a real pet). First she was Hara, Greek for ‘joy’ and the name of a favourite haunt when I was a child growing up in Greece. Then I decided to go ultra-traditional and named her Sally, after my mother. But somehow neither name stuck and I’ve always simply referred to her as ‘the skiff’. It’s taken me nearly 20 years to realise that I don’t need to force a name onto her and that ‘the skiff’ is a perfectly good pair of words, full of romantic connotations and richly evocative in its own right.
Three years after the skiff was launched I was divorced and living (alone) on an old 12-tonne cutter in nearby Newhaven. Between the heaps of scrap metal and the depressing housing estates, there was a small oasis: a muddy creek where I moored my yacht. Here, the skiff was moored alongside and when I came home from work, if the tide was up, I went for long rows, lit up by the lights of the ferry terminal. In the summer, friends visited and we would sail upstream and bathe in the river. After sitting in front of a computer all week, the skiff provided true solace.
After eight years living on my own up a muddy creek, I decided to sell my beloved Gauntlet and buy a flat in trendy Brighton. For a while, I kept the skiff on the beach, with a plywood lid to keep intruders out, and launched her for the occasional row or sail.
But Brighton is a better place for partying than boating, and I have to admit the skiff entered into a period of neglect as I made the most of being a bachelor again.
When I discovered part of the lid had been ripped off and used for a beach fire, I decided to put her back on her trailer and keep her, for want of anywhere better, in a friend’s garden. Over the next few years I parked her wherever I could and, as her cover deteriorated, the neglect deepened – and so did my guilt.
Then I met Anna and two years later we had a lovely daughter (Betty, now aged 8) and then a lovely son (Sol now aged 6), and the skiff fell further down my list of priorities. Soon after meeting, in the first flush of optimism, we made one half-hearted attempt at cutting out some of the rot and repainting her, but sailing from Brighton was just too much effort for too little return.
As the bills piled up, I thought about selling the skiff but I always had a feeling that our circumstances might change, and that somehow she might become the ideal boat once again. Or, to put it another way, I always knew that, if the skiff didn’t have a place in my life, that probably meant I was probably not leading the right life, and it was only a matter of time before the balance was redressed and she would regain her rightful place.
Not everyone shared my despair, however. I couldn’t help feeling a glimmer of pride when our neighbours told us that, far from finding the sodden hulk parked opposite their front door a nuisance, they enjoyed having her there and thought she added character to the neighbourhood.
Another friend expressed the same sentiment when I parked the boat in her front drive and she became an object of curiosity for visitors, who could always be sure of finding ‘the house with the boat outside’ in a row of identikit modern houses. Even in her deteriorated state, it seemed, the skiff could still inspire pleasure.
Eventually we could take city life no more, and in July 2015 we upped sticks and moved to a beautiful village on the River Dart, in Devon.


A return to the water
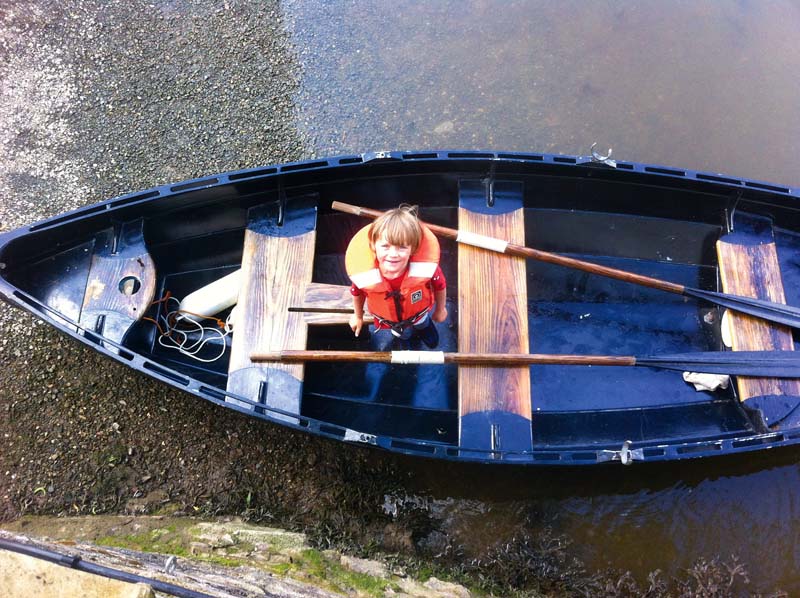
Straightaway, we launched the skiff into the tidal estuary which flowed within sight (just) of our bedroom. She proved an ideal boat for exploring our new environment, and for the first six months we went out most weeks, either rowing to nearby pubs or collecting driftwood off the nearby beaches to chop up into firewood.
The only limitation was that, while most of the other families we met had boats with outboards and could happily nip up and down the river at almost any state of the tide, we were limited by how far we could row – which, with two adults, two children and (eventually) a dog on board, wasn’t all that far!
I left the skiff on the jetty that autumn and by winter’s end she looked in a very sorry state. The rot at either end of the fore and aft thwarts (due to a drainage channel which had a tendency to get blocked up) had spread, and when I turned her over I found there was even some gribble (worm) on the keel!
To my eyes she was still the exciting lightweight rowing dinghy, designed by the legendary Nigel Irens, which I had built with my own hands all those years before and which had stood by me in good times and bad, and I still got a thrill riding the little wave that built up on the stern quarter when the prevailing south-westerly clashed with the outgoing tide. But to most other people she must have just looked like a sad old wreck.
I decided to take her out for a major overhaul, and began to think the unthinkable. What if we fitted an outboard on her? The very idea had always been an anathema to me, but I began to see that, if we put a well through the aft buoyancy tank, it needn’t be intrusive or detract from her performance under sail and oar. I consulted the designer and, to my surprise, he was very relaxed about the idea. He agreed that a well was the ‘way to go’ and even suggested the outboard could be positioned on the centreline, by cutting out the aft end of the keel.
As expected, the refurbishment turned out to be more extensive than I had expected. I replaced both the fore and aft thwarts, cut out and scarfed new sections of planking and bulkheads where the moisture had spread into the adjoining plywood. And of course I repainted inside and out.
River life upgrades
I also made a couple of important upgrades for her new life on the river, fitting a rope fender around the bulwarks and attaching brass strips to the keel and bilges, to protect her when coming alongside and when being dragged up and down beaches. The overall effect was pretty spectacular and made me look at her with renewed affection.
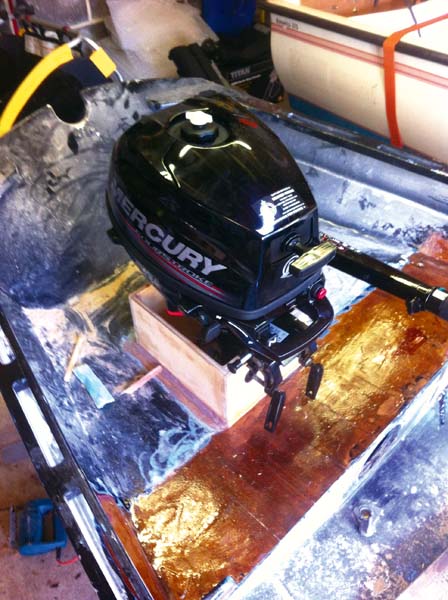
As for the outboard well, I couldn’t bring myself to cut the keel and instead made the smallest well possible directly next to it on the starboard side. The well itself was made out of 12mm marine ply, with three layers on the forward side, lapped over the new stern thwart to spread the load of the outboard.
I shaped the hole through the hull to the dimensions of the propeller and skeg, and used the cut-out to make a lid to close the hole while under oar or sail.
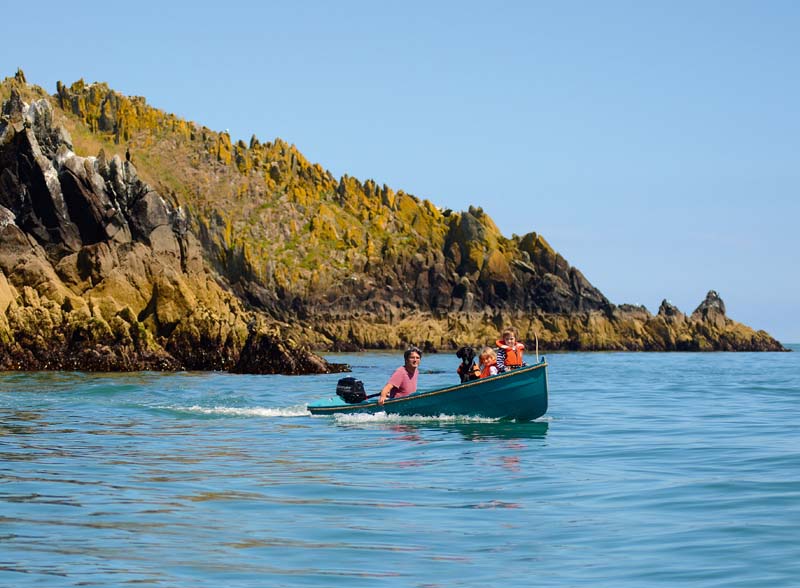
We relaunched the skiff in June 2016, and the effects were immediate and dramatic – a ‘life-changer’, as my neighbour put it. The outboard conversion was a great success, performing far better than I had expected.
Even laden down with the whole family, including dog and picnic, she nipped along at quarter-throttle under her new 3.5hp engine (suggesting, as Nigel gently hinted, we could have got away with the smaller, lighter 2.5hp engine we had originally intended). The tilt of the outboard needed adjusting, as the aft bulkhead (whose angle I had copied for the outboard well) turned out not to be vertical – but it was nothing a couple of shimmies of wood couldn’t rectify.
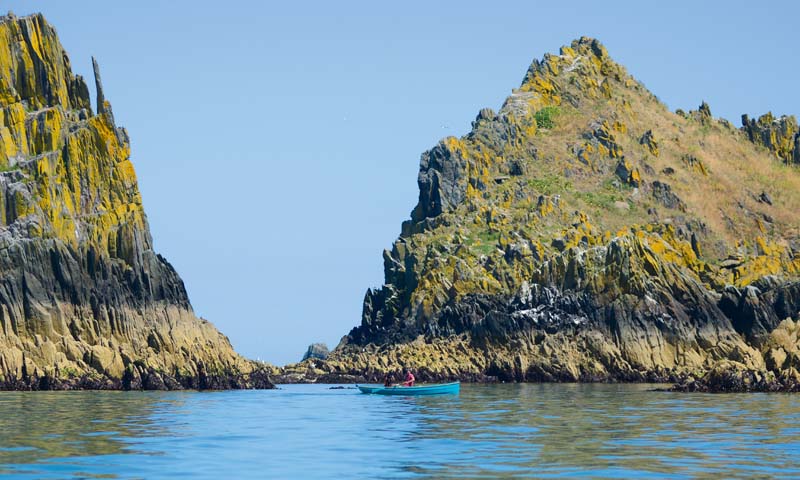
Suddenly, the river opened up to us. Whereas before we had been more or less confined to a mile or two upstream or downstream, we now had the run of the whole estuary, and beyond. We sped up to Totnes (4 miles upstream) in half an hour and Dartmouth (5 miles downstream) in 40 minutes (on both occasions with the tide). And, for the first time since coming to the village, we headed out to the open sea to take pictures off the spectacular Mew Rock, now just an hour away. More importantly, perhaps, she has embedded us in the local community, allowing us to join social events on the river that would have been out of reach before.
There have been some unexpected side benefits of having an outboard. Because the skiff is so light, Nigel always used to recommend carrying a couple of jerrycans of water as ballast when rowing alone, to give the boat more momentum. Now, the outboard does the job. When not in use, it fits snugly next to the centreboard case and provides the ideal extra weight in just the right place. If the outboard isn’t on board, then our dog provides the extra ballast.
In due course, I intend to re-rig her to teach my kids to sail, so that potential is still there waiting to be unlocked.
But, in the meantime, there’s no doubt that the outboard has breathed new life into old bones and brought the skiff back into our lives as a much-loved member of the family.
And it’s not just in my head this time, as friends and strangers now tell me how good she looks, and one person even asked to buy her. The answer to aspiring buyers is the same now as it’s been for the past 20 years: not a chance!
Step by step: restoring the skiff and creating an outboard well
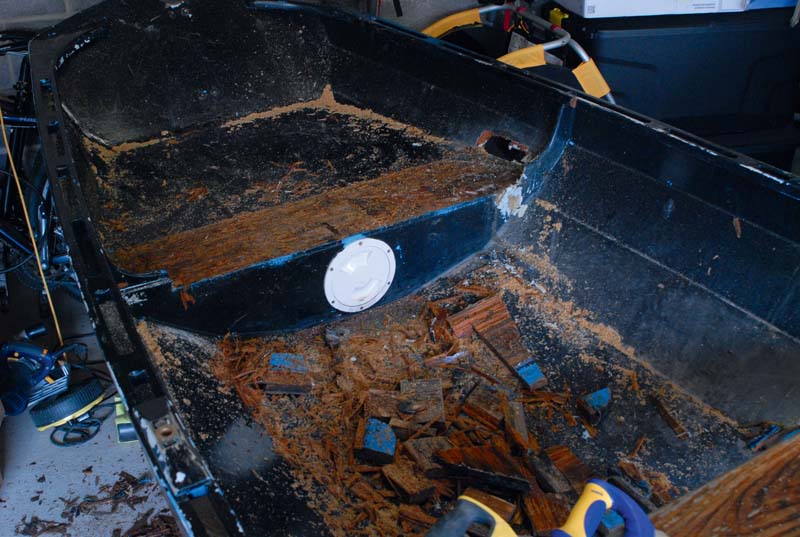
1. This was the brutal part: slicing the old thwart into flapjack-width chunks with a circular saw, and then chipping out the mushy timber with a mallet and chisel.
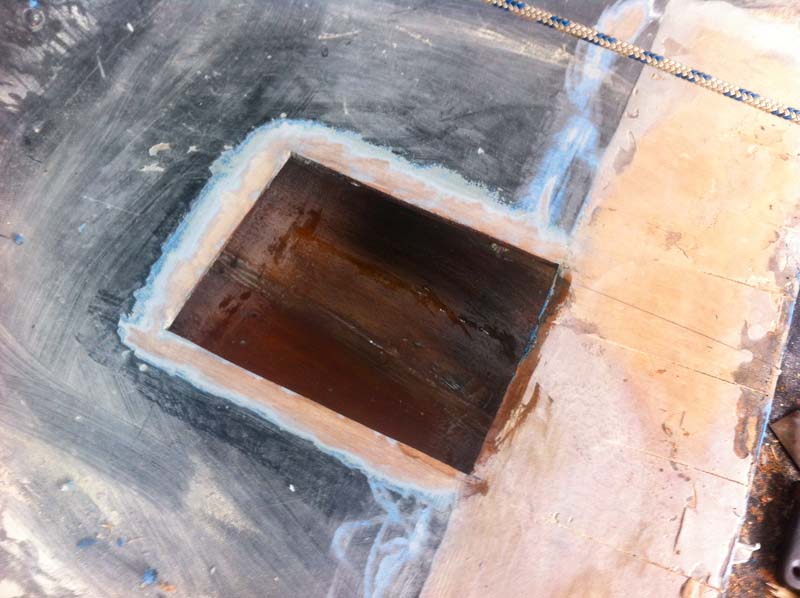
2. After establishing the centreline, I cut a hole on the starboard side of the line so the outboard would clear the keel. The width of the hole in the buoyancy box was determined by the diameter of the propeller, and the length by the size of the outboard’s anti-cavitation plate – plus some room for error!
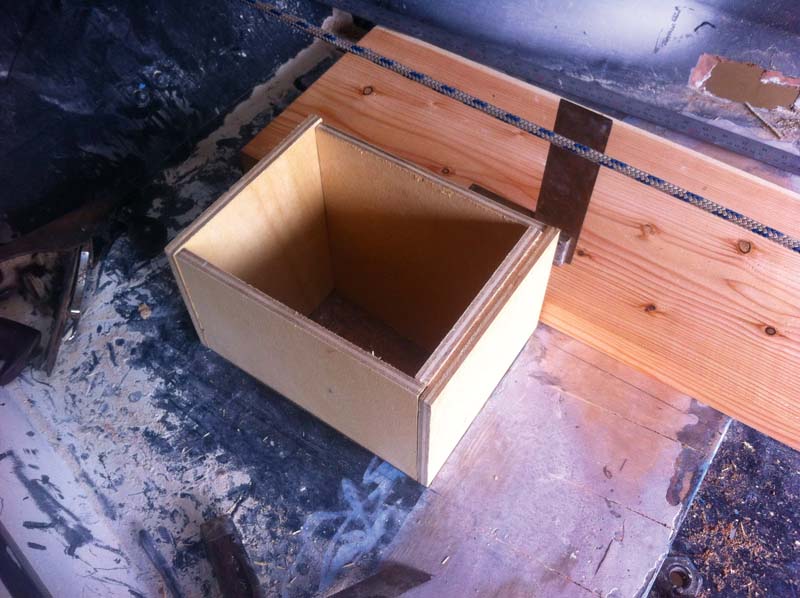
3. The plywood well, loose-fitted through the hole before glueing up. Note the set square to keep it all vertical, and the rope used to establish the centreline. The front end of the well box was doubled and a third layer added after the thwart was fitted to provide strength for the outboard clamps.

4. The outboard well glued and clamped in place using WEST System epoxy thickened with 403 microfibres for the glue (white in colour) and 405 powder for the fillets (red). No mechanical fastenings were used.
5. I next drilled a couple of pilot holes from above and then cut out the hole in the hull from underneath. The cut-out made a blanking plate to close the hole when the outboard was not in use.
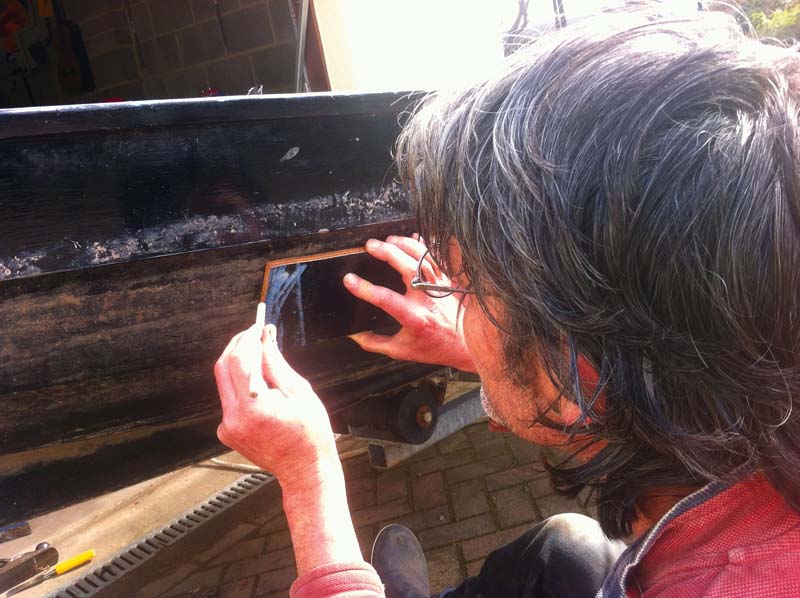
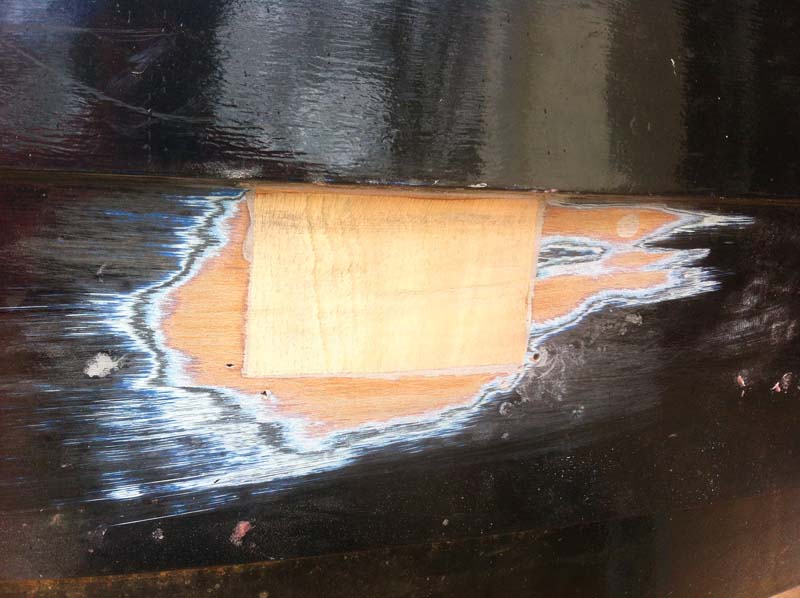
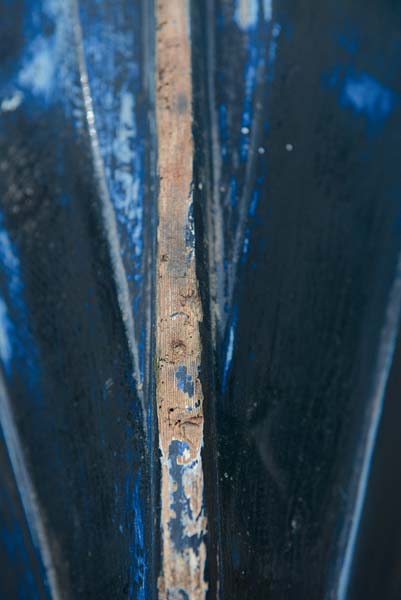
6. Rot in the ends of the thwarts had spread to the adjoining planks, so after chiselling out the rotten section I cut a rectangular piece of planking (using the scrap ply from the outboard well), marked its outline on the hull then bevelled the edges of the ply.
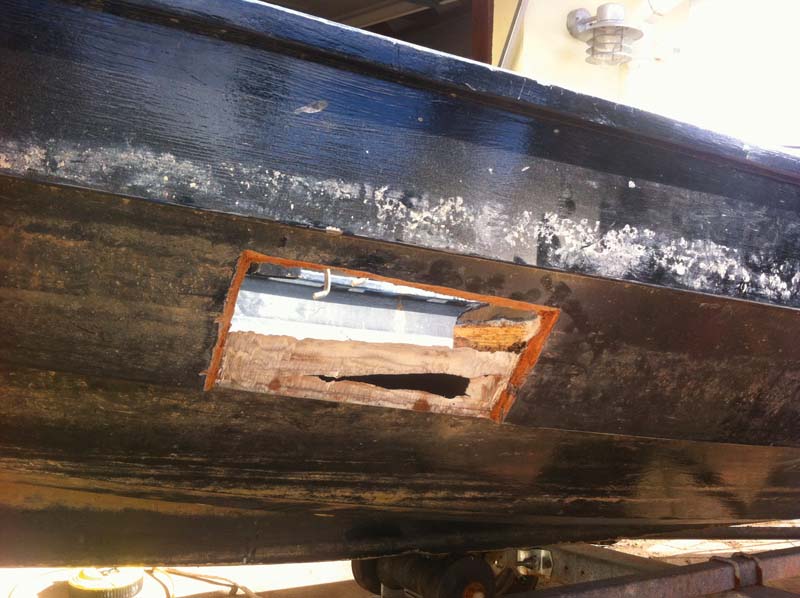
6a. Note the end of the thwart and the lower plank land visible through the hole.
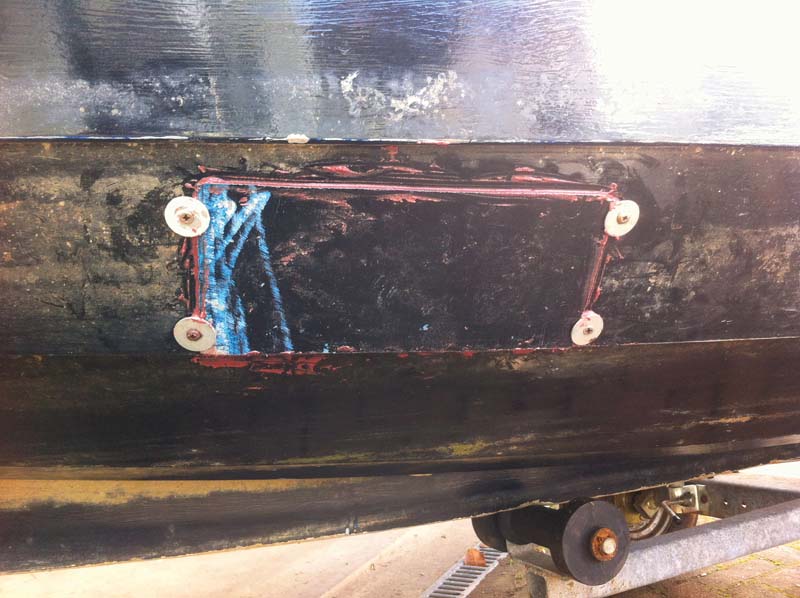
7. The new plank sections were glued with thickened epoxy. Not having any deep-throated clamps, I used screws and washers to hold the new sections in place. The screw holes were filled later.
8. Once the epoxy had cured, I removed the screws and washers, then planed off the edges of the new planking and sanded it all smooth with a belt sander. Ruthless but effective.

9. I managed to get some lovely 1in-thick Columbian pine (Douglas fir) from a local sawmill which I cut into shape for the new thwarts. The split plank shown underneath was a reject section.
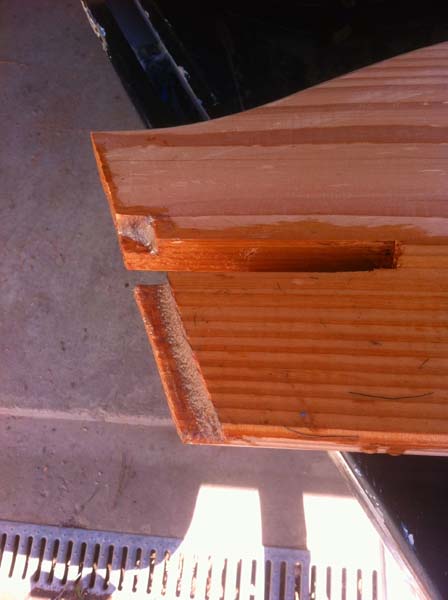
10. To prevent the thwarts rotting out again, I cut extra large drainage channels into the ends which I then sealed with thickened epoxy.
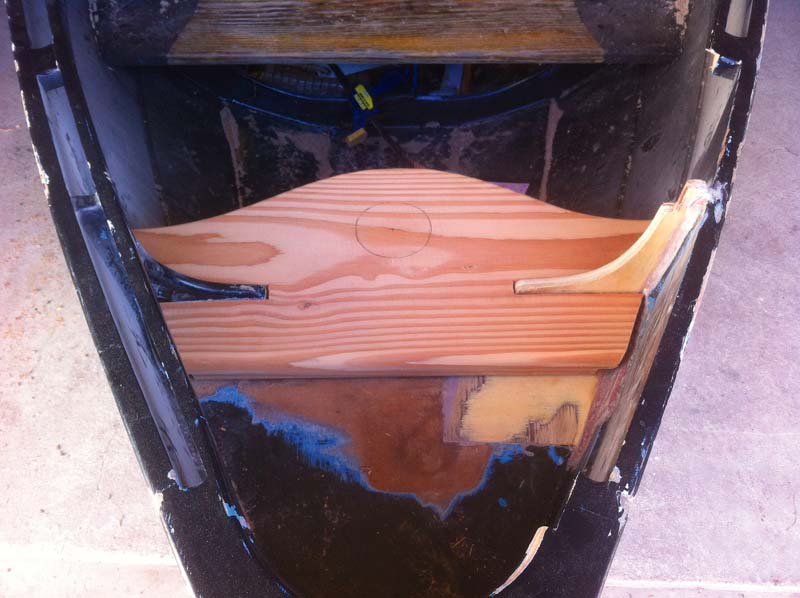
11. Trying the new thwarts out for size. Note the rotten bulkhead sections which I’d cut out and replaced in a similar way as the hull planking.
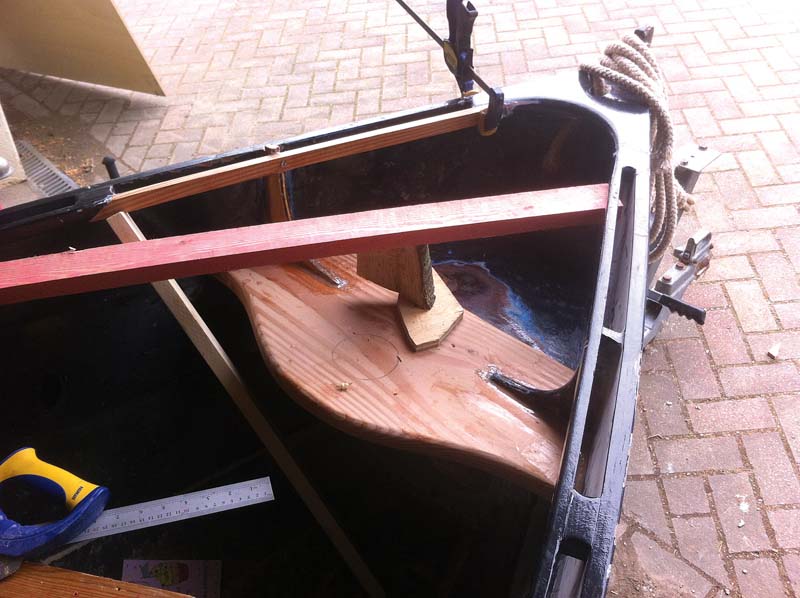
12. After sealing the underside with liquid epoxy, I put a thick layer of epoxy glue over the plywood base and fitted the thwarts. Some ingenuity was required to wedge them in place!
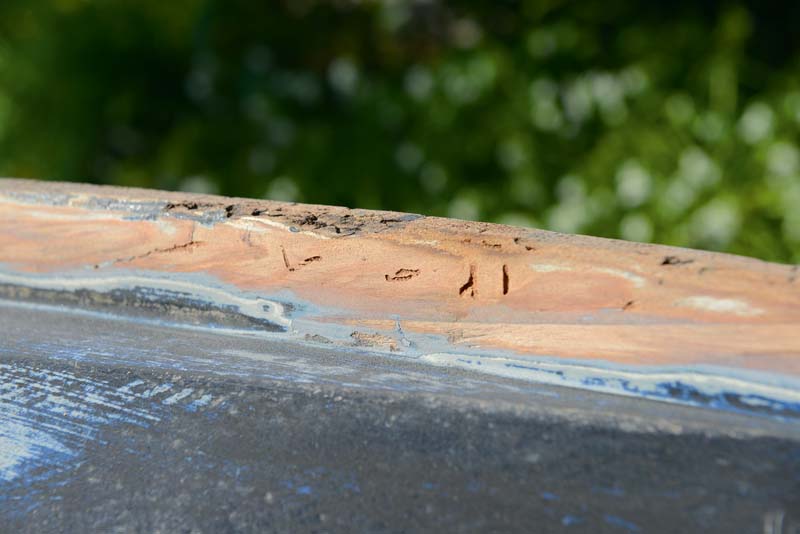
13. The unmistakable signs of gribble on the keel – the result of leaving the boat on a mud berth for eight months without touching up the paintwork first to ensure it was sound and able to resist worm attack.
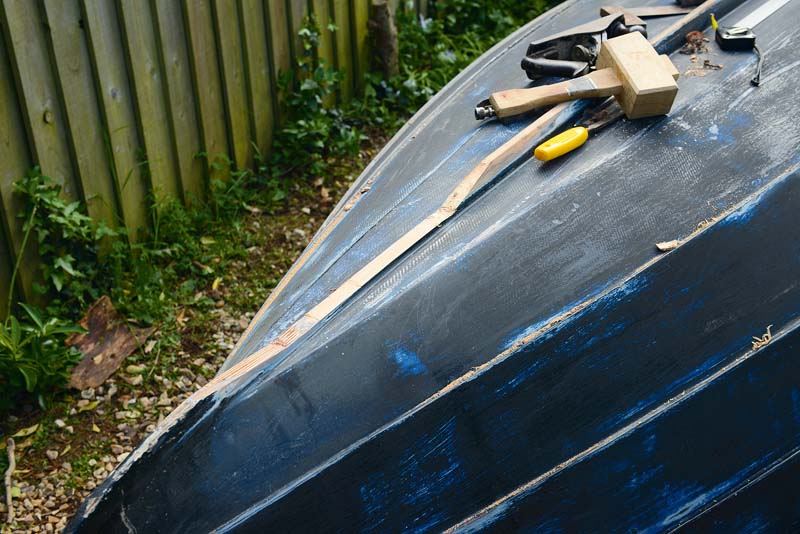
14. I marked the scarfs off by eye and cut the offending section of keel out with a handsaw. The new section (an offcut of hardwood I had lying around) was then marked directly off the keel.
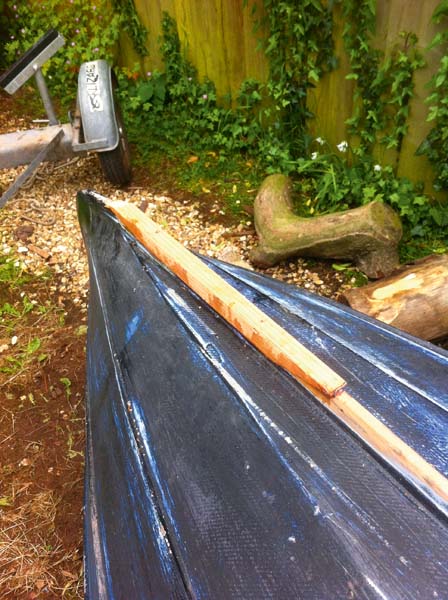
15 … and bedded in a thick layer of epoxy, with a screw at either end to hold it in place.
16. Once the epoxy was cured I planed it to shape and sanded the new section smooth.
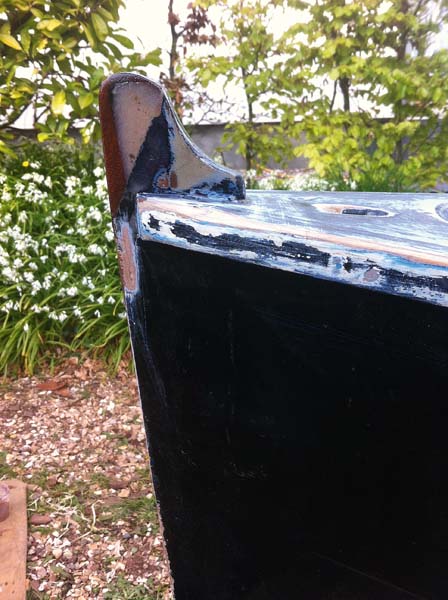
17. I used a similar method to cut off the rotten stemhead and scarf in a new section of hardwood.
18. Once everything was repaired and fixed in place I was faced with the tedious task of sanding the whole interior – a job thankfully made much easier by the lack of ribs.
19. After a disastrous attempt to use water-based paint (which I had to sand off completely) I went with Jotun fishing boat paint – available for half the price of normal yacht paint.

20. To stop the skiff bashing the side of our sailing boat or the jetty, I fitted a rope fender. Cable ties passed through small holes in the topsides and around a single strand of rope did a neat job.
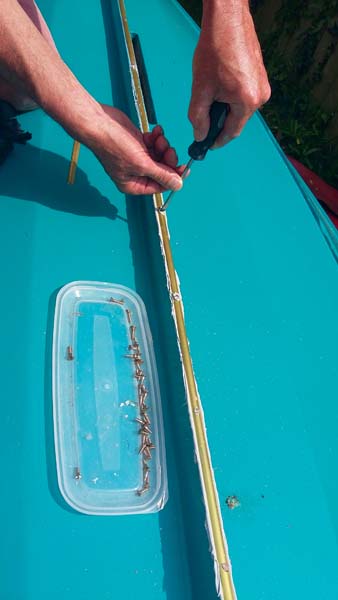
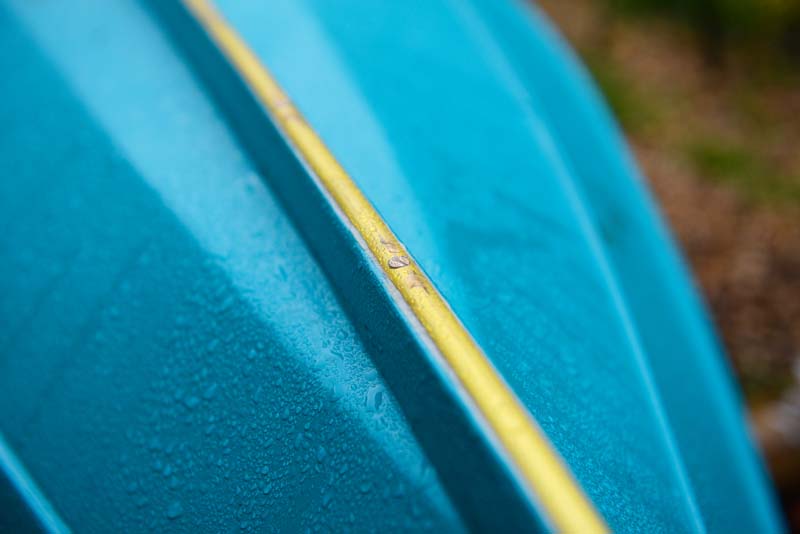
21. As the dinghy is continually being dragged up and down a rocky foreshore, I fitted 1⁄2in brass keelbands on the whole keel and the middle part of the adjacent strakes.
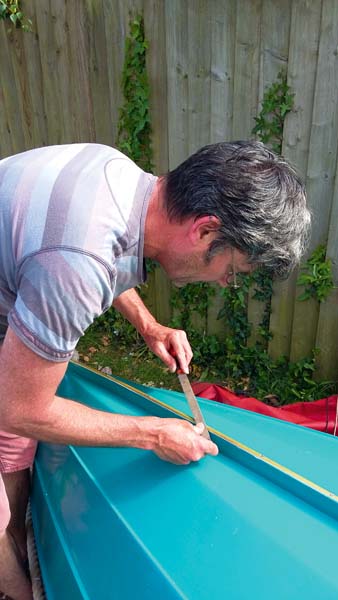
22. Once the bands were fastened in place (with white mastic to stop water getting underneath), I filed off any projecting screw tops to stop them chaffing the trailer rollers, errant ropes and small hands!
Although I fitted the keelbands and rope fender for purely practical reasons, they did also add a touch of class to the boat’s general appearance.
If you fancy building your own Western Skiff, visit: pbo.co.uk/western_skiff