




Gilbert Park explains how he dealt with an oil leak on his motorboat’s hydraulic steering ram by replacing the O-ring seals
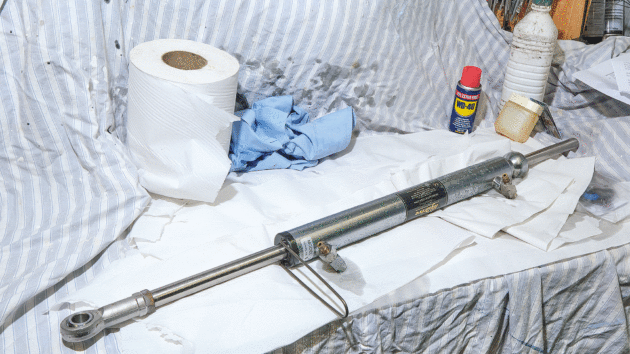
For several months I’ve been having to top up the hydraulic steering system reservoir with oil.
The reservoir is difficult to access, requiring a panel to be unscrewed, and once I’ve done that there is only an inch or so above the filler so I have to use a syringe or small beaker to add the oil.
An added complication is the fine filter, which means only a few millilitres can actually be poured in, making topping up tedious and messy.
Then it all started to get worse.
Something, somewhere was leaking and it wasn’t going to get better on its own.
As I’ve twice had steering failure already, I decided to sort this problem once and for all.
Steering failure in the middle of the Channel is my biggest fear. While I can cope, and in a twin-engined boat with Humphree interceptors can make port safely without help, I don’t want to have to do this.
Replacing the seal on my hydraulic steering
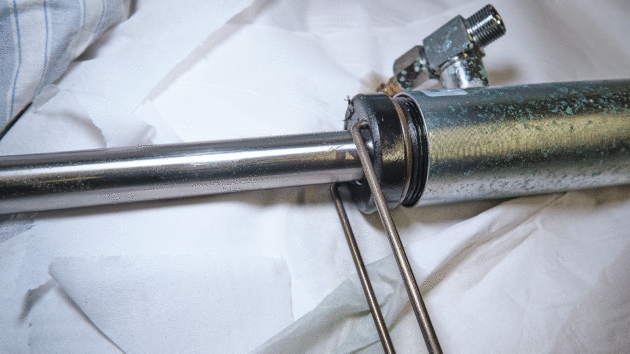
A special two-pronged fork was used to release the end cap – though not without some difficulty. Photo by Gilbert Park
After very careful inspection revealed a tiny amount of oil coming out of the port side of the steering ram. I concluded that the seals were leaking. It was time to change them.
I sent a photograph of the ram to Phoenix Marine; the staff were very helpful and knew instantly what I needed – a seal kit and two litres of hydraulic oil.
I declined the offer of a bleeding kit as I’d found the right diameter of tubing for bleeding and reckoned that I could unscrew the reservoir, remove the fine filter and just use that as a top-up holder. The useful instructions were to be found online.
I dismantled the ram and found amongst all the white, corrosion debris, a grease nipple that I didn’t know was there!
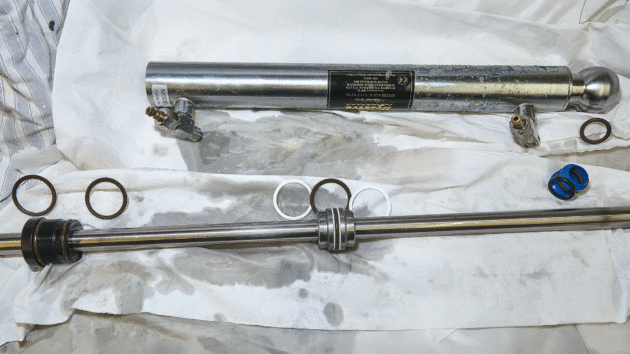
Accuracy is essential. The dismantled piston and cylinder showing the new seals alongside the old ones to ensure they matched. Photo by Gilbert Park
As I removed some of the tubing I also found what I thought was a small leak from one of the fittings of the port side hose.
During the survey it had been noted that the hoses around the autopilot pump were in a poor state, so I decided to change the ones supplying the ram as well.
Getting started
Preparation began with my general-purpose workshop bench – first removing all of the accumulated junk, followed by a good vacuum, then a surface clean with acetone.
A freshly laundered worksheet was placed on top. I’m told cleanliness is essential for hydraulics!
With the ram on the work bench I began dismantling it.
The first thing I had to remove was the end cap. While the kit I had contained the special two-pronged wire fork ‘spanner’, unfortunately undoing the end cap was not easy.
The ‘spanner’ kept jumping out of the two holes. I had to put the ram into a vice that had soft jaws to hold it gently while I pushed the two prongs in and turned at the same time.
That did the trick, and finally I could carefully remove the ram.
Precision techniques
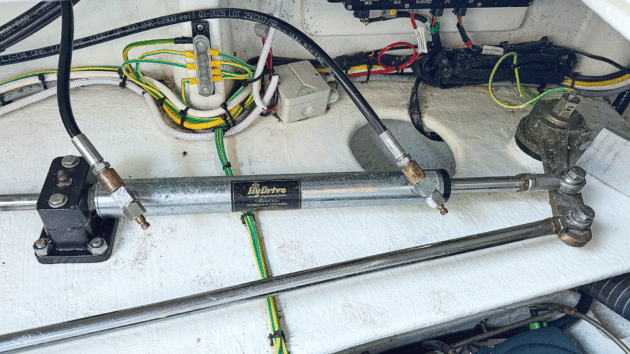
The steering ram reinstalled ahead of bleeding and a test on the water. Photo by Gilbert Park
Once the ram was out, I could identify the seals and place the new ones opposite them.
Photographs at this time are very useful, so you can be sure to get the right seal in the right place when you replace them.
Removing the seals on the piston is straightforward.
You mustn’t damage the seal seats, so I squeezed the side of the seal and in the gap this created inserted an old credit card to lever the seal off.
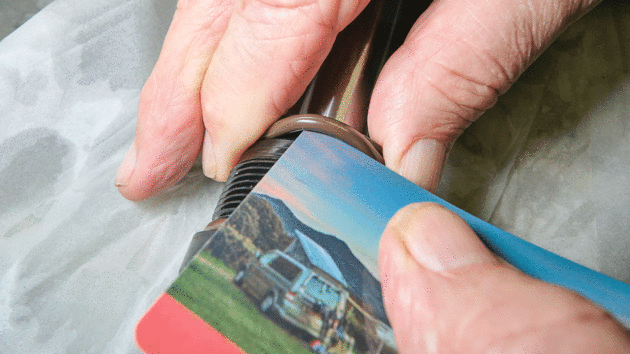
The O-ring piston seal is squeezed at the side and levered out with an old credit card. Photo by Gilbert Park
Those in the cylinder were more difficult to get out. The old seal needs to be ‘speared’ by a needle and then levered out.
The piston and cylinder were cleaned to ensure no debris was present. Vaseline was used to lubricate the replacement of the seals.
The seals on the piston were easy to put in the correct place, and those that go into the cylinder were much easier to insert than remove!
Once the seals were in place a small amount of hydraulic oil was put on the piston and in the cylinder, which enabled the reassembly of the ram.
After that the ram was reinstalled back on the boat, with the necessary parts being lubricated with waterproof grease.
The two new hoses were replaced.
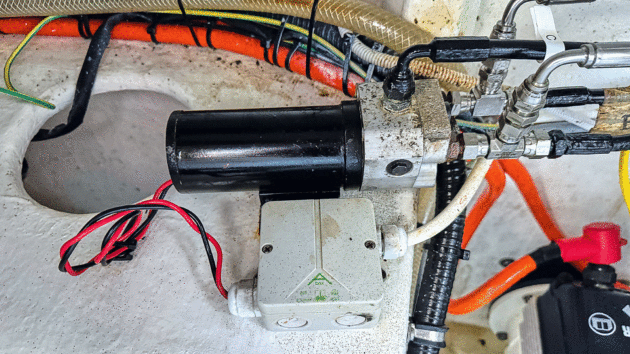
The new connections on the autopilot pump which connects to the ram. The others were cleaned up and painted with black anti-rust paint. Photo by Gilbert Park
The remaining hoses were cleaned up with a wire brush on a Dremel to remove as much rust as possible. They were repainted with multiple coats of paint.
Once the autopilot pump was reassembled all connections were sprayed with a rust-prevention spray.
Bleeding the system
The next step was to bleed the system.
I have described this in a previous article on how to fit your own autopilot.
I followed the instructions from the manufacturers of the hydraulic steering gear and autopilot, and eventually all of the air was bled from the system.
The bleeding instructions say the oil can be filtered before reuse. I did try this with a large funnel and some large filter papers, but it didn’t work as it was too slow.
Seeing as the system was already closed and clean, I didn’t bother with this.
Testing my refit hydraulic steering
Once I had tidied up it was time to motor into Chichester Harbour to check the steering.
After some slow-speed manual steering the oil level and ram were checked, then checks with the autopilot.
Finally, out of the harbour and some high-speed steering manually and with the autopilot.
As for checking the oil level in the steering, I plan to fit a large, white removable grommet so I can inspect the oil level more regularly in the hope I don’t have to remove the panel to top it up again.
But that will have to wait for the slow boat from China to arrive.
Gilbert Park taught himself to sail in a Mirror dinghy on the River Tamar; he worked through the Drascombe range of boats, then moved on to some cruisers. Sailing boats began to cause problems with his arthritis, so he switched to motorboats and now has a Seaward 29.
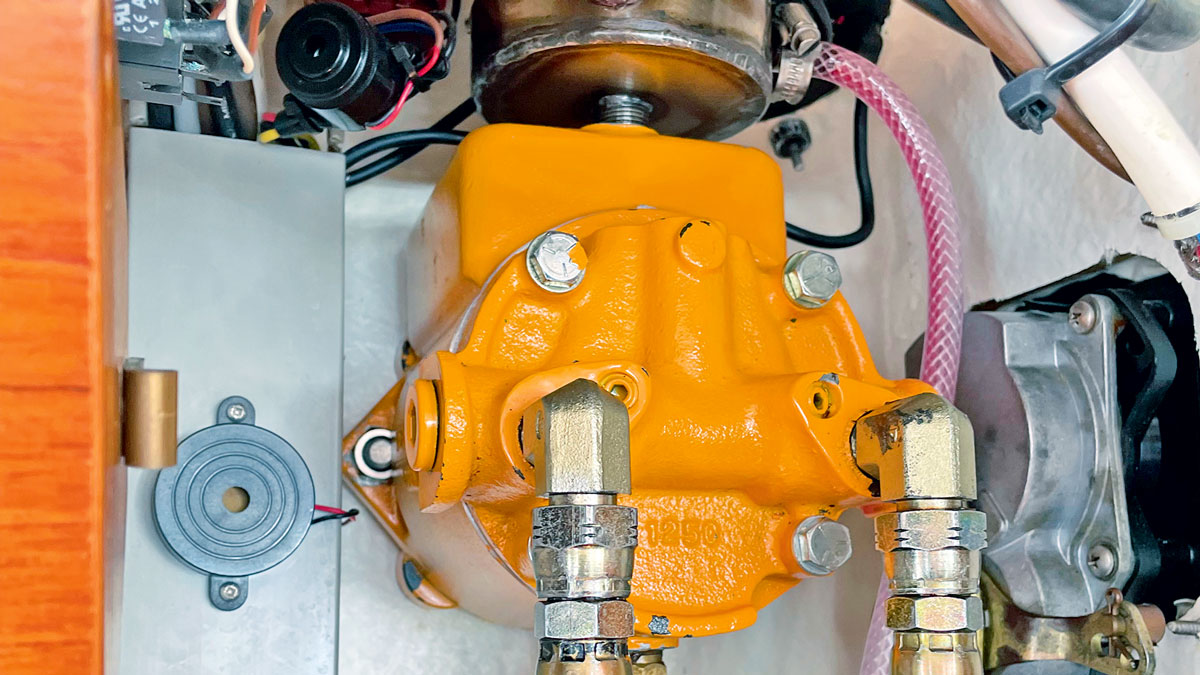
Servicing a hydraulic steering helm on a boat
After finding a hydraulic oil leak in the steering of his Nauticat 331, Mike Corp services the yacht’s helm pump…
What to consider when sailing offshore in a small boat: Sailing advice for ‘Miscreants and Misfits’ from the Jester Challenge
‘Rarely will you meet such a bunch of miscreants and misfits,’ event organiser David McDowall pronounced in the opening speech…

Windvane self-steering: a complete guide for sailors
Ali Wood explains how you can harness the power of the wind and sea to steer efficiently
Want to read more articles about hydraulic steering maintenance?
A subscription to Practical Boat Owner magazine costs around 40% less than the cover price.
Print and digital editions are available through Magazines Direct – where you can also find the latest deals.
PBO is packed with information to help you get the most from boat ownership – whether sail or power.
-
-
-
- Take your DIY skills to the next level with trusted advice on boat maintenance and repairs
- Impartial, in-depth gear reviews
- Practical cruising tips for making the most of your time afloat
-
-
Follow us on Facebook, Instagram, TikTok and Twitter
PBO web categories