
Are you coming unstuck? If your headlining is starting to part company with the deckhead, it’s time for a makeover. Jake Kavanagh follows professional upholsterer Roger Nantais as he refurbishes a Westerly Seahawk

Relining the cabin
With the surfaces properly rubbed down, and all the residue vacuumed up, it’s time to apply the contact adhesive.
Roger uses an impact or contact adhesive such as Evo-stick. He paints the glue onto the inside of the hull straight from the pot, using a large brush. A commercial spray gun is used to coat the back of the foam, but aerosol cans are just as effective. Only prepare the area you are able to work on immediately, and try not to get the glue onto the surface of the vinyl. To avoid inhaling nasty fumes, keep the cabin well ventilated and wear a proper anti-fume mask. A cap and a pair of goggles are also recommended.

The first panel to be fitted is the chain locker bulkhead, followed by the huge and unwieldy main panel under the foredeck. The glue is allowed about 15 minutes to go tacky, and then you have to be brave, because once contact is made, you’re committed. The hatch aperture has already been cut – a shade too small – to help with orientating the panel.

From here, he sweeps out with both hands, pushing the panel against the glue, and attempting to keep a leading edge between the vinyl and the adhesive. He doesn’t want any part of the panel sticking prematurely, so he lets it hang freely as he works his way forwards. The last six inches of the outside edges are rubbed down last.
TOP TIP
To keep your broad brush useable, seal it in a large tin with some residue glue. The solvent fumes will stop it drying out.

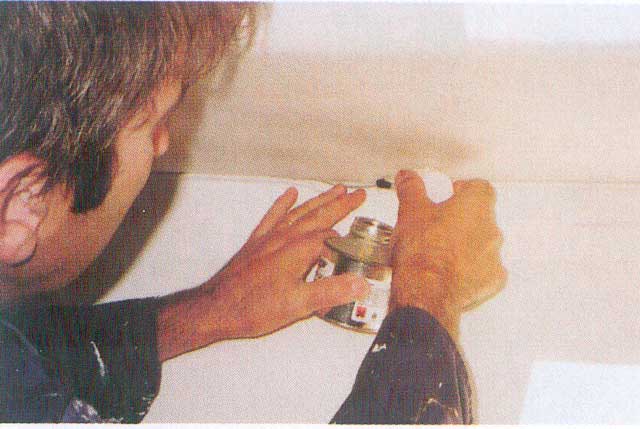
Excess material is trimmed back with a knife, leaving enough to underlap the side panel when it goes on. Roger uses a screwdriver to tuck the edge of the top panel, which hasn’t been sewn, inside itself where it butts up against the bulkhead.

The process is repeated for the side panels – paint glue onto the hull, spray it onto the back of the panel, let it go tacky, and then use the sewn edge as the anchor point to position the panel and smooth it down.

Having the edges of the side panels folded over and sewn will give a very neat finish. Mark the foam (not the vinyl) on the new panels so you know which ones are which.
Tidying Up
The process described for the forecabin was repeated throughout the boat, although some areas gave Roger a few challenges.

The edges of the chain locker are loosened with the hot-air gun to make them more pliable before being stuck around the back.

A sharp blade is used to cut the excess material from the hatch aperture until it’s flush with the hatch…

…and the plastic trim is held in place with a clamp while the screws are relocated.
Roger uses an adhesive that dries clear, such as Bostik, to seal the edges of the sheets of vinyl.

A sharp blade is also used to trim the window vinyl back to the edge of the inner frame. Small cut-outs are made around each of the screw holes, and the outer frame is then located over the top.

Where the vinyl meets an edge, it is trimmed and rolled under itself.
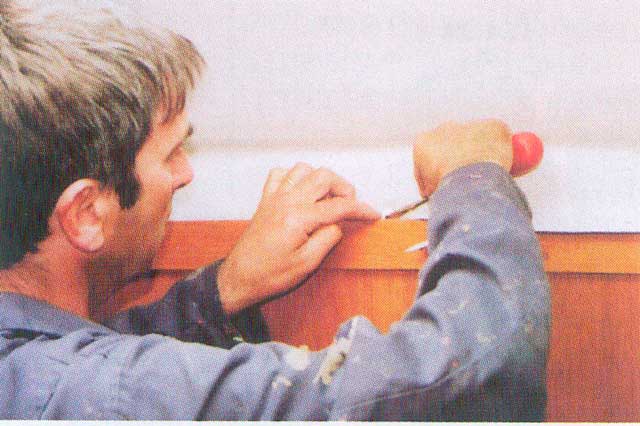
If there is a protruding length of trim, such as in the rear cabin, the new vinyl can be simply tucked in behind it. Cut the overlap back to within about 5mm, and then simply use a screwdriver to tuck it into the gap between the wood and the hull.