
There is no need to put up with a leaky, smelly inboard engine. By dealing with small leaks as they arise, even the oldest units can be maintained drip-free
It is almost inevitable that marine diesel engines develop leaks of fuel, oil or water as they age, so knowing how to fix and avoid engine leaks is vital!
Modern units are much better than those of 30 years ago in this respect, thanks largely to improvements in the materials used for gaskets and seals.
Often leaks may not appear to be a big problem in isolation, but it’s always worth identifying the source of the leak and rectifying the fault, if only to prevent consequential damage.
If fuel or oil is allowed to drip onto rubber components for any length of time the rudder will gradually degrade – this is one of the most common reasons for failure of engine mounts, for example.
In addition, small leaks will almost always get progressively bigger over time – it pays to see them as an early warning of impending trouble.
If you’re still not convinced, think about how unpleasant it is to spend time on a boat in which diesel is swilling around in the bilge.
At very best it’s smelly and can kick off seasickness: at worst it can mast other odours such as a dangerous butane or propane gas leak.
Install a drip tray to be alerted to engine leaks
Many modern boats have a drip tray under the engine that will capture liquids and, equally important, alert you to the presence of a leak.
Most older boats have no drip tray, allowing spillages to drain directly into the bilge which then creates a disposal problem: you can’t just pump water out of the bilge and overboard if it’s contaminated with diesel.
And if your boat doesn’t have a very deep bilge it won’t be long before the insides of lockers are covered in a yucky, oily sheen.
It can be very easy to retrofit a drip tray under the engine.
A piece of sheet aluminium simply glued across the front of the engine bearers creates a dam to form a drip tray beneath the motor of Rupert’s Discovery 3000. Credit: Rupert Holmes
On my 30ft (9.1m) Discovery 3000, I cut a sheet of 2mm aluminium to create a dam across the space at the front of the engine bearers, and sealed it in place with Sikaflex 291.
It’s now been in place for well over a decade and has done a sterling job in keeping the rest of the bilge free of contaminants.
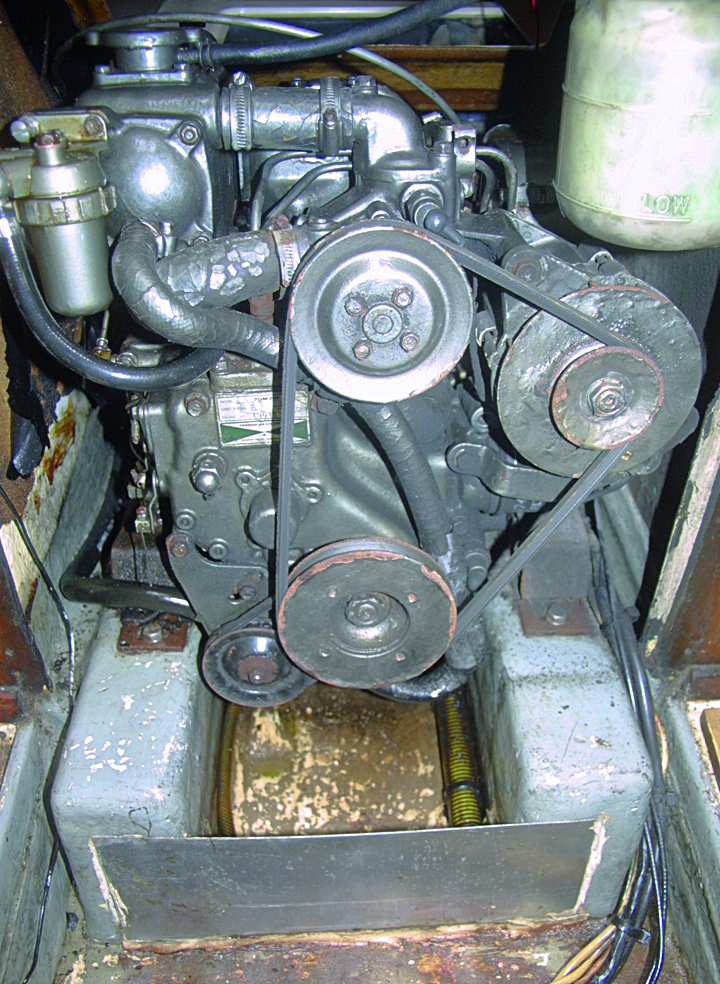
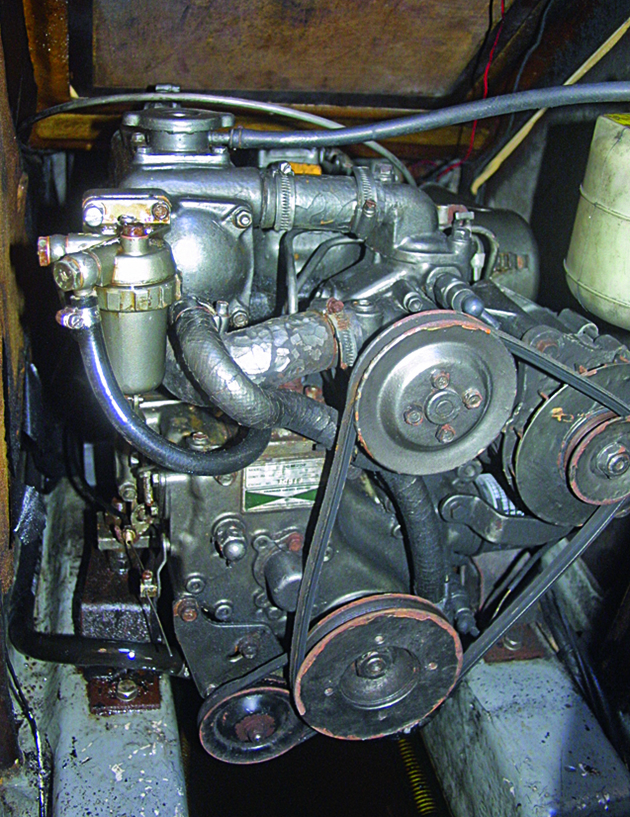
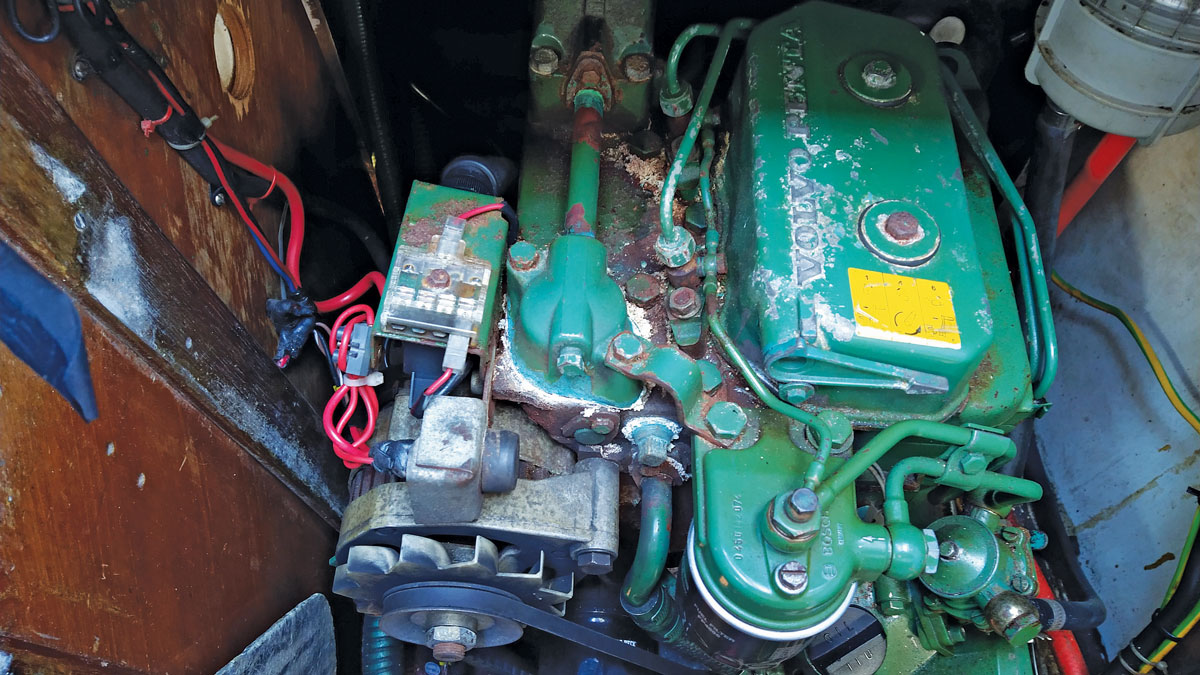
If the engine is kept clean it’s often relatively easy to trace the source of leaks – but a neglected unit with a thick covering of grime can make this a dirty and unpleasant task.
It’s therefore worth cleaning the motor as part of its annual maintenance.
Oil leaks
To avoid expensive, or even terminal damage to the engine, oil leaks should be dealt with as quickly as possible.
It’s important not to be complacent: many smaller engines have a relatively small oil capacity.
The 18hp Yanmar 2GM, for instance, takes only 2lt of oil – that’s less than half the capacity of a medium-sized car engine.
There are a number of places from which engine oil can leak, usually as a result of seals and gaskets breaking down over time.
Leaks can also appear when an engine has been overfilled with lubricating oil – this can be as damaging as running the motor with too little oil.
Diesel can be seen leaking out of the bleed screw (bottom left) of this engine and can be seen glistening on the cooling hose and engine mount
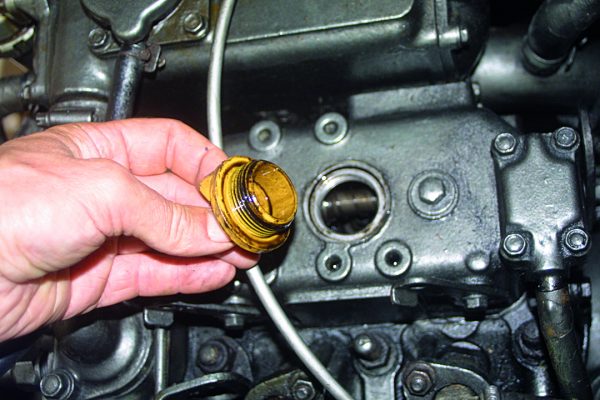
Prime culprits for oil leaks include rocker cover gasket, oil filler cap, dipstick, breather pipes and oil filter.
Weeping rocker covers can be tightened on their existing gaskets at first, although this generally only delays their longer-term replacement.
Breather pipes become less flexible with age so the ends can easily slip off or crack.
Simply pushing them back in place or using a hose clip is a temporary solution, but ideally, the pipe should be replaced.
If the oil has recently been changed and the filter replaced, check it for seepage around the seal.
You may be able to hand-tighten it a little more.
Fuel leaks
When dealing with fuel leaks it’s important to distinguish between those on the low-pressure part of the system, and those after the injector pump, where fuel pressure is boosted to around 600psi (41 bar) on older engines and considerably more on common-rail injection types.
Diesel at this pressure can penetrate the skin and cause severe dermatological problems, so keep your hands and body well away from high-pressure leaks or wear appropriate PPE if avoidable.
Common sources of leaks are around the fuel filters and bleed screws, as these are the components most likely to be disturbed during routine maintenance or when rectifying problems.
It’s vital to ensure new O-rings and sealing washers are used when replacing filters. Smear both mating surfaces on the rubber with clean fuel before fitting the filter – this allows the components to tighten without kinking the rubber.
Be wary of overtightening bleed screws as it’s easy to strip the thread.
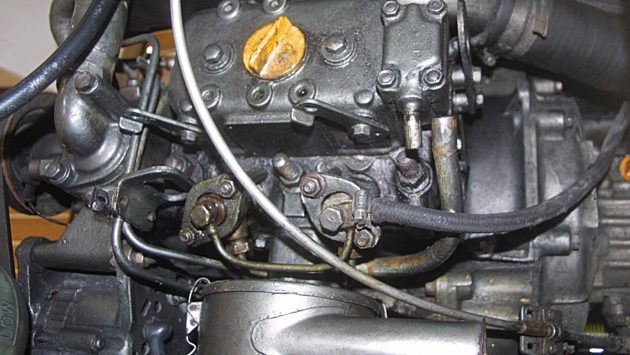
Attention to detail is vital when inspecting an engine: a loose oil breather pipe (middle of photo) is a common source of leaks on older engines, and will have a detrimental effect on the motor’s performance. Credit: Rupert Holmes
If these are leaking, the first check is to ensure the screws have now simply worked loose. If that isn’t the problem then the sealing washers must be assumed to be suspect and should be replaced.
A similar approach can be applied to leaking joints in pipework. If they haven’t worked loose dismantle the components, clean them carefully and reassemble with new copper washers.
New washers are important as old ones will be work hardened and won’t take up the exact shape needed to prevent leaks.
A good tip: as a get-you-home measure, a thoroughly cleaned copper washer can be heated in a gas flame to restore some of its original malleability.
If the pipework has been dismantled any air that has entered will need to be bled out of the fuel system.
On most engines, this is done at the engine-mounted fine fuel filter.
A connection that leaks on the suction side of the low-pressure lift pump will exhibit different characteristics to those on the opposite side: instead of fuel leaking out, air will be sucked in.
If the fuel filters are clean but it seems almost impossible to bleed the fuel system successfully, or air repeatedly finds its way into the system, this is likely to be the problem.
Water leaks
Water leaks have the potential to cause significant damage to the engine in a relatively short time, or even to start filling the boat with seawater!
If it’s not clear exactly where the water is coming from, narrow down the possibilities by dipping a finger in the fluid to check whether it is warm or cold, and tasting it to check whether it is salty or fresh.
However, water leaks are likely to start in a much more subtle manner – often they can only be identified by a telltale, often rust coloured, trail.
If this is the case on pipe or hose unions, dismantle the pipe, clean them up and fit a new hose clip.
Continues below…

How to service a marine diesel engine in 12 simple steps
It was time to service the marine diesel engine on our Maxi 84 cruiser. Knowing how to diagnose and fix…
How to fix a leak in the marine engine cooling system
Stu Davies advises PBO reader Richard Jales how to solve a leak in his boat's marine engine cooling system

How to remove a marine diesel cylinder head step by step
During the summer of the 2019 our Bavaria 39 Tessa Jane began producing black exhaust smoke and suffering a reduction…

Engine health check: 6 steps to make sure your diesel is in fine fettle
An idea struck me when I ordered an oil analysis for Merlot, my lockdown project boat. Routine health checks are…
Core plug leaks are more unusual but not unheard of, and more often than not occur in places that are difficult to get at.
These round steel plugs are designed to pop out to protect the engine block from severe damage should the coolant freeze during a cold winter, but they can also be subject to corrosion.
Check for weeping rust streaks around or on the plug.
Many marine installations give scope for cooling hoses to chafe against other hoses, bulkheads or even metal parts of the engine itself.
It’s only a matter of time before they wear through, so this should be part of the regular engine checks.
A similar comprehensive check of other aspects of the engine can also help to pre-empt oil and fuel leaks – remember that, if the engine is kept in good condition, you can generally spot the early signs of problems more easily.
Not only is that good for reliability, but it can also save you from some nasty and unexpected repair bills.
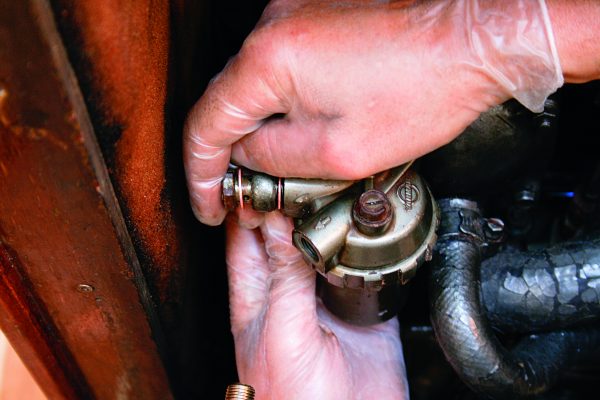
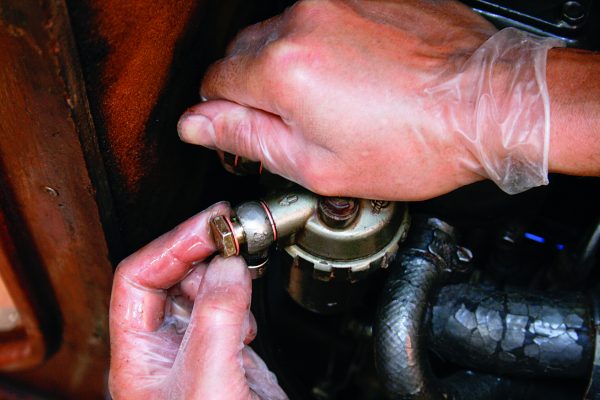
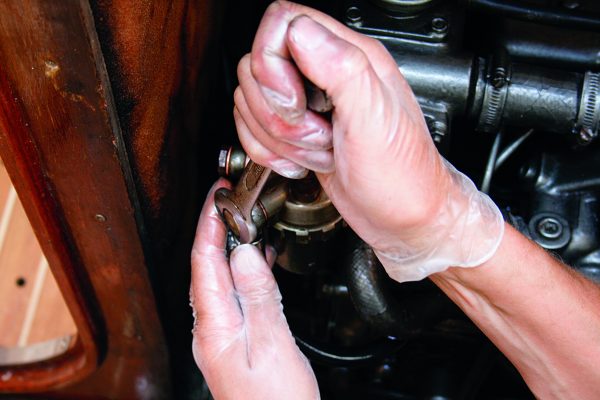
Making a fuel system connection: step by step
Credit: Rupert Holmes
1. When working on the fuel system absolute cleanliness is essential to avoid damage to the precision elements of the injection system.
Credit: Rupert Holmes
2. When replacing banjo-type connections new copper washers must be used. Start by doing up the bolt hand tight as far as it will go….
Credit: Rupert Holmes
3….the nip it up with a well-fitted spanner – but don’t overtighten. Usually, nothing more than a quarter turn with the spanner will be required.
Spares to solve engine fluid leaks
There’s not a great number of spares that are needed in addition to the standard kit of fuel filters, drive belts and water pump impellers.
However, a supply of O-rings and copper washers for the fuel system can be useful.

A selection box of copper washers
It can be difficult to improvise repairs to some cooling hoses if they are of a complex shape, but carrying spare pipe of the same section, as well as some whose external diameter matches the internal diameter of yours, along with a plentiful supply of suitable hose clips, will maximise your chances of getting home without assistance.
Enjoyed reading Fixing and avoiding marine engine leaks? 
A subscription to Practical Boat Owner magazine costs around 40% less than the cover price.
Print and digital editions are available through Magazines Direct – where you can also find the latest deals.
PBO is packed with information to help you get the most from boat ownership – whether sail or power.
-
-
-
- Take your DIY skills to the next level with trusted advice on boat maintenance and repairs
- Impartial in-depth gear reviews
- Practical cruising tips for making the most of your time afloat
-
-
Follow us on Facebook, Instagram, TikTok and Twitter