
Epoxy sheathing offers a long-lasting alternative to canvas for covering a traditional plywood coachroof or deck, as Richard Johnstone-Bryden explains
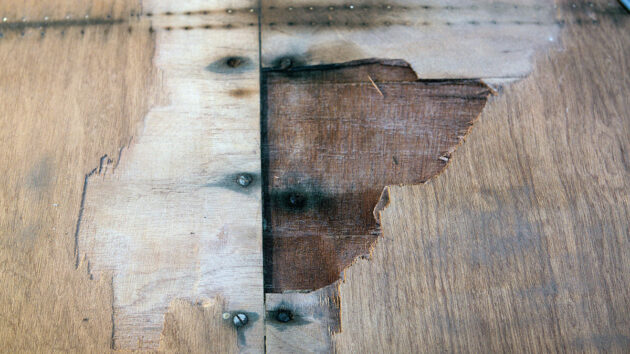
As the painted canvas covering on a traditional plywood yacht coachroof or deck nears the end of its working life, it will begin to crack and allow water underneath, resulting in leaks and ultimately rot. Although canvas can be replaced like-for-like, boatbuilders often opt for the longer-lasting alternative of epoxy sheathing.
Here, boatbuilders are repairing and epoxy sheathing the coachroof of the Powles 38 motor cruiser Broadstar.
Repairing rot in the ply coachroof
Credit: Richard Johnstone-Bryden
1. If the bond between the canvas and the plywood is still generally sound, use a Stanley knife to cut the canvas into thin strips, which will make it easier to remove. Great care is required to ensure the blade only cuts through the canvas and not into the plywood. Each piece of canvas should be removed in a steady yet gentle manner to minimise the number of plywood shards that are pulled away with it. Heat from a hot air gun may help soften adhesive and make the canvas easier to strip off, especially in winter.
Credit: Richard Johnstone-Bryden
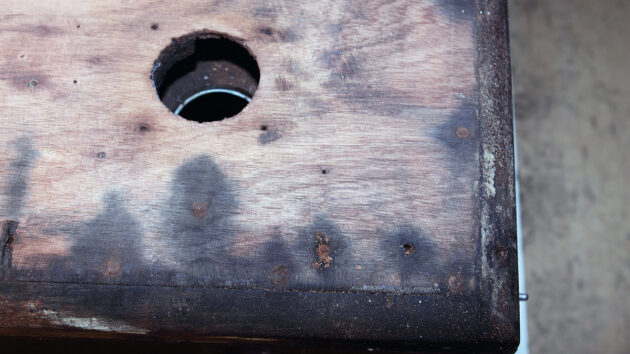
2. With canvas removed, thoroughly inspect the underlying wood of the coachroof. Dark, damp patches like these should be carefully dried out over several days.
Credit: Richard Johnstone-Bryden
3. Once the damp is dried out, sand the coachroof all over – this will reveal what patching or filling work is required.
Credit: Richard Johnstone-Bryden
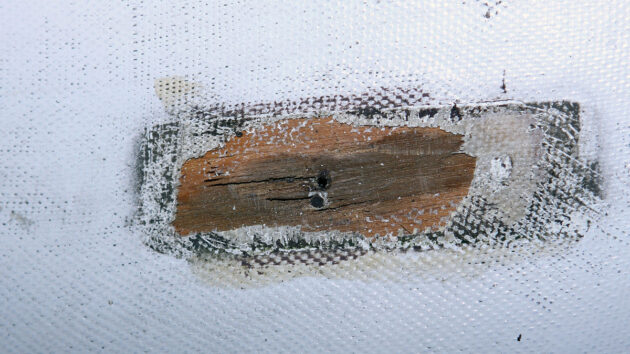
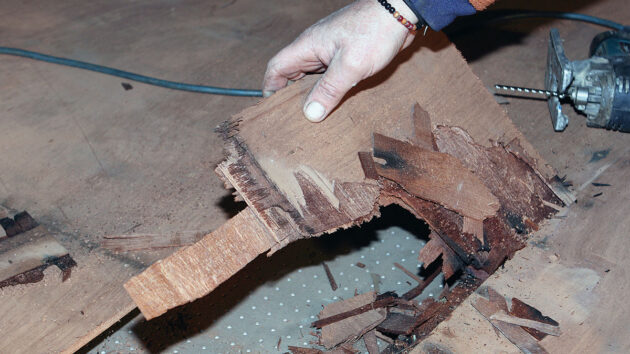
4. This patch of rotten wood is past saving and will have to be replaced.
Credit: Richard Johnstone-Bryden
5. The method of patching will be determined by what lies underneath. Start your investigation by carefully cutting away some of the rotten timber.
Credit: Richard Johnstone-Bryden
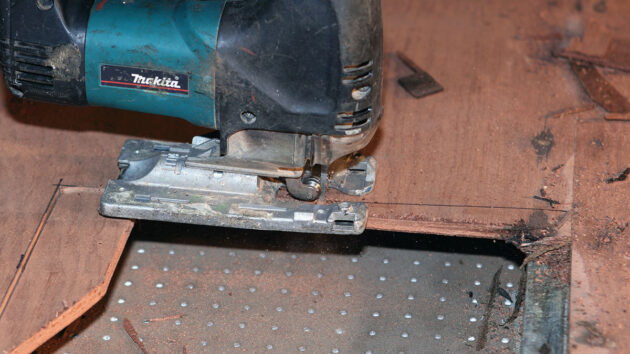
6. In this case the underside of the coachroof is covered by a lining board and it was possible to cut out just the damaged section with a jigsaw. If there’s no lining and the underside of the coachroof is visible down below then you may have to replace a complete width of plywood between deck beams because it’ll be difficult to disguise a patch.

Credit: Richard Johnstone-Bryden
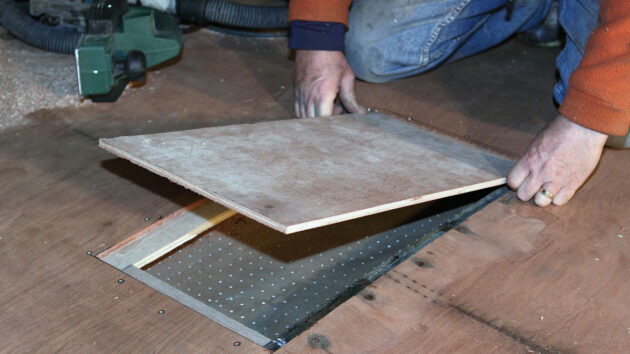
7. Wooden cleats are glued and screwed into position to support three sides of the wooden patch – an existing deck beam supports the remaining edge here.
Credit: Richard Johnstone-Bryden
8. The patch is cut to size to fit the hole, and glued and screwed firmly in place to the cleats and deck beam.
Credit: Richard Johnstone-Bryden
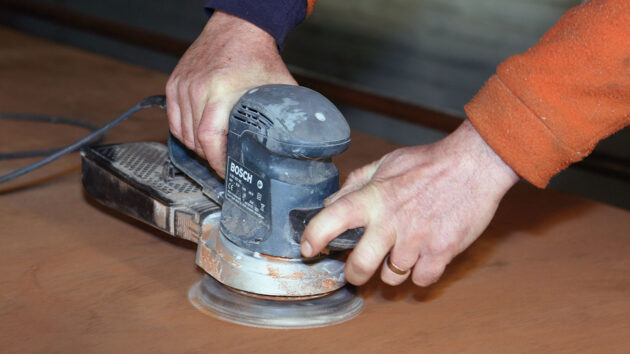
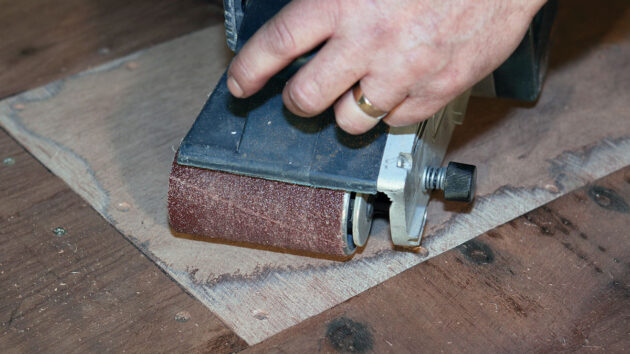
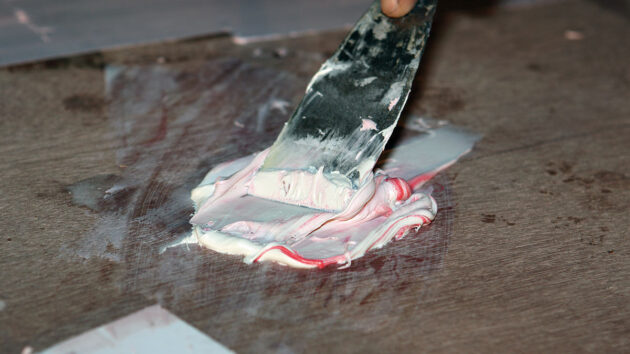
9. With the glue set, a belt sander ensures there are no uneven edges between the patch and the coachroof which could lead to gaps between the ply and the glass cloth of the sheathing. Any further imperfections in coachroof surface, small hollows or old screw holes can be filled with epoxy filler (below) and then sanded smooth.
Credit: Richard Johnstone-Bryden
Give the surface a thorough clean and vacuum to remove dust
Epoxy sheathing the coachroof
Credit: Richard Johnstone-Bryden
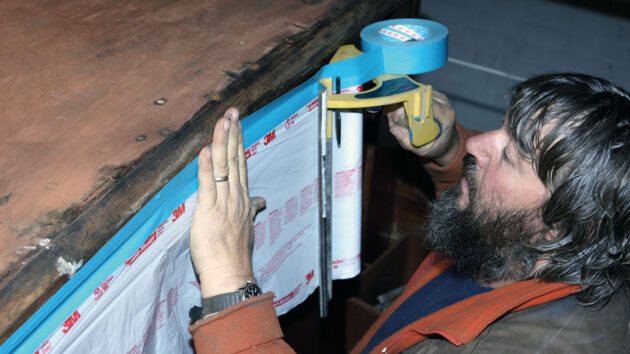
1. To protect the varnished cabin sides and spray screen, everything that needs covering up is masked off with plastic sheeting.
Credit: Richard Johnstone-Bryden. Ed’s note: wear appropriate PPE
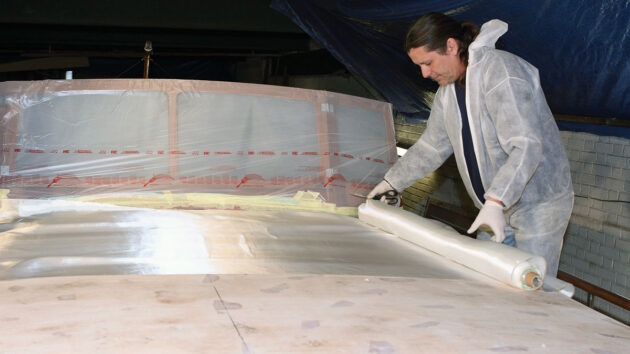
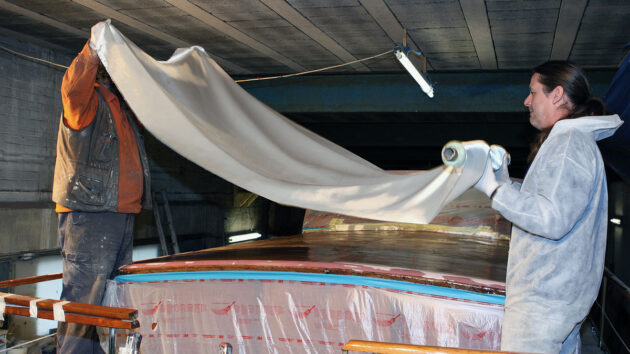
2. The glass cloth is rolled out across the width of the coachroof and cut roughly to length. Handle the cloth very carefully to ensure it is not snagged by anything or distorted. If the coachroof is large, you may have to butt several pieces of cloth together
Credit: Richard Johnstone-Bryden. Ed’s note: wear appropriate PPE
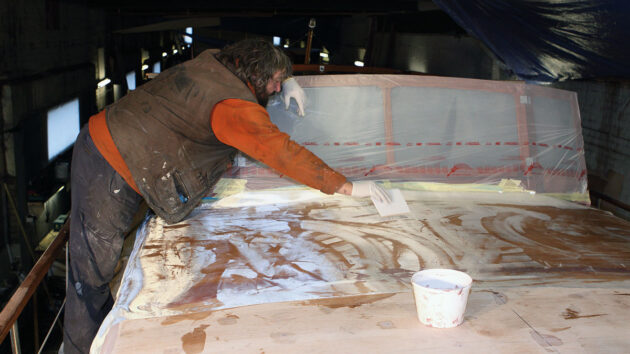
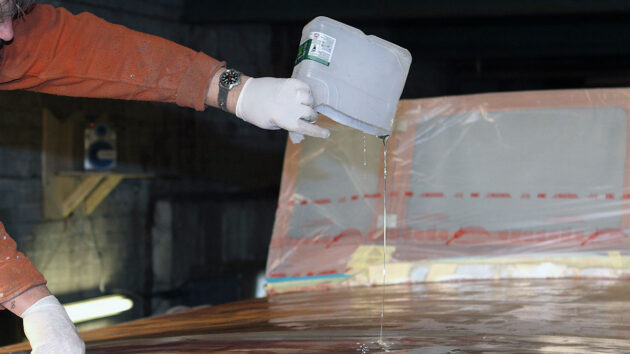
3. Apply a generous coat of resin directly to the coachroof for the glass cloth to be laid on. It’s important to ensure there is enough resin on the plywood to soak into the cloth, otherwise it will have to be forced through the cloth later on which increases the risk of creating ripples in the cloth and stretching it in all the wrong places.
Credit: Richard Johnstone-Bryden. Ed’s note: wear appropriate PPE
4. Gently lower the cloth onto the resin.
Credit: Richard Johnstone-Bryden. Ed’s note: wear appropriate PPE
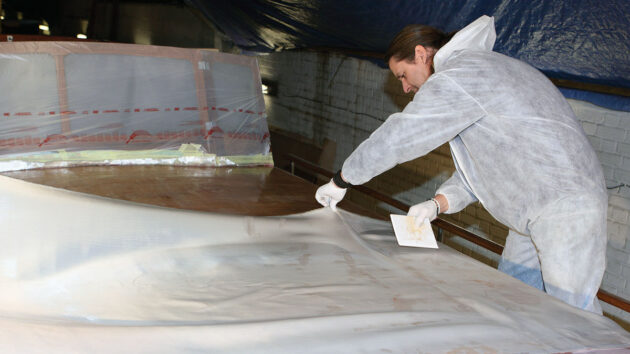
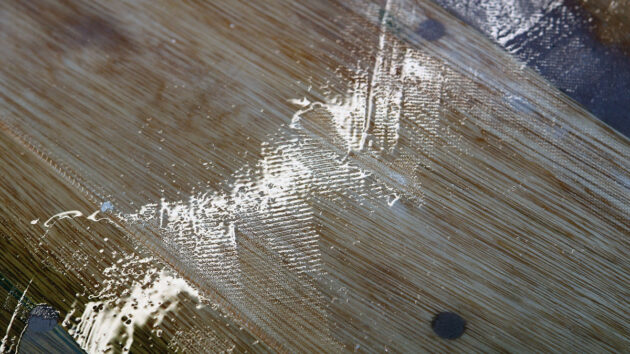
5. Smooth the cloth as you go. The ultimate success of this job is determined by being able to lay the cloth as level as possible because the more ripples you have, the longer it takes to achieve a smooth finish, which in turn increases the risk of stretching the cloth.
Credit: Richard Johnstone-Bryden.
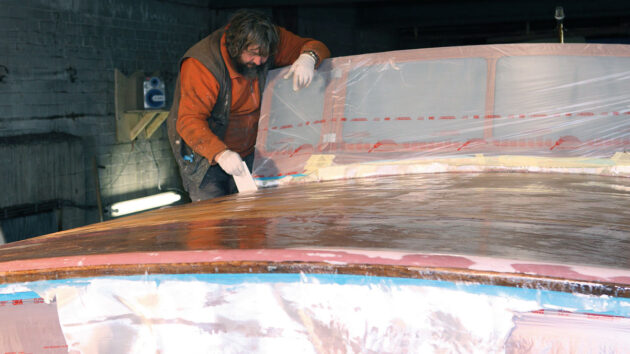
6. Now apply more resin. You’re aiming to wet the cloth completely through with no pale ‘starved’ patches.
Credit: Richard Johnstone-Bryden. Ed’s note: wear appropriate PPE
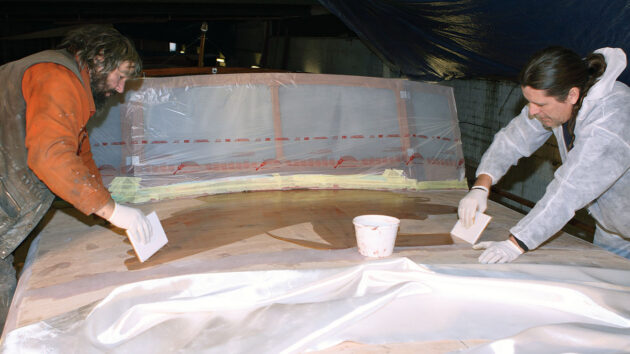
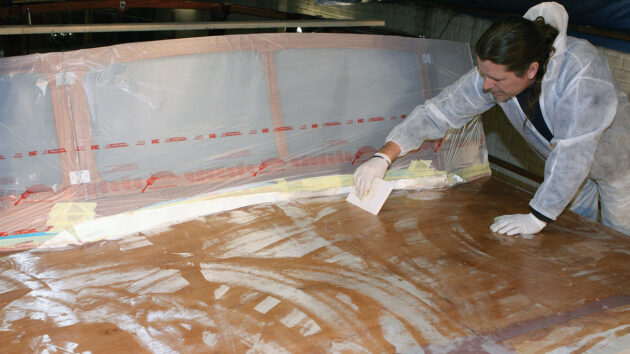
7. Work the resin into the cloth with a plastic spreader, eliminating ripples by ‘working’ the cloth from the centre of the boat outwards.
Credit: Richard Johnstone-Bryden. Ed’s note: wear appropriate PPE
8. Once you have achieved a nice smooth and even finish to the cloth it is left for the resin to cure overnight.
Credit: Richard Johnstone-Bryden.
9. Epoxy sheathing will need to be finished off with a coat of paint to protect it against degradation by UV light, so depending on the finished surface you require you can either paint the surface as it is to create a non-slip surface with the glass cloth weave, or apply a thin layer of filler and sand it for a perfectly smooth finish. For the best results, use a two-pack paint to achieve a durable finish.
Best marine sealants and adhesives for boat jobs
With help from adhesive and sealant expert Laurie Brebner, PBO’s Ali Wood explains which works best for different jobs on…
Fitting and sealing new deck gear and winches
Rupert Holmes shares how he redesigned and refitted the deck hardware on his Quarter-Tonner, Minestrone

Can you epoxy repair an aluminium boat heat exchanger?
PBO reader Chris Marden wants to know if he can repair the outer case of his boat heat exchanger with…

Clinker-built boat repair: step-by-step
Richard Johnstone-Bryden explains the basic principles of clinker construction and the method of replacing damaged hull planking
What kit has impressed while maintaining or modifying your boat?

Follow Practical Boat Owner on Facebook, Instagram, TikTok and X