
You can keep cool in hot climates without resorting to amp-chewing fans and air-conditioners. Richard Hare shows how to make a simple hatch blanking plate
The thought of keeping the sun out of a boat’s interior may seem anathema to those of us in UK waters, but anyone gearing up for sunnier climes will look at it from a different perspective.
Shade, and lots of it, will be the order of the day.
This problem is far from insurmountable, and can be done without the need for power-hungry fans and air-conditioners.

Steps like painting coachroofs and side decks with cool colours – cream is excellent for reflecting heat, while dark blue and Treadmaster brown are appalling – and adding insulation behind coloured hulls and sheerstrakes help a lot.
Rigging a bimini to provide shade over the companionway hatch is a major contributor to keeping cool within, as hatches are nearly always left open during daytime.
Cabin windows that open to allow a through-breeze work wonders too.
Companionway hatches aside, the forehatch can be an even more aggressive ‘radiator’. It faces upwards towards the sun and unless some means can be provided to block the rays, forecabins can heat up alarmingly.
And if there’s a holding tank fitted beneath the berths (why do people think it’s a good idea to fit them there?), then a large part of a boat becomes virtually uninhabitable. I can think of two approaches to solving this problem.
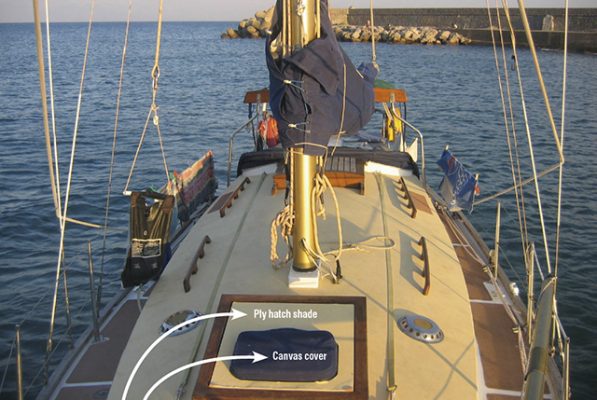
Modern hatches, like the small forward-opening hatch shown here, can have a custom-made canvas cover that snaps neatly on to a groove that is usually provided for the purpose around the hatch rim.

Some modern hatches have a groove to accept a canvas hatch cover
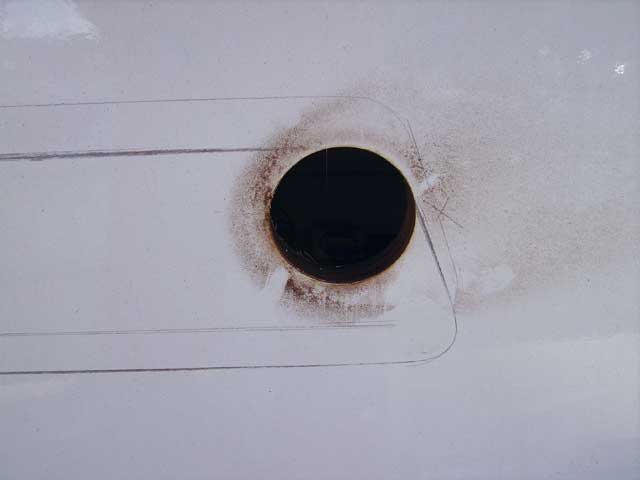
draw-cord. Note also the eyelet to accept bungee cord that is used to
secure the sun shade board in rough or very windy weather
The other solution – one that may appeal to owners of boats fitted with traditional wooden hatches – involves a plywood insert that can be slotted into place. Although this is ideally suited to wood/sheet acrylic (Perspex) hatches, it can also be adapted to suit many other types of hatch.
Forward-opening hatches are an obvious benefit in the Med where a yacht settles at anchor head to wind, but few yachts are made with these nowadays. The traditional wooden hatch pictured here is an aft-opening hatch but with a modern alloy forward-opening hatch added, which thereby enables it to act as a wind scoop or a venturi ventilator, depending on the conditions.
As an interim emergency measure, an inflatable dinghy can be plonked over the forehatch. It keeps the sun out, and so long as a halyard or a block is used to raise it a tad, a fair bit of breeze and deflected light gets in.

Crossing the southern Adriatic in a flat calm can be a hot experience. An inflatable dinghy can provide improvised temporary shade over a hatch
However, a tender has a role of its own and is no long-term substitute for a proper forehatch insert, a component that is very cheap and simple to make and one that will deliver an excellent result. When it is not required the insert, or cover, can easily be stowed away.
Year-round use?
Although the hatch shade board is enveloped in epoxy, it’s inadvisable to leave it in place during the winter because it will encourage rainwater to accumulate and pool. Inevitably, when you return in the following spring, you’ll find a horrible, mouldy, mossy soup underneath.
It won’t do the hatch joinery much good either. A cockpit locker would be a good place to stow the cover out of the way, perhaps held snug against a bulkhead by a length of bungee cord.
Making the hatch shade board

1. If the area to be covered is anything other than a straightforward square or rectangle, try to scrounge a scrap of vinyl flooring which will make an excellent template. Check it in-situ and note any minor tweaks.

2. Place the template on to a piece of 6mm (1⁄4in) exterior/ WBP plywood. Tropical hardwood plywood is likely to be best. Since this isn’t a permanent exterior application there’s no need for marine-grade ply.

3. Using a jigsaw, remove any required bites or apertures: in this case, an aperture for the forward-opening hatch.

4. Using a polyester filler like Isopon, fill all core gaps and make good any other defects like lifted splinters. Once cured, sand smooth.

5. Encapsulate both sides and all edges with a single coat of epoxy.

6. Paint the underside in either a full traditional paint system (primer, undercoats, top coats) or a single priming coat of a waterbased exterior paint followed by a couple of coats of oil-based gloss.

7. After priming finish the upper surface with a deck paint – in this example, cream. Note the two eyelets on the leading edge of the hatch (there’s one at the back too) to take a bungee ‘spider’ to hold the cover in place in the very roughest of weather.
This practical article by Richard Hare was published in the June 2011 issue of PBO. To search the PBO archives visit our online copy shop.

Nav in a nutshell: How to use a Breton Plotter
Breton Plotters are simple to use in practice, but tricky to explain on paper – it’s much easier if you…

How to replace your sprayhood windows
Do you have a foggy view? Don’t throw away your expensive sprayhood or awning – you can replace the windows…
How to cut rounded corners with a hole saw
How to cut rounded corners with a hole saw

How to repair big holes in GRP boats
Even wrecks can be rescued! Damaged boats can often be bought for a song and then successfully repaired – but…

How to check keel bolts
Colin Brown describes a series of checks you can carry out to assess the structural integrity of the bolts which…

5 top causes of boat engine failure – and how to avoid them
Jake Kavanagh talks to Sea Start marine engineer Nick Eales about how to avoid the five major causes of an…

How to reef – expert advice from PBO Sail Clinic
How do you ensure an efficient reef with a roller-reefing headsail and slab-reefing mainsail? David Harding explains

How to service a 2-stroke outboard engine
After a long winter indoors many 2-stroke outboards are reluctant to start. A simple service should make yours more reliable.…
How to tow alongside
Towing another boat in the confines of a harbour means that you'll need to set up a tow alongside. Here's…
How to sail off a mooring
In many situations, leaving the mooring under power is the only sensible option. But if conditions allow, why not spare…

How to make your own canvas bucket
Lin and Larry Pardey's step-by-step guide to producing a durable canvas bucket: from the January 1995 issue of Practical Boat…

How to deal with riding turns on a winch
Riding turns always occur at the worst possible moment - here's how to remove a riding turn and avoid them…