
Even wrecks can be rescued! Damaged boats can often be bought for a song and then successfully repaired – but it’s not a job for the faint-hearted. Jake Kavanagh explains how major repairs are tackled

It doesn’t matter how experienced a boater you are, there is no accounting for the completely unexpected – and you don’t need to be at sea for something to happen to your boat.
An unfortunate few have seen their pride and joy dropped from a travel-hoist, gutted by fire, or even thrown across a motorway. But even the most hideous wounds and big holes in GRP can be repaired – given time, money and a skilled workforce.
A competent DIY enthusiast could also obtain a smashed-up wreck for peanuts and make a perfectly sound and seaworthy vessel from the mess – which happens all the time in America in the wake of a hurricane.
Worth fixing?
The big question any owner (or more likely their insurers) has to ask is, ‘Is it worth fixing?’
Once your boat has been damaged, your first priority is to ring your insurers, explain the situation and ask for a claim form. If they decide the damage is likely to be above a certain floor price (usually around £1,500) they will appoint a surveyor who will assess the full extent of the damage and give a ballpark figure for repairs. While spectacular damage is pretty obvious, it is also the hidden damage that the surveyor will be looking for.
Depending on the policy, the insurers will then ask for three quotes from recognised repairers.
‘This is where the owner often forgets his rights,’ says Mark Goodacre, managing director of Goodacre Boat Repairs at Port Solent in Hampshire.
‘The insurers will recommend a repair specialist, but the owner may decide he prefers another, even though it’s more expensive. You’re not obliged to go with the insurer’s choice – most companies will allow some monetary discrepancy, providing you are convinced you’ll get a better job. Push hard to get your preferred repairer.
‘Remember, it’s your boat, and your choice, not the insurer’s.’
Once the repairer has been selected and the price agreed, the contract is then drawn up between the owner and the repairer, and not the insurer – another reason why the owner has to be completely happy that his boat is in the right hands.
‘Talk with the repairer, and ask how many other boats of a similar type they have handled,’ Mark suggests. ‘You’ll soon be able to assess if they know what they are doing.’
Sometimes, however, a boat is just too badly damaged – or too inaccessible – to be economically repaired, so the owner is paid the insured value, and the remains sold off to anyone who will pay to take it away. We saw a damaged 30ft (9.1m) ketch in the Channel Islands with a large gash in its side which was eventually sold for £100. It was broken up, and the spars, winches and other gear sold for a profit. This was a shame because it could have been repaired and spent many more years as someone’s pride and joy.
Fixing the unfixable
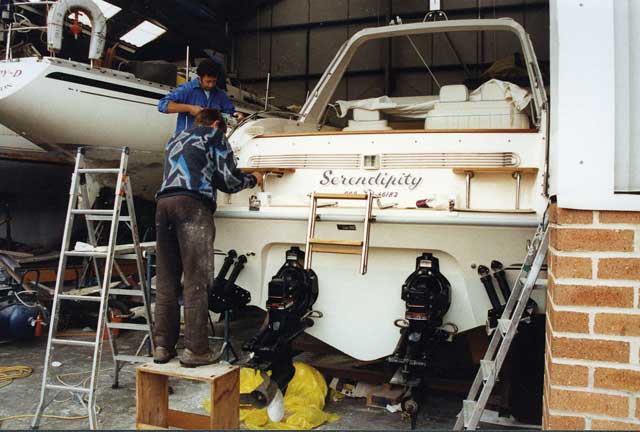
To find out just how a big job is tackled, we looked at a couple of case histories at Goodacre Boat Repairs to see how they carry out major repair jobs. The Hampshire-based yard specialises in repairing the most horrendous damage, and to a standard where the vessel is not only as strong – or stronger – than it was before, but where repairs are completely invisible.
Buyer beware
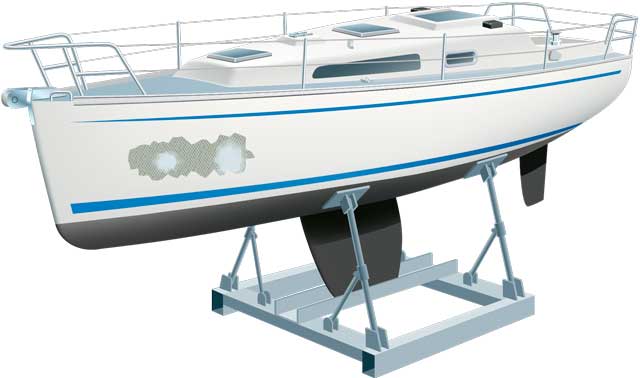
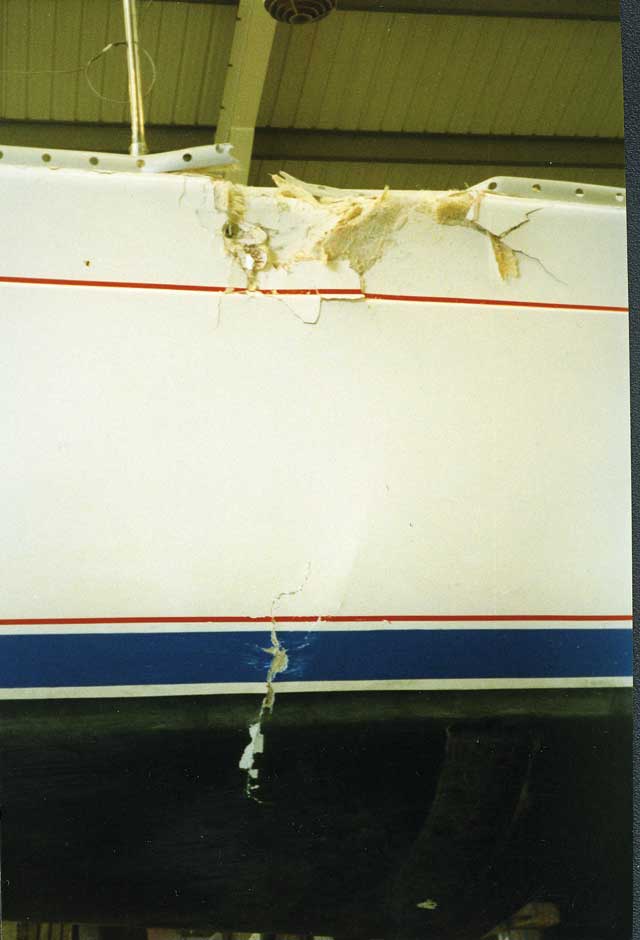
Aaron Logan, a freelance GRP specialist, showed us a yacht that had been T-boned by another. The boat seemed fine apart from a small hole in the side, which the owner had patched with a dollop of plastic padding.
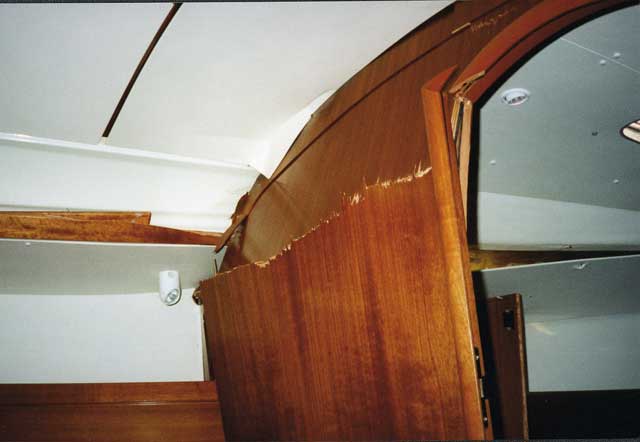
It was only inside that we saw the true extent of the impact. The collision had compressed the hull and, while it had appeared to pop back into shape, the main bulkhead had been badly damaged.
Worse still, the hole was beneath an inner lining, so major surgery was needed to open up the boat to fix it. What initially appeared to be an innocuous little knock would run up a repair bill of a couple of thousand pounds.
Advice from the surveyor: When is a boat a write-off?
The point at which a damaged boat becomes a write-off depends largely on the value of the boat and the estimated costs of repair. As those costs approach 80% of its insured value, insurers will be thinking more and more about declaring the vessel a ‘constructive total loss’ (CTL).
Their nervousness arises from experience. It’s not uncommon for repair costs to escalate once work begins – often because cutting away splintered structure brings to light damage that wasn’t visible at the outset. Better by far, argue the insurers, to pay up for the whole boat – the absolute limit of their liability – rather than have repair charges spiral to an even greater sum.
The practical implications are clear. Bash a hole in a large expensive boat and it’s very likely to be repaired, whereas a similar hole in an older vessel might see it declared a CTL. Note that this doesn’t mean that the damage is irreparable – simply that the insurers think that the CTL route is a less risky option for them.
Geography also plays its part. Repair facilities are much scarcer and less dependable in some areas than others. When hurricane Ivan rampaged through Grenada in 2004 at least one insurer decided to ship boats all the way back to Europe for repair – not just to save money, but more to have them under the sort of local supervision they were familiar and comfortable with. Those shipping costs would have been yet another factor in deciding whether a boat should be repaired or written off.
Andrew Simpson
Moulding from a sister ship
Taking mouldings from an identical boat is a good way to repair hull damage, or to simply match a damaged item, but it does require a willing owner for the donor boat. You may have to remove some transfers or decals to get a completely smooth original hull.
Step 1: assessing the damage
Step 2: Remove bunks and chop out damage back to sound laminate
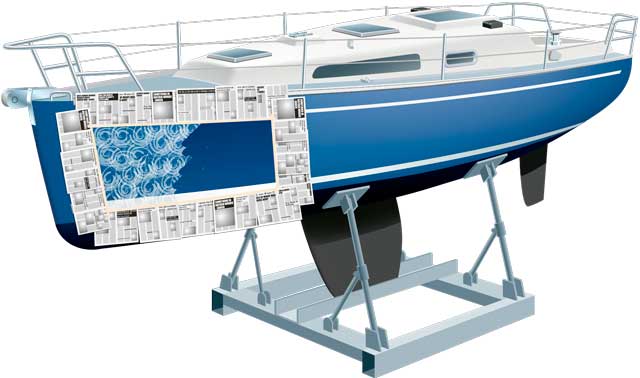
Step 3: On the sister ship, thoroughly clean the area you want to mould from (ideally with soft soap followed by an acetone wipe) and then mask off. You then polish the area to make it as shiny as possible before applying three layers of release wax. Leave each layer for an hour before polishing it to a shine.
With all three wax layers added, you can now brush on two layers of gel coat, leaving each to cure to tackiness. The gel is then followed by some chopped strand mat, with foam or wood stiffeners bonded in for strength. Brace the whole thing so its weight won’t allow it to fall from the hull.
Remove the mould, trim it, and then polish the inside with three layers of release wax ready to fit against the hull of your own boat.
Step 4: Put the mould in place and lay up from inside
Step 5: Colour match gel coat and replace interior fittings
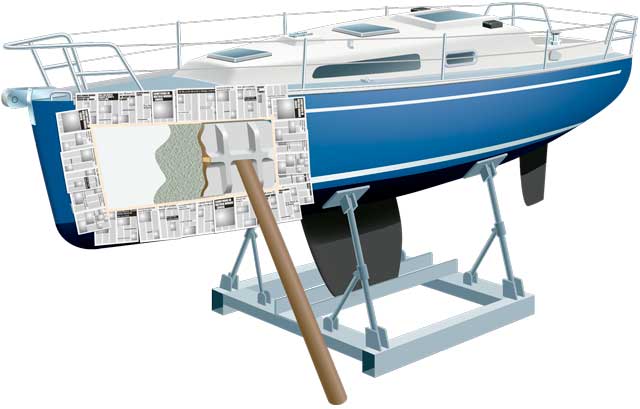
Moulding from ‘made good’
This method can work well if your boat is damaged but the affected area is still more or less intact. The technique requires using filler to patch up and ‘make good’ the damage, and then sanding back so the shape is as close to original as possible.
Next polish up the ‘made good’ area with three layers of release wax and take your casting – just as you would if taking a mould from a sister ship, as described above.
With the mould cured and removed, you can then cut out the temporary repair and the damaged area back to sound material. It’s then a case of rebuilding that section of hull using your newly-made mould.
Damage made good with filler – not a strong permanent repair, but smooth enough to take a mould from

Take a mould from the ‘made good area’. Then chop out the damage and rebuild from the mould as in steps 4 and 5 (above)
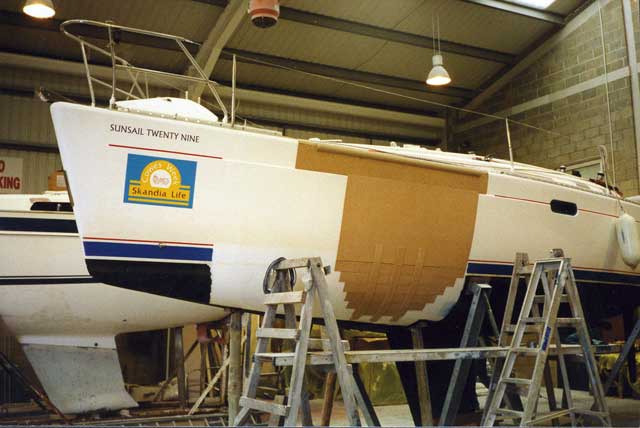
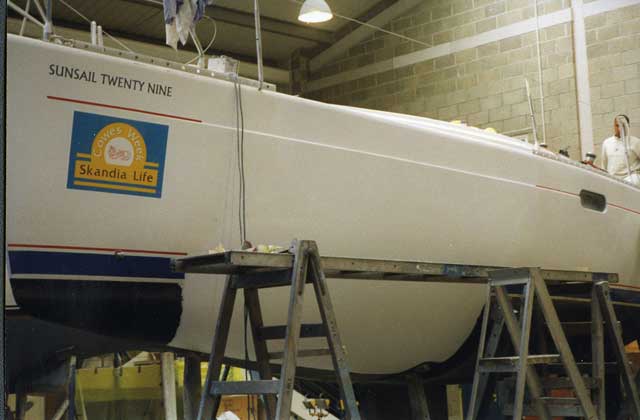
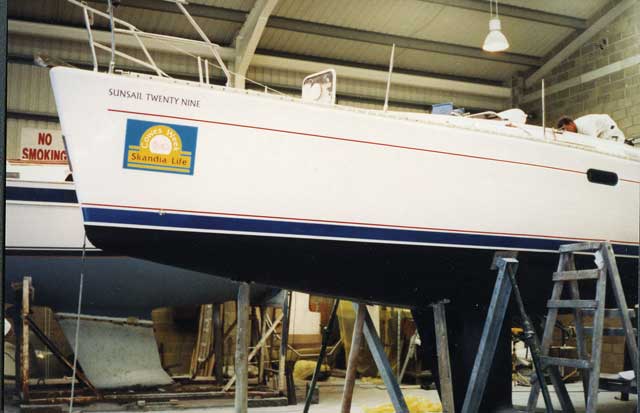
Case History 1: Using an existing mould
This new Windy 906 sports cruiser was being transported down a German autobahn when the lorry it was on jack-knifed. The boat was dumped onto the road where it was then struck by another vehicle. Despite major damage to the transom, which also involved the wrecking of one of the outdrives, the insurers decided it was repairable.
‘With a new boat, it is often possible to ask the builders if they can send you a section of mould,’ Mark Goodacre explained. ‘This can sometimes take a while, as the mould will be in use all the time making new boats, but you might be able to find a gap in production where the builder will mould just the section you want. From that, you can then make a female mould – which is exactly what we did here.’
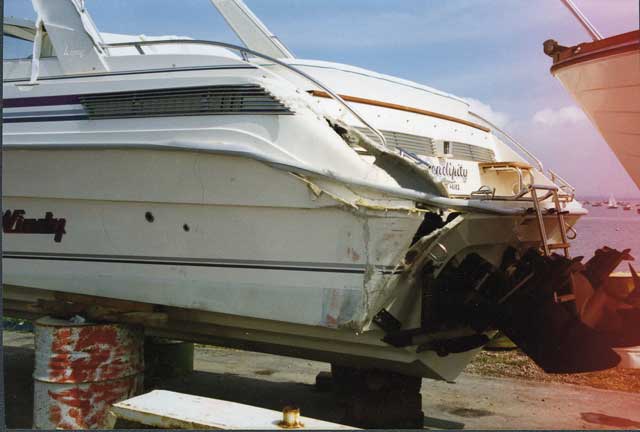
1 The worst of the damage was to the port quarter, where the transom had been completely opened up.
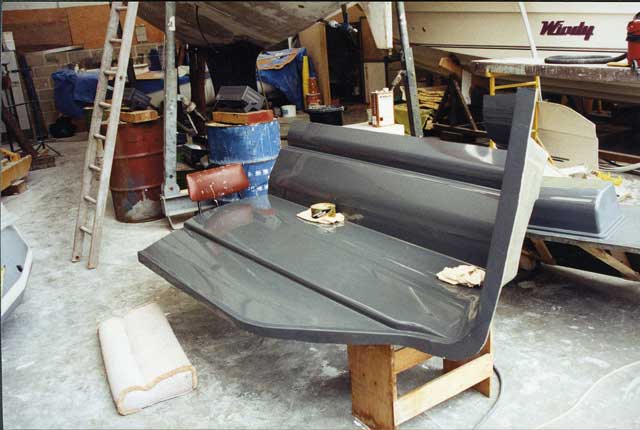
2 During a gap in production the Windy factory was able to supply a cast from the mould, from which this female mould was made.
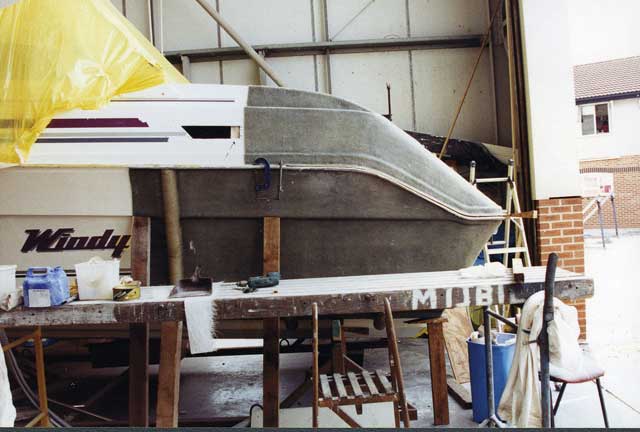
3 Once the damage has been cut back beyond the stress cracking, and the exposed edges tapered, the moulds are carefully eased into place and then firmly held with battens and clamps.
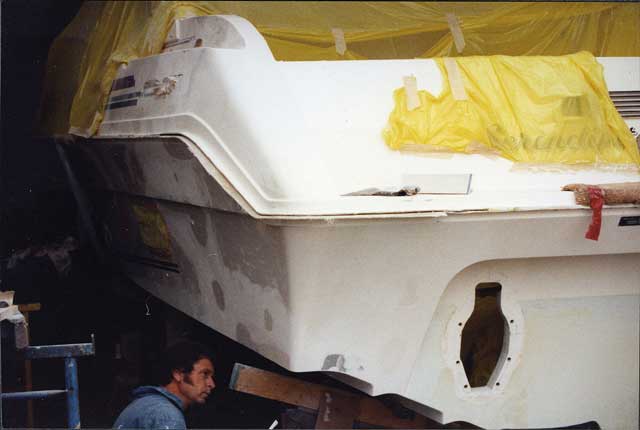
4 White gel coat is carefully colour-matched then applied from the inside of the boat, followed by layers of chopped strand mat to build up the thickness of the hull again. Stringers and other strengthening are also replaced. Once the moulds are released, final colour matching takes place with a finishing coat, applied from the outside.
5 With the rebuilt hull fully cured, all the deck hardware and engineering can then start to be replaced.
Case History 2: Making a temporary mould
It may not always be possible to obtain a mould from the factory, or it may be just too expensive, so another option is to make a temporary mould with ‘white faced’ Melamine-type hardboard. There is more work involved in the final stages of the finish, as the moulding will be cruder, but there are savings to be made.
1 When this Jeanneau was struck by another yacht during a race, the damage seemed relatively light. However, once craned ashore, it was found that the hull had stress cracks from the toerail right down to below the waterline.
Inside, the main saloon bulkhead had been shattered.
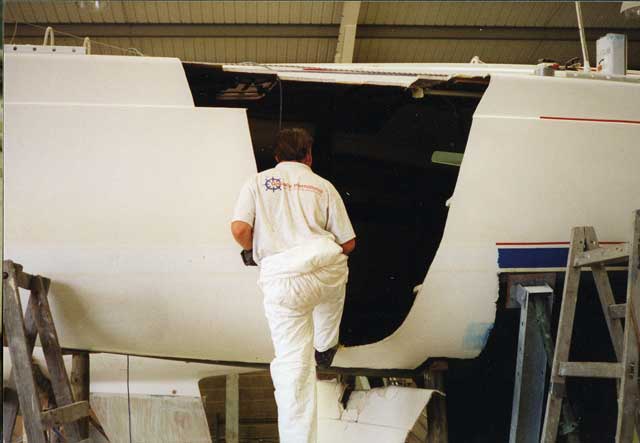
2: The first job is to cut away all the damage to beyond the last of the stress cracks. A fine soot is used to trace where the hairline cracks finally end. Note how all the antifouling has been stripped for some distance each side of the damage. To get to the hull, much of the internal furniture in this section had to be disassembled.
3: With the insides of the cut-marks tapered, sheets of Melamine hardboard are now used to recreate the hull shape. This is fairly quick, but will it be quite labour-intensive when it comes to flatting back the gel coat that has been laid up against it from the inside.
4: Colour-matched white gel coat, built up behind with chopped strand mat, has been used on the repair. Once the mould has been removed, additional layers of colour-matched gel coat will be applied from the outside. These will be repeatedly applied and sanded back until the whole hull is fair.
5: The finished job, complete with a fresh coat of antifouling, original-spec decals and a new toerail. From start to finish this job took about a month and cost £15,000.
Conclusion
These are some of the basic methods for repairing a hull, and from looking through the Goodacre photo album it seems that even the most badly damaged hulls can be restored. Let’s face it, you can’t exactly devalue a hull that has an enormous hole in its side, but the potential to repair and make it even stronger than the original is always there.
I remember many years ago covering the story of a Fairline 36 Turbo that had been gutted by fire. The DIY owner turned her into a highly functional workboat that is still doing sterling service today. The entire superstructure had been cast from a disposable mould made from Melamine hardboard.
So, if a large hole appears in your boat, don’t despair! If your insurance company is willing, it can be repaired as if it never happened. And if you fancy a worthwhile project, just keep an eye on the hurricane season in the United States. You really could pick up a bargain.
Our thanks to Mark, Barry and the team at Goodacre Boat Repairs of Port Solent. The company has been specialising in high-quality repairs since 1990, and its experienced technicians are often contracted by insurance companies to fly out to hurricane zones to repair damaged yachts in situ. The firm is currently working on the restoration of two America’s Cup boats, and also offer a full refit and customisation service for both power and sail.
Goodacre Boat Repairs, The Boatshed, Port Solent, Portsmouth, Hants PO6 4TR. Tel: 02392 210220, Goodacre Boat Repairs website


Ask the Experts: repairing a Westerly Oceanranger
A reader's question about survey and corrosion gets answered by one of PBO's experts

Gelcoat repair: How to make an invisible repair
Everything you need to know to make an invisible gelcoat repair, from preparation and filling to topcoat and polishing

DIY Sail repairs – how to do a ‘get you home’ repair
Ben Meakins tries out some useful temporary sail repair methods that will tide you over until you can get to…
Repair a depth transducer afloat!
I recently carried out a repair to my boat using a 3D printed part in the process. There was a…

DIY Osmosis Repair
If you’ve found a few blisters on your gel coat, don’t despair. You may not need to do a full…

Repairing holes in GRP
If you need to plug a hole in your glassfibre boat, fear not – repairs are easy to make. Jake…

Testing times on the Atlantic Rally for Cruisers (ARC)
Laura Hodgetts talks to the skippers of 20 boats on the Atlantic Rally for Cruisers (ARC), ‘the biggest downwind gear…

PBO Ask the Experts LIVE! 2016
We are building on the success of Practical Boat Owner magazine's Ask the Experts pages by bringing PBO Ask the…

Flare amnesty at Beaulieu Boatjumble – and much more!
A flare amnesty will be held at Beaulieu Boatjumble when the largest outdoor sale of maritime items in Europe returns…
Sail repairs – how to get sticky stuff to stick
Acetone is the key!

Check your liferaft’s repair kit
Contents vary hugely - but which is the best method of repair?