
Richard Rogers rethinks his twin V-berths to double configuration ‘without that annoying triangular insert’ aboard his Morgan Giles 30
Forepeak V-berths are all very well but many of us prefer them set up as a double.
The hassle is that awkward-to-stow triangle of wood that fills the gap between the single bunks to enable conversion. It’s horrible, isn’t it?
Like that huge removable dining table your boat came with, it lives nowhere in particular.

Unrestored Aurora’s original forepeak with traditional twin boat bunks and insert supports. Credit: Richard Rogers
And when you do find it and fit it, it cuts the height of the doorway to the forepeak in half.
Getting in and out of double boat berth is gymnastics at best, and at worst a fight with your partner involving knees and elbows.
Then there’s its buddy, the triangular cushion, which similarly has nowhere sensible to live, and so is always damp and smelly because it’s been stuffed out of sight somewhere cold.
There’s a better way.
No loose and awkward triangle of wood commuting around the boat, and no need to compromise the height of the doorway to the forepeak.
No smelly cushion either.
Boat berth: the basics
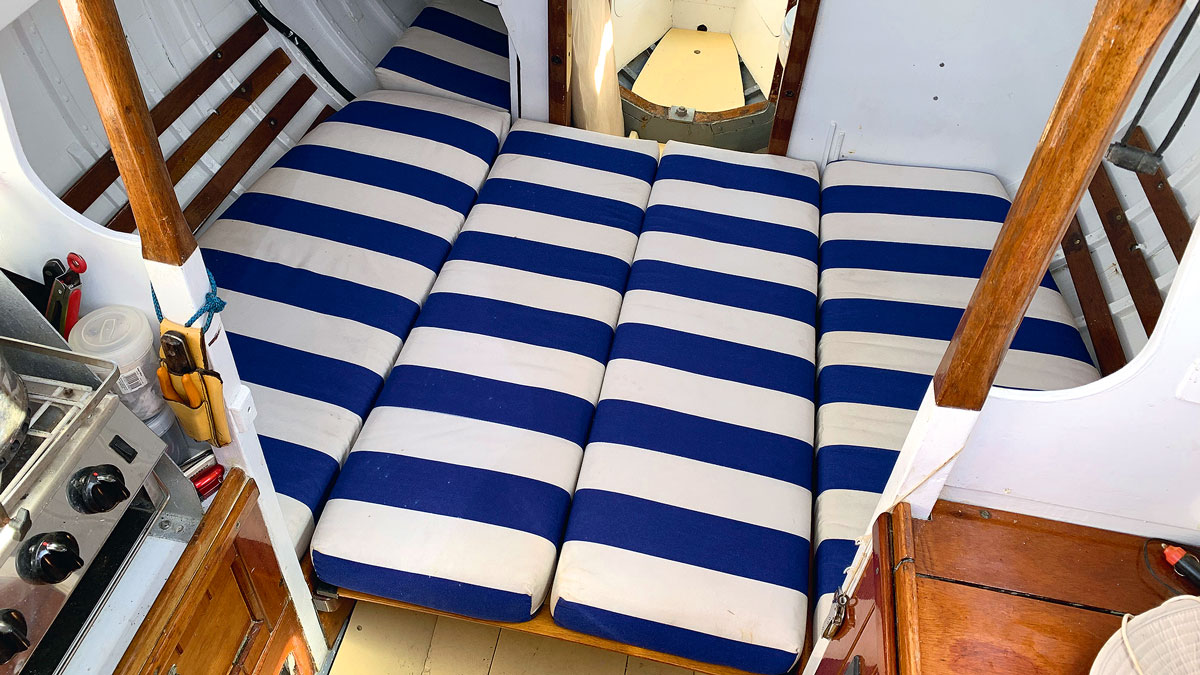
The alternative design is simple. Offset a double bunk to one side of the forepeak, and make a trapezoid insert that flips over to restore the single bunks if you want them.
To convert from the double bunk to the two singles and vice versa, you simply flip over the insert – the trapezium of ply in the foreground (right) without holes in.
The big advantage of this design is that in both set ups you can get in and out of the cabin using the full height of the door.
Also, the trapezoid insert is used in both configurations. It’s always in the forepeak as part of the bunk and never has to be stored elsewhere.

The layout of the supporting frame for new boat bunk, which took some ‘pushing around’ to get right. Credit: Richard Rogers
Its cushion, which also flips over, never needs to be stored anywhere else either.
It should stay dry and fragrant too, because it lives permanently in a well-ventilated spot.
The idea works best if the doorway to your forepeak is to one side of centre, but the idea can still work if it is not exactly like that, with a bit of tweaking.
We were lucky with Aurora, she came with the doorway in the right place.

The geometry of the alternative design
When we rebuilt her we kept the doorway where it was.
The one thing we did differently was build a watertight locker in the forward half of the forepeak, which can support the forward half of the bunk(s).
The forepeak is lined with insulation and glassed over because we are rebuilding Aurora as an out-of-season expedition boat.
I mention that because Alice and I want a double bunk for our sailing together, but there may be times when I sail with mountaineer friends.
Hence the need for conversion between a double and singles.
The geometry
Before starting to build one of these, the geometry of the alternative design is worth thinking about (see diagram, top right).
Critically, the insert must sit perfectly on shape a,b,c,d AND when flipped over on shape a,b,e,f – those two shapes being exact mirror images of each other.
That is going to require some cunning with carpentry to get right.
Also, as near as you can get it, given the position of the doorway and other constraints, P should equal Q, and R should equal S, so that the single bunks are as similar as possible.
Supporting frame
I began by building a frame to support the bunk top, which was made from lengths of iroko, approximately 30 x 50mm.
These were cut, oversized, from a lump of iroko, using a circular saw, and then planed to reduce them to the required dimensions.
We had already decided on a frame rather than the usual vertical bunk sides made of ply because we want to stow sails underneath the bunk ready to grab.
We do not want to be removing cushions to access sails in lockers, or be stowing potentially wet sails on the bunk itself.
Continues below…

Making a headboard for comfier sleeping on board
Chris Mardon fabricates a removable wooden bunk headboard
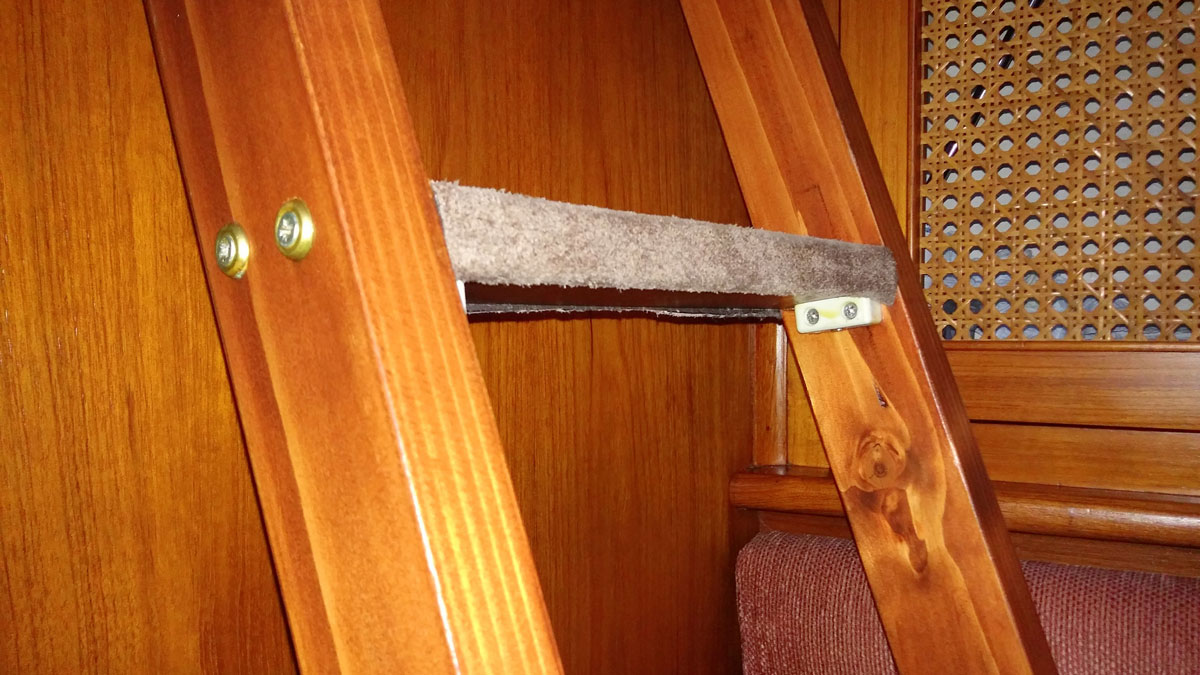
DIY bunk ladder for getting in and out of berths easily
Don Fitzroy Smith fashions cheap, light, easy to stow and make bunk ladder and headboards for getting in and out…
Boat berth upgrade: a cheap and simple way
Barry Pickthall makes a cheap and simple sleeping comfort upgrade - a double boat berth
Forepeak berth extension
Ben Meakins gets a good night sleep with an extension piece for the forepeak on his Hunter Impala 28
Nevertheless, deciding on the exact layout of the frame took a lot of pushing the components around to understand the geometry and get it right.
Taking your time is worth it. You only want to build the frame once.
The most important thing is the tricky symmetry of axis X-Y.
If you want the insert to be well supported by the frame and to look right, the tolerance along lines a-c and b-f is tight, only about 2mm or 3mm of width.
That is because the insert will rest on only half the width of the supporting frame, or 15mm of the 30mm width available.
The edge of the fixed bunk top must rest on the other half. Making the frame accurately was a challenge.
I didn’t reckon I could do it by measuring sides and trying to replicate the angles of corners.
Frame precision
Ordinary woodworking tools did not feel precise enough (another method is shown below).
Once you have the components of the frame in exactly the right place, you can carefully mark up where they cross each other and join them with cross-lap joints.
The frame can then be dry-fitted.

Cutting off the forward ‘nose’ of the bunk top so all the pieces would go into the cabin. Credit: Richard Rogers
How the frame is supported around the edge depends on how your boat is constructed.
On Aurora, the forward edge sits on the locker and the aft edge is supported by batons screwed to the cabin bulkhead, joined with more cross-lap joints.
The frame should then be levelled carefully, both fore/aft and port/starboard. But do not fix it permanently in place yet.
Fine adjustments to levels will be needed later when you have the insert in your hands. You want it to sit comfortably in place whichever way it is flipped over.
If it rocks you will notice when you try to sleep on it.
Bunk top
We used 15mm marine ply for the bunk top. It’s not much heavier than the 12mm we used for most of our furniture building but it’s a lot more rigid.
It’s ideal for bunk tops for that reason alone. Make a template first. I used one of the large sheets of cardboard that the ply was delivered between.
Cheap 3mm ply is stiffer, so generally better for templates, but in this case cardboard was best because it could be bent and folded easily to get it in and out of the boat.
How to make and use templates is something I did not know when we started rebuilding Aurora.
A simple and accurate method was taught to me by Simon Papendick at the yard where we keep her.

Marking the frame position on the underside of the bunk top, to help understand exactly where to cut out the insert. Credit: Richard Rogers
I love it and would not have been able to build her interior without it.
I cut my bunk top from one piece of ply before cutting it into pieces small enough to get them into the forepeak.
How many pieces and which shapes will depend on the dimensions of your boat and the details of how you intend to support the bunk top.
On Aurora, I had to cut the forward ‘nose’ off the bunk top, and support that on its own frame.
However you do it, if you start with one piece of ply, all the edges will meet nicely when everything is reassembled in the boat – but you could make it from separate pieces if your template is really accurate.

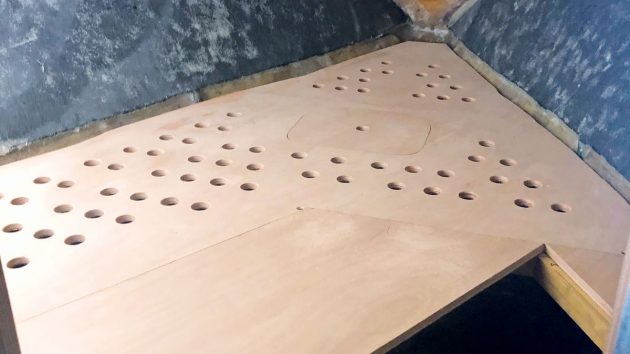
Components of the bunk top with ventilation holes cut out. Credit: Richard Rogers
The most important cuts are the edges of the insert.
If you can get the bunk top into the forepeak and sit it on the frame, before you cut out the insert, do that.
You will be able to mark the edges of the frame on the underside of the bunk top, which will help you accurately work out where to cut out the insert.
Otherwise, mark up the cardboard and use that to mark up the ply.
Take great care to be accurate with your marking and cutting.
The insert must be properly supported by the narrow edges of the frame whichever way over it is flipped!
There may be other things you need to do to the bunk top.

Aurora in the shed at J-Star Boat Services, Walton-on-the-Naze. Credit: Richard Rogers
On Aurora, a hatch was needed to provide access to the forward locker.
We also cut nearly 100 ventilation holes in the bunk top, using a 1.25in hole saw. These are to help get air through the cushions and keep them dry.
The holes were kept well away from the edges of the bunk top and the frame, so as not to compromise its strength.
We did not put ventilation holes in the insert.
It’s unsupported along one edge by virtue of the design and we thought it best left as strong as it could be.
I will trim the unsupported edge of the insert with mahogany, partly to strengthen it and partly to help retain the cushions on the bunk, when we get them.
Once the bunk top and insert are made, you can adjust the levels of whatever is supporting them, to make sure the insert does not rock, whichever way over it is flipped.
Only then can you paint or finish all the components, then glue the frame together and screw the bunk top to it.
I am going to finish ours as simply as possible, with a couple of coats of thinned epoxy.
After that, completing the bunk is up to an upholsterer, unless of course you fancy that job yourself.
Hindsight
I like what we have done but the precision demanded was at the limit of my carpentry skills.
I do not think I could have done it if I had not already spent three years on and off creating Aurora’s interior.
Those with more advanced skills may have begun somewhere else. It might be easier to make the bunk top and then the frame, rather than the other way around as I did.
Despite extreme care, I ended up adjusting one of the frame’s joints by a couple of millimetres.

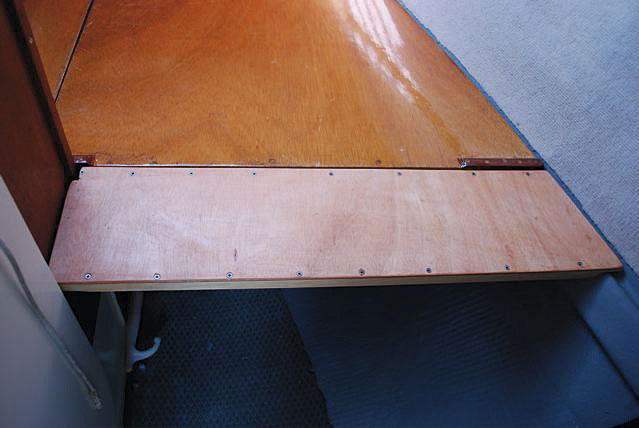
The finished boat berth configured as two singles. Credit: Richard Rogers
It seems to be strong enough; you cannot see the adjustment and I can live with it. But I know the error is there.
I also think my frame is a bit skinny. Time will tell if the structure is strong enough to resist the abuses of the crew.
The very rigid ply used for the bunk top, well secured to the frame with screws, will help.
In the end though, schoolboy geometry and woodworking skills were enough to get a satisfactory result, alongside learning how to make and use templates.
We just need to finish building Aurora, get her in the water, and see how much of an improvement on tradition those bunk(s) are for our life at sea.
Making the insert and frame: step by step

1. Make a rectangle with dimensions M x N from scrap ply.

2. Mark lines c-a and b-f, making sure g-a and b-h are exactly the same.

3. Then cut out shape c-a-b-f.

4. Use that as a template to accurately align the frame around the insert.
Making and using a template for a boat berth: step by step

1. First, cut a sheet of cardboard roughly to size – it must be slightly smaller all round than the anticipated final bunk top, maybe by as much as 20mm or 30mm. Place it in the boat, where the bunk top will be going. It can’t be allowed to move while completing the next step! Tack it down, tape it or clamp it securely.

2. Take a scrap of wood, about 50x70mm, with parallel sides. Set it on the cardboard – outside edge touching the cabin side. Mark on the cardboard the position of the other, parallel, inside edge of the piece of wood. Do this every few centimetres all the way around the edge of the cardboard.

3. Pay extra attention to any obstacles the bunk top needs to be cut round, such as ribs. Also pay attention to where the edge of the bunk top will rest on the frame. Remember that this edge needs to be exactly halfway across the width of the frame so both the bunk top and insert will have some frame to sit on.

4. Take the cardboard out of the boat and lay it on the sheet of ply from which you want to cut the bunk top. As before, take whatever steps are necessary to fix the cardboard to make sure it doesn’t move around on the ply while you complete the next step.

5. Go around the edge of the cardboard again. Place the piece of wood in each position you had it inside the boat by aligning it with each of the marks you made on the cardboard. For each placing, accurately mark on the ply the outside edge of the piece of wood.

6. Remove the cardboard and join up your marks on the ply. I’ve found it best to do this freehand for any edge that isn’t straight. If your boat is like mine, nothing is as straight as it looks. Trust your marks, even if the result looks surprisingly ragged and wandering. Cut out the bunk top with a jigsaw.

7. Decide how tight you want the bunk top. Too tight on the hull sides tends to jam when you fit it. A bunk top is going to be hidden under cushions so I cut mine about a centimetre inside the marks. But I cut it tight against the cabin bulkhead, to maximise support from batons there.
Enjoyed reading Boat berth: forepeak conversion? 
A subscription to Practical Boat Owner magazine costs around 40% less than the cover price.
Print and digital editions are available through Magazines Direct – where you can also find the latest deals.
PBO is packed with information to help you get the most from boat ownership – whether sail or power.
-
-
-
- Take your DIY skills to the next level with trusted advice on boat maintenance and repairs
- Impartial in-depth gear reviews
- Practical cruising tips for making the most of your time afloat
-
-