
If your DIY ambitions outstrip the capability of your workshop tools, perhaps it's time to think about expanding. Tony Davies shows how to get a professional finish using woodworking machinery that doesn’t cost a fortune

Woodworking tools for boat owners part 2
Tony Davies shows how to fit and finish a piece of cockpit coaming trim using woodworking machinery that doesn’t cost a fortune
For most people who run a boat on a budget, portable power tools are essential items of kit. But if you are competent already and want to expand your wood-working range, then perhaps it’s time to contemplate some fixed power tools.
All of the kit mentioned in this article is either available second-hand or brand new at reasonable prices. And the extension to your DIY capabilities might just surprise you!
In the first half of this article I demonstrated how to create a pair of matching sapele planks from a much larger slab of material, then join them together to make a wider plank using biscuit joints.
In this part we fit and finish the cockpit coaming using a few variations on the same tools as last month – table saw, router, belt sander – plus we introduce the band saw, circular saw and pillar drill.
On the final few pages, I show you how to cut plugs for hiding screw holes and how to make ring pulls for locker doors.
How to cut to length with a chop saw
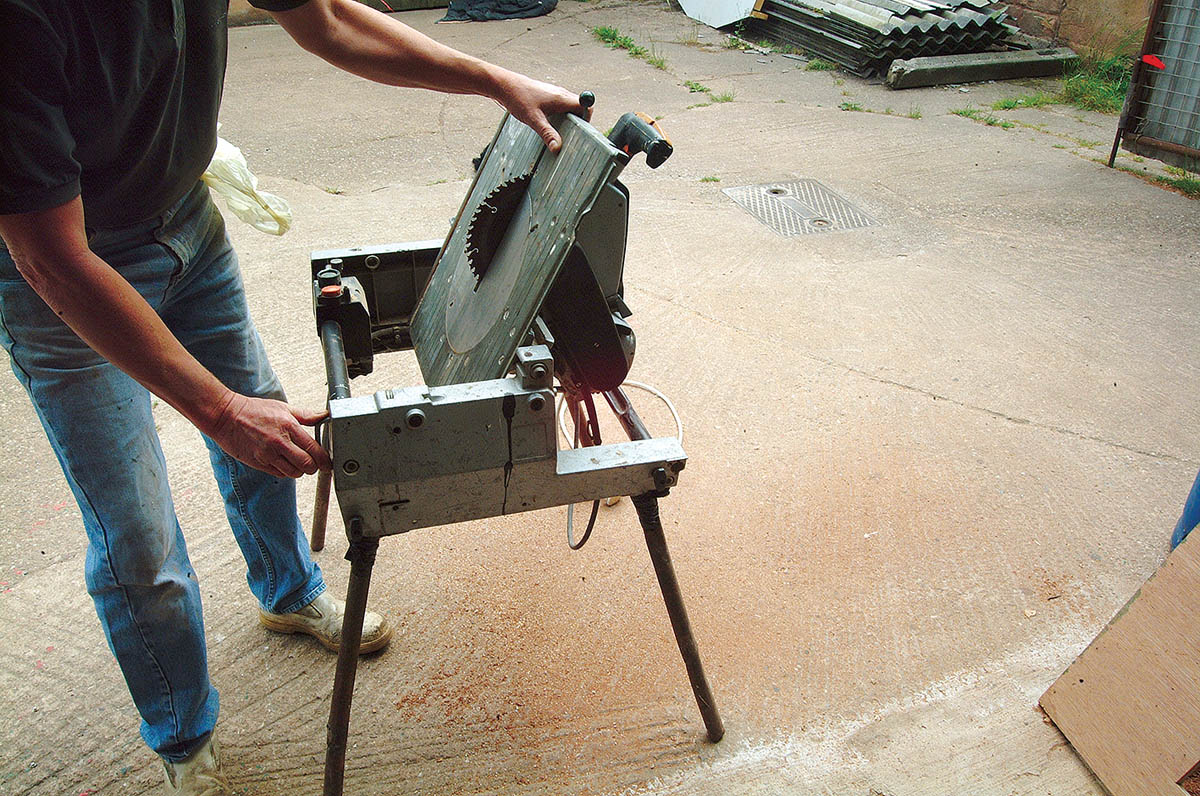
1. Our table saw (we’ve had this one for years, but I’ve seen them for as little as £50 at car boot sales and on ebay) converts to a chop saw by flipping the table.
2. Set up the roller supports (£13 each) and, having accurately measured the length of the coaming trim, cut it with the chop saw.
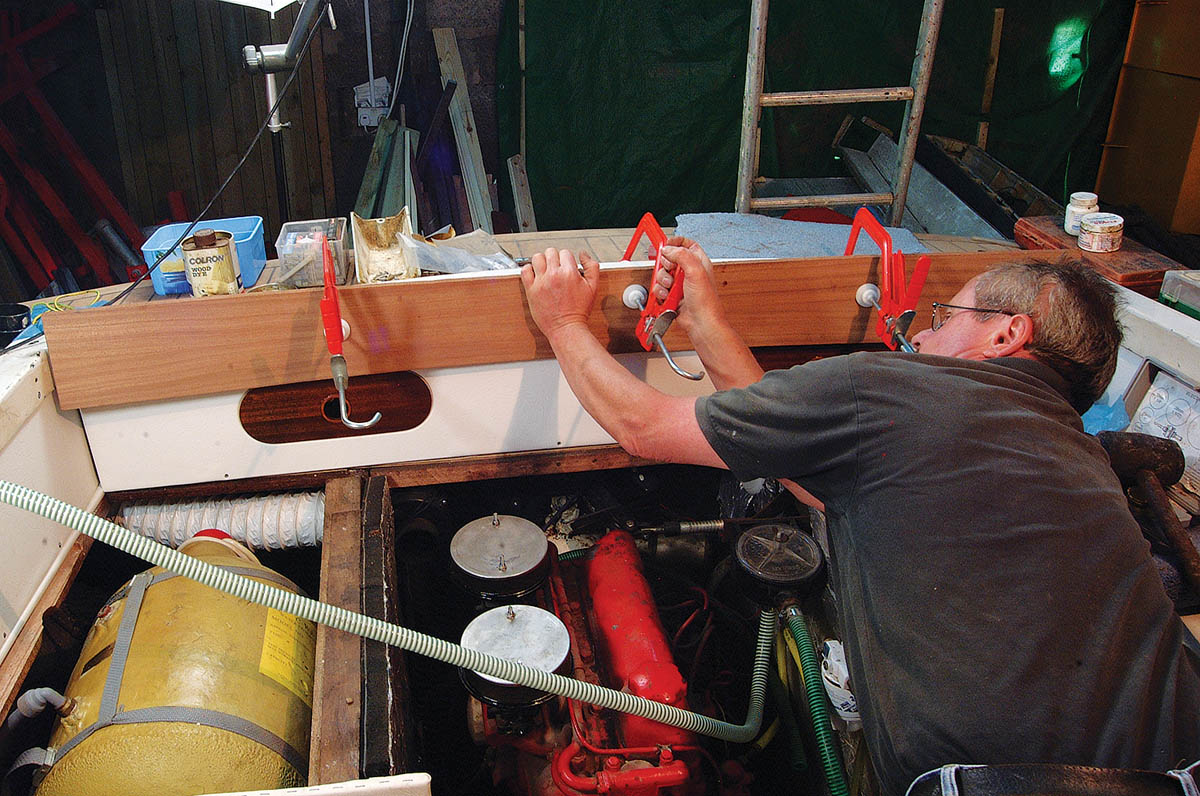
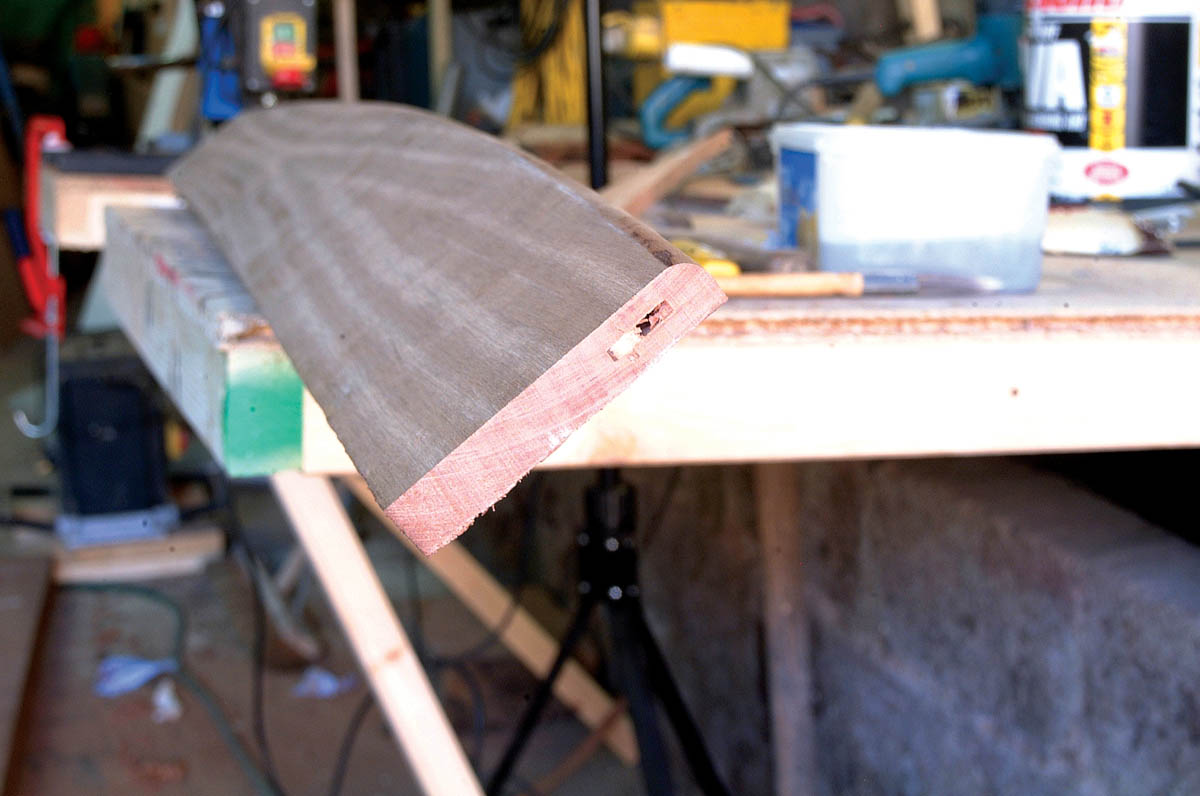
3. The trim is clamped to the coaming ready for marking out the shape of the top edge that’ll need to be cut.
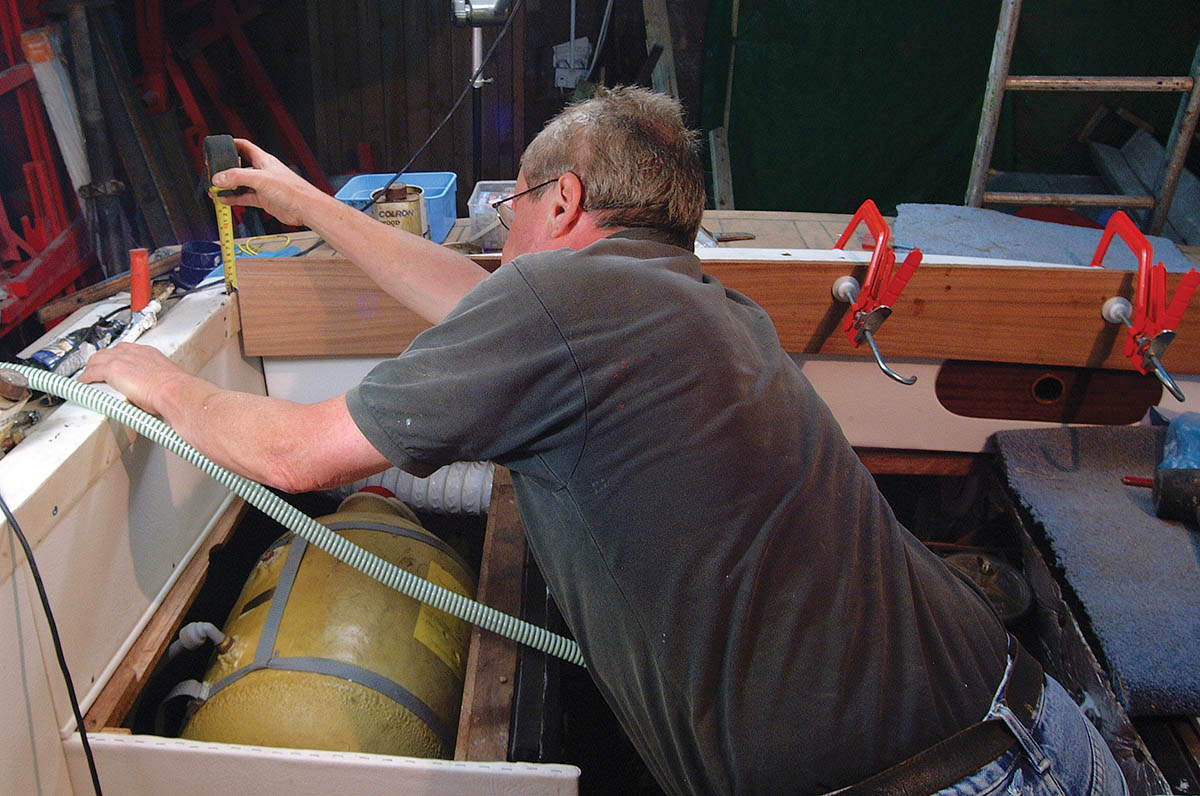
4. Check the height of the plank above the coaming on both sides to ensure the work-piece is square.
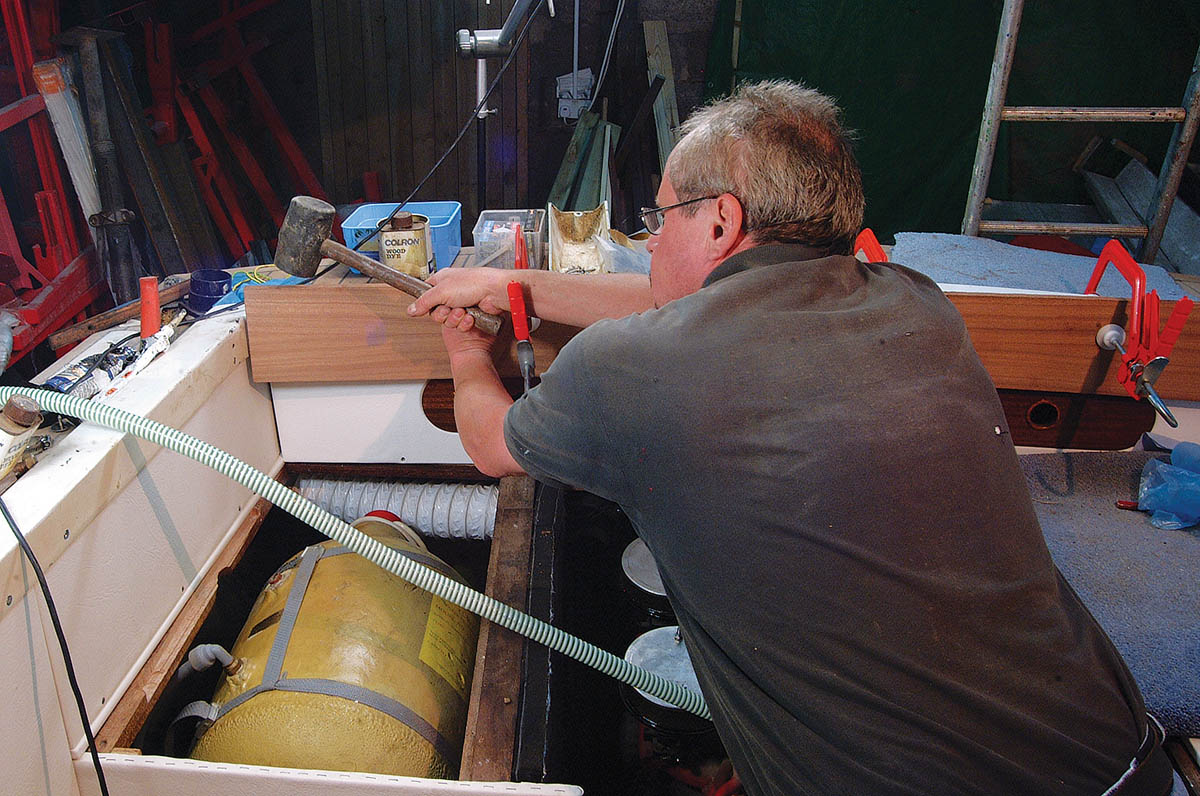
5. Fine adjustments are made in the time honoured fashion!
6. Once the trim is correctly aligned the shape of coaming is simply drawn along the back of timber.
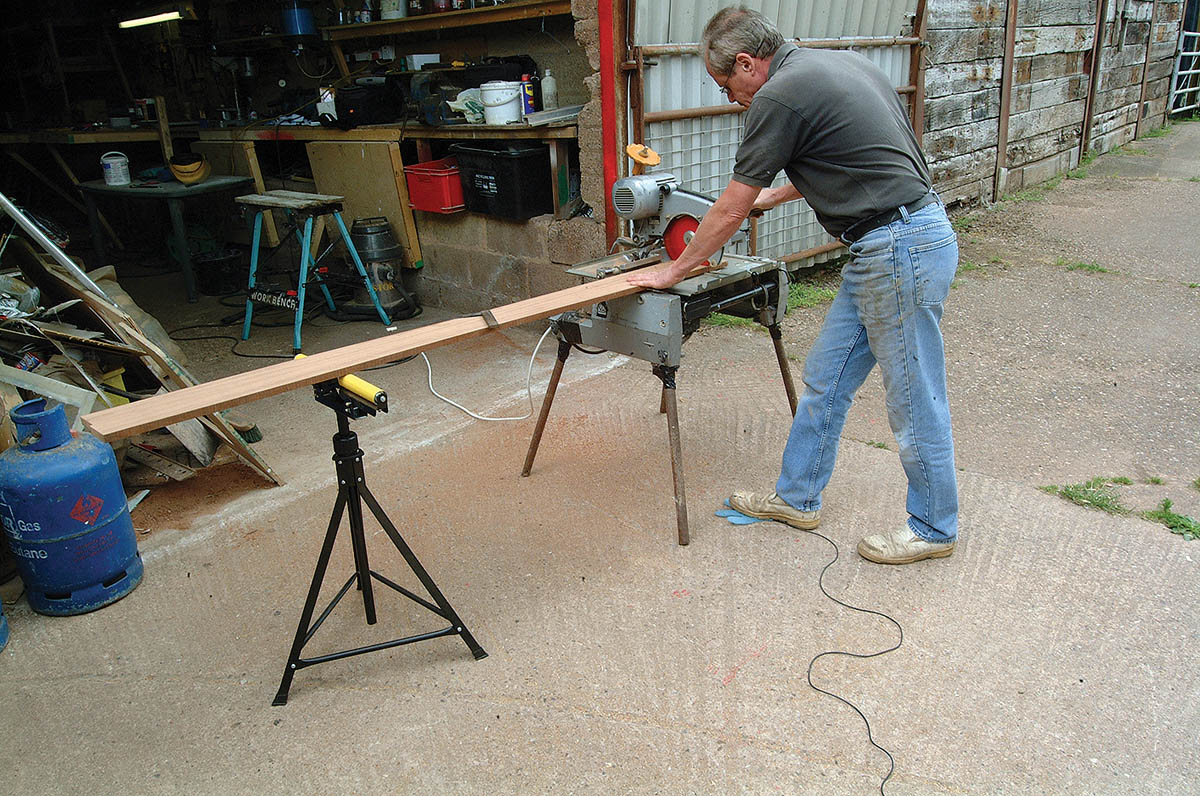
How to cut a straight edge with a circular saw
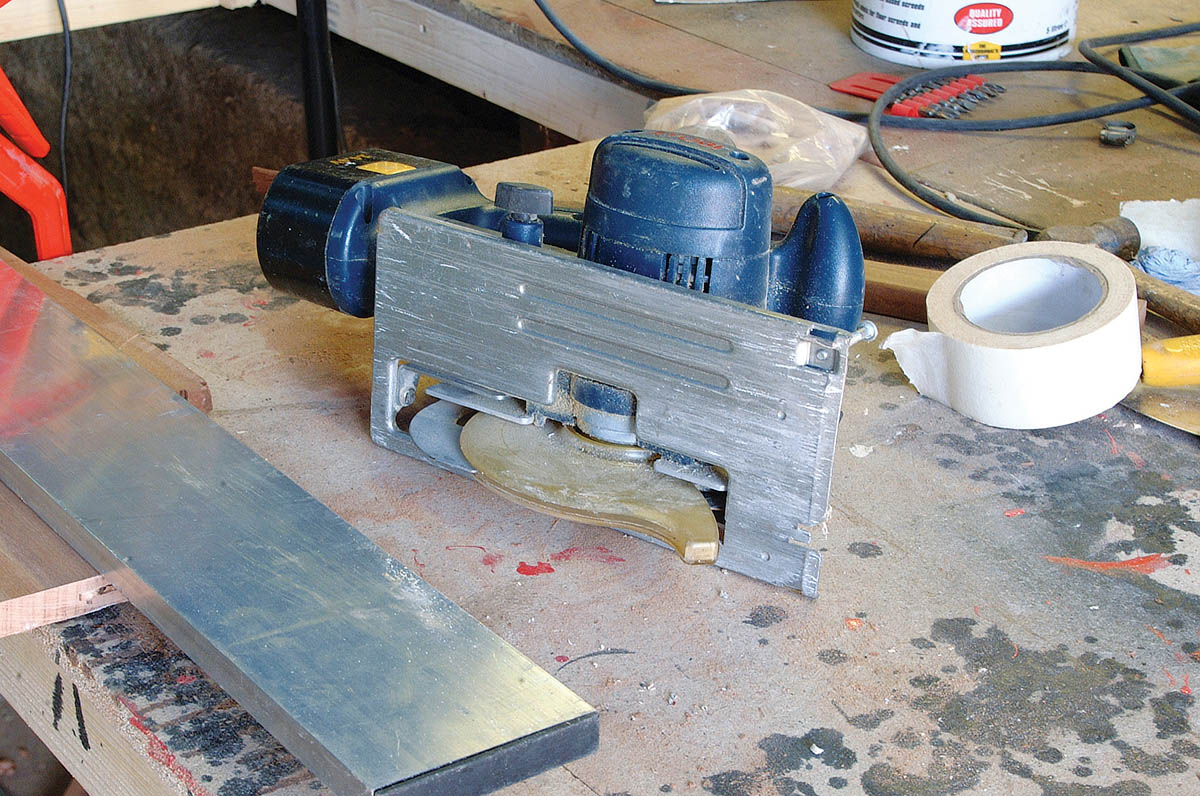
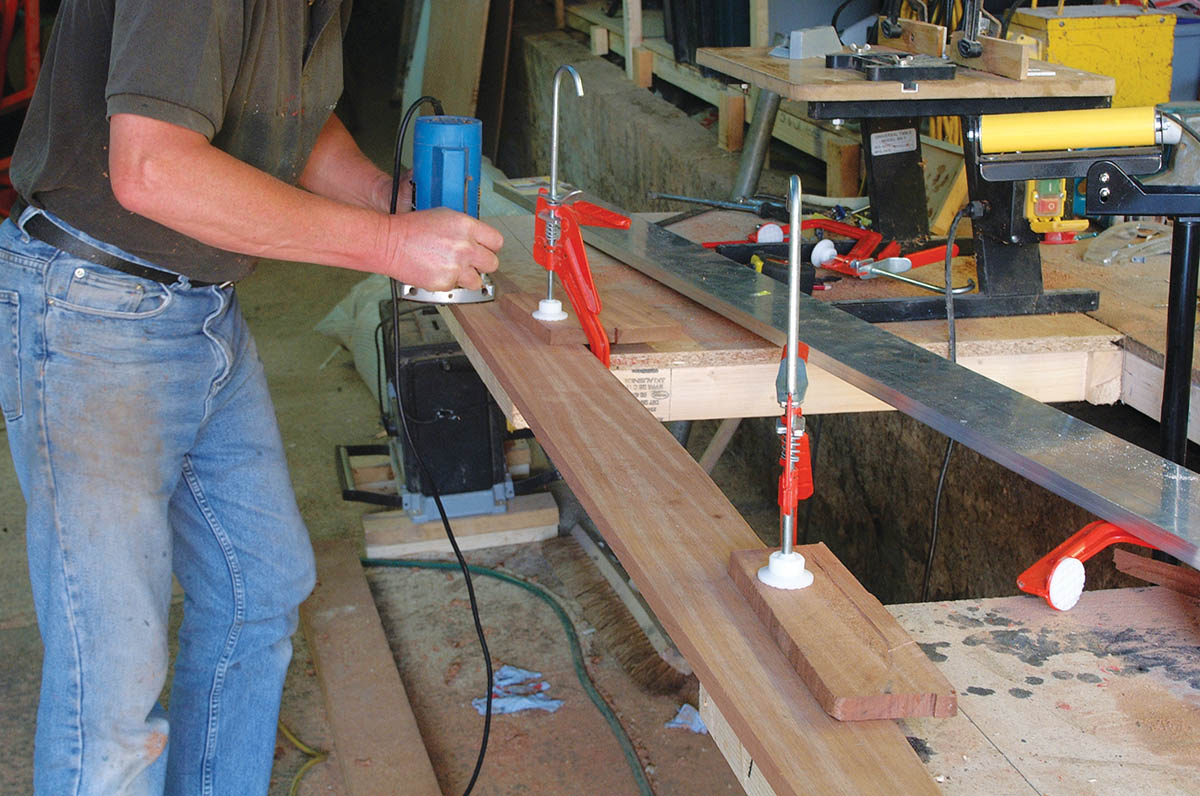
1. After measuring the width of the cockpit coaming the next job is to cut the work-piece to the required size. As the rough edge is not straight it can’t easily be straightened using the table saw. The best machine here is the old faithful portable circular saw.
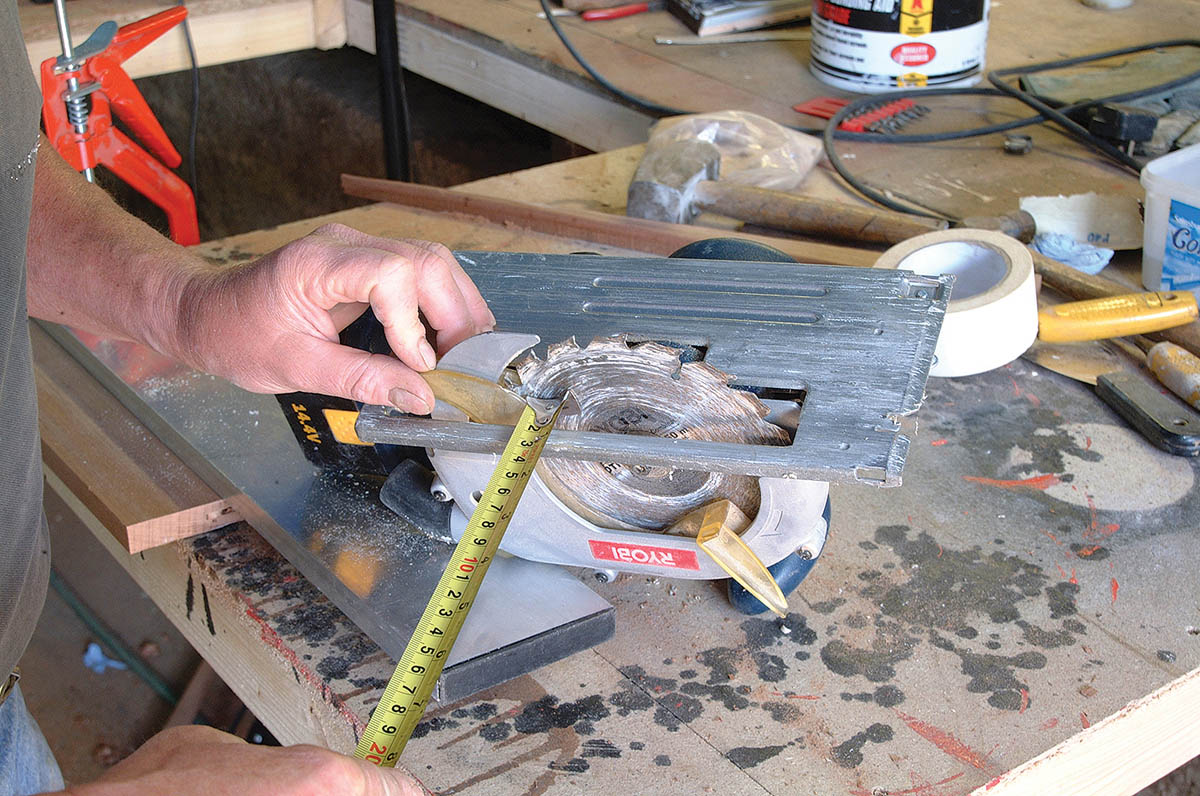
2. First check the distance from the edge of the saw base to the blade – in this case exactly one inch.
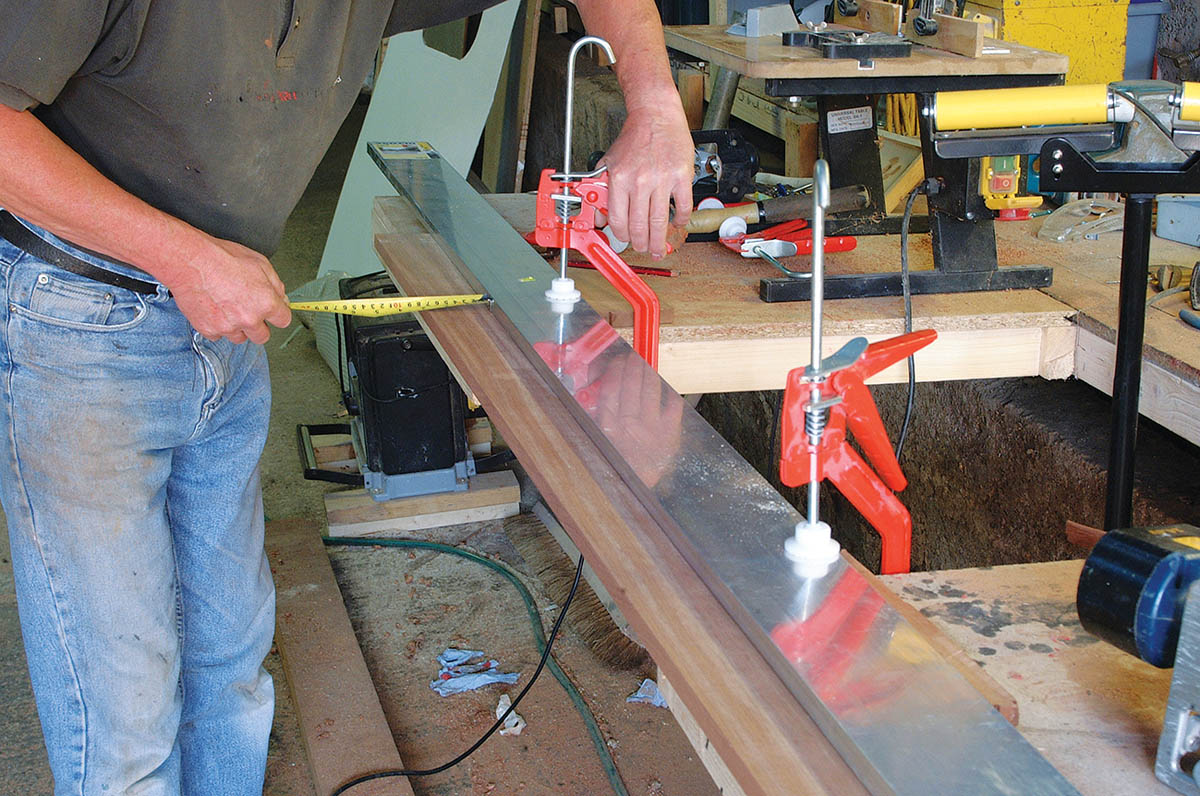
3. An aluminium straight edge (worth investing in – ours cost £39 new) can now be set up on the work-piece exactly one inch (or whatever the dimension on your own saw is) from the line marking the cut-off point.
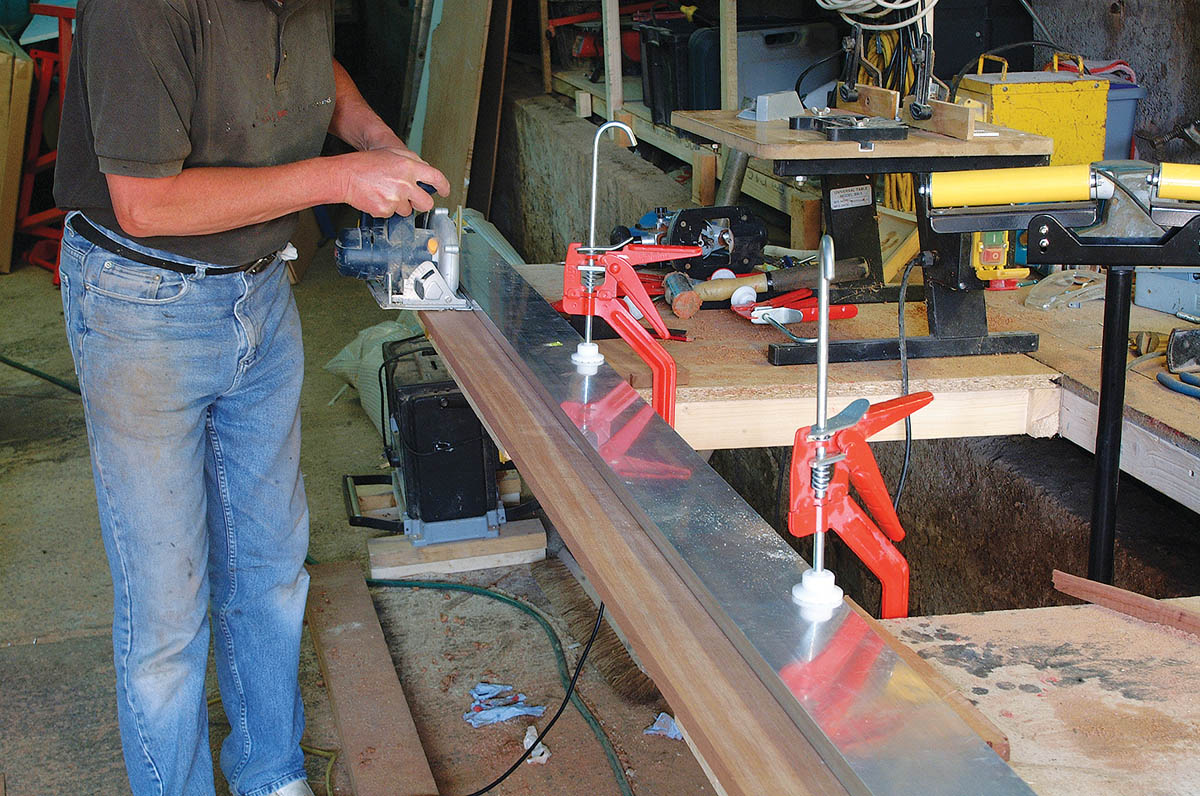
4. The piece can now be cut with the saw following the straight edge to give a perfect straight edge.
Cut a curve with a bandsaw
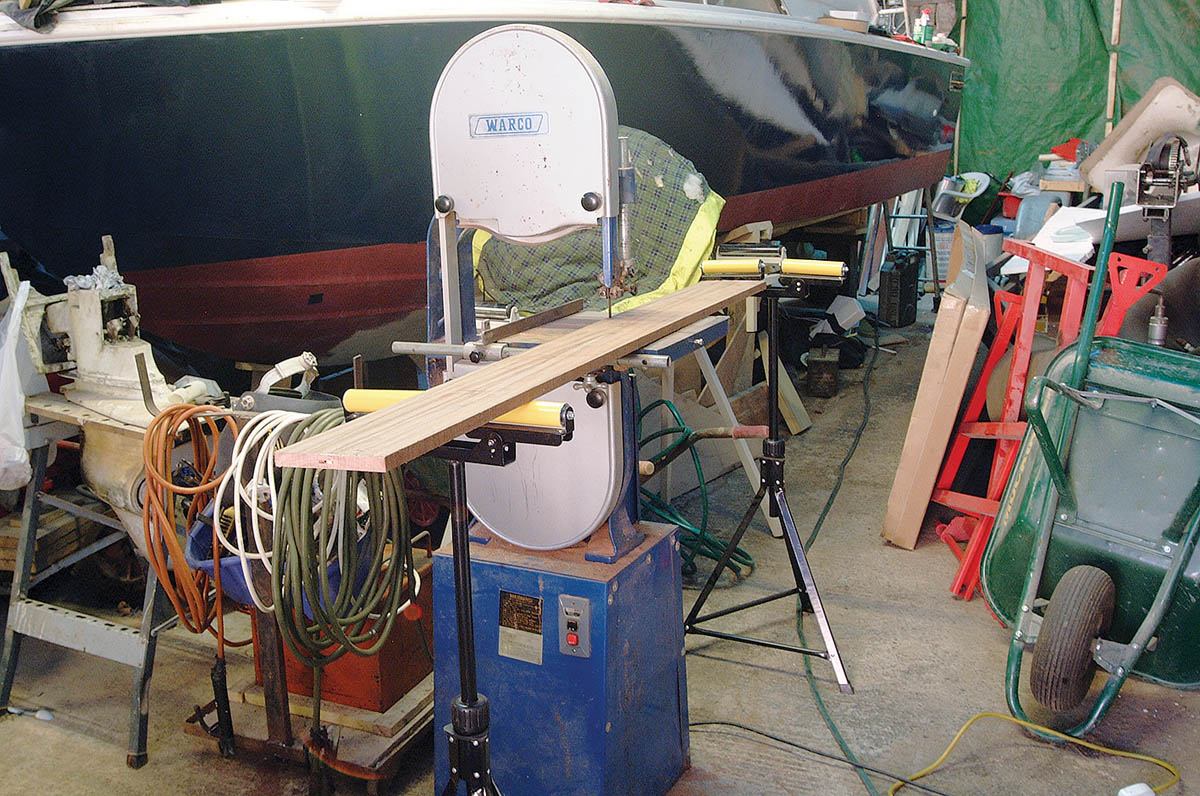
With the piece marked it can be cut to the required shape. A jigsaw will do the job OK but a bandsaw will provide a more accurate cut. This was one of our best buys to date and cost £43 on ebay. It needed new blades but these are fairly cheap consumables and cost £12-£15 depending on quality.
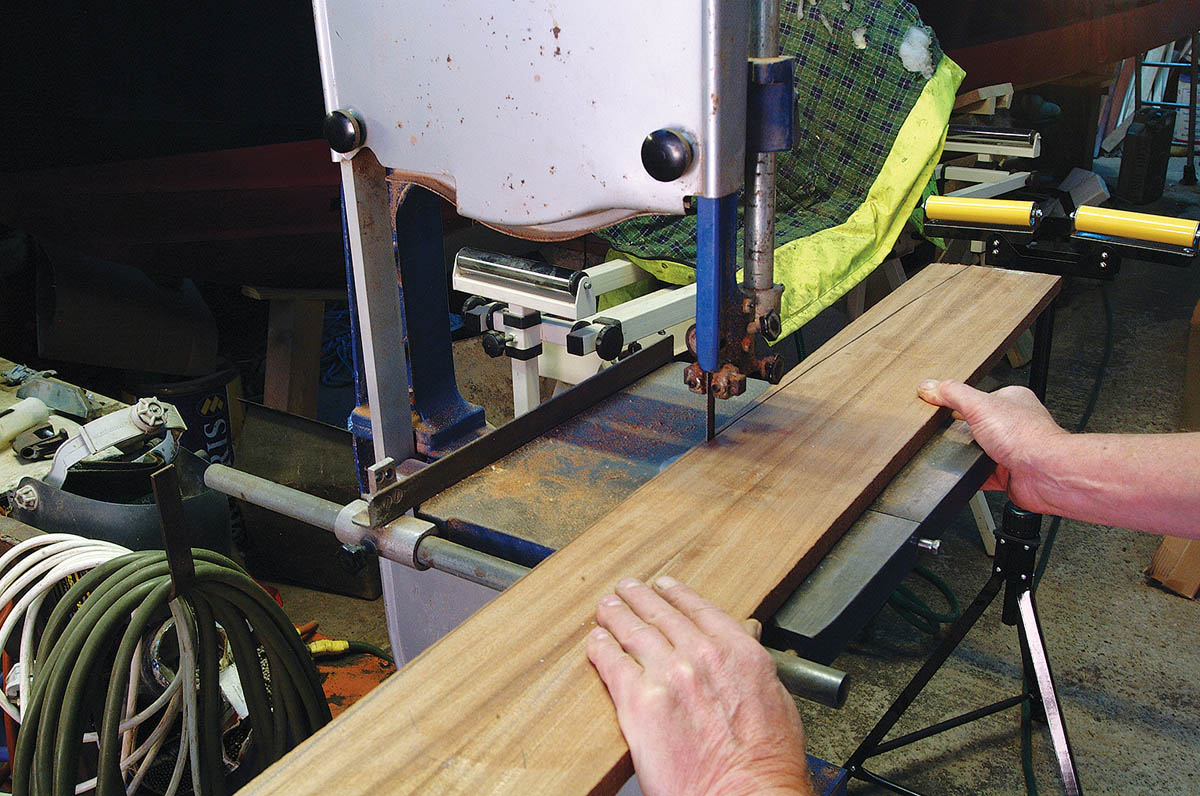
With the length properly supported using the roller supports it is only necessary to guide the plank carefully through the blade to give a very accurate freehand cut.
Using a belt sander upside-down
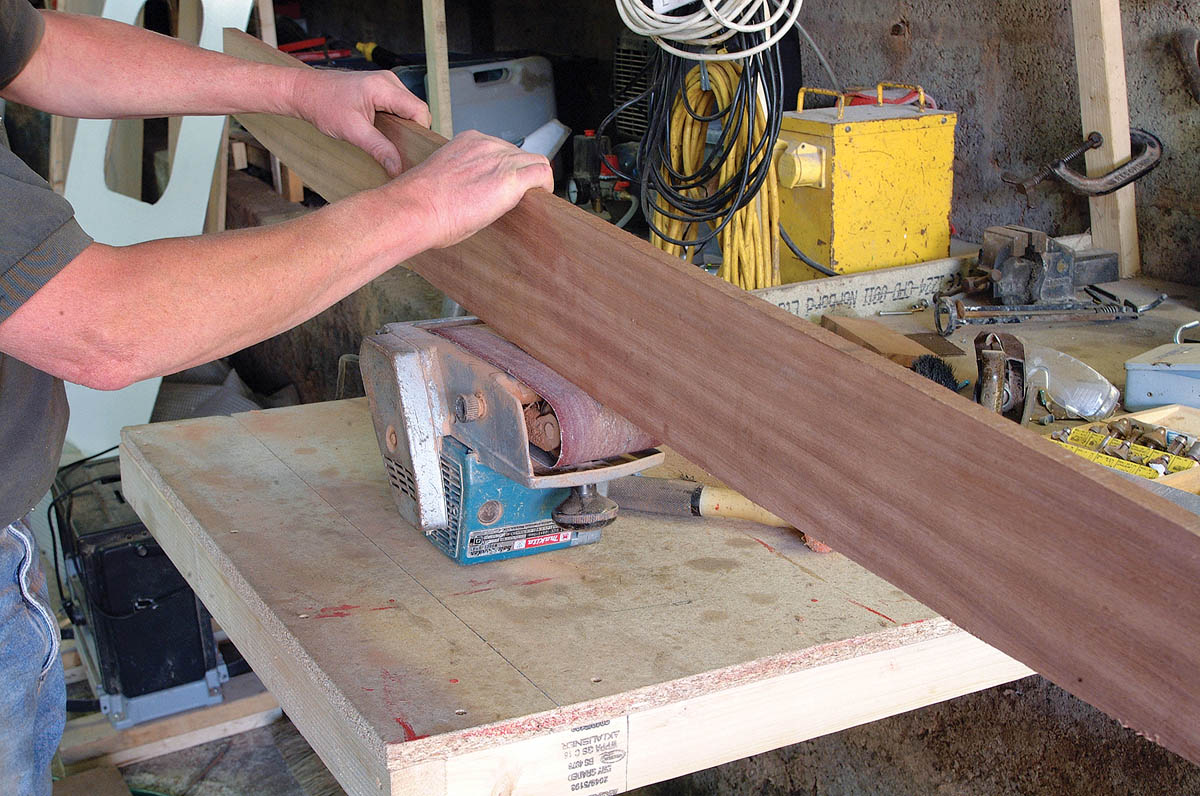
With the belt sander sitting upside down it can be used as a table sander to lightly smooth the cut edge. You may need to secure the sander to the bench.

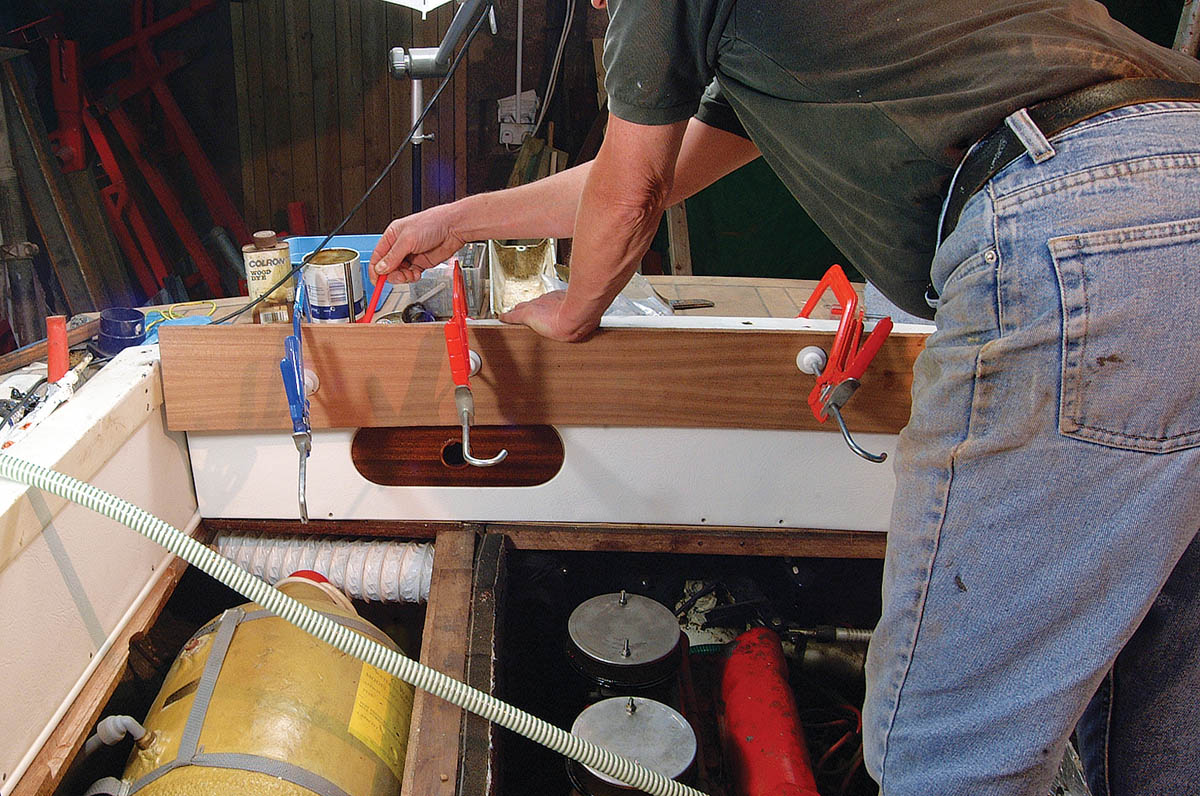
The piece can then be quickly offered up onto the coaming to check that the curve is correct.
How to profile wood with a portable table router
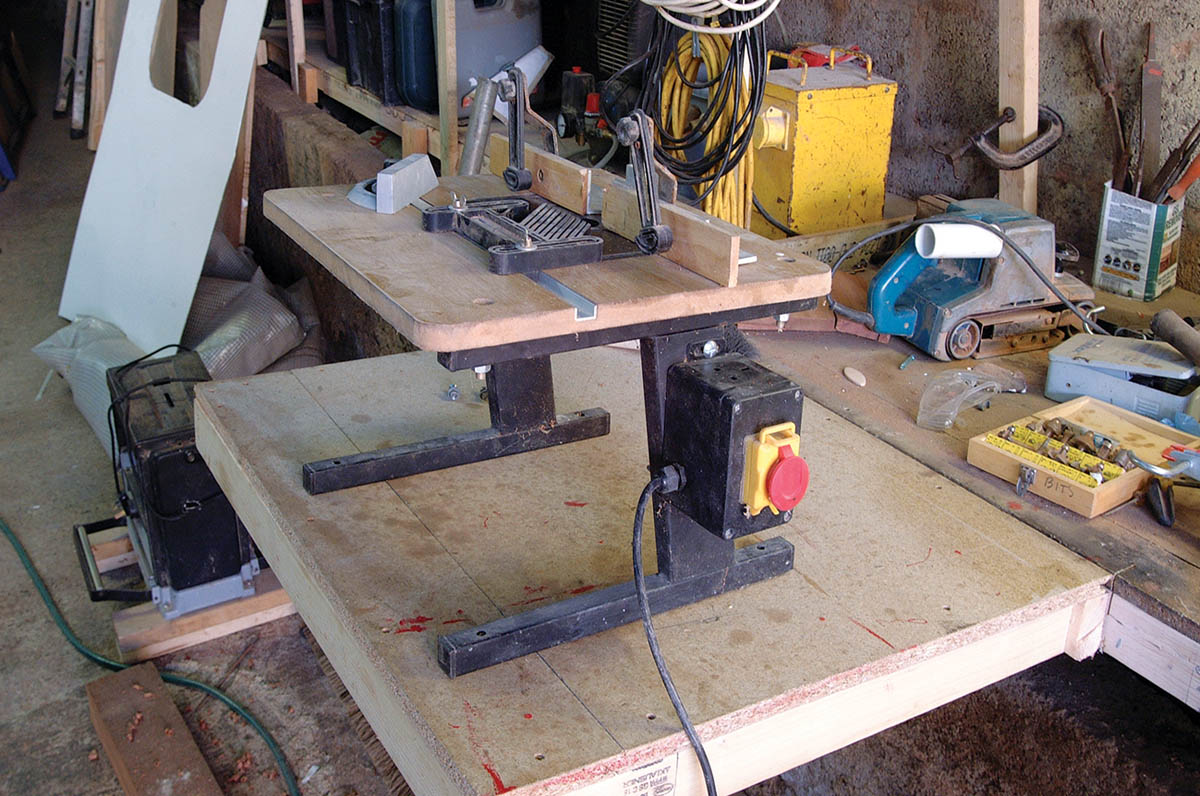
1. To put a profiled shape onto the coaming edge we need a portable router table. You guessed it, ebay £35!

2. Our router is secured under the table with two nuts and bolts.
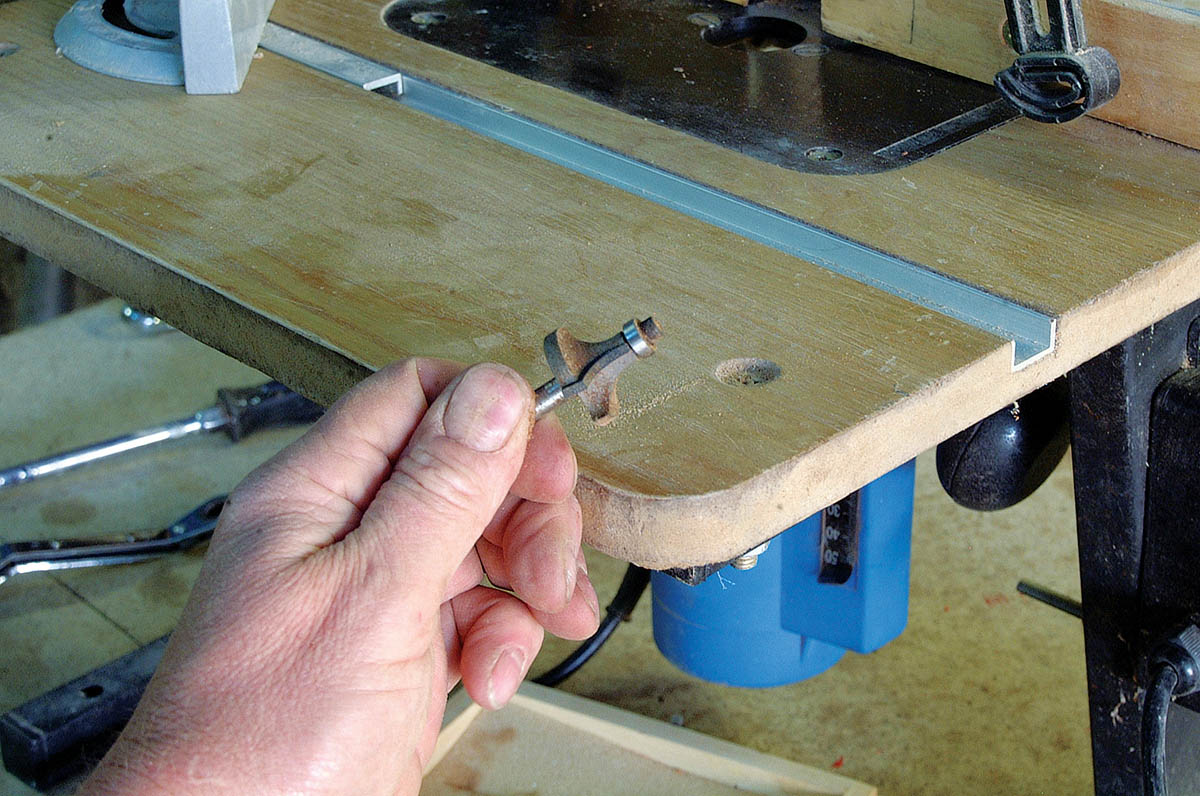
3. A suitable bit for the required shape is chosen: this one gives a Roman ogee profile at full depth cut…
4. … but by setting the router bit to a lower height we can achieve the simple rounded shape we want for our coaming.

5. First run an offcut through to ensure the bit is at the required depth.

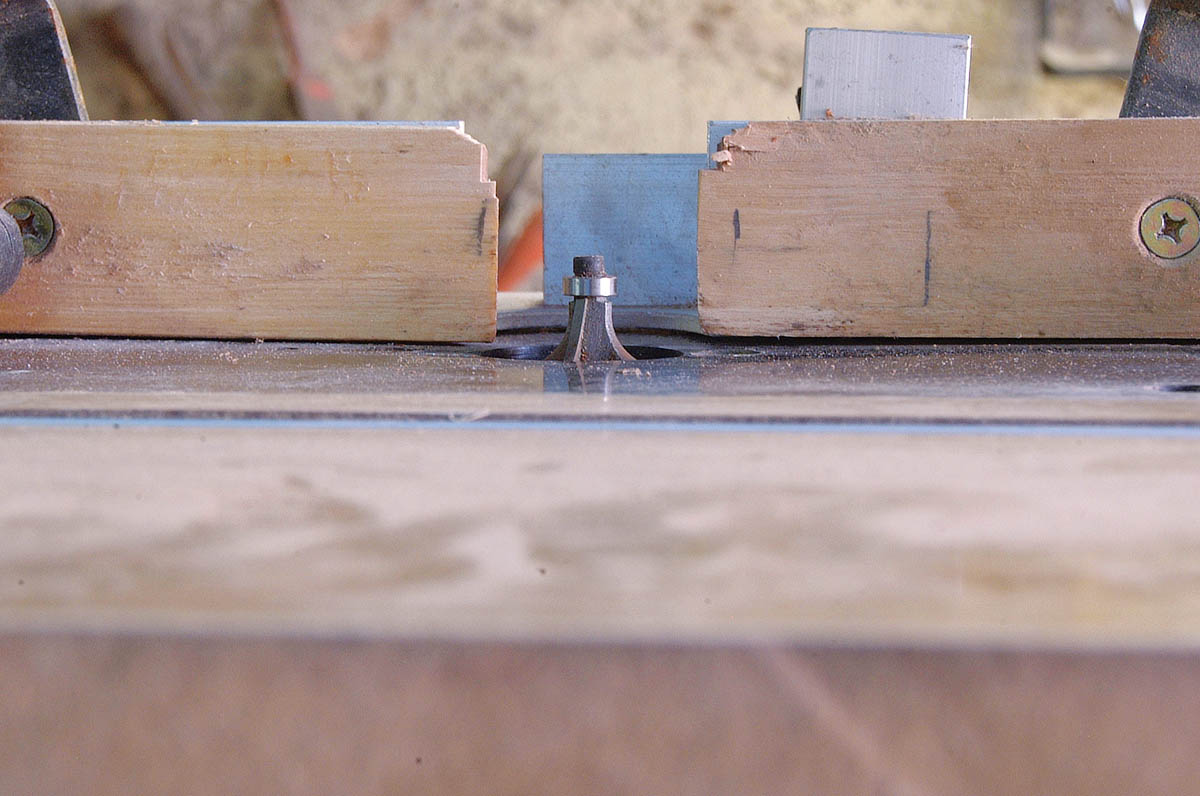
6. Once the setting is satisfactory the work-piece can be run through.
7. The finished simple curved profile is good but looks a bit plain. Maybe it should be a little more fancy!
How to machine wood freehand with a router
1. The final flourish is to route the edge to the desired shape. Although using the same bit it was easier this time to use the router freehand and let the guide bearing on the bit decide the width of the cut.
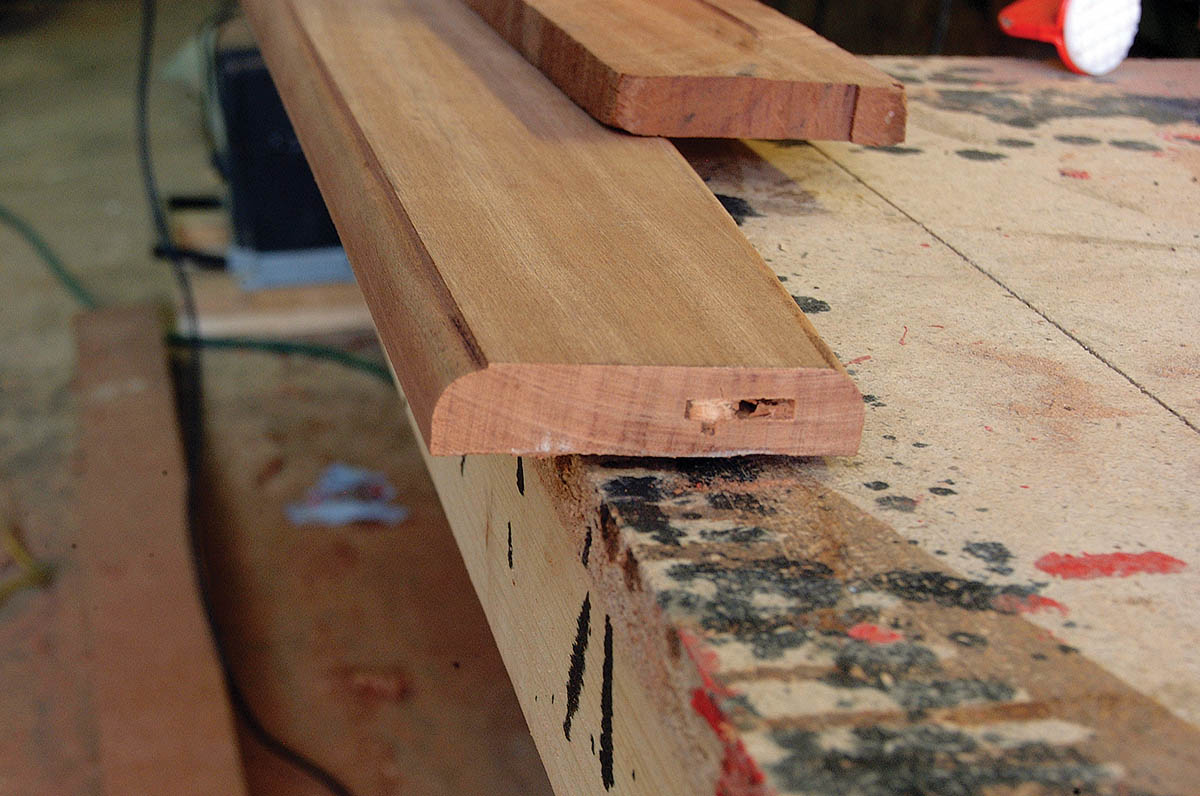
2. I plunged the router deeper to give the full ogee effect which I preferred to the previous simple half round cut. Both profiles can be seen. Note the scrap timber used as a pad between the clamp and work-piece.

3. That’s because even plastic faced clamps can mark the timber once it has been sanded.

4. Here’s the finished profile. Note that the first machined edge has now been revisited and machined to match the second edge.
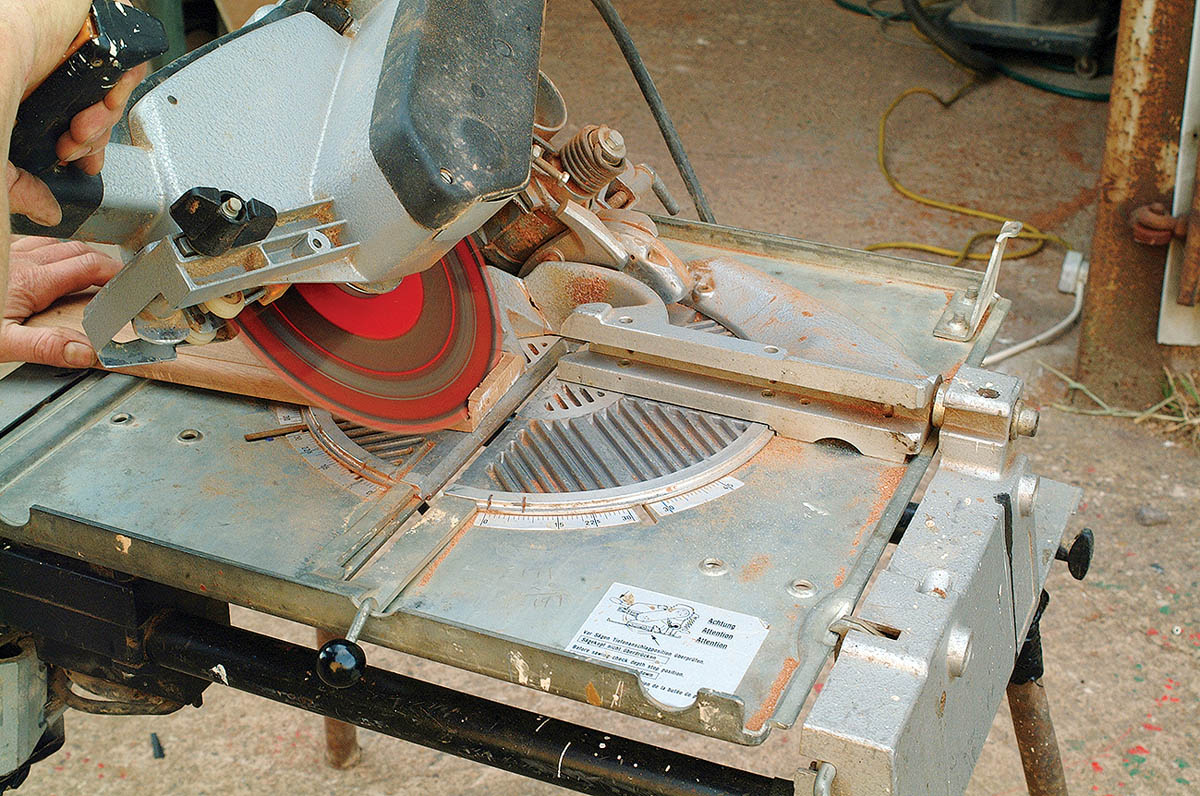
5. The final job was to cut a 45° chamfer on each end of the piece to butt against the coaming side trims when they are completed. The chop saw shows its versatility again with its ability to cut at any angle.
How to make plugs to cover fixing screws
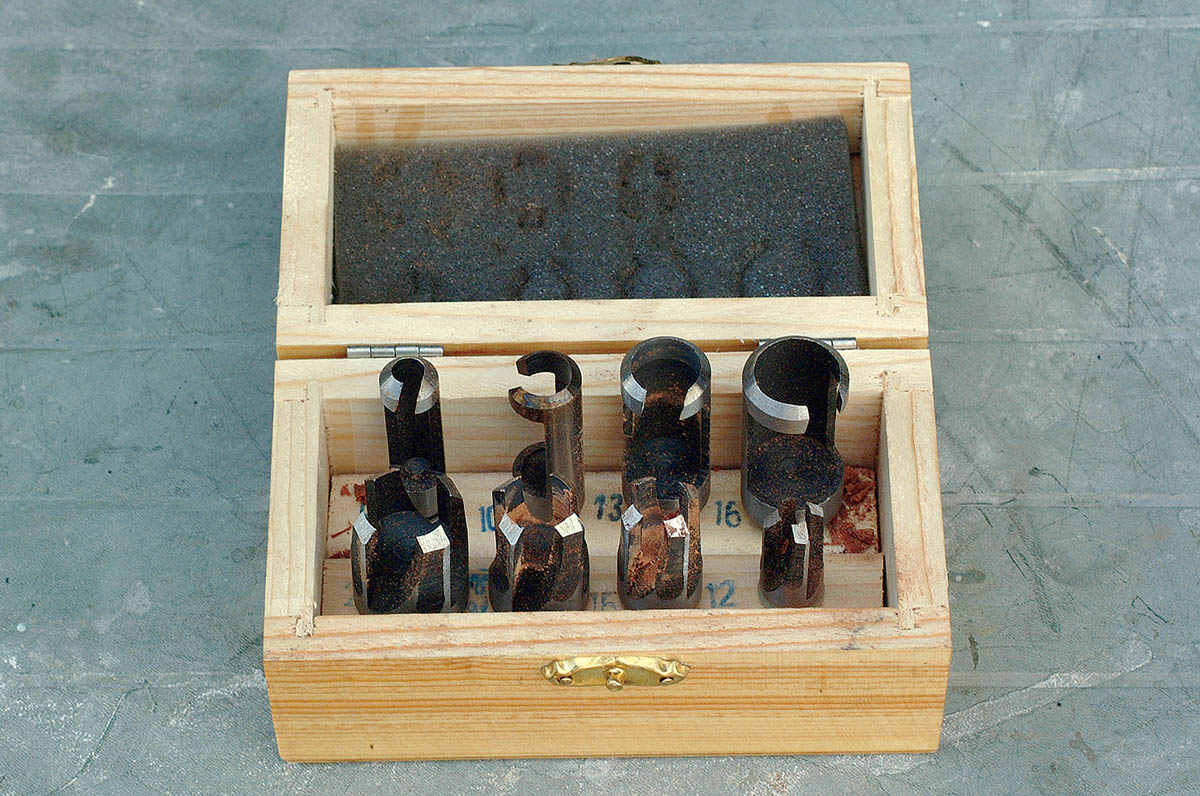
This set of eight different sized plug cutters cost £9 from the local tool supplies and consists of two different styles of cutter, although both types can be used in the same way.

For this job I selected a 13mm cutter to allow large-headed screws to be used for fixing the coaming trim.
Using a pillar drill
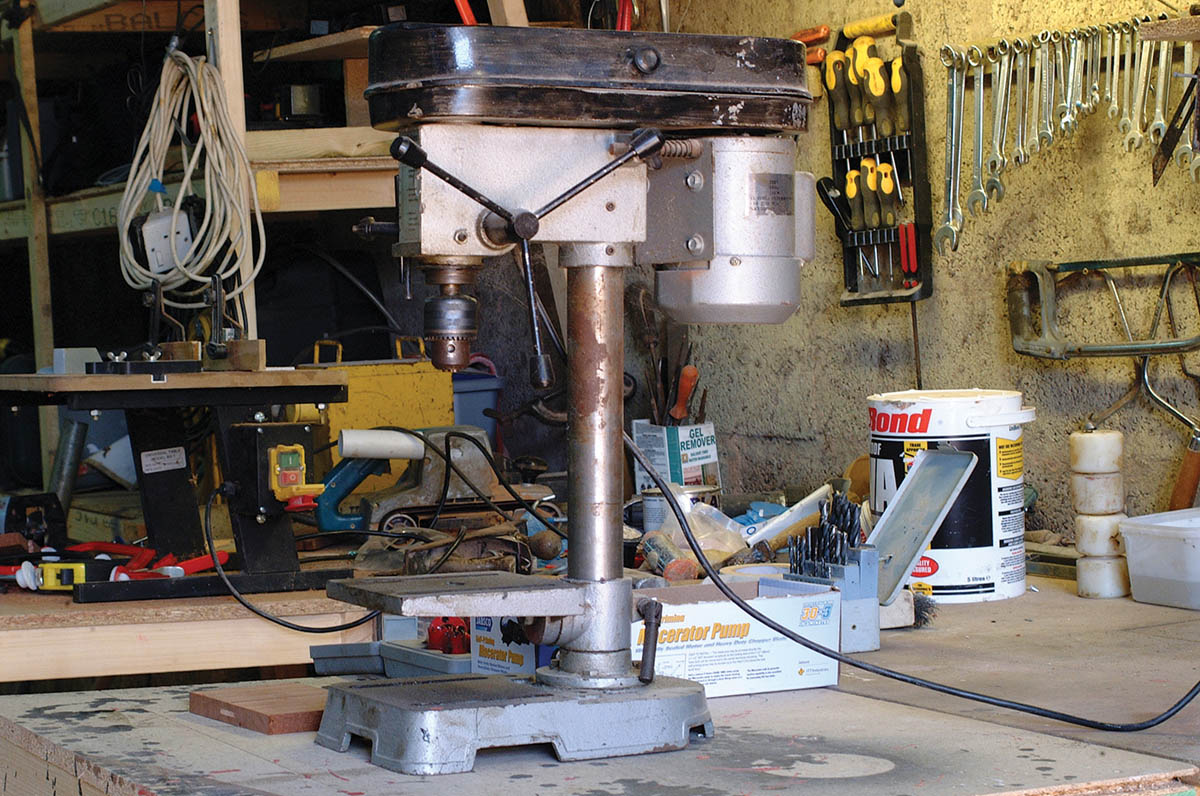
1. Plug cutters can be used successfully with a hand drill but it is so much easier with a drill stand or bench mounted pillar drill. Low powered units are available from about £60 new.

2. The cutter is inserted in the normal manner and the chuck tightened.
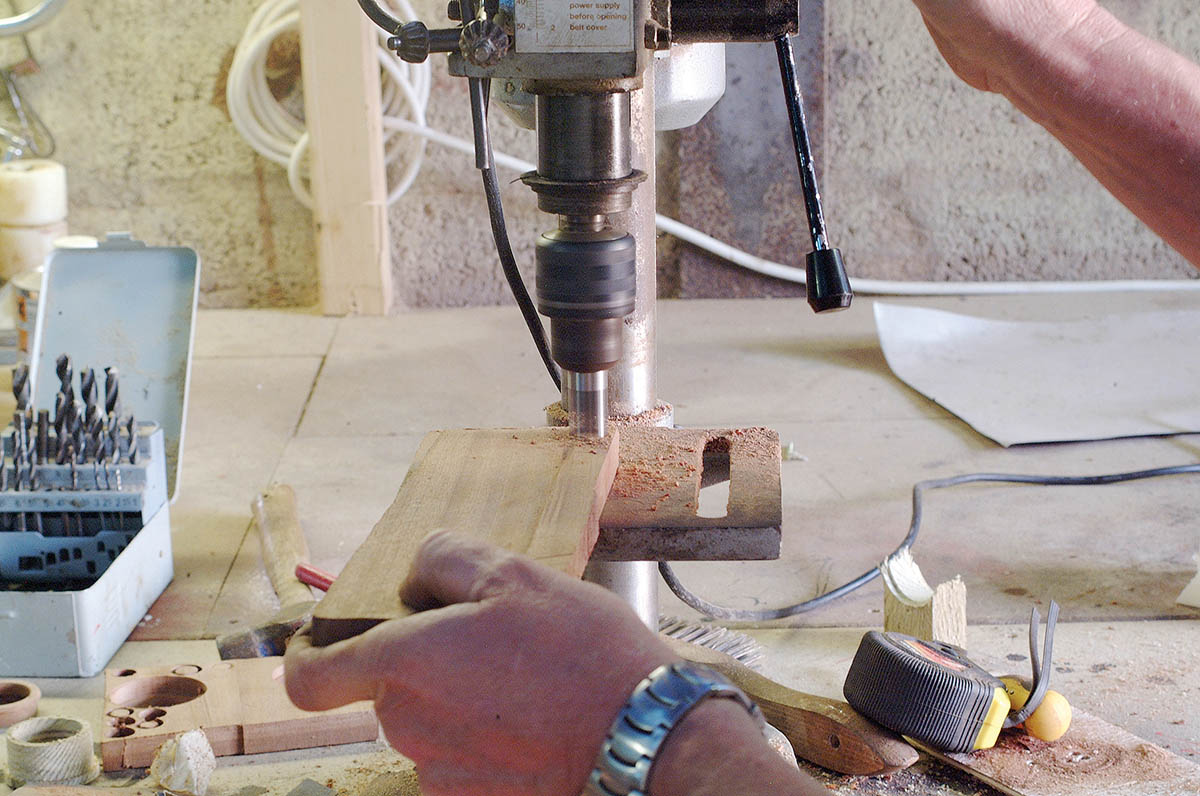
3. Using the cutter just like drill bit make as many plugs as you need. They can be cut right through (in which case have some sacrificial timber underneath) or just deep enough for your current needs. Cut some extras – invariably some will break.

4. To remove the cut plugs from the scrap board use a thin bladed screwdriver to break them out.
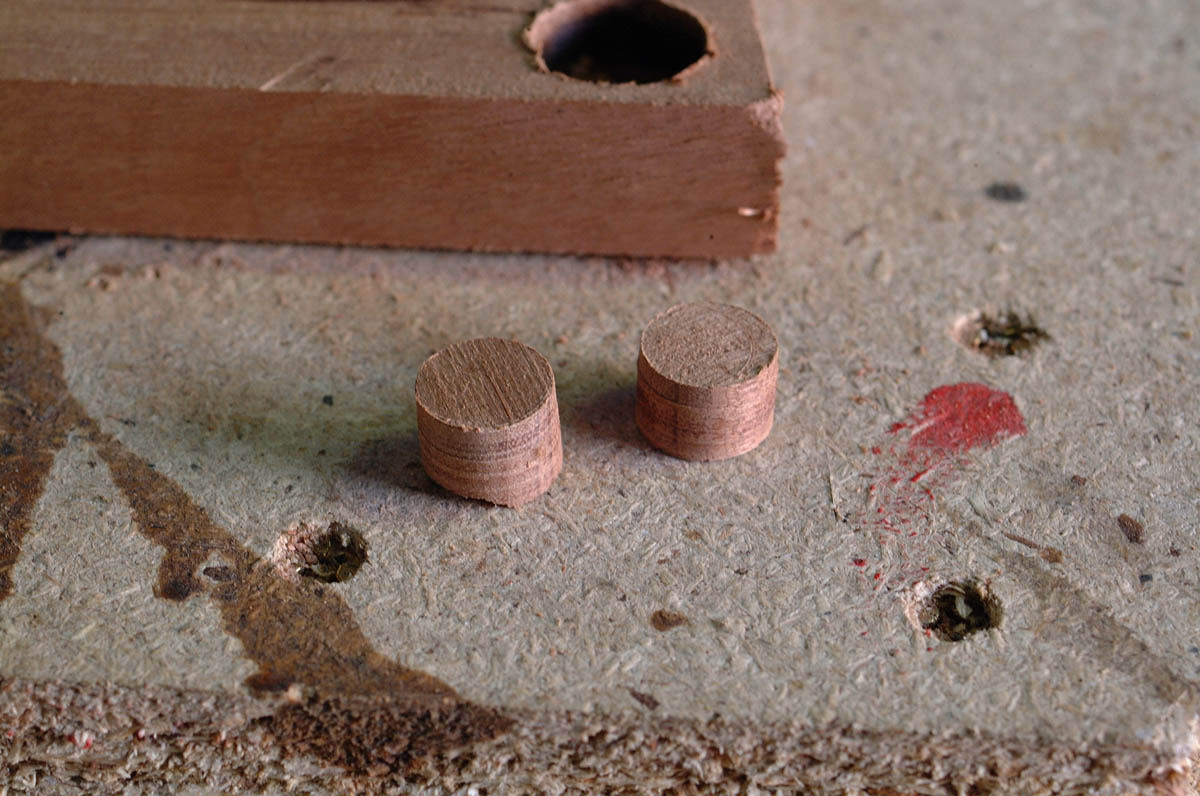
5. And this is what the plugs look like when released from the scrap.
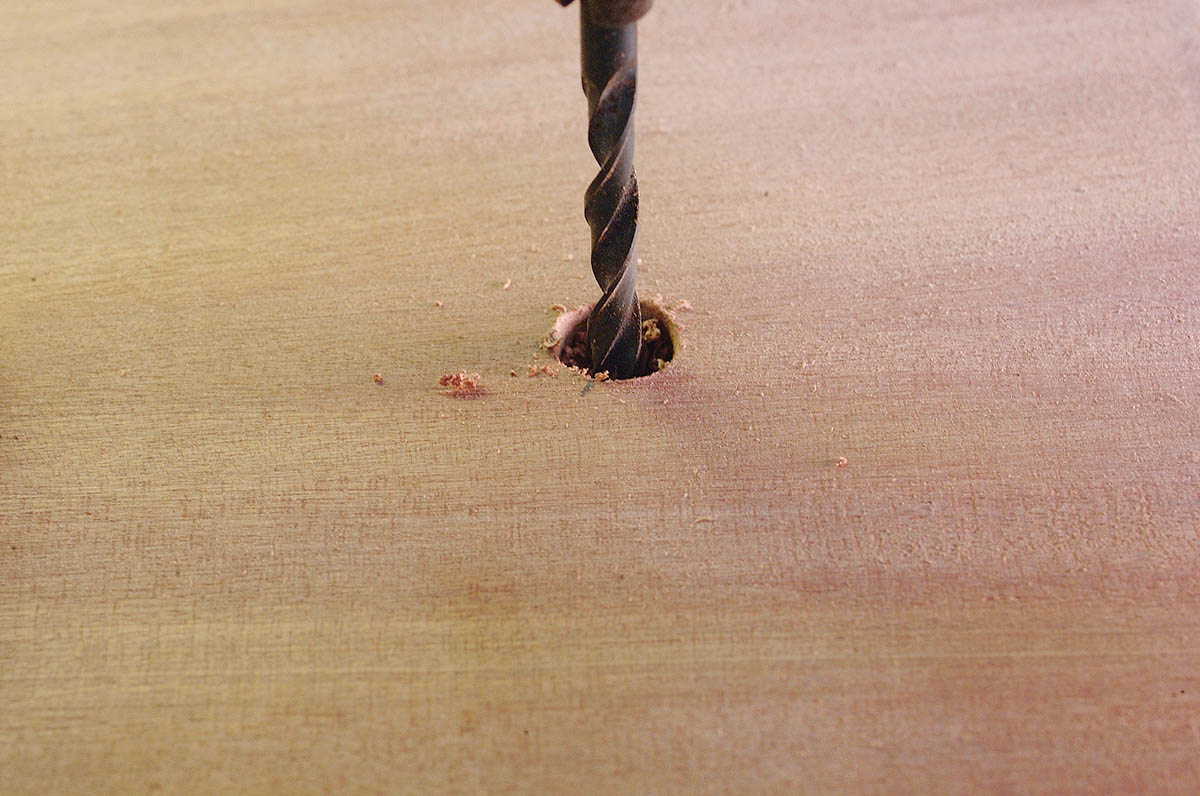
6. For the coaming trim we drilled the large 13mm countersunk hole first, followed by a smaller hole the size of the screw shank right through the board.

7. Fix the item into position using the appropriately sized screws.
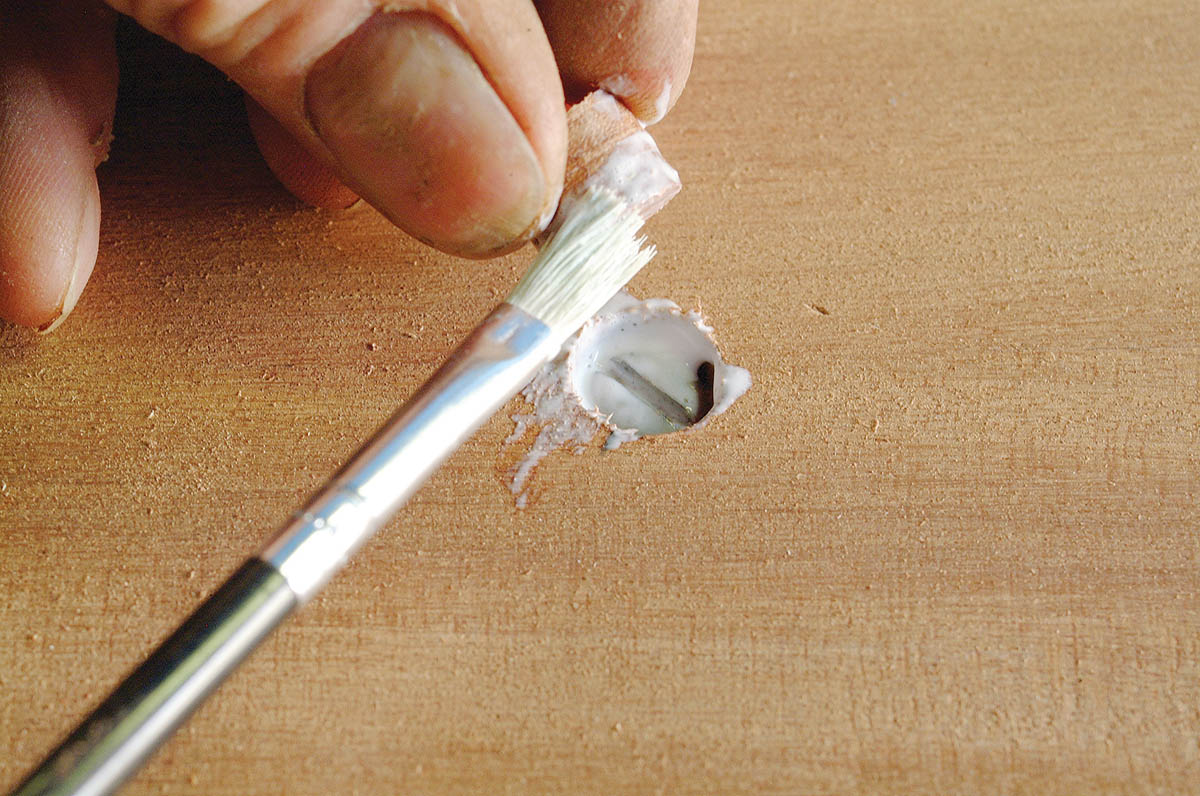
8. Apply adhesive to the hole, but not so much as to stop the plug seating properly due to hydraulic action. You can also apply a little around the plug itself to ensure proper coverage.
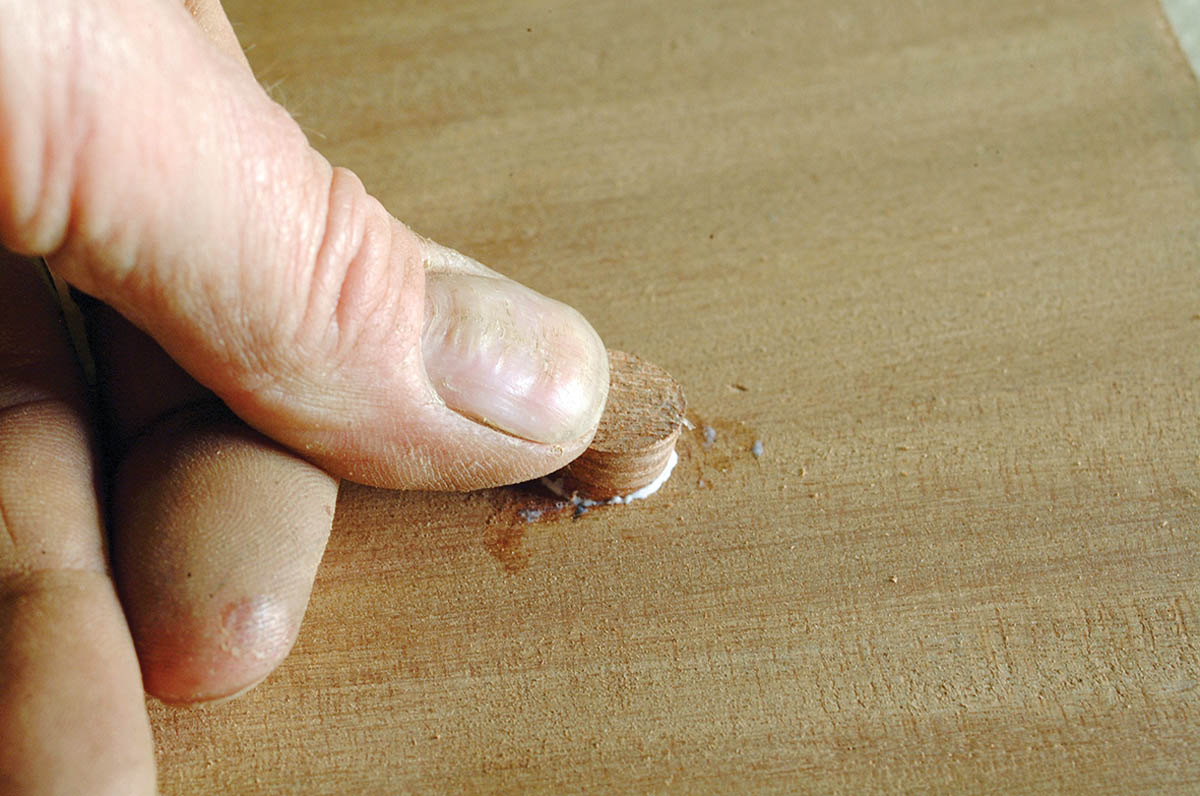
9. Align the grain of the plug with that of the work-piece and push it home. It’ll probably need a light hammering to ensure it is properly seated.
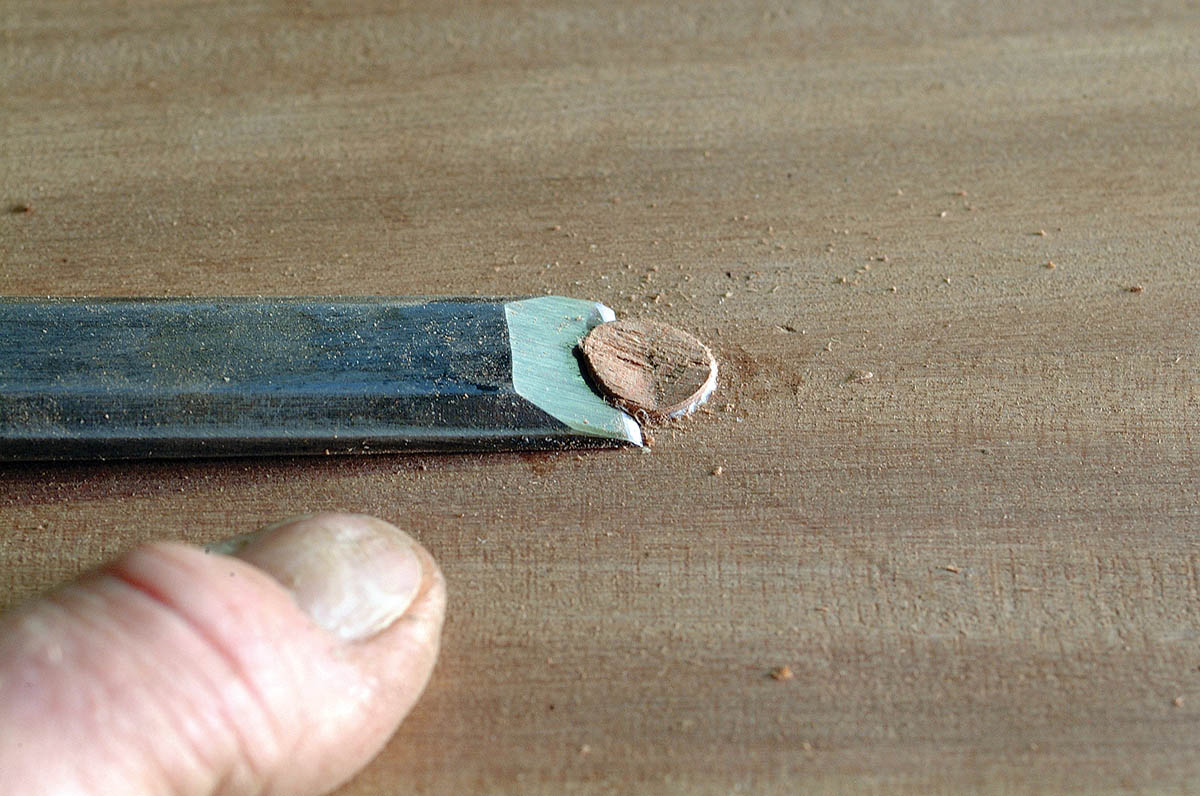
10. When the glue is dry use a sharp chisel to carefully trim the plug level with the worksurface. Cut away a little at time to prevent the plug breaking.

11. A light rub down by hand should finish it off perfectly flush…
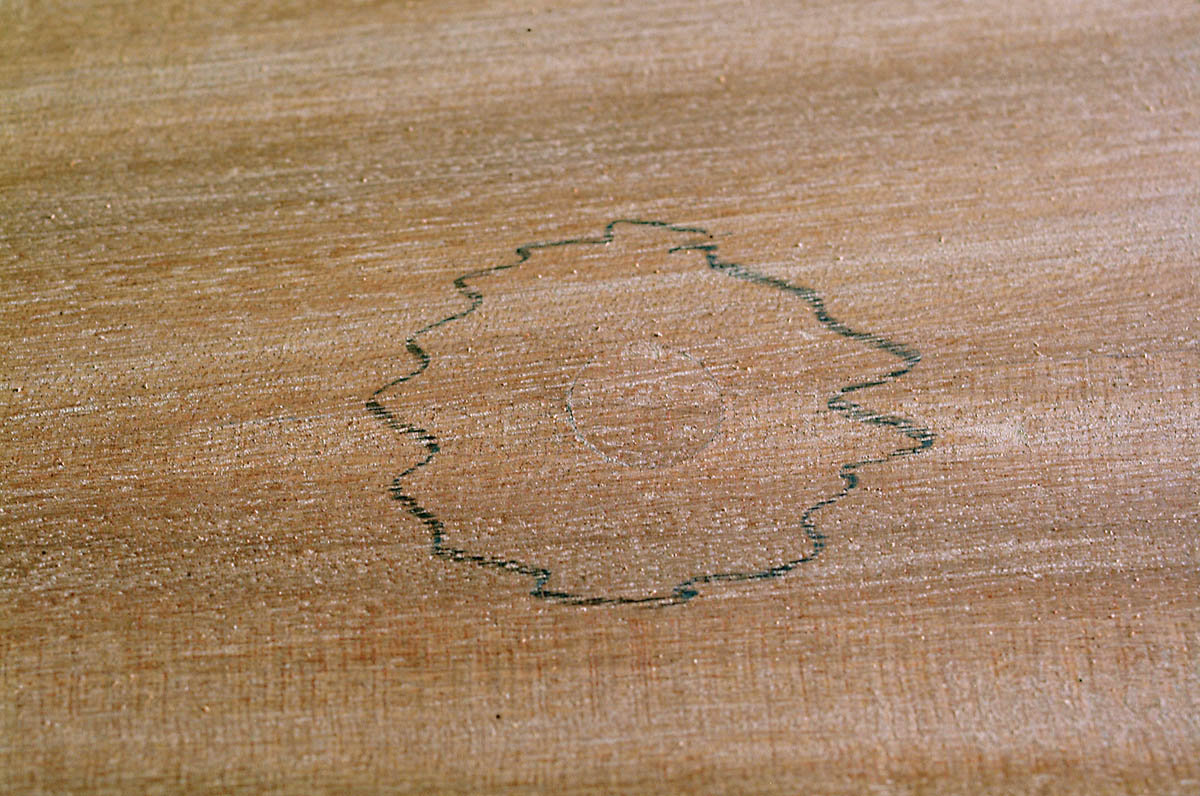
12. … and with a little bit of luck it’ll be almost invisible – unless some idiot has scribbled round it with a pencil!
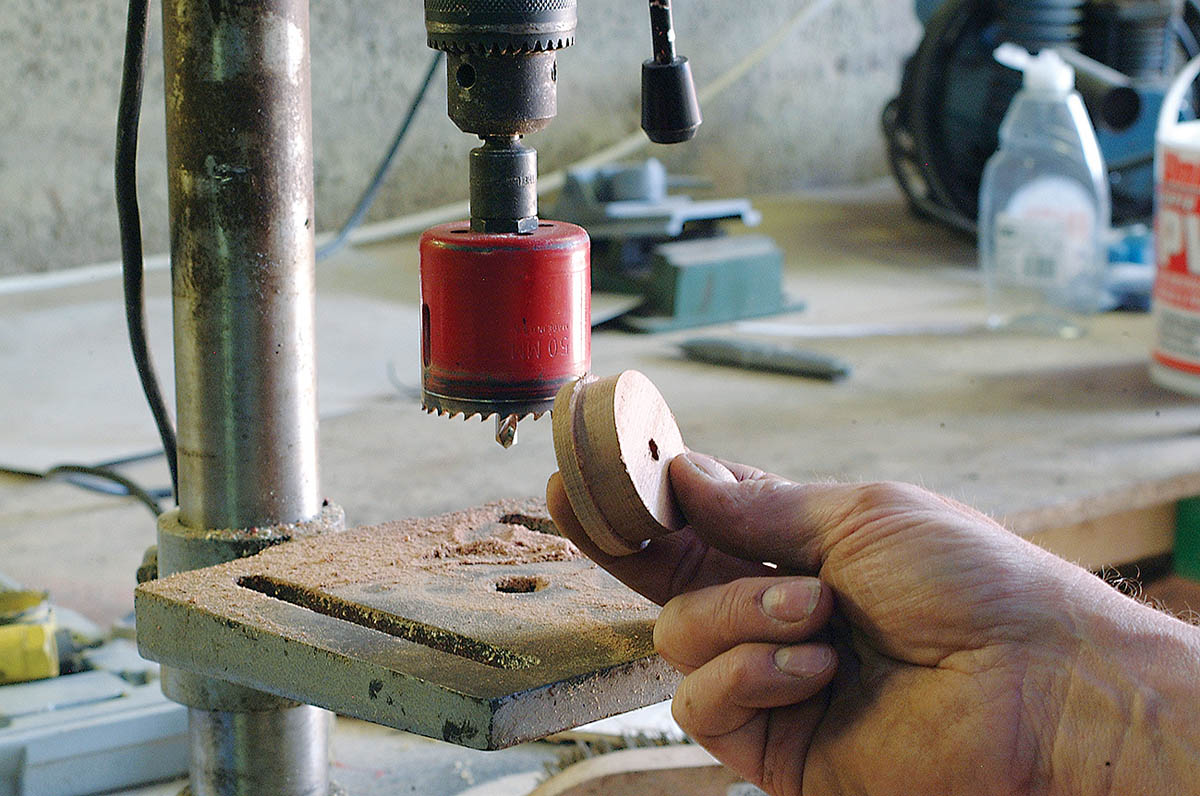
How to create finger ring pulls with a hole-saw
1. Finger pull rings are available from chandlers but can be quite expensive and not always the size you want. They’re actually pretty easy to make when you know how.
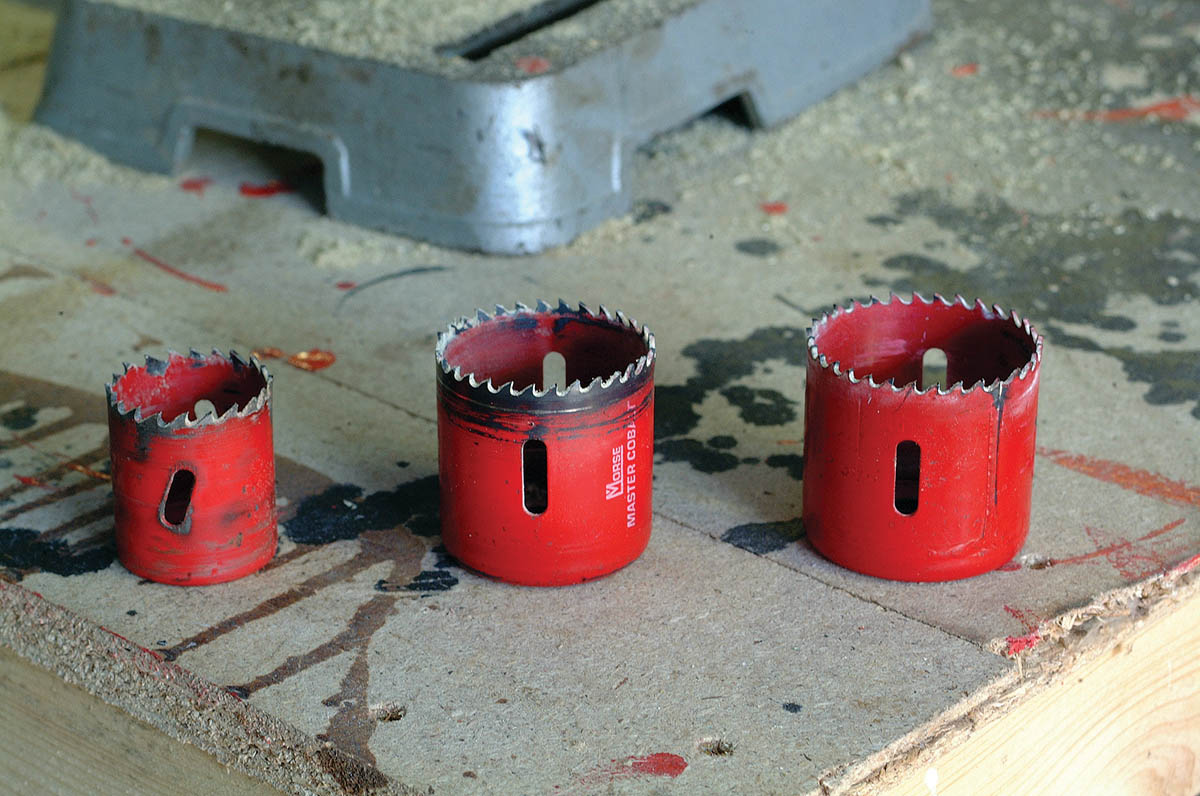
You’ll need three hole saws for this job plus the bench drill – it’s not really feasible to make these using a handheld drill. The size you choose is immaterial as long as the hole saws are of corresponding sizes.
NOTE: The largest saw decides the diameter of the outer flange. The next size down decides the outside diameter of the body of the ring and therefore the width of the flange. The smallest saw decides the hole size and thickness of the body of the ring. Experiment with different size combinations.
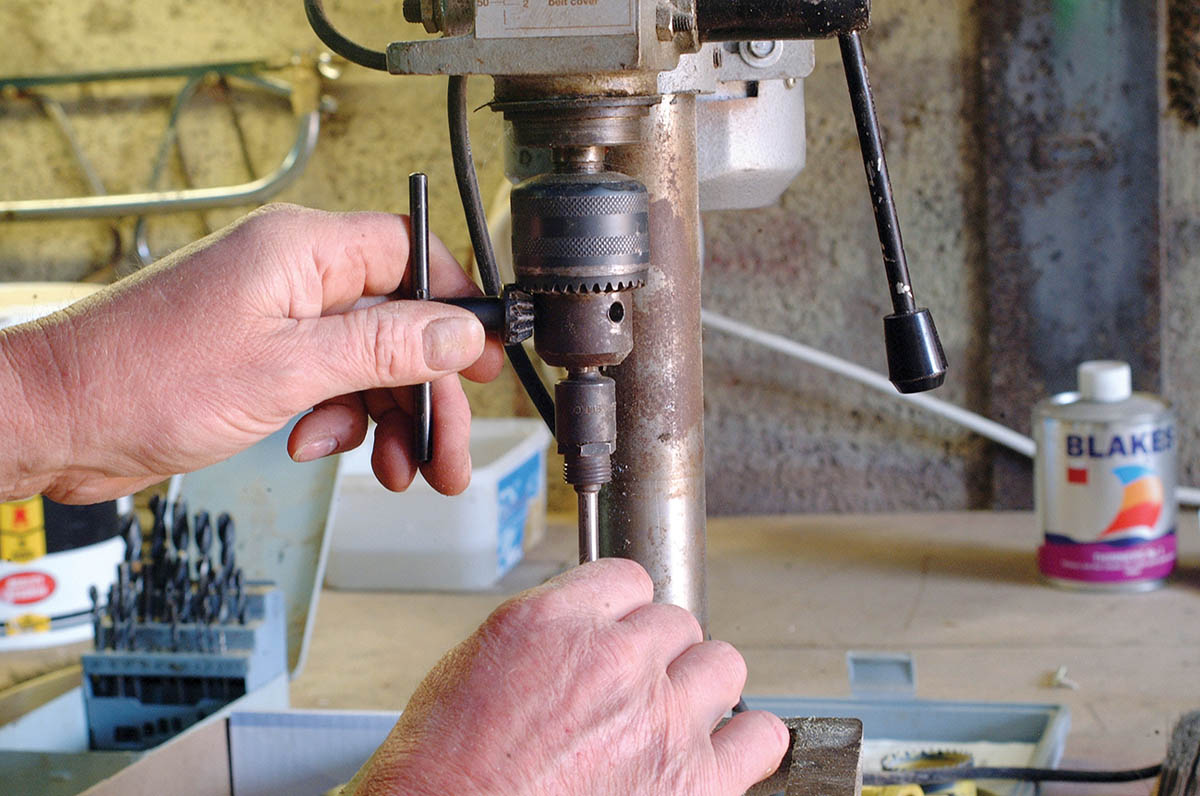
3. Fit the arbor that carries the hole saws into the drill chuck and tighten in the normal manner. Ensure the guide bit in the centre is set long enough to pass right through the work-piece when the largest hole-saw is installed.

4. Fit the middle sized hole saw first and adjust the drill table to provide a depth of cut that leaves sufficient material for the flange of the ring. This can be done by eye or using a packing piece of the desired thickness.
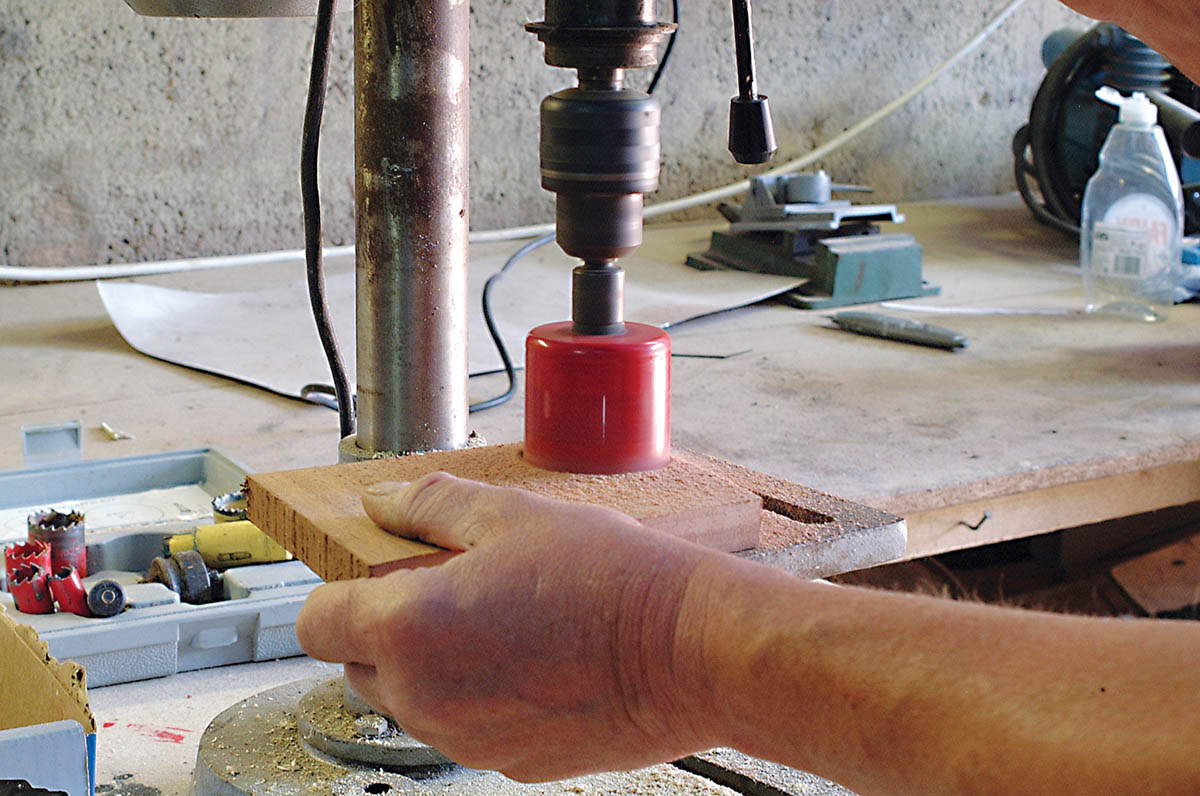
5. Now fit the largest saw and make the first cut which should be a little deeper than the required thickness of the flange (but don’t cut all the way through).
6. By making the largest cut first you are assured that the cut stays within the boundaries of the work-piece.
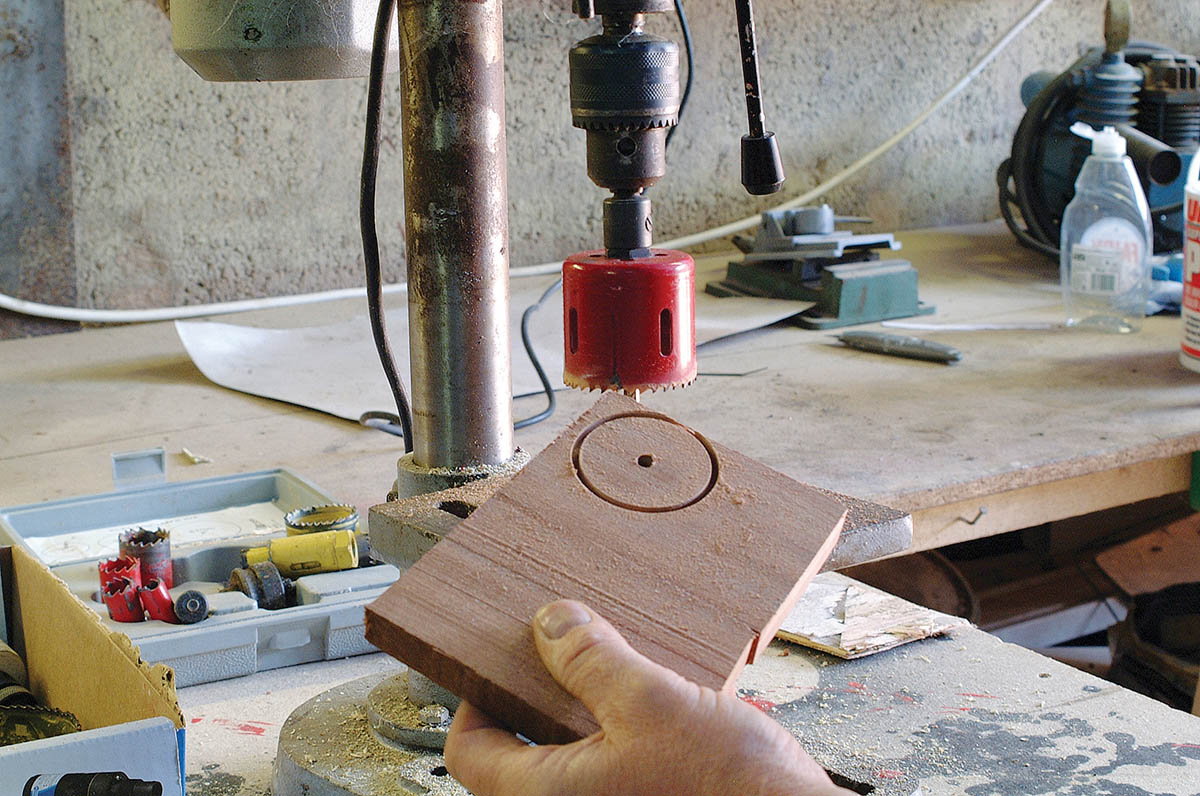
7. Re-fit the middle sized saw and turn the work-piece over. Locate the bit in the hole that was drilled from the other side while using the larger hole saw.

8. Cut right down to the stop that you set previously to give the required thickness of flange.
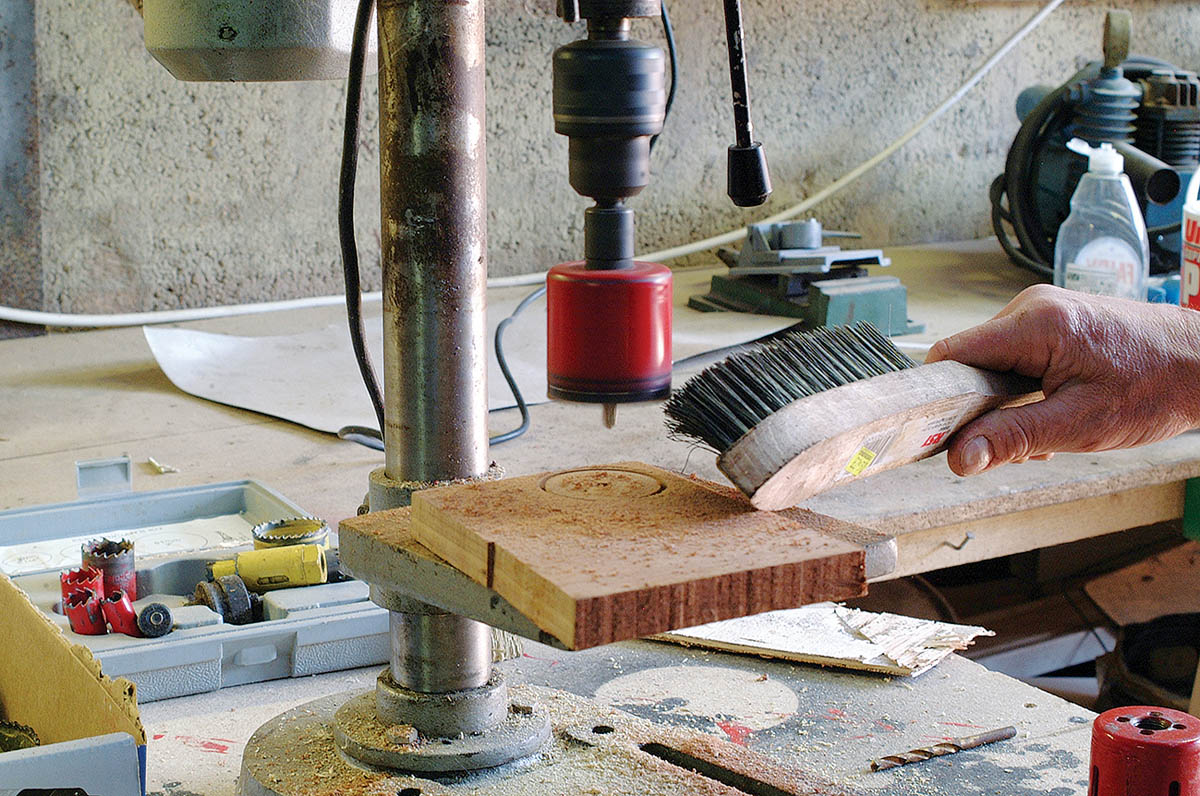
9. When making a deep cut like this the blade is likely to become clogged. A light touch with a wire brush will clear swarf and help to make the cut faster and cleaner.
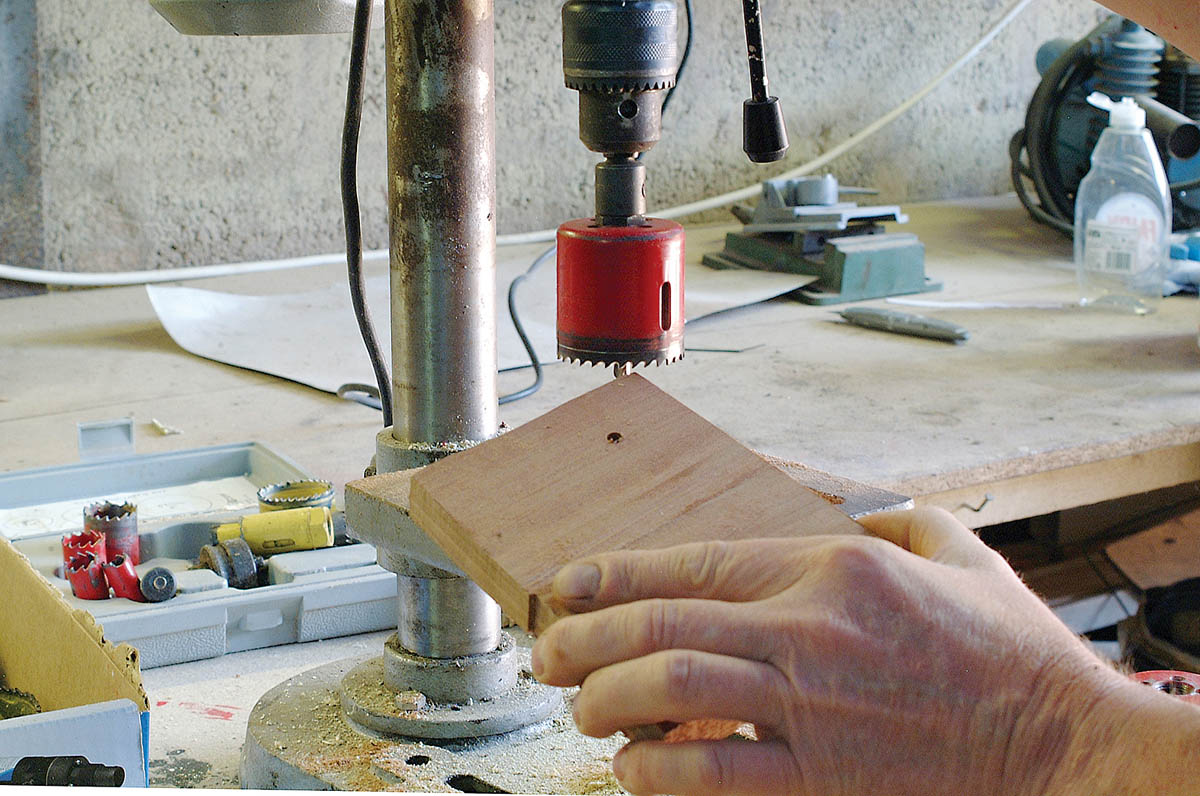
10. Having made the first cut from the other side the blank ring should now come out with the flange in place.
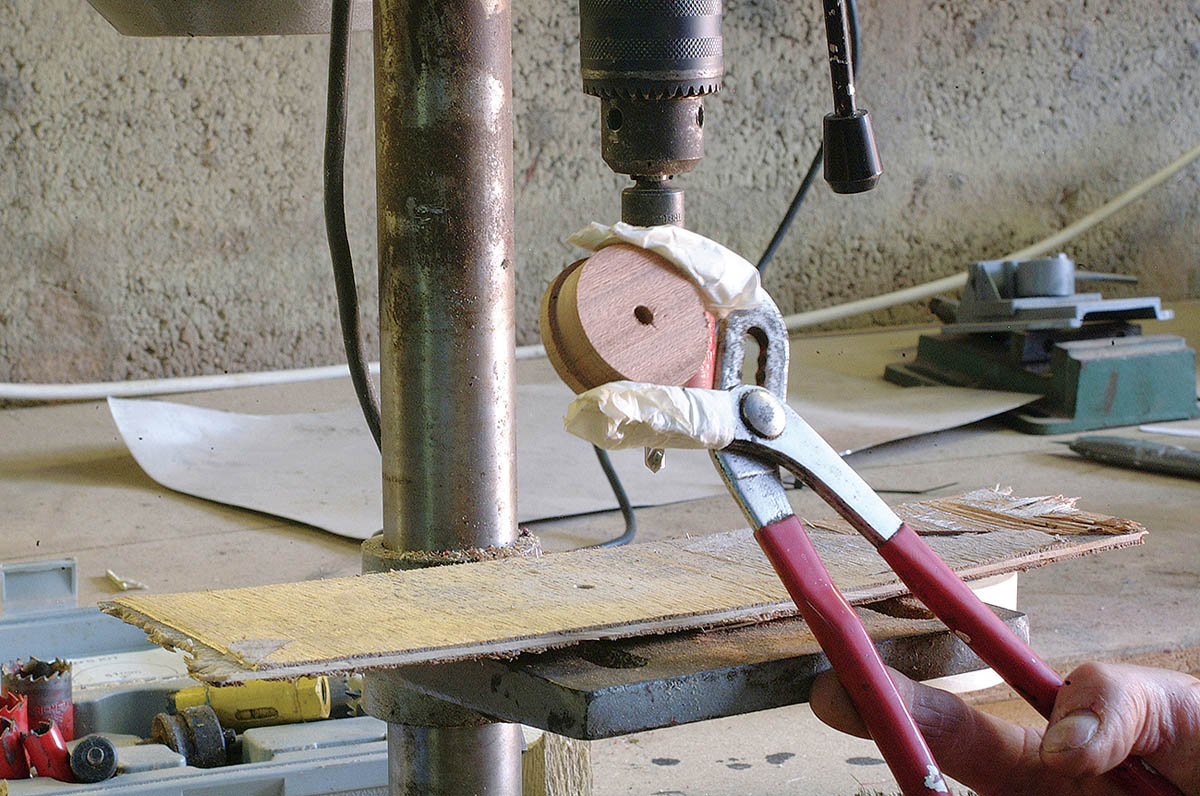
11. To take the centre out you’ll need to be able to hold the ring securely. I find a pair of water-pump pliers do the job perfectly well. Some tape around the jaws helps prevent damage to the ring.
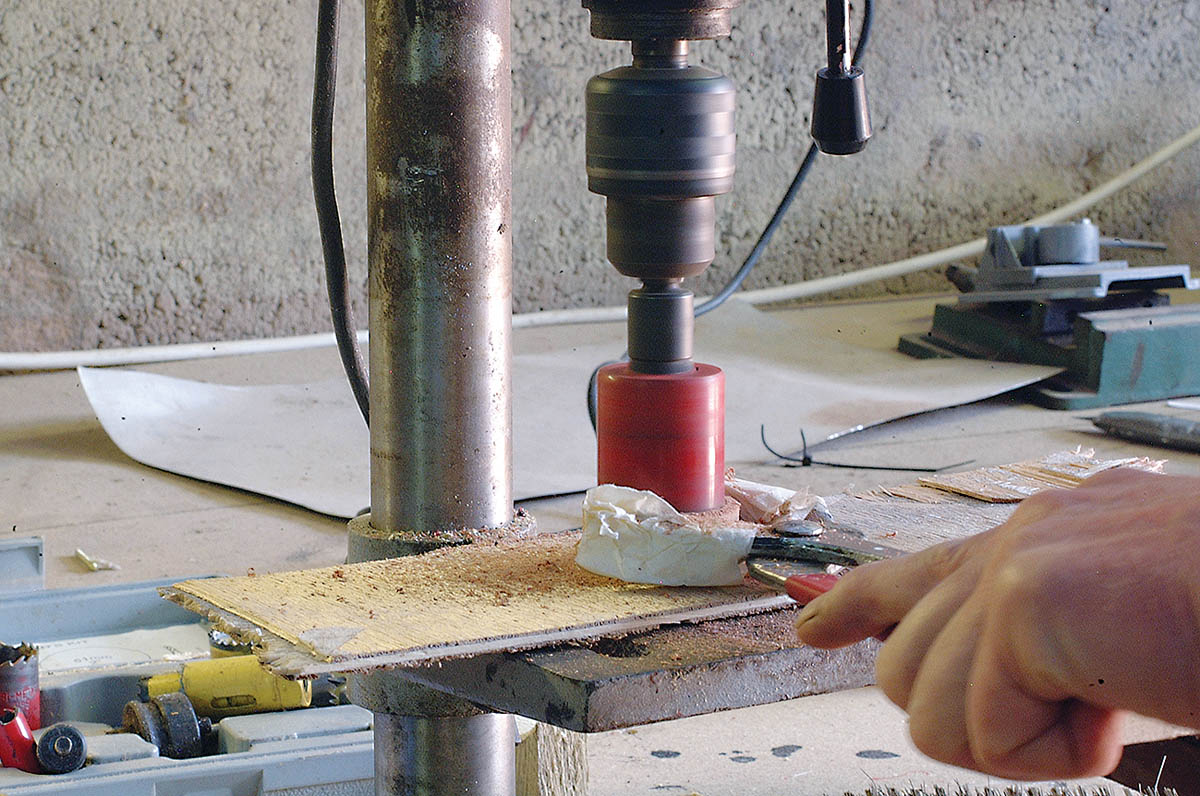
12. Now fit the smallest saw and cut right through the centre of the ring.
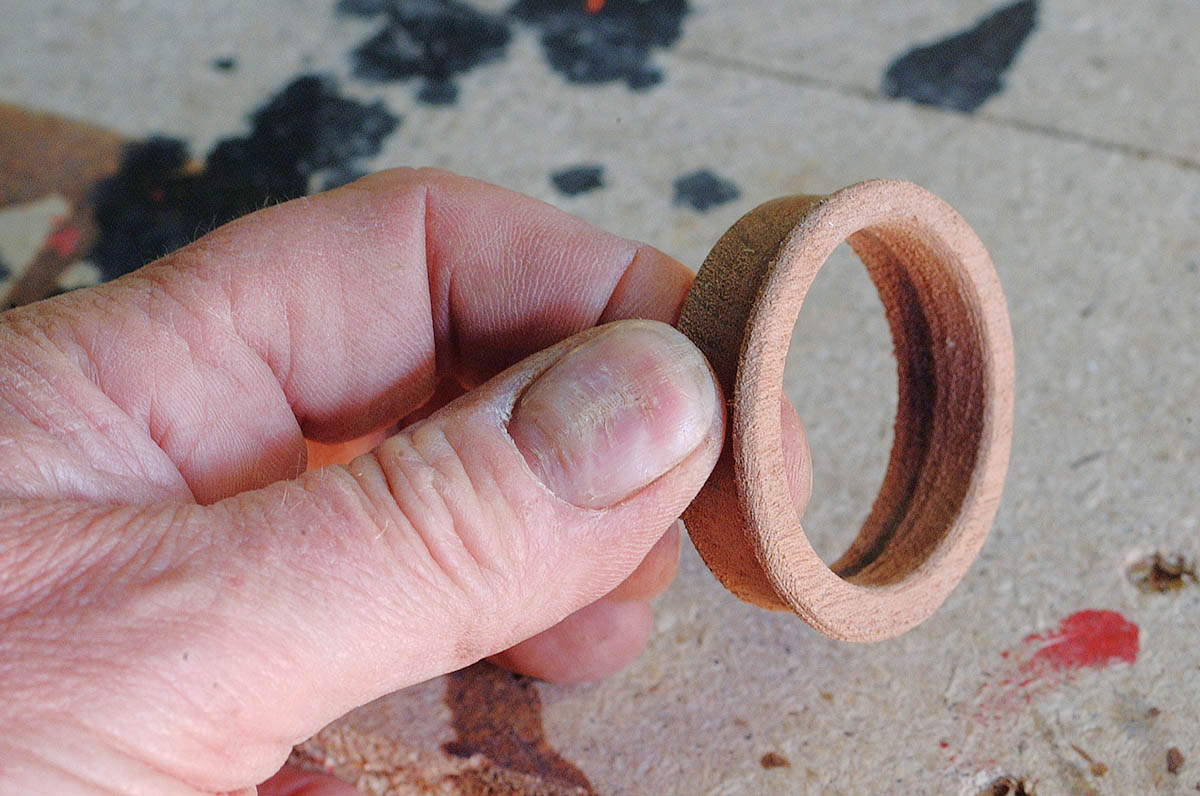
13. The result is a rough-cut ring ready for finishing.

14. A rub down with glass-paper will soon provide a smooth finish.
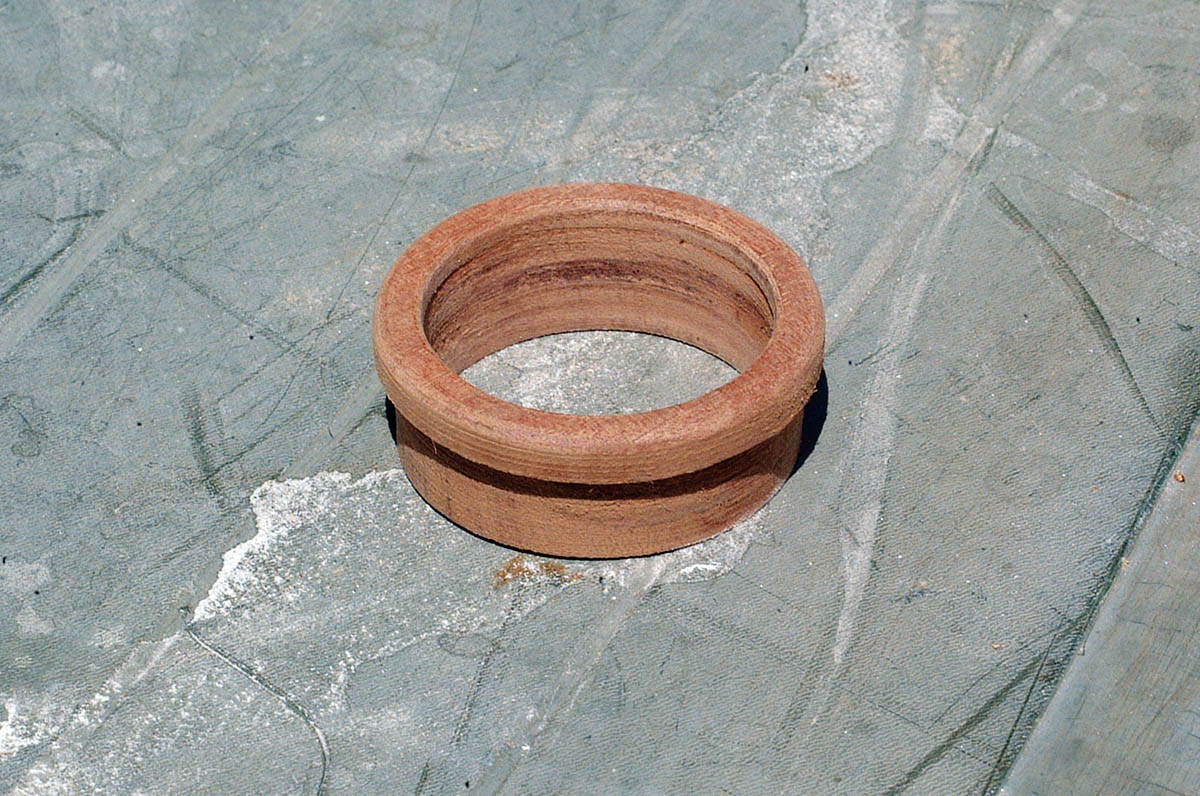
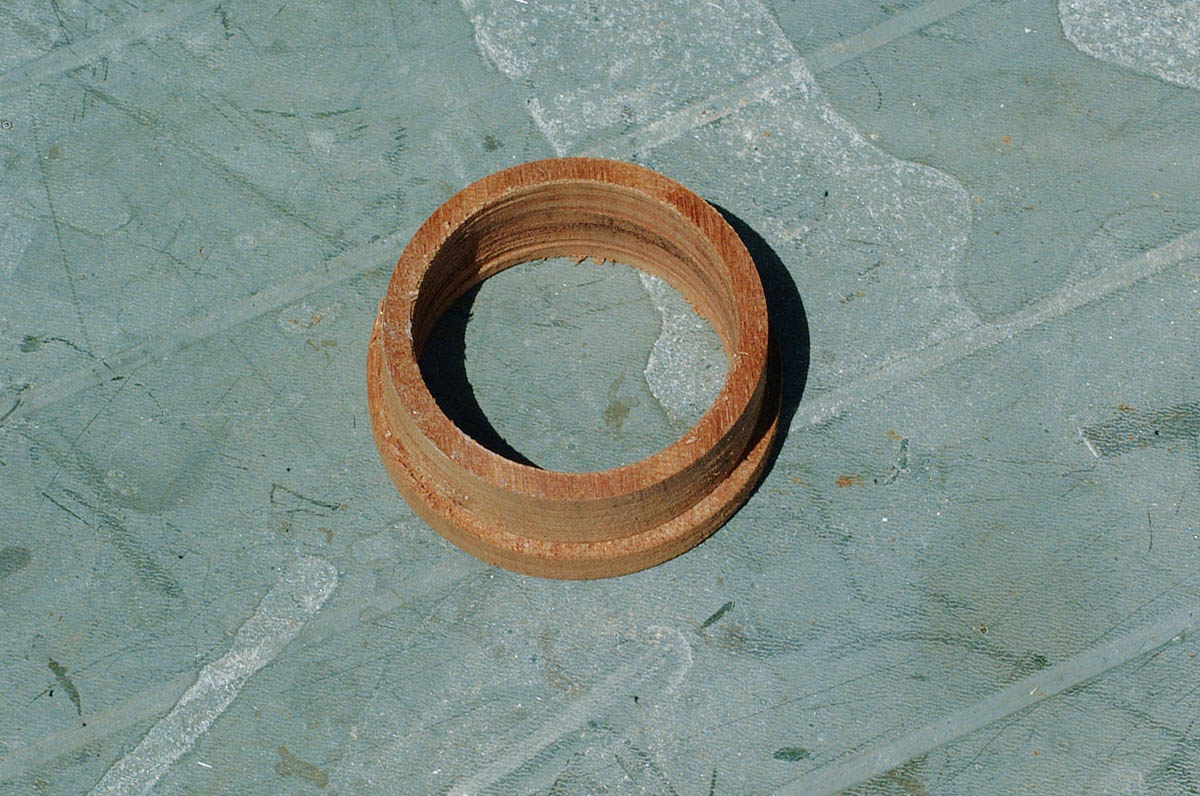
15. Here’s a finished ring ready for some additional fine sanding before varnishing.

16. This shows how you can vary the thickness of the flange to what you require by adjusting the depth stop on the pillar drill.

17. In true Blue Peter style. Here’s one I made earlier!