
If your DIY ambitions outstrip the capability of your workshop tools, perhaps it's time to think about expanding. Tony Davies shows how to get a professional finish using woodworking machinery that doesn’t cost a fortune

Well, you probably have a couple of basic machines in the tool kit already: a jigsaw, electric drill and sander are the most common. But have you considered getting a table saw, chop saw and router?
If you keep the boat in a yard or belong to a club where there are several owners fitting out or doing major repairs, why not get together and purchase some slightly more ambitious machines like a thickness planer and a band saw? They don’t need to be top of the range as their use will be far less than commercial tools even with several owners using them.
With the tools listed here and a few extras below, you’ll be well on your way to having a professional machine shop.
What follows is part one of a simple project that utilises basic techniques and a variety of tools. It goes without saying that when working with power tools always remember to take special care with safety.
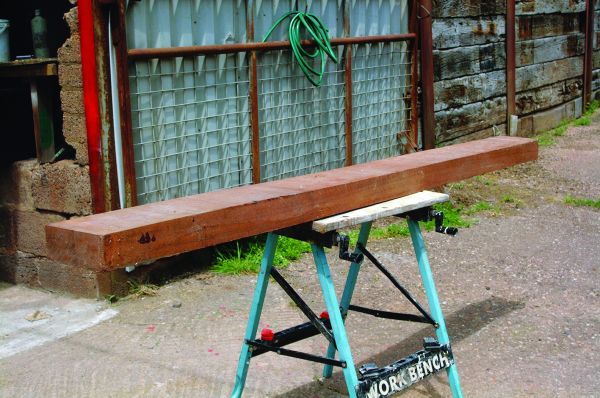
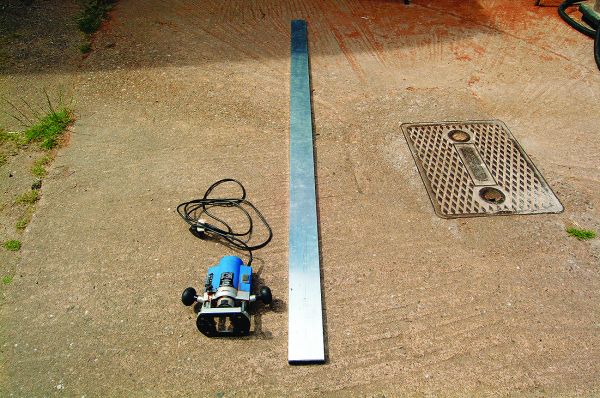
We buy our timber from the local builder’s merchant. This piece of sapele measuring 2.26m x 300mm x 80mm cost £34 and you can make a lot of trim from a piece this size!

The first machine used to cut the piece into useful planks is the table saw. This is a flip-over saw that combines the table saw and a chop saw (we’ll be using the chop saw in next month’s article). We’ve had this one for years but I have seen them at car boot sales and on ebay for as little as £50.

When working with heavy or long planks a pair of roller supports is invaluable. These were £13 each and are adjustable for height.

The depth of cut on this saw is not sufficient to pass right through the plank in one go so it’s necessary to remove the guard to allow the blade to cut into the plank before turning it over and finishing the cut from the opposite side. Extreme care is needed when sawing with an exposed blade. Set the saw guide to give the required thickness of cut…

…set up the roller supports, put on your protective gear and make the first cut by pushing the plank over the blade while keeping it firmly pressed against the guide.
At this stage the plank is partially cut through – you can see it is only about 10mm short of the full thickness. The timber is now turned over for the second cut.

Repeating the procedure provides the two strips that will be used for the job. The uncut remainder of the timber can then go back in the store ready for the next time we need it.
How to join two planks together
To make a coaming trim for this small motor cruiser the timber we have isn’t wide enough to do the job in one piece. It’s therefore necessary to join two pieces to give the required width.

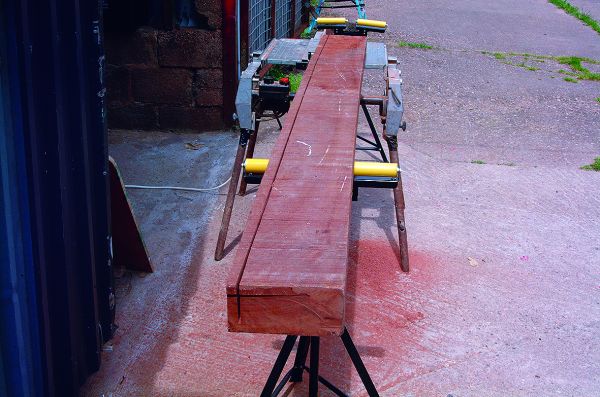
The next stage is to plane the two rough-sawn strips so they are smooth and to the required thickness. For this we use portable planer thicknesser bought new for £200. I have seen good second-hand ones for half this.
Although designed to be bolted down on a bench we find it more convenient to clamp it onto the stable saw bench table.

The support rollers are now set up to the correct height for the thicknesser table.

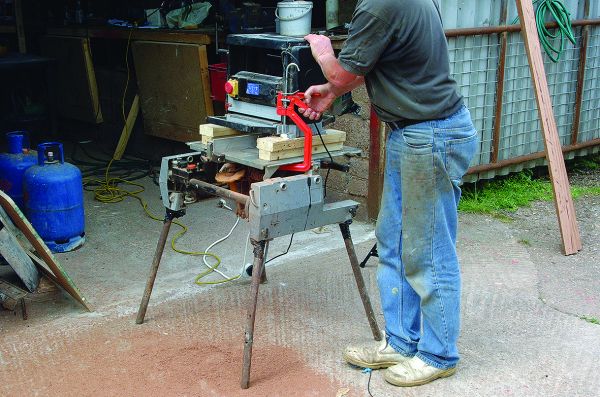
We also use a dust extractor with the thicknesser. It keeps debris to a minimum and also helps prevent the machine becoming clogged, which can happen.

This thicknesser is adjusted with a handle on the side. It can be set using the scale on the front or simply wound down until it is just touching the face of the timber. Remove the timber before starting or it’ll snatch and may damage the blade and/or motor. Don’t overwork the thicknesser – several light passes are better than one heavy one.

The timber will be drawn through the machine automatically but you may need to guide it to keep it running straight as it passes through.
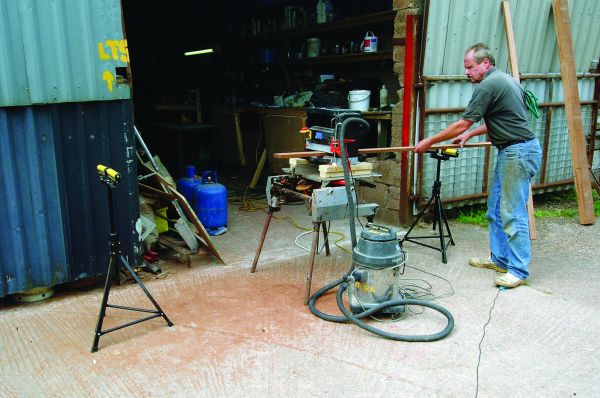
As it emerges at the other end it can be guided out until it is free of the rollers and can be lifted away from the machine. Both planks must be planed using the same thickness setting at each pass to ensure that once the job is complete they are both exactly the same.

There is a slight ridge running along the strip shown on the right – caused by a nick in the thicknesser blade. Blades are straightforward to change (always unplug the machine) but for the moment these small ridges will be easily removed when the strip is finish sanded.
How to use a router to prepare biscuit joints
The next stage is machining of the joint faces. This time using a small DIY router that cost £35 when new. An accurate straight edge is also required. This one is a 2.5m long plasterer’s aluminium edge costing £26. It’s essential if a precise joint is to be achieved.

The thicknessed strips are placed on the bench ready for machining…

… and a suitable router bit is selected from the set.

For this job I’m using a medium diameter straight cutter to give a straight and square joint edge.
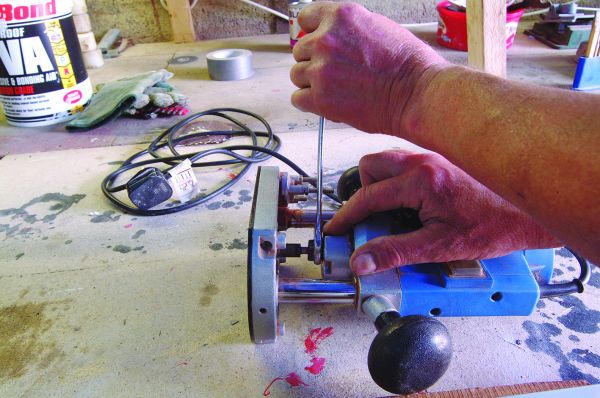
The bit is placed in the router and the nut tightened using the spindle lock to prevent the spindle turning during tightening. It’s important to make sure the bit is tightened securely to prevent it slipping under load.

Once the straight edge is satisfactorily aligned the edge can be machined. With a 2,000W (or more) commercial machine the cut can be made in one pass. If a DIY router like this one is being used then it is best to take shallower cuts to keep the revs up rather than trying to make the cut in one go.

With the router plunged so the bit is deep enough to make the cut, place the blade against the edge of the timber then line up the straight edge allowing a small gap between the straight edge and the router base. When running against the straight edge the router will then machine the same amount of timber off the length of the strip.

The straight edge must be clamped on top of the timber strip as a guide for machining the edge. Place clamps throughout the length of the work to ensure the straight edge cannot move when the router is pressed against it.

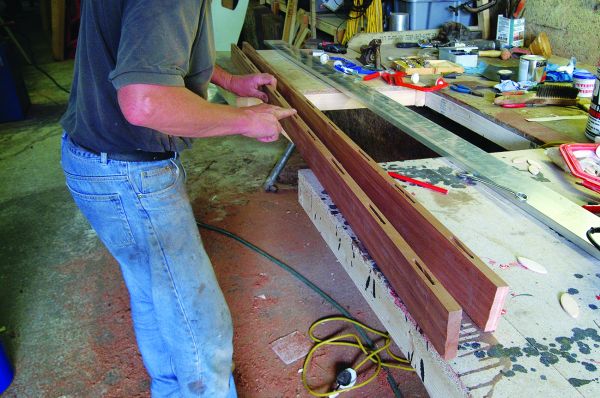
Repeat the process for the second strip and the two edges can then be lightly clamped together to ensure they are a perfect fit.
How to join two planks with a biscuit joint

The two strips can now be joined using these beechwood biscuits and a jointing bit on the router.

With the two strips roughly aligned mark the positions of the biscuits on the two adjoining edges. They don’t need to be precise, just enough to ensure the biscuits fit in each side of the joint while allowing the two strips to pull together without any strain. I generally fit biscuits at 6in (15cm) intervals.

Now plunge and lock the router to provide a cut at half the thickness of the strip.

Now cut the recesses for the biscuits between the previously marked positions. The bit has a bearing guide which provides the correct depth of cut.
Repeat the process for the second strip ensuring that it is the same way up as the first. This guarantees that both faces will align correctly. Then check both machined faces to ensure there are no rough or ragged edges that would prevent the two faces mating.

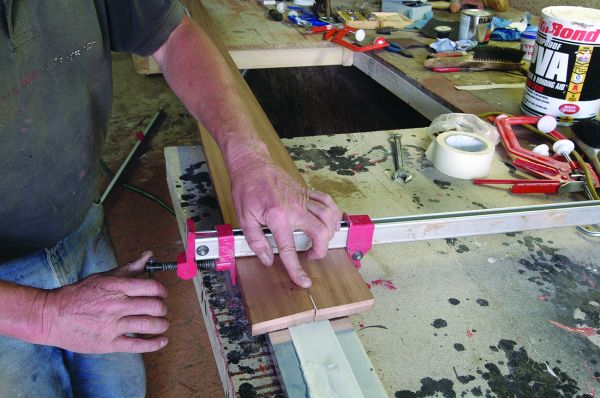
First it’s important to do a dry run, so temporarily place the biscuits in their recesses.

Now bring both planks together to ensure the recesses are correct and that the biscuits are not stopping them aligning. If for any reason the planks do not align correctly, find and resolve the problem before attempting to glue them.

Once you’re happy, disassemble and fill the recesses with adhesive as well as coating the mating faces.
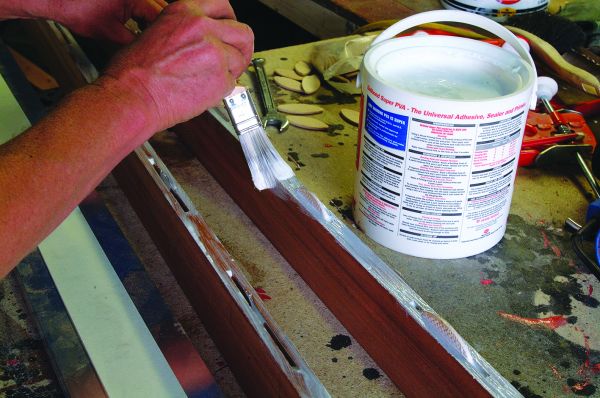
Place the biscuits in the recesses and this will squeeze out excess adhesive which can be brushed along the edges to even it out.

The two halves can now be brought together ready for clamping.
Ensure the work is placed on a flat surface (I use the side of the straight edge) and begin clamping while ensuring the top faces are flush.

Sash clamps are best for this type of work but where the piece is not too wide, single-handed clamps are equally suitable. Once properly clamped it can be left overnight to cure.

Once cured the work can be initially sanded to check how well the joint has formed. I use a heavy duty belt sander (£40 second-hand locally) but an orbital sander will do the job too.

In this case the joint is pretty near perfect with an interesting match of grains as a bonus.
Originally published in PBO Jan2020