
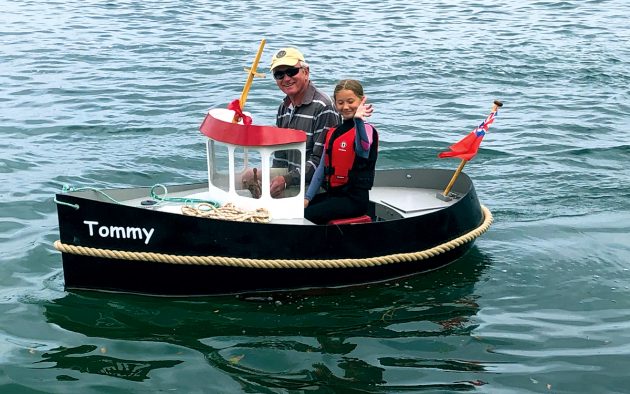
Determined to build a small, fun boat for his young grandchildren, Ian Royston made one in the style of a cheeky tugboat. He explains how...
Like many other boating fathers I made a couple of small dinghies using the stitch and glue method for my sons in the early 1990s and now it’s the turn for my grandchildren aged nine and five. This would be a winter project and, as it turned out, perfect for the imminent lockdown.
Small tugboats have long been popular in the USA and Canada but not so much in this country. Children’s boats must be smaller than adult size, stable, easy to handle and preferably eco-friendly (electric) with a maximum speed of 3-4 knots.
Dimensions of 8ft (2.4m) LOA and 4ft (1.2m) beam seemed ideal and would fit inside my garage. Model prototype line plans were drawn up based around larger American designs onto an 8×4 sheet of ply.
Article continues below…

Shipwrecked in a 14ft keelboat then rescued by a cargo ship
Yann Quenet is a genius from Brittany I would love to meet. He is an inventor, designer, and builder of…

How to build a Baby Tender – the miniature clinker boat baby cradle
I first saw a cradle boat at a wooden-boat show years ago, and thought to myself: ‘When I have kids,…
While retaining the usual two upper strakes of the hull and obligatory reverse sheer transom, the lowest strake was given a shallow angle with a degree of rocker to improve the underwater shape.
First I built a half size model in hardboard around a construction jig. This was intended as a trial run using inexpensive materials for further development tweaks. The two upper strakes were straightforward to fit but the corresponding curved stern sections proved harder.
Many variations of the wheelhouse were tried for size and angulation and a cut-out in the top was added for the benefit of adult skippers. An outboard well was fitted in the stern section (with rear seating on both sides), bilge keels were added for directional stability and finally a drop-down rudder.
A half size model of Tommy was first built to see if the full-size version would be a success
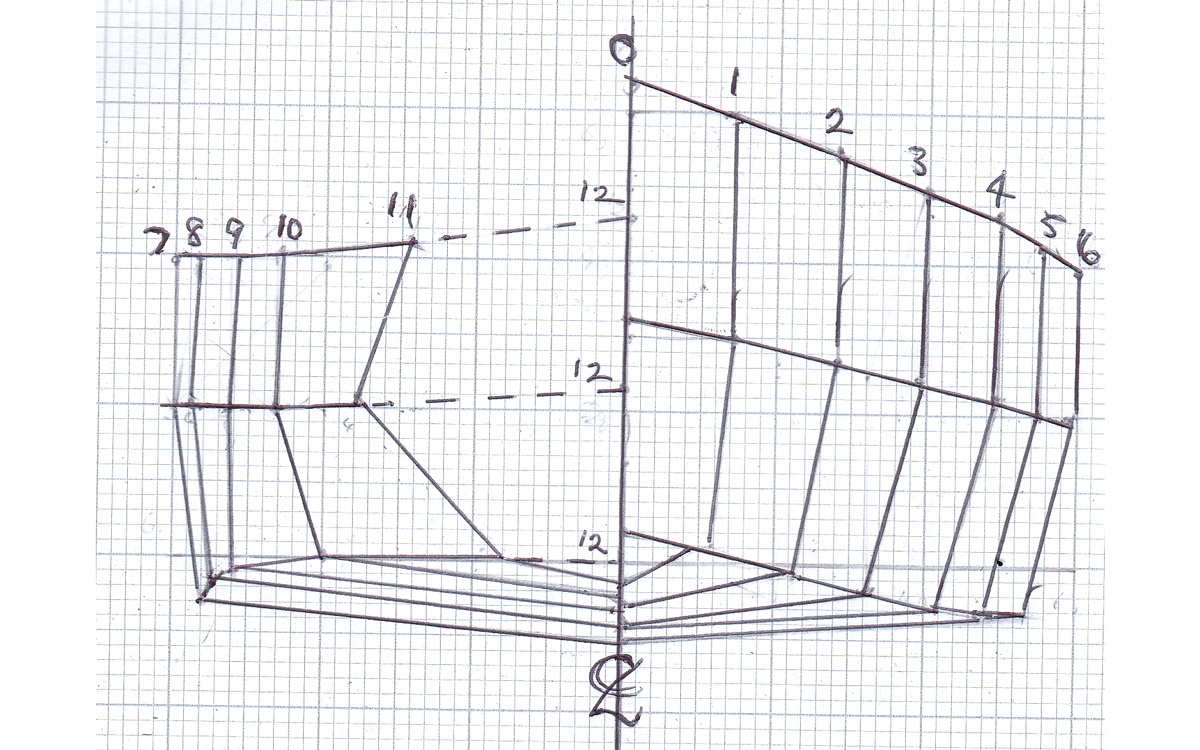
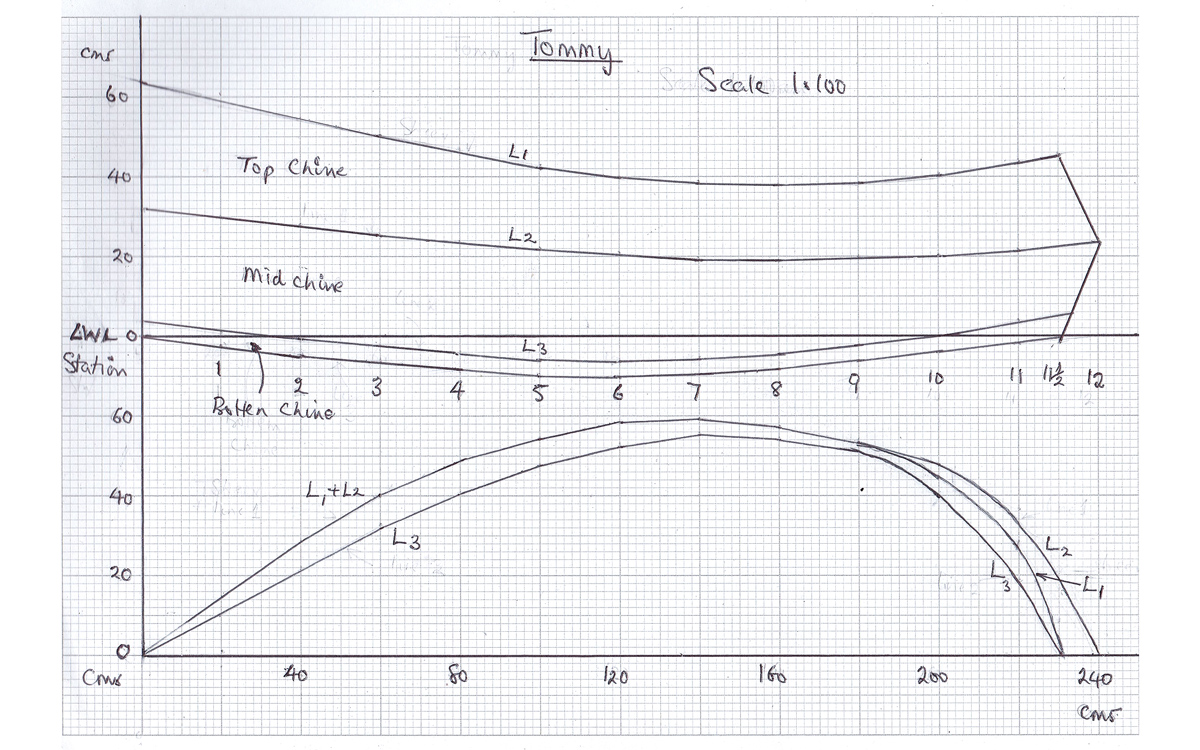
Scale elevation and plan for the boat
Drawing for strakes and frames
By now it was December and time to get started on Tommy. I set up a building jig on trestles with station frames attached at 40cm intervals using the dimensions from the full size lines plan. I used 6mm marine ply for the hull. Hardboard templates were used initially for all the planking – starting with the two halves of the bottom strake.
The upper and mid forward strakes quickly followed and were attached to the bottom strake by thin copper wire ties. The curved stern sections were laminated up from four layers of 1.6mm birch ply glued with West epoxy laid over the underlying hardboard templates. Flexible ply would have been preferable but was not available at the time.
Next the curved stern planks were butt joined to the forward planking but this caused unsightly ridging. Scarfing would have been a better option!
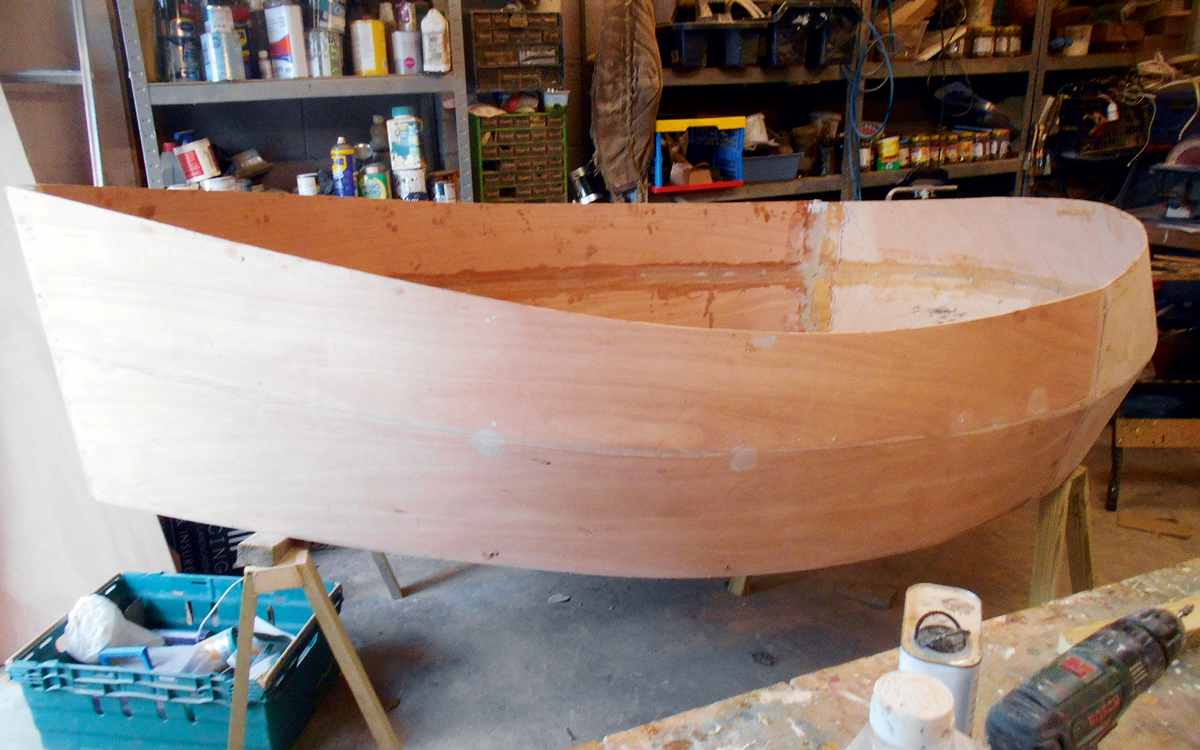
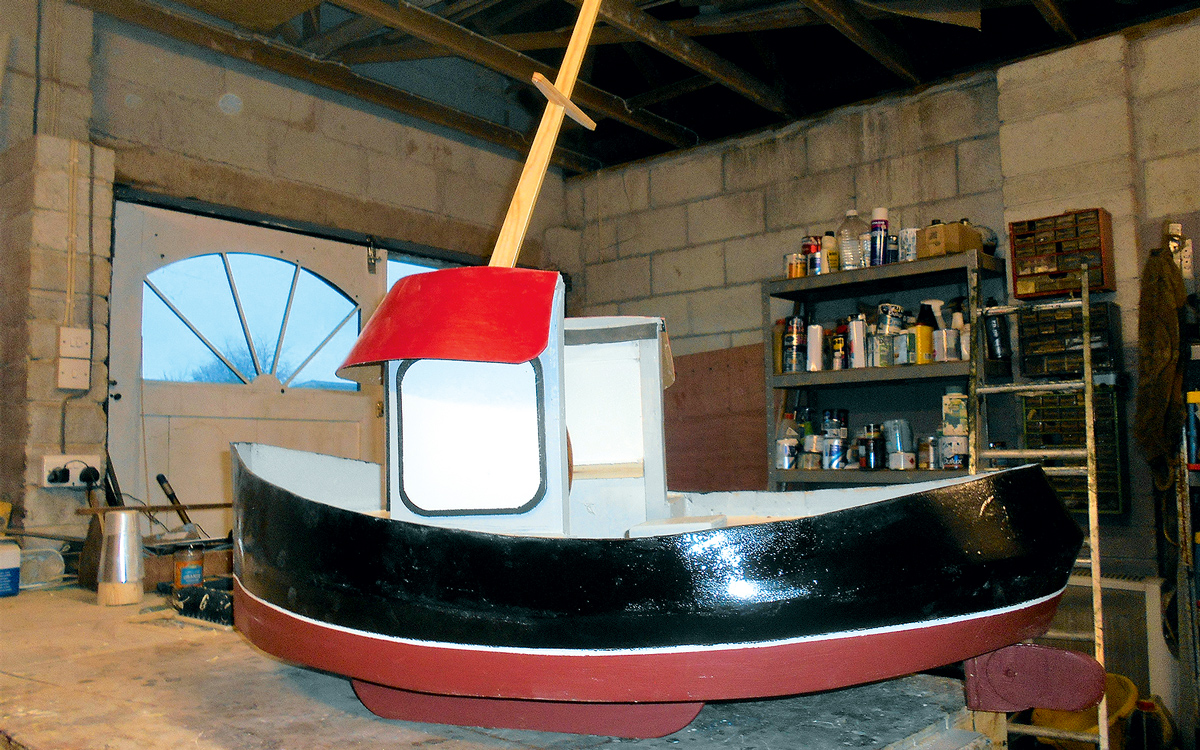
Stitch and glue construction and Tommy’s hull starts to take shape in Ian’s garage
The hull was then carefully detached from the station frames and with assistance, inverted so the hull was ‘right side up’. All the planking seams were glued with 2in glass tape with West epoxy glue, allowing for the copper ties to be removed from the exterior and the external seams sanded smooth.
With the hull now complete, floor timbers were glassed in place, a floor of 9mm ply laid on top and an outboard well fitted in the stern. I also built the wheelhouse ready for installation. The wheelhouse was built from 9mm marine ply and glazed using 4mm acrylic sheets recessed into the panels.
The steering pedestal contained a 2:1 reduction gearing, initially belt driven but changed to chain drive due to slippage. This in turn was linked to the rudder assembly via Bowden cables. A small (ornamental) ship’s wheel of 18in diameter was bought via eBay and attached to the pedestal steering shaft.
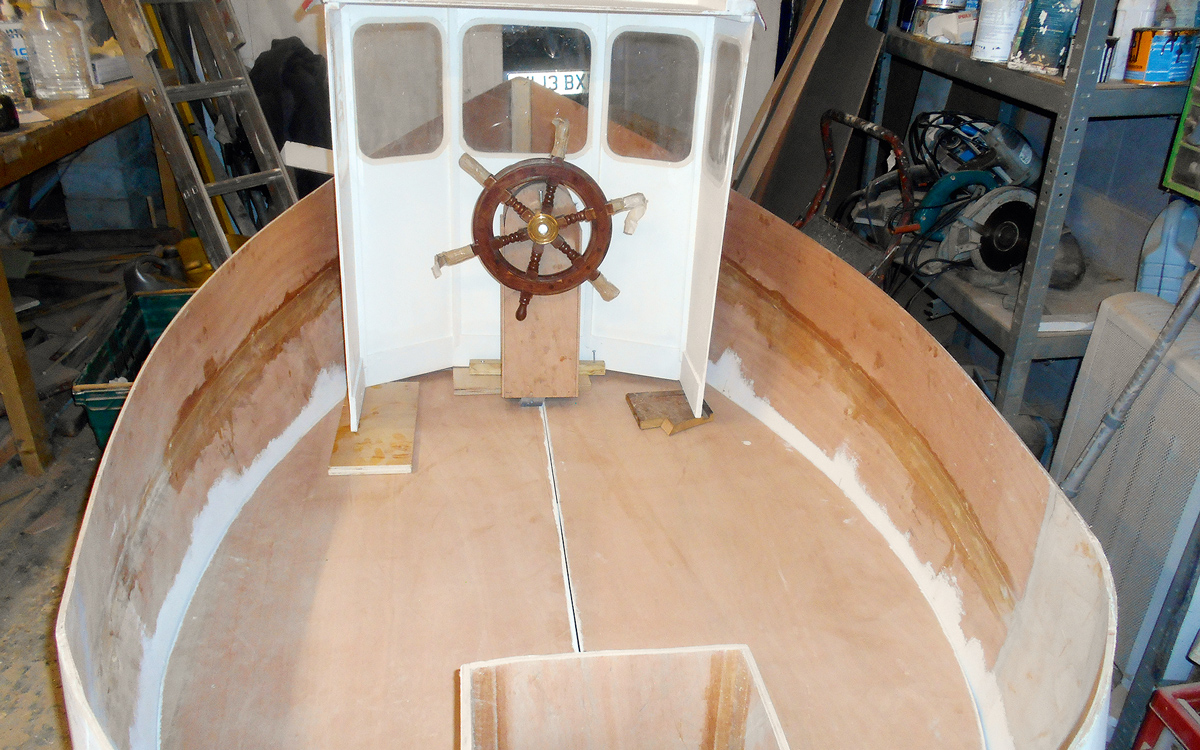
The floor and outboard well in place with the wheelhouse placed in the boat
At first I had Tommy powered by a 2.5hp Yamaha 4-stroke outboard and the twist grip throttle control was linked to a control lever next to the seat by Bowden cables. Bilge keels of 36in x 8in x 1in in iroko were glued and screwed to the bottom strake and a 12in x 12in rudder attached to the rudder post.
It only remained to paint Tommy as befitted a tugboat and construct a short but wide trailer then it came time for a maiden voyage.
Launch day
It proved a steep learning curve once Tommy was in the water. Tommy was scarily fast, difficult to steer, had poor engine control and heavily trimmed down to the stern, which took water on board on full power. That wasn’t an encouraging start, and clearly this was going to be a work in progress!
Back at base again, I first reduced the rudder size to 9in x 9in and secondly a lay shaft was inserted into the steering pedestal with extra gears giving a reduced ratio of 4:1. At the second launch 30kg of concrete blocks were loaded on to the foredeck until Tommy was back on her lines. Although the steering was improved, her handling was not due to the additional top weight.
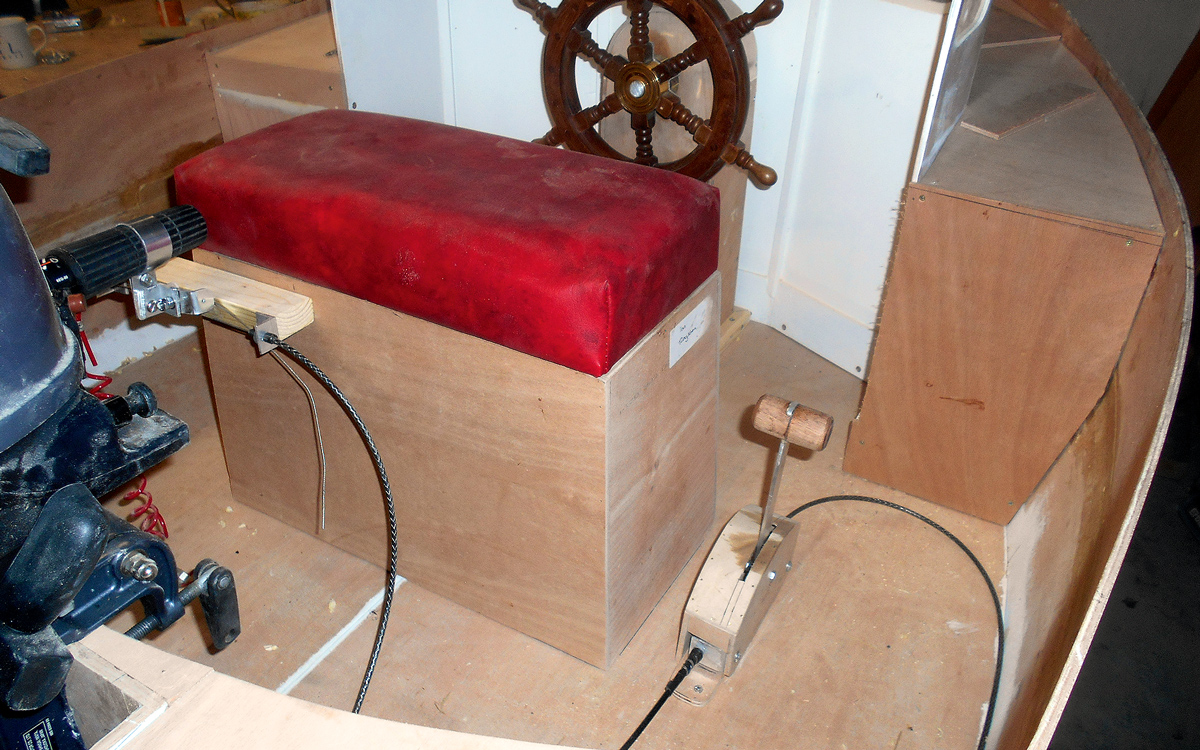
The engine control lever next to the seat. ‘Ornamental’ mini ship’s wheel is perfect for the job

The wheelhouse installed and glazedWater ballast was now required so the foredeck was opened up and a 100lt triangular water ballast tank fitted inside with a deck-mounted water filler cap. A small in-line water pump was fitted to the outlet so the tank could be emptied after use.
For the next launch the ballast tank was filled with water until the trim level was balanced (approx. 30lt = 30kg) and the throttle control linkage correctly adjusted. This proved a great improvement with better control and handling but was still too fast (and noisy!) to be suitable for children.
The Yamaha outboard was now replaced by 65lb thrust trolling electric outboard motor. The engine shaft was cut and 12in of shaft discarded. The lower section was mounted directly in the outboard well while the control handle with its remaining shaft stub was mounted by the side of the seat.
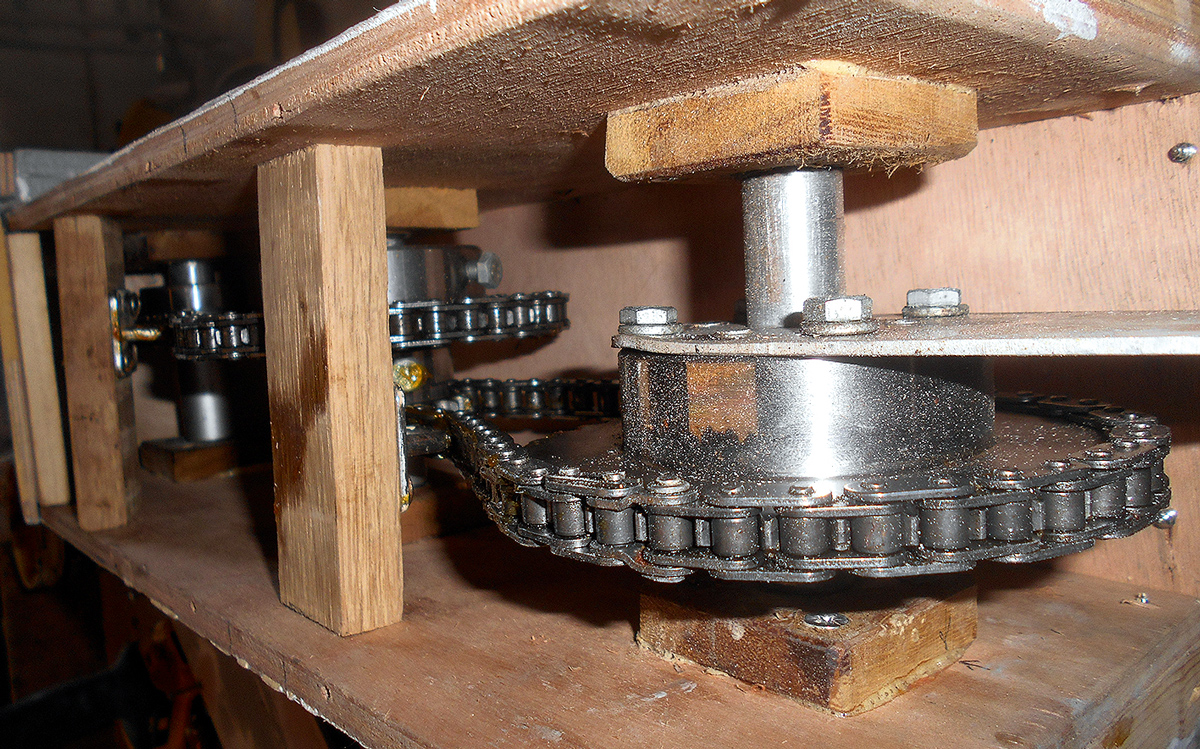
Close up view of the steering pedestal gearing
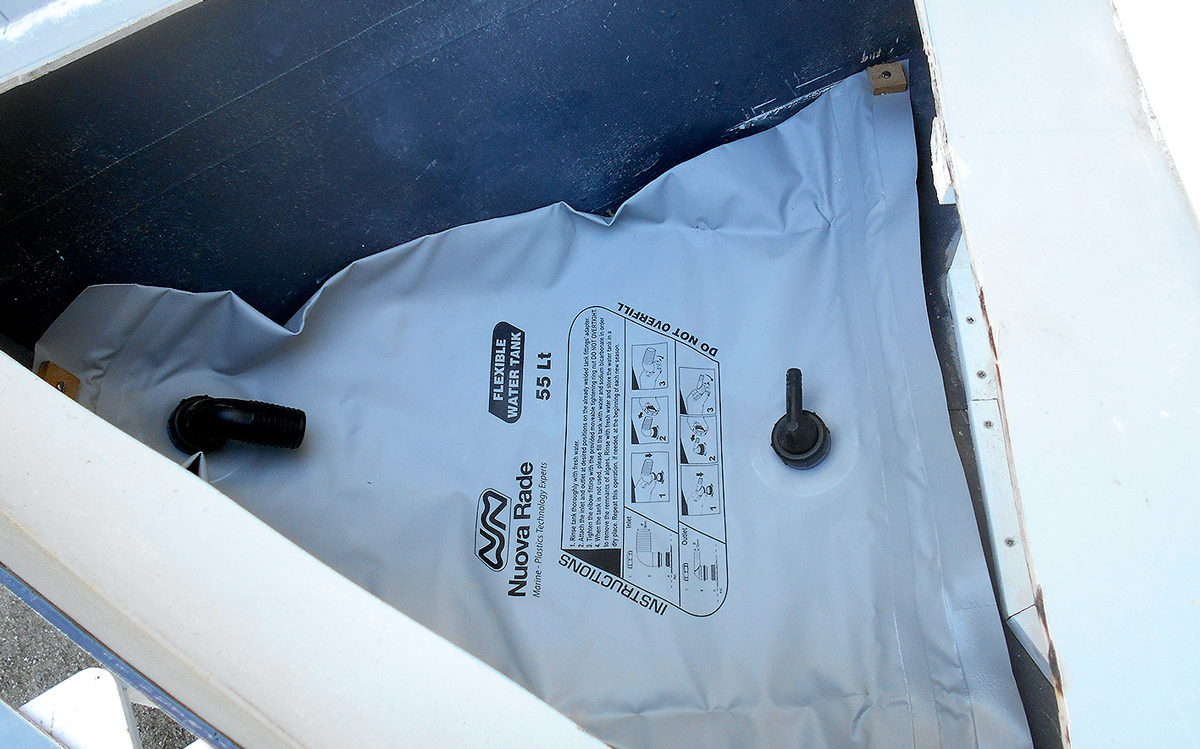
Water ballast tank installed in the bow
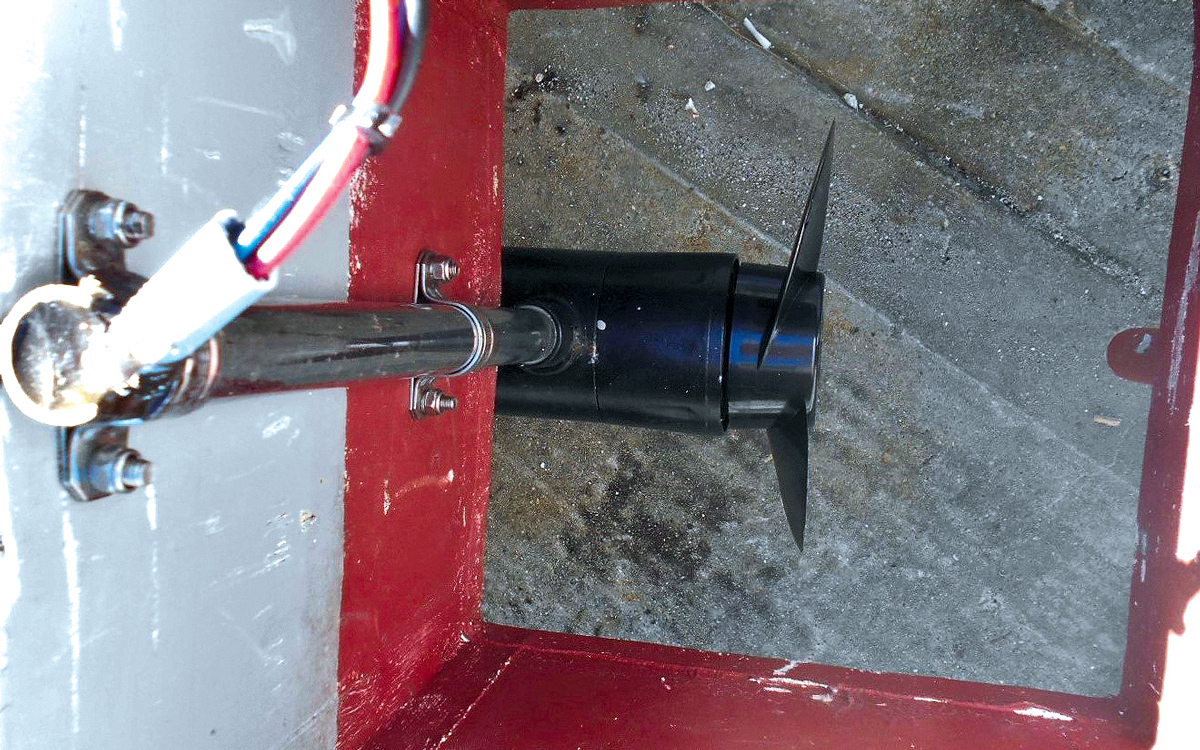
A cut-down electric trolling motor installed in the outboard well
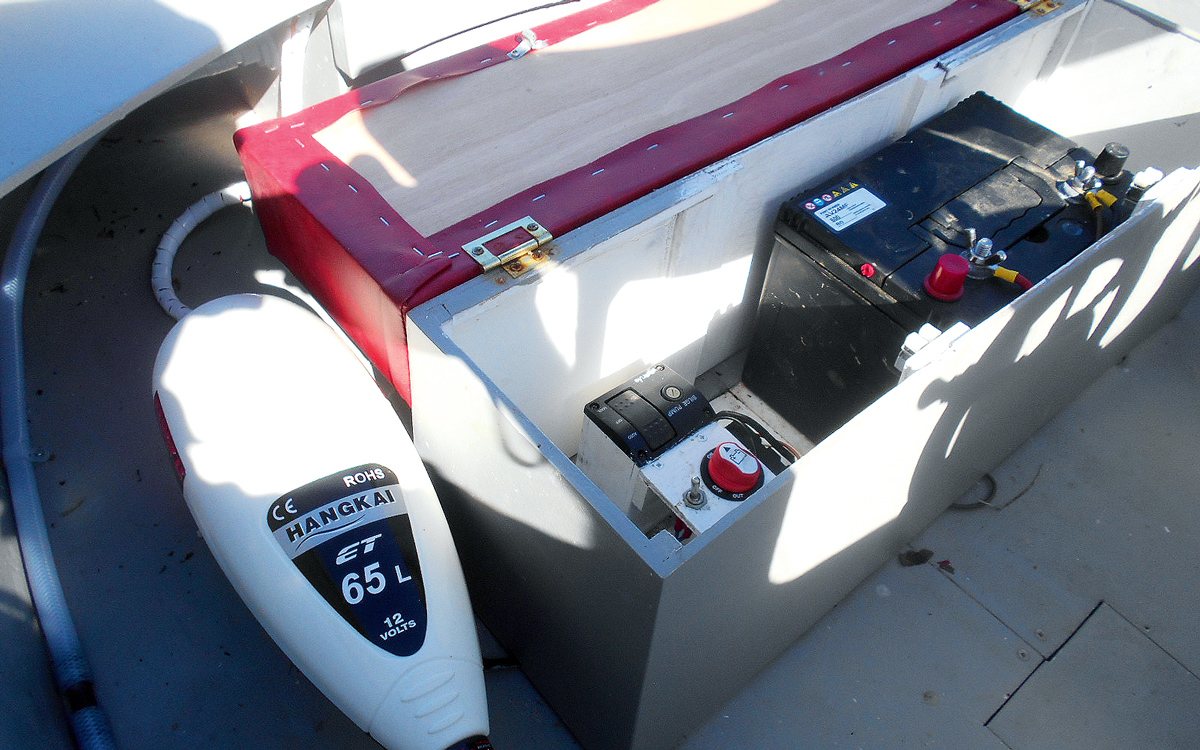
The electric motor control at the helm and batteries installed under a widened seat
An 80Ah leisure battery was located inside the seat housing (now extended widthwise to accommodate a parent and small child) and the system wired up. The new engine twist grip control was easy to reach with five forward speeds and two in reverse.
On the fourth launch the electric outboard proved so much lighter that less water ballast was required in the forepeak, and Tommy was then propelled at a safe and silent 3 knots with good rudder control – just right for children and their young-at-heart parents. Success!
This unique project – costing around £1,200 including trailer – had no underlying intention of future commercial development, thereby obviating the need for stability tests and extra buoyancy etc. Tommy is best suited to quiet harbours and inlets with parental supervision. The project has proved great fun and detailed building plans are available for other amateur builders without charge.
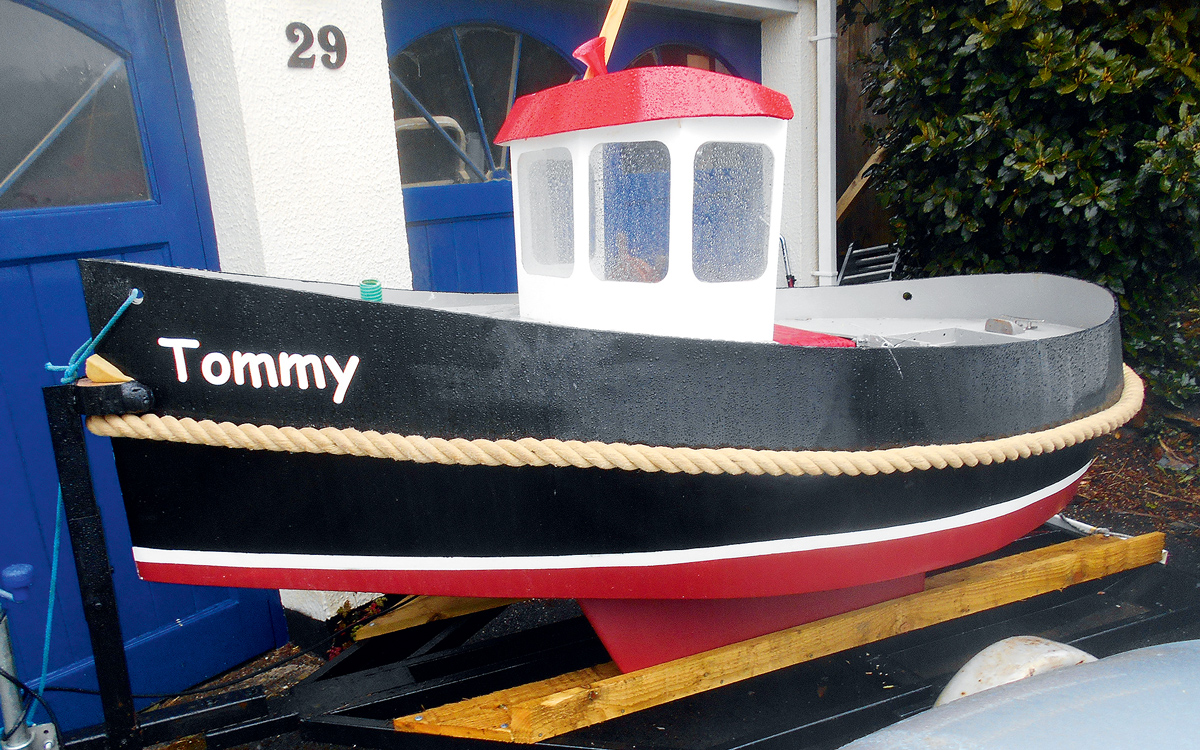
The finished Tommy on his trailer
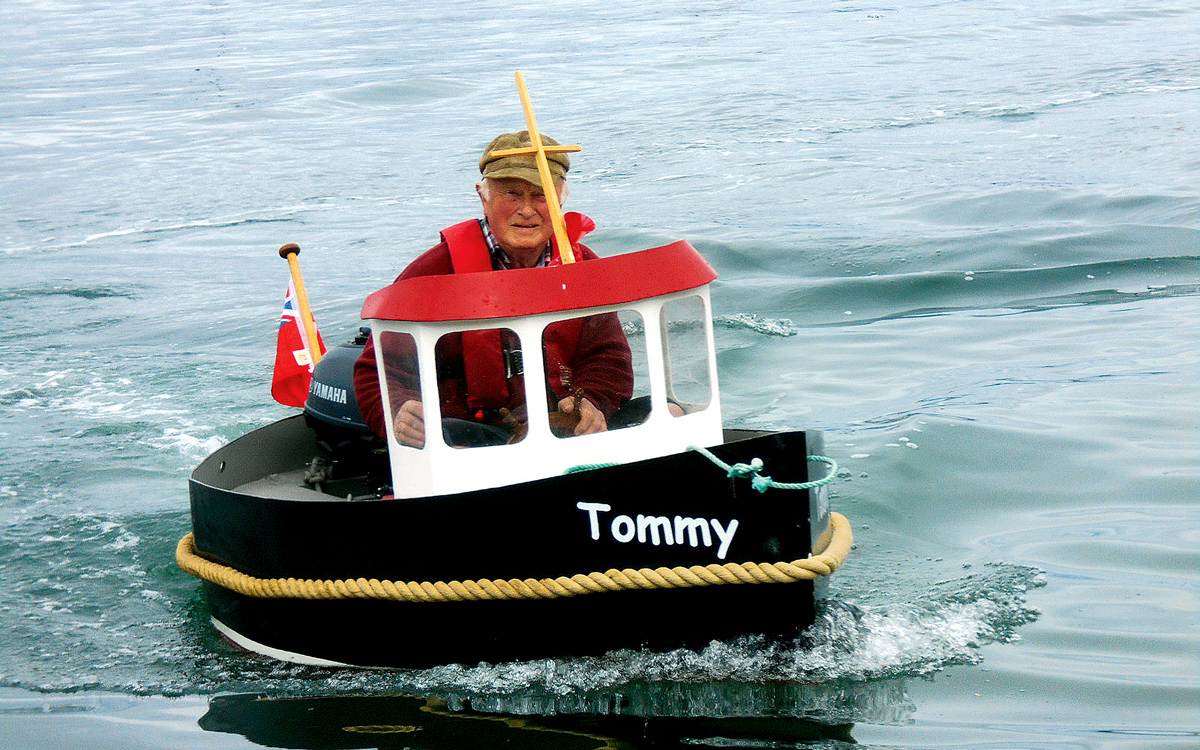
Tommy’s builder Ian Royston at the helm during a trial runabout before the switch from petrol to electric power
Why not subscribe today?
This feature appeared in the October 2021 edition of Practical Boat Owner. For more articles like this, including DIY, money-saving advice, great boat projects, expert tips and ways to improve your boat’s performance, take out a magazine subscription to Britain’s best-selling boating magazine.
Subscribe, or make a gift for someone else, and you’ll always save at least 30% compared to newsstand prices.
See the latest PBO subscription deals on magazinesdirect.com