
PBO’s Secret 20 kit boat now boasts around 250 fillets, and the transom has been fitted. Ben Meakins reports

Last month, I left you with the immortal words: ‘all we have to do is make a couple of hundred fillets and we’ll be able to move on…’
See the full set of articles: Building the Secret 20 kit boat with PBO.
Four weeks later, we’ve used many kilowatt-hours heating our cold garage and have consumed many mugs of tea.
Oh yes, and in the process filleted the whole boat. This involved lying in all sorts of awkward areas and using most of two large tubs of filleting compound and a 5kg pack of WEST SYSTEM epoxy – but at the end of it we had a solid, stiff and shapely boat skeleton.
With so many fillets to make (around 250, at a rough estimate) and the possibility of accidentally moving something and misaligning the whole skeleton, we decided to carry out this massive job in stages, which would allow a bit more control and let us check alignment at every step.
After four days’ solid epoxy work, she’s now ready for the next step – but how did we do it?

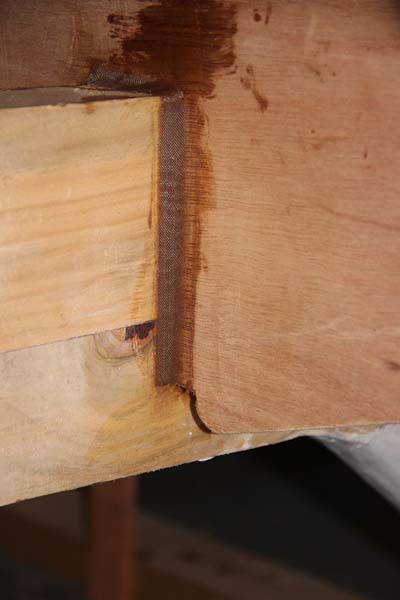
Temporary legs helped true up each frame
Frames to keel
Last month we added legs to each side of every frame, carefully fitting them so that the frames were level side-to-side, upright and fully down into the keel recesses and slots.
One more check with a spirit level and we had reached the ‘sod it and move on’ stage, where you have to learn to stop worrying and accept that your alignments must be right.
So, first up was filleting each frame to the keel.
We did this exactly as described last month, by piping in a fillet of thickened epoxy, smoothing it off, removing the excess and then laying in a length of peel ply over the top.
Once these had cured, the boat was well on the way to being stiff and solid – and the alignment was set.
The first step was to fillet each frame onto the keel
Anchor well
We installed the anchor locker base last month, but now it was time to join the two halves and make the whole thing waterproof – an important job, as if it leaks it will pour water straight onto the feet of whoever happens to be sleeping in the bunk at the time!
We applied a strip of glassfibre tape along the join between the two on top and bottom, making sure it was thoroughly wetted out.
The last job was to peel ply over this, so as to leave a smooth surface and also to feather in the edges of the tape.
With these joints taped, we could then add long fillets to all the areas where the locker floor meets frames, to both strengthen and waterproof the locker.

Fillets join the anchor locker base to frames
Glass tape joins the two halves of the well base, top and bottom
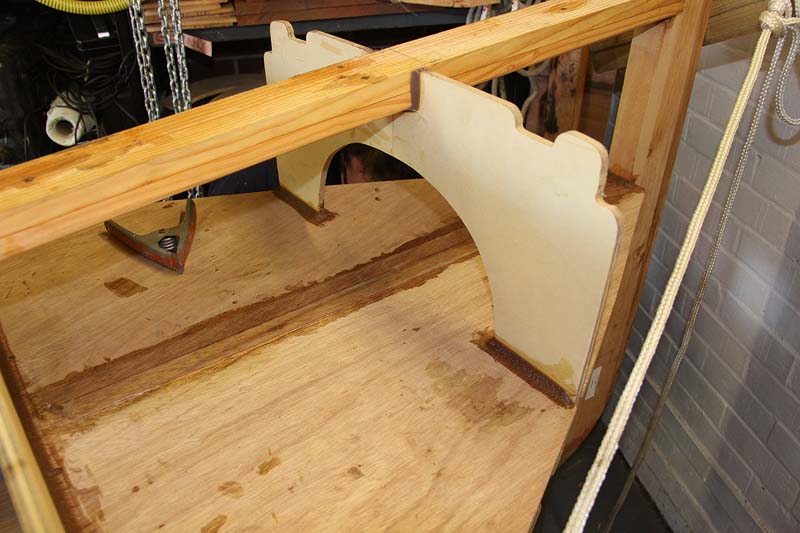
Bunk boards
The bunk boards rest inside the first four frames and slot into the outer edges. We fixed the boards down temporarily with screws, before adding fillets where they met the frames.
They also rest on the fore-and-aft frames, and these also needed filleting. These were the most unpleasant to fillet, and required lying on the cold concrete floor, filleting a joint inches above your face with rapidly-setting epoxy.
Finally, as with the anchor locker, we added glassfibre tape to the bottom of the join between the boards, and will fill the small gap on top with thickened epoxy.

A neat masked fillet at the aft end of the bunk boards
Shelves
A clever feature of the Secret’s design is that every frame has a primary purpose – stiffening and strengthening – and a secondary purpose.
The cabin shelves are no exception. These slot into the frames and provide extra structure and strength, while also providing useful storage when the boat is in commission.
These frames slotted in and were filleted to the frames.
Further aft
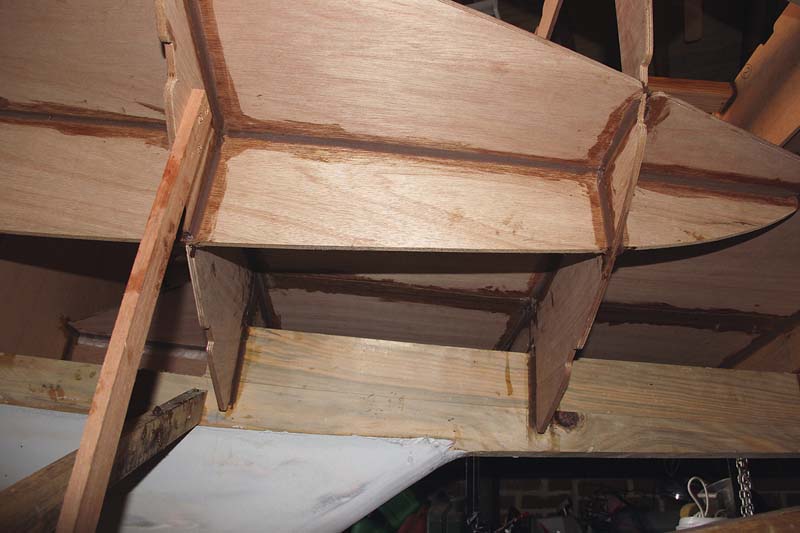
Further aft, the frames slot together with the cockpit sides and the cockpit seats to form a rigid skeleton.
Once again, these needed filleting together. As these fillets were longer than the others, we soon found that masking the filleting area made for a much neater fillet.
It took a bit more time, but it looked much better and should save on sanding time.
In each ‘cave’ formed by the gap between frames there were five individual long fillets, so this part of the job took a long time, and took its toll on knees and backs – while the tea (and biscuit) intake rocketed in direct correlation with the number of fillets to be made!
Eventually, however, we reached the transom.

We needed to fillet wherever two frames met: here you can see the peel ply smoothing off the frame to cockpit side fillets

Masking each area to be filleted made them neater

Inside each ‘cave’ between frames were five long fillets
Building the transom
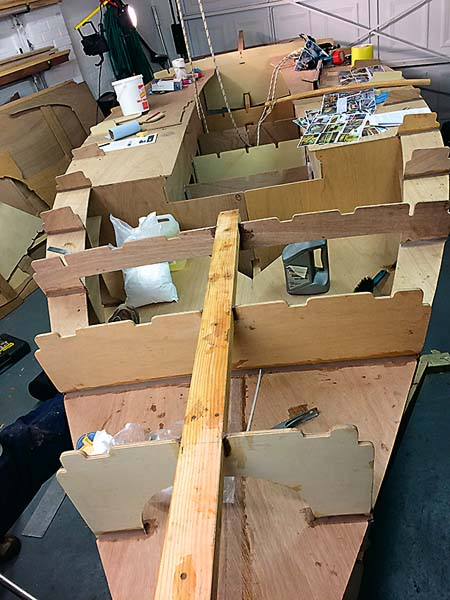
With everything forward of the aft end of the cockpit filleted, we could move on to something else.
OK, so fitting the transom and its supporting structure involved more fillets, but at least there was also some woodwork involved!
The Secret has a long counter stern, the shape of which is set by the raked sternpost.
We fitted this towards the start of the project (see PBO October 2016), but the time had now come to add the supporting structure.
This consists of a plywood ‘stern quarter’, which sets the angle of the sternpost and adds some strength to it.
Next up is a plywood ‘wing’, which slots into the sternpost and sets the curve. This tabs onto the back ends of the cockpit seat frames, which protrude through frame 10 and terminate on the wing.

A plywood panel fixes the angle of the sternpost

The transom, dry-fitted to the support structure

We edge-glued the parts together temporarily with quick-setting…

…5-minute epoxy to hold them until the epoxy and glass tape set
Cross-halving joint
Finally, a laminated beam is attached with a cross-halving joint. This provides most of the strength to the structure, and sets the curve of the transom.
However, before the plywood transom could be attached, we needed to epoxy and glassfibre the structure together to create something strong enough to bend, shape and support the transom.
We’d had to remove the lower parts of the panel which forms the cockpit sides to pass it through a slot in the final frame, so the first step was to reattach these.
This we did temporarily with West’s G5 Five-Minute Epoxy, which once set would hold them in place long enough to fillet them in properly.
The extensions to the cockpit seats attached to the ‘wing’ with glass tape and epoxy, while the fore-and-aft ‘stern quarter’ fitted into a slot in the sternpost and keel.
A timber batten then slots on top of this, and everything is secured with epoxy fillets.
A few days later, the structure had cured and was as solid as it ever would be. That meant it was time to fit the transom itself.
This was particularly important to get right, being a perfect opportunity to induce some unwanted twist in the hull shape.
A centreline was marked on the transom and we carefully aligned this with the sternpost, fixing it temporarily with screws and clamps to ensure it was lined up properly.
With the central spine secured, we carefully used screws and clamps to pull in the panel to fit the curve of the laminated beam.
But try as we might, we couldn’t get the top edges to pull in: some lateral thinking was needed.
We settled on using an old spinnaker sheet taken to a hole in an overhead joist to pull in the corners of the transom, and a frapping tightened up the line to pull in the top edges successfully.

We added epoxy fillets to both sides of the supports

We used a line taken to the rafters to persuade the transom to bend
Gluing on the transom
With the transom duly supported, we could epoxy it on – which meant more fillets.
While these would probably be strong enough on their own, we realised that the plywood wing was a little vulnerable, so we opted to add some glass tape to the top of the fillet to give it some extra strength and durability.
And with that, we have the boat’s shape. She only just fits in the garage – with the transom on, there is around 3in clearance with the door shut – but her lines are beginning to show themselves.
The build is moving on at an exciting pace!

Transom fitted and glued on, ready for the next step

Transom structure and beam glued up and ready
What’s next?
With the transom fitted and the boat filleted together, what happens now?
We have a few hatches to fit while we can still access the inside easily, but with those done, progress should be made on really setting the boat’s shape – installing stringers.
These laminated timbers set the boat’s sheerline and will support the plywood hull panels. Watch this space!
As published in the January 2017 issue of Practical Boat Owner magazine.