
Bruno Brown isn’t fazed by what seems a daunting task
Where does it start? An impact against a moored heavy steel vessel? A bent shaft caused by the metal handle of a bucket getting caught round the boat propeller during MOB drills?
Loose engine-supporting nuts on the engine mounts? Or perhaps one of the occasional dings and scrapes suffered by my Jeanneau Voyagè 12.5 Cascadeur in use as a school boat?
When I bought Cascadeur in 2011, it was for the express purpose of using her as a sail training vessel, initially with my own school, but later with a well-known Southampton-based sailing academy.
Now, as a recently retired cruising instructor, I know that for students to learn they have to be allowed to make some mistakes.
The instructor’s job is to see the adverse situation developing, and then to intercede just after the student realises their error, but before serious harm happens.
Not always an easy task, and sometimes the take-over is post, rather than prior to, the impact!
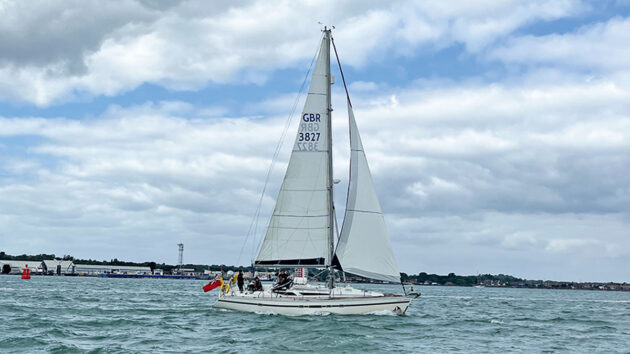
Bruno Brown’s Jeanneau Voyage 12.5 Cascadeur, Credit: Bruno Brown
So thorough regular inspections of the boat are very necessary!
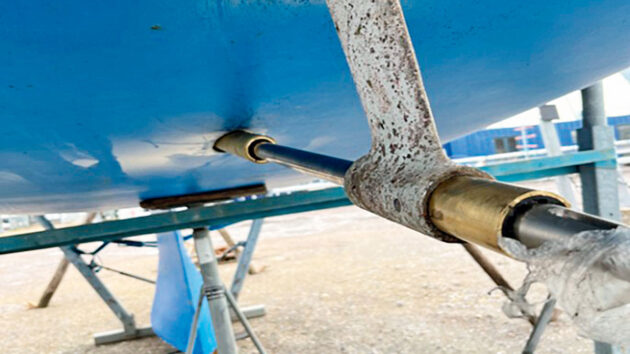
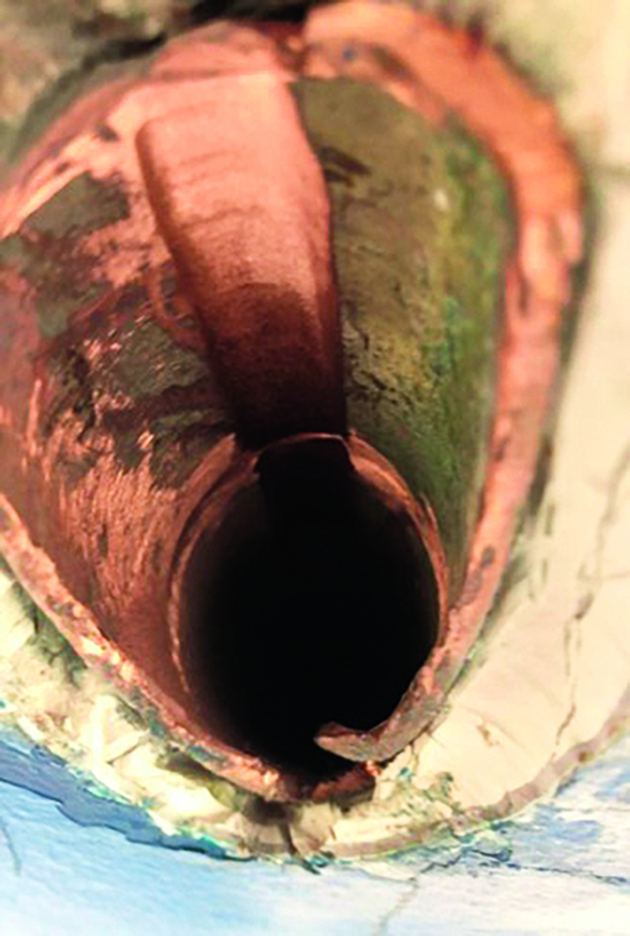
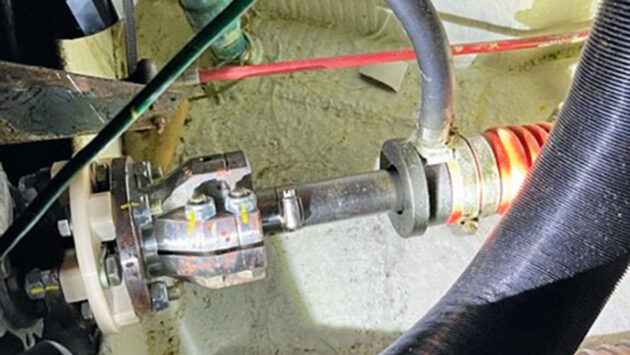
Noticing a drip from Cassie’s stern gland, as soon as she was lifted for annual inspection and service I removed the shaft seal bellows.
What I found was the engine had clearly shifted to port at some point, most probably due to two of the engine mount height-adjuster nuts working loose, and had happily ground away part of the side of the stern tube!
Hence the leak.
What was also immediately obvious was that dezincification had got to the point that the tube needed replacing anyway.
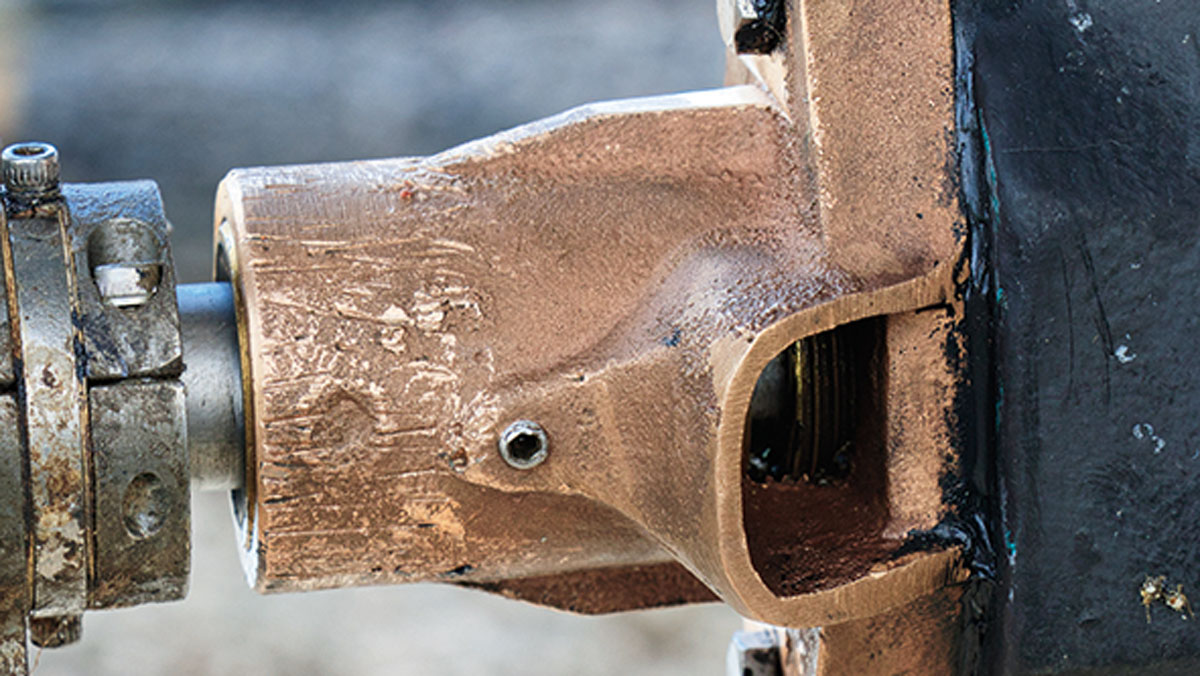
Original stern tube worn away on one side. Credit: Bruno Brown
My surveyor had condemned the original through-hull fittings and seacocks a year earlier, leading to their total replacement, so this was no great surprise.
How to go about the job? Obviously, it was going to involve a new shaft, cutless bearing, R&D coupling and engine mounts as well as the stern tube itself.
So having checked with my surveyor that he was happy with a composite tube, I ordered most of the stuff from the very helpful staff at T Norris.
The stern tube on the Voyage is not actually that long, about 40cm in total, but to get the old tube out I tried various ever-increasingly brutal methods until I found one that worked for me.
I used my Dremel with a cut-off wheel to cut the tube internally into two lengths.
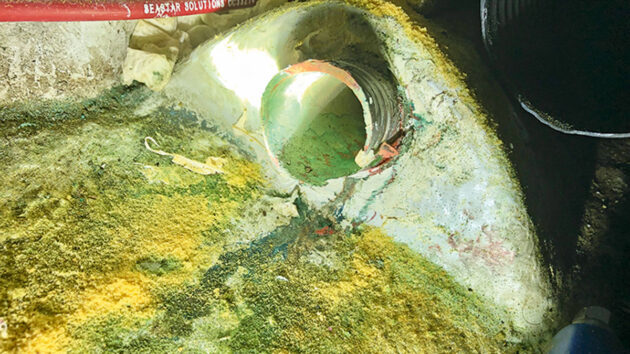
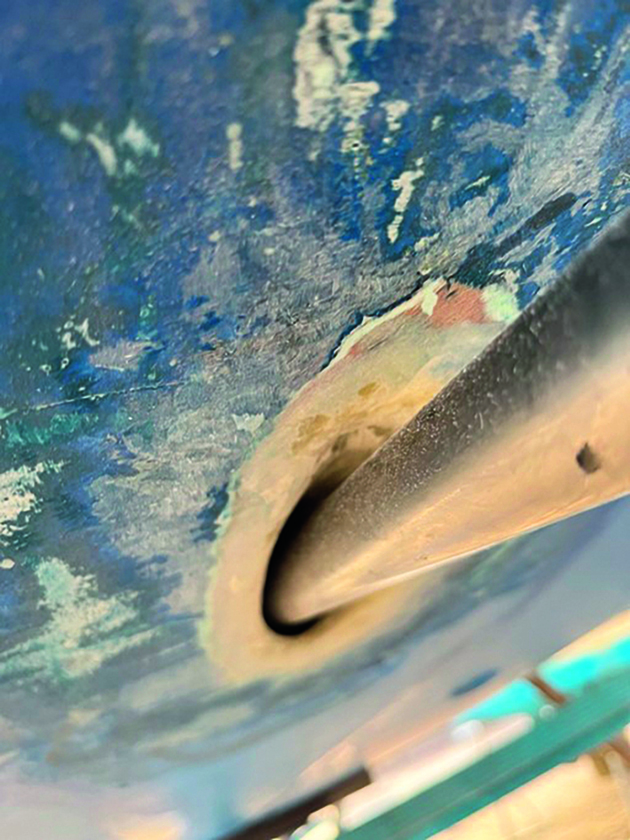
Ground away aft end of the stern tube – note pink tinge of dezincified metal. Credit: Bruno Brown
I then found that I could power-file a groove through the now-sectioned wall of the tube, such that I could collapse it inwards to free it up.
During the process, I power-filed the filler off the outboard end of the tube.
Having finally got the remains of the tube out, I then was faced with the task of cleaning up the hole.
I used a 60mm flapper wheel on my battery drill to great effect, using the long mandrel from a hole-saw kit to reach right into the tube (the shaft of the flapper wheel was exactly the same size as the pilot drill in the hole-cutter set! How lucky is that?).
Groove filed in tube wall so it can be collapsed inwards. Credit: Bruno Brown
I had a Henry vacuum cleaner running inside the boat throughout this phase of the job to minimise dust.
That left me with a nice, clean hole into which I could start rebuilding the whole thing.
I started with the engine mounts, swapping them one at a time and approximating the height of each new one based on the original mount dimensions.
I supported each corner of the engine with a scissor jack while swapping the mounts.
I’d made sure before ordering the mounts that the securing holes of the new ones were the same as the originals.
The stern tube cut off, filled and faired with the hull. Credit: Bruno Brown
Changing the mounts was a relatively easy task, but it took a bit of ingenuity in holding the mounting-bolt retaining nuts; long-reach locking pliers proved ideal.
I then fitted the R&D clamp and split shaft couplings, and set about aligning everything with the new shaft and cutless bearing.
Fortunately, short sections of the old cutless bearing would just fit inside each end of the bore of the new stern tube, so I had a nicely centred shaft and stern tube acting effectively as one unit to centre between the new cutless bearing in the P-bracket and the bore of the split coupling on the gearbox end.
I then spent a happy day tweaking the engine mount adjusters to get a beautiful sliding fit of the prop shaft into the gearbox split coupling together with no load on the cutless bearing.
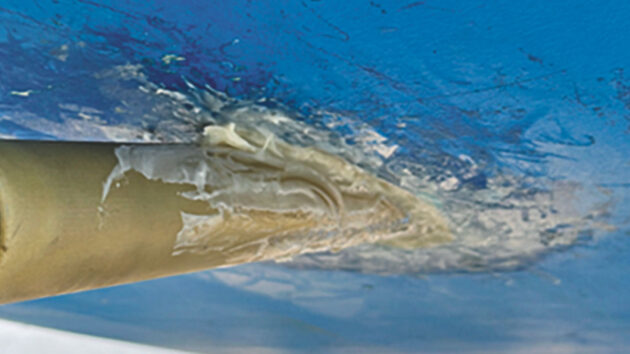
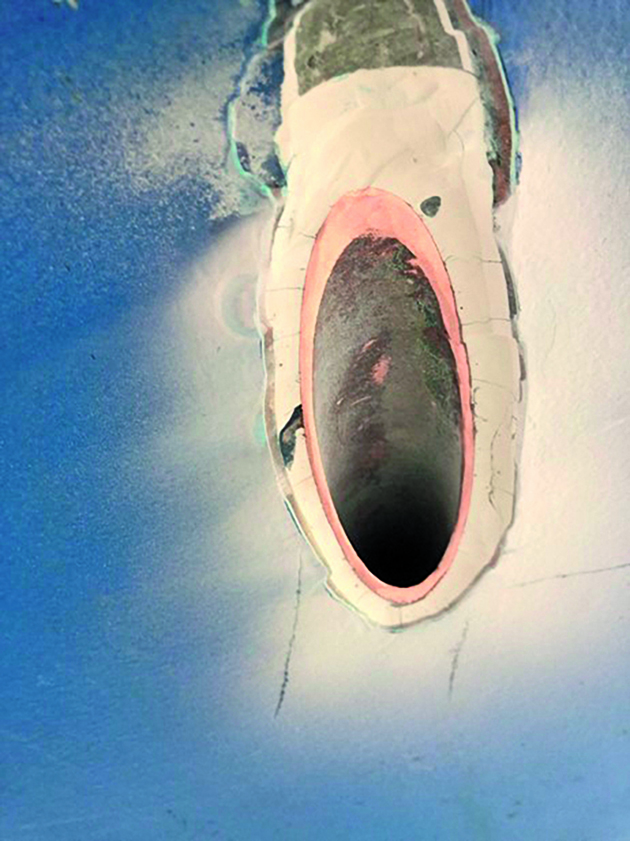
Outboard end view of the stern tube glued in. Credit: Bruno Brown
Time then to look at glueing in the stern tube.
I had on average about 3mm clearance between the outside diameter of the new stern tube and the aperture in the boat.
What I needed was a wonder filler to secure the tube into the aperture.
Initially, I was worried that I might get some voids during this process, but I asked a professional who put my mind at rest with the advice that “The middle isn’t that important, just make sure it’s a good job at each end!”
I satisfied myself that I could use epoxy so my jollop of choice was West’s Six10 thickened self-mixing epoxy in a tube that fits a standard cartridge gun.
I have to say that this is brilliant stuff – just squirt it in! I taped up the inboard end of the tube to protect it while I thoroughly packed the gap with the Six10 from the outboard end.
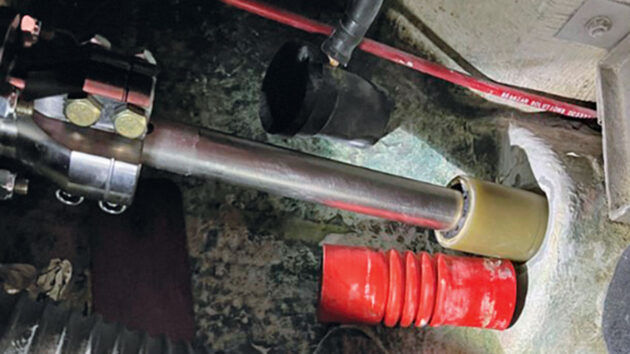
Test fit showing everything fits at the inboard end. Credit: Bruno Brown
I then packed and filleted the inboard end using the Six10 that had extruded through.
When this stage had cured, I cut off the extraneous external bit of stern tube to replicate the shape of the original, then feathered back the inside of the tube and the adjacent original GRP on the hull to allow me to completely cover the external end of the tube with several layers of very fine glass cloth using West resin, extending to 30mm or so onto the feathered original hull GRP surface.
With the new resin washed and abraded, a spot of filling and fairing followed by several coats of epoxy primer finished the job ready for the antifouling. I could now do final alignment checks before the final fit.
Once back in the water, I did the feeler gauge check on the R&D coupling as per the instructions. I found no need for any further adjustment.
Job done and everything back together inside. Credit: Bruno Brown
Replacing a stern tube is one of those tasks that I think strikes fear into most of us and while this started out looking like a very daunting task, taking it one step at a time meant the job turned out to be surprisingly easy!
The necessary skills needed are just some experience working with resins and glass cloth, and an awareness of dust hazards, but that’s about it.
In terms of equipment, I didn’t find the need for anything particularly special other than the items mentioned in the article and masks etc for good dust protection.
In terms of time, it took me about three weeks overall including weighing-up time, awaiting spares… and Christmas!

Boat propeller: How to choose the right one for your boat
The correct prop can have a dramatic effect on your boat's performance. Ali Wood learns how you can save fuel,…
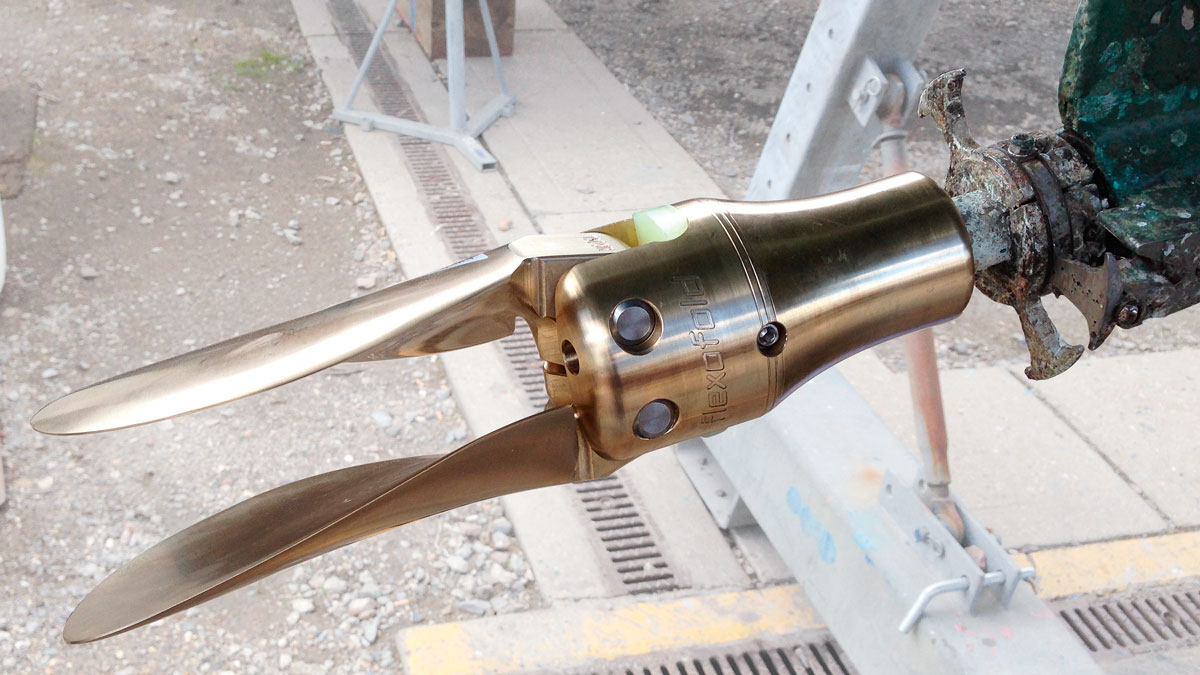
How to fit a folding propeller
Mark Ryan shares how he removed the old propeller on his Albin Ballad and replaced it with a two-bladed Flexofold…

Will my old propeller work with a new engine?
Jerry Armitage is planning to replace his boat engine, but will the old propeller work? PBO expert Tony Davies has…
Casting a cutless bearing housing
Don Fitzroy Smith turns to the experts when an obsolete fitting can’t be found

DIY cutless bearing extractor
Graham Swetman makes his own heavy-duty bearing extractor
Want to read more practical articles?

A subscription to Practical Boat Owner magazine costs around 40% less than the cover price.
Print and digital editions are available through Magazines Direct – where you can also find the latest deals.
PBO is packed with information to help you get the most from boat ownership – whether sail or power.
-
-
-
- Take your DIY skills to the next level with trusted advice on boat maintenance and repairs
- Impartial in-depth gear reviews
- Practical cruising tips for making the most of your time afloat
-
-
Follow us on Facebook, Instagram, TikTok and Twitter