
Richard Rogers explains how to insulate the hull of a small yacht for high latitudes sailing to cold, remote and beautiful places

After rebuilding our Morgan Giles 30, Aurora, Alice and I plan to sail northwards or out-of-season from our base in north-west Scotland.
It’ll be cold, and from talking to others we know that sailing in the cold in an uninsulated boat is miserable.
Condensation can wreck expensive equipment. Then there’s the unhealthy mould spores to live with and the smell of damp which, when it gets in your clothes, drains your morale.
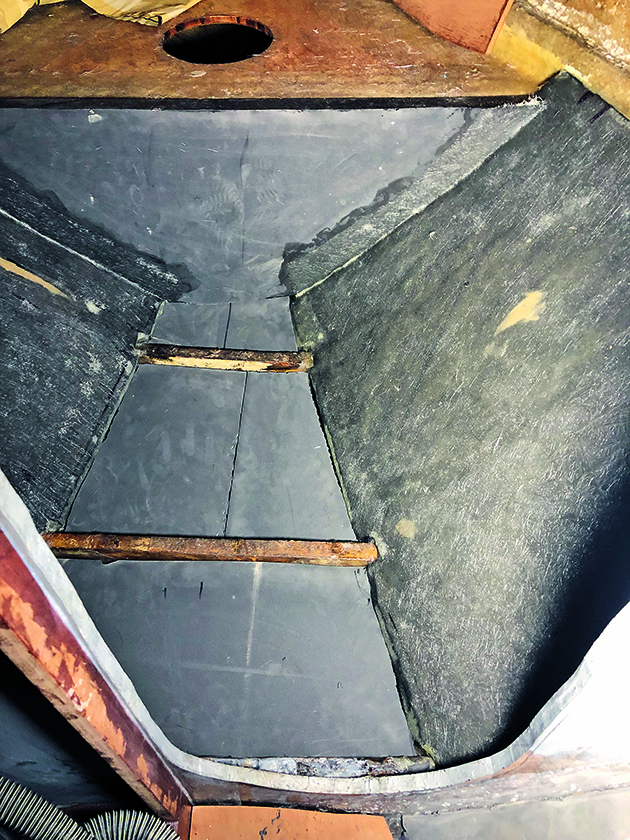
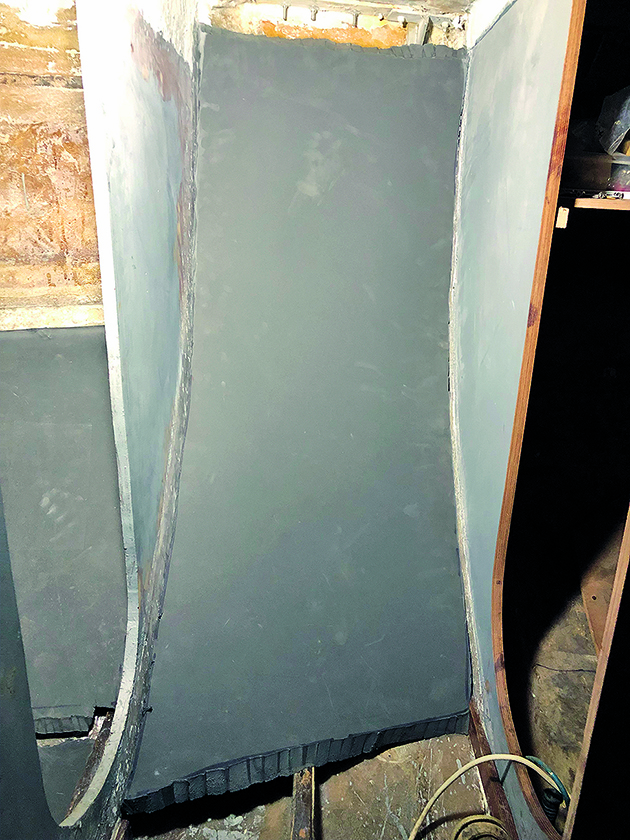
Here’s the lower half of the forward cabin showing the insulation fitted and glassed over on the hull sides, and fitted waiting for a floor and glass over the top. Credit: Richard Rogers
Nobody can live well if their breath condenses and drips back on them day after day.
Aurora was built in about 1970 from a single skin of fibreglass. There are no extra layers in the form of a sandwich of foam or balsa wood.
So, right from the outset of the project, we’d known that insulating the hull was one of the must-dos of the rebuild.
Making sense of the advice on hull insulation
The trouble was, how to do it? Looking online there are so many ways insulation has been done.
Some have used solid insulation such as Kingspan. That seems OK for flat surfaces but it’s not flexible enough to fit the curves of a hull.
Others have used spray foam but we thought it would be difficult to get a uniform thickness.
On flat surfaces, like the walls of a narrowboat, it might work fine, but Aurora is a very curvy boat, which would make trimming uneven foam a very long and difficult job.
Sheets of closed-cell foam sounded more promising. Even relatively thick sheets seemed flexible enough.
The bulkheads in and the hull clean, ready for insulation. Credit: Richard Rogers
We’d heard of people using the interlocking sheets that gyms use for flooring.
We chose a low-density polyethylene foam called Plastazote, as fitted by Roger D Taylor in his small Arctic yachts, which may well be the same material.
Our concerns about what happens if insulation catches fire were allayed by our surveyor.
‘If your boat is that much alight,’ he said, ‘you’ll be rowing away quickly in your liferaft. Don’t worry too much about it.’
Indeed, there’s only so much you can do about risk. Next, we had to work out how to cut the sheets to the right size and shape.
Fortunately, we’d started with an empty boat hull. Then we’d made and glassed-in all the bulkheads and other pieces of ply that needed fixing to the hull.
The spaces in between were well defined and accessible, with no plumbing or wiring yet to get in the way.
About 16 pieces of insulation would do the whole job. Again, there were plenty of ideas to be found online.
Someone recommended cutting the sheets slightly smaller than they needed to be, and then filling the gaps around the edge with spray foam.
But when it came to it, we were pleasantly surprised at how accurately the foam could be cut, and how snugly it would push into tight spaces.
Once cut, fixing the sheets to the hull was to be a two-stage process. First, we’d glue them on, then glass over them.
Continues below…
Cutting foam accurately
Cutting the foam roughly to shape then refining it wasn’t effective. It wasn’t accurate enough and took too long.
Making patterns out of brown paper is the way to do it. They can be made to a tolerance of 3-4mm.
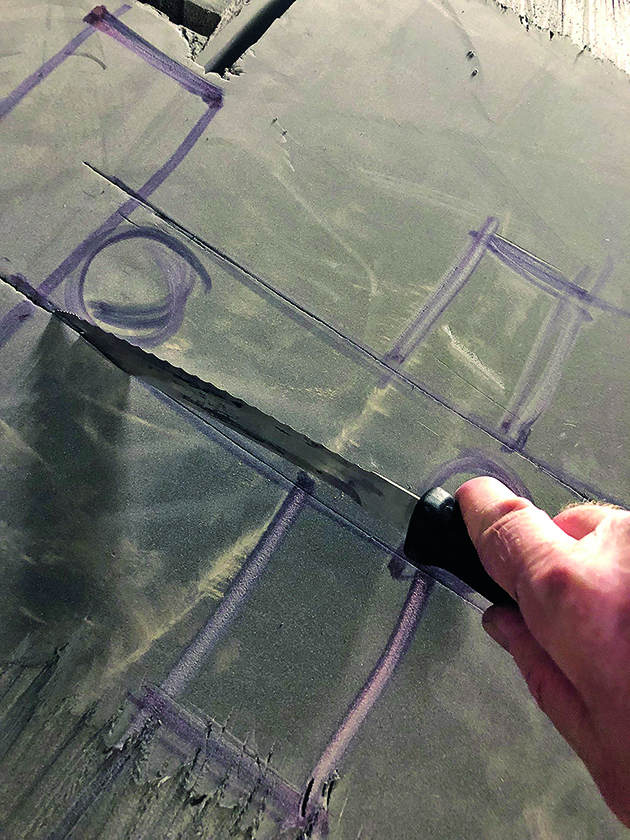
The outline of the pattern is transferred to the foam using a marker pen and the foam then cut out. The foam is thick enough for the bevel of its edge to matter.
After a little practice a good enough angle can be cut by eye, though it takes a little mental agility to imagine the correct angle when you have a large and complex piece of foam in your hands.
I got it wrong a couple of times, but can live with the results.
We also cut away the back of the foam in places so that it would fit flat over whatever was under it, for example where the edge comes up against thick layers of fibreglass at large bulkheads.
Our chain plates are fixed to the hull and glassed over, so the foam was cut away at the back to accommodate them too.
At the top and bottom of each sheet, where the sheet meets the hull and not a bulkhead, we cut a bevel edge so that wet glass would lie easily over it without forming an air bubble underneath.
A bread knife with fine teeth turned out to be the cutting tool of choice. Short strokes produced a more even edge.
Gluing and glassing
We glued the foam to the hull using an ordinary ‘grab’-type builder’s glue.
To hold the sheets in place while the glue dried, we used a pair of ceiling props and some scraps of ply to spread the load.
It was awkward to get everything in the right place, but once arranged the method worked very well. Glassing was the usual chore!
It’s not my favourite job, especially as the workshop needs to be warm, and a claustrophobic respirator and large noisy fan are musts.
We were dealing with large areas of glass and a lot of fumes.
In most places we used just one sheet of 450g CSM fibreglass over the top of the foam sheets.
Most of the insulation is behind furniture, so it won’t be under stress and one sheet of glass should be enough to hold it in place.
Where the foam takes a load, say near the edges of floors where people will tread on it, or under luggage and equipment, we used an extra one or two layers of glass depending on how vulnerable to loading we thought it would be.
Through-hulls should be straightforward to fit through the foam. The foam cuts well enough with a hole saw if you drill slowly.
A hole large enough to accommodate a disc of ply will need to be cut for each.
Through-hulls must be fitted to something solid and not tightened against something squashable like foam – you’re asking for a serious leak if you do.
The results
Closed-cell foam sheet wasn’t the cheapest material we could have used.
We got through 12 large sheets of it, at 33kg/m3 density and 30mm thick, costing about £75 each.
Glassing over it was a big job costing another £300 in fibreglass and polyester resin.
But cutting and fitting the foam was much faster and more accurate than we thought it would be.
And we were surprised at how well the glass stuck to it. The finish is very satisfactory and should take a coat of paint nicely.
And, of course, we should be free of condensation when we finally get Aurora in the water!
Hull insulation: Templating, cutting and gluing foam insulation

1. A locker space sanded, vacuumed and wiped down with acetone to ensure it is free of dirt, dust and grease before insulation is laid.
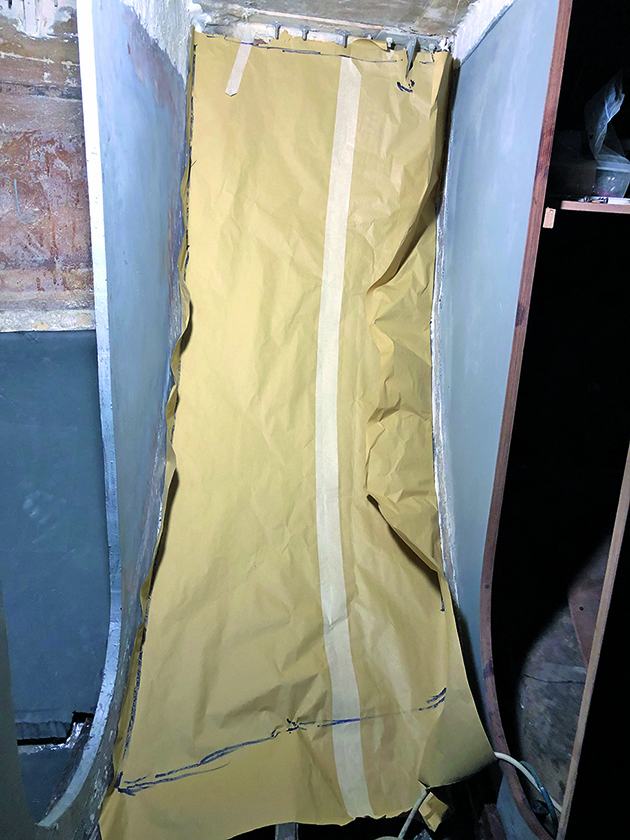
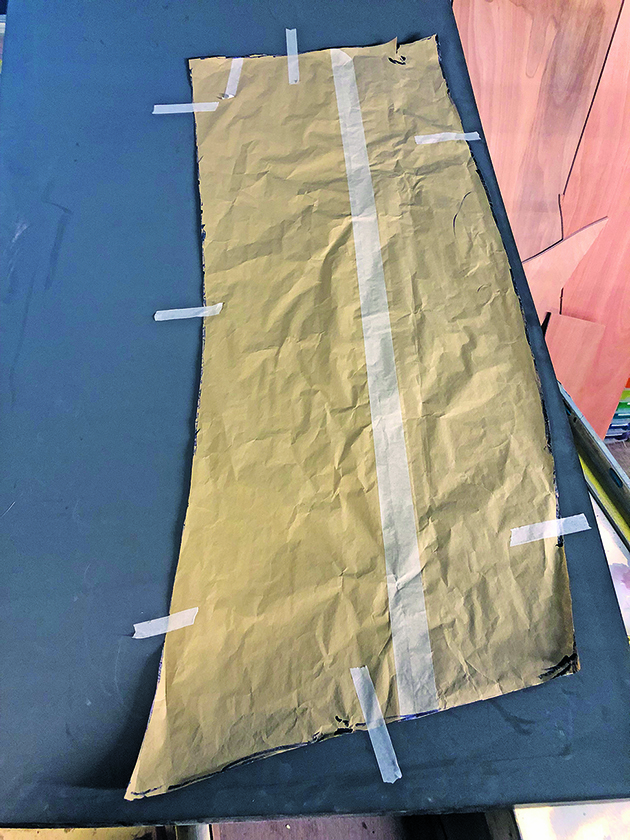
2. Making a brown paper pattern. The pattern is pushed into place and taped to the hull at the top to stop it slipping down.
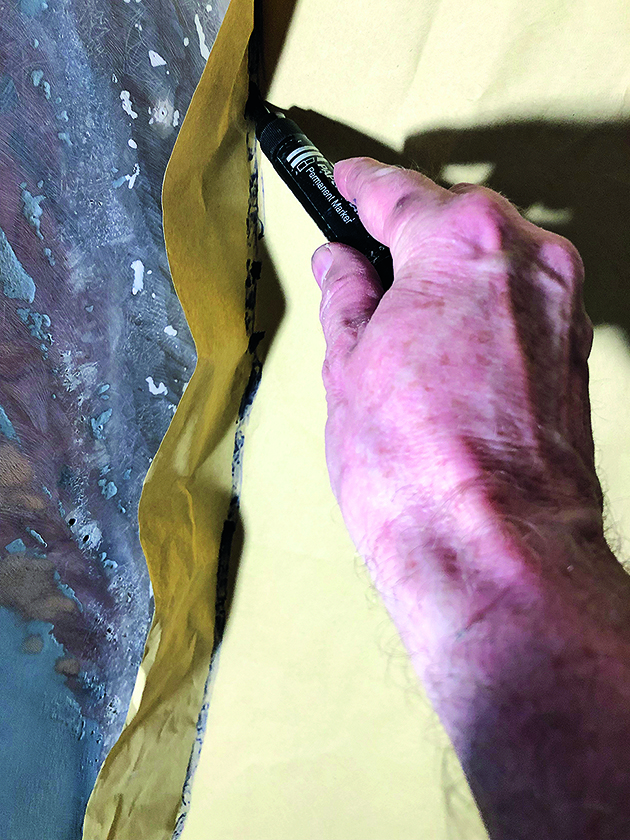
3. The edge of the pattern is then marked accurately by running a marker pen down the crease, ensuring the paper doesn’t move in the process.
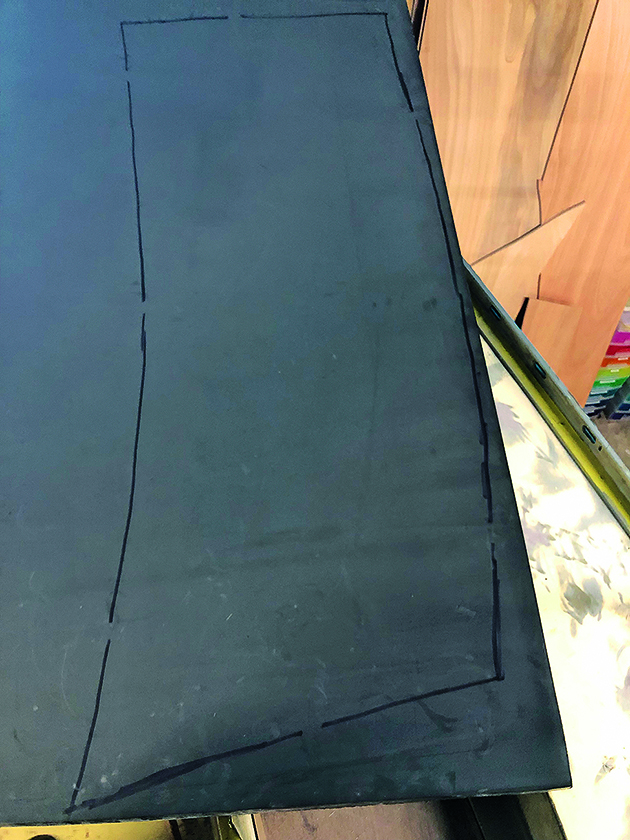
4. The paper pattern can then be cut to your drawn lines before being taped to the foam sheet and drawn round with a marker pen.
5. Foam marked up ready for cutting out. The edges should be bevelled to get the best possible fit against the neighbouring bulkheads.
6. Test fitting the foam. The open top and bottom edges should be bevelled too so the fibreglass can lie more easily over them.
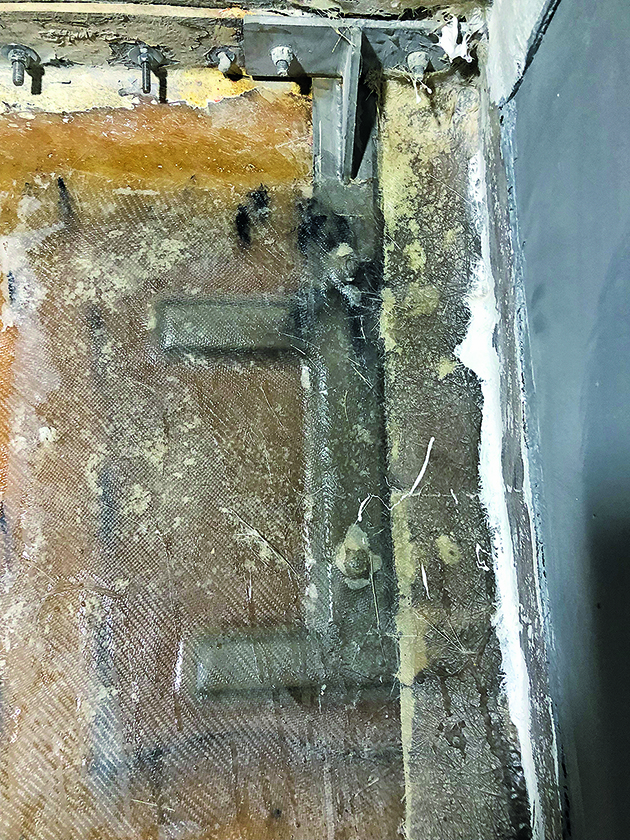
7. Raised surfaces under the insulation. The back of the insulation must be cut out here, otherwise it won’t sit flat against the hull.
8. Areas to be hollowed out are marked up on the front first, then transferred to the back. I did this by eye, but the paper template could be used.
9. First cut part-way through the foam at the edges of the area to be removed. Next, carefully cut back the foam in layers to the depth required.
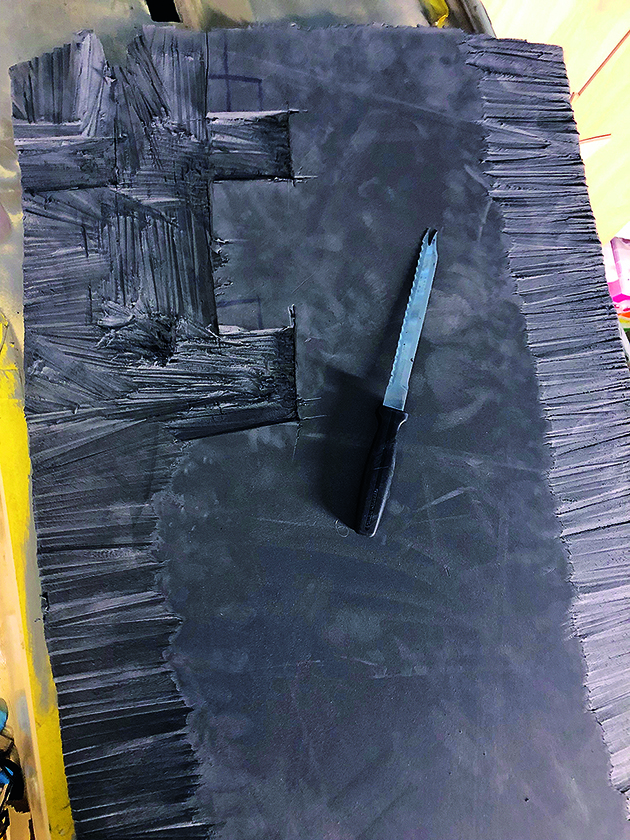
10. Take care not to hollow out any deeper than necessary. When excavations are complete, the foam sheet is ready for fitting.
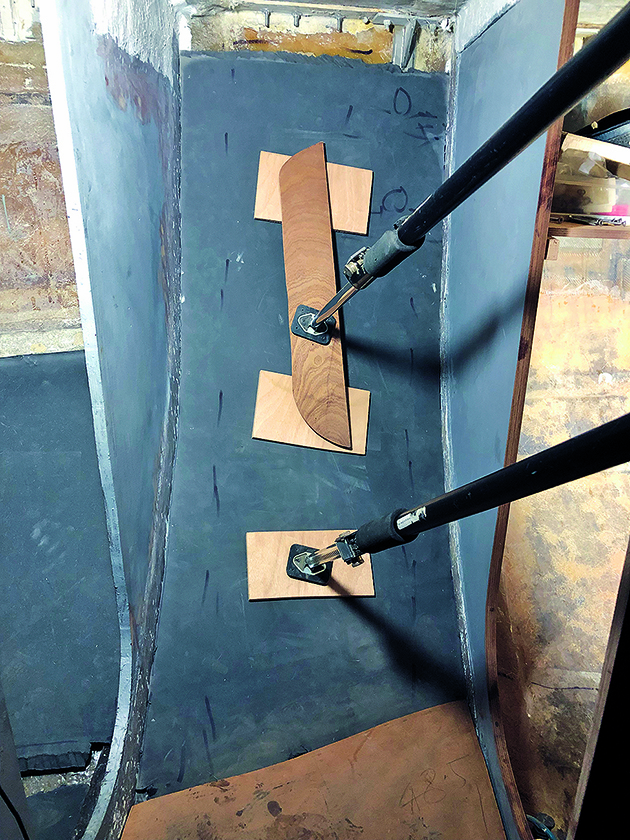
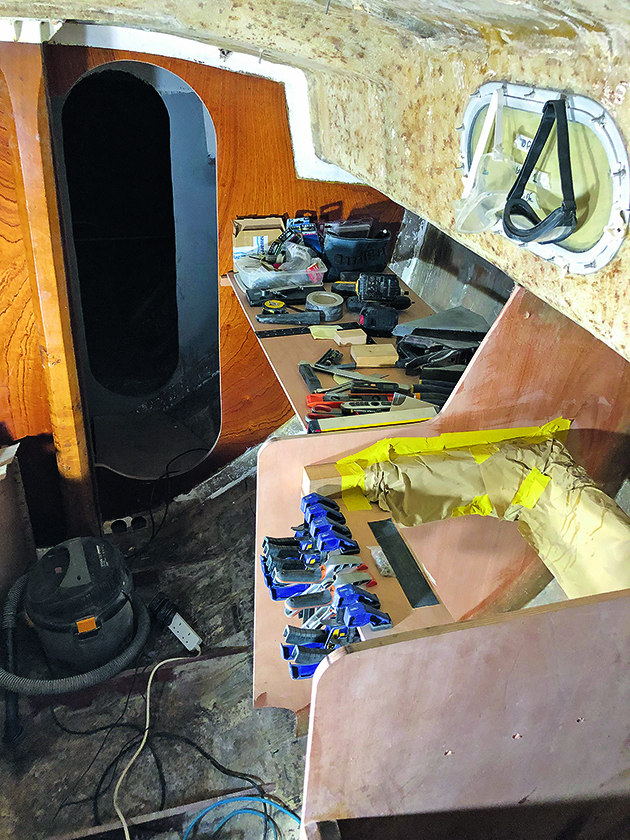
11. The foam can now be glued in place. Ceiling props hold it in place and scraps of ply help spread the load while the glue dries.
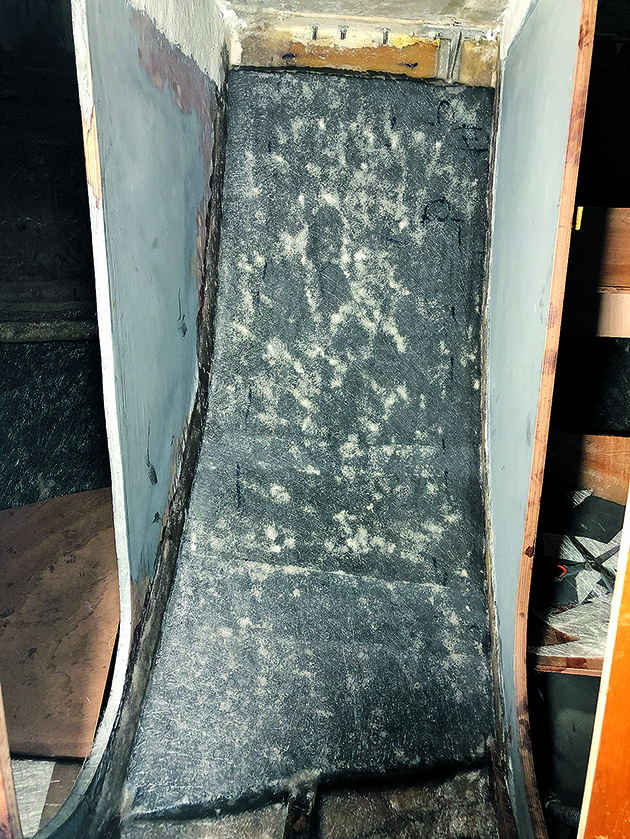
12. The foam is glassed over with one sheet of fibreglass, except for the traffic area at the bottom where two extra layers of glass have been added.
Enjoyed reading Hull insulation: a DIY guide?

A subscription to Practical Boat Owner magazine costs around 40% less than the cover price.
Print and digital editions are available through Magazines Direct – where you can also find the latest deals.
PBO is packed with information to help you get the most from boat ownership – whether sail or power.
-
-
-
- Take your DIY skills to the next level with trusted advice on boat maintenance and repairs
- Impartial in-depth gear reviews
- Practical cruising tips for making the most of your time afloat
-
-