
How does a boat bow thruster work? Mike Attree explains, and shares how he repaired this handy bit of kit on his own yacht
Recently, we were in a tricky berthing situation, but when I operated the bow thruster controls, to my surprise it didn’t work, writes Mike Attree.
Once the initial shock had passed, I managed to recall the traditional methods of using wind, current and prop-kick to manoeuvre, and we got in safely.
I appreciate that you shouldn’t depend on a bow thruster, but I expected it to work, and when it didn’t, it took time to reset my thinking. Normally, I try to use the bow thruster as little as possible, but I’d be the first to admit that this nice-to-have luxury has got us out of trouble on more than one occasion. Fixing it was definitely on the high-priority to-do list.
Fault diagnosis
Safely in the berth, I discovered that when I operated the thruster controls, not only was the motor not running, but there were no clicks from the thruster relay, despite 3A of current being drawn with each press. This suggested the control box was working, but most likely the bow thruster relay was faulty; and sure enough, after a few tests, I found that a broken relay had indeed caused our bow-thruster failure.
I’m reasonably familiar with fault-finding on troublesome boat electrics, but for those not quite so sure how to go about it, here’s how to diagnose faulty bow thruster electrics.
- If a thruster doesn’t run, first check that its propeller isn’t choked by weed, plastic bags etc, or it hasn’t shut down due to overheating.
- Clear any blockages, and if it’s hot, give it time to cool down and reset itself.
- See whether any breakers or fuses have tripped, and check for loose cables or connectors.
- Confirm that 12/24V is reaching the thruster, and if all is good so far, continue your checks as per the table below.

Bow thruster relay
In order to repair the relay, I needed to remove the bow-thruster motor assembly from the boat, and according to the manufacturer, this can be done with the boat in the water (check with the manufacturer first).
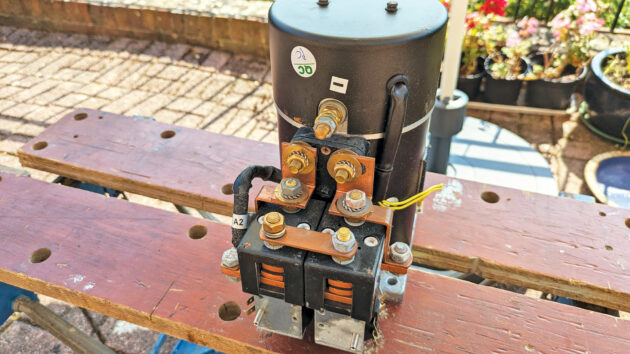
Before removing the motor, make sure everything is depowered and that all cables are disconnected; bear in mind that bow thruster motors are heavy (ours weighs 13kg), so take care when lifting it out. Once the motor assembly is on the bench, separating the relay from the motor is straightforward.
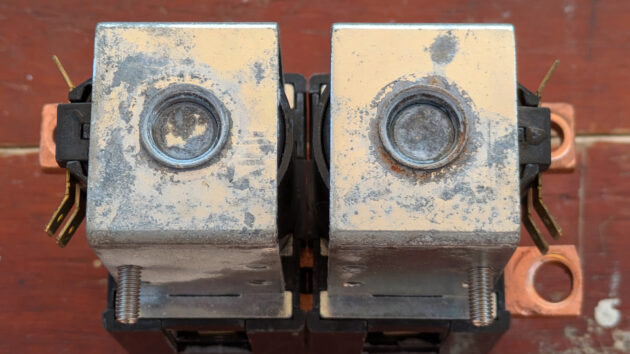
On examining the relay, I found that although I could move its contacts, the relay’s solenoids were stuck fast; and after removing their dust caps, it was clear that corrosion was the cause. A light tap on the end of the solenoids’ central metal rods set them free, and I had a working relay; but as the relay had been in use for several years, it seemed prudent to give it a general overhaul.

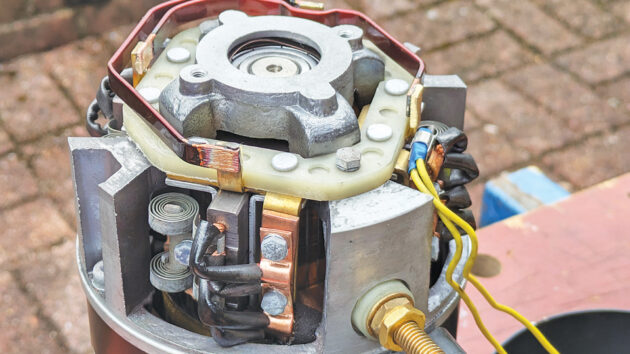
The boat bow thruster relay assembly separated from the motor ready to be taken apart. Photo: Mike Attree.
At this point, I considered buying a brand new relay (which no doubt is what a boat electrician would do), but unfortunately, they are an expensive spare part – around £500 from the bow thruster manufacturer. However, it’s worth knowing that thruster manufacturers don’t normally make their own relays (in fact, the maker’s label was still stuck to ours), and it’s often cheaper to buy a replacement relay from the original maker.
Another approach is to replace only the worn or broken parts (such as contacts, springs etc.), and of course, this is much cheaper than buying a complete relay.
But since this is Practical Boat Owner, and assuming you are reasonably confident working with boat electrics, it’s not difficult to overhaul the relay yourself. Doing it yourself saves quite a bit of money, avoids sending the relay to landfill and, as with many DIY projects, increases your range of skills and knowledge.
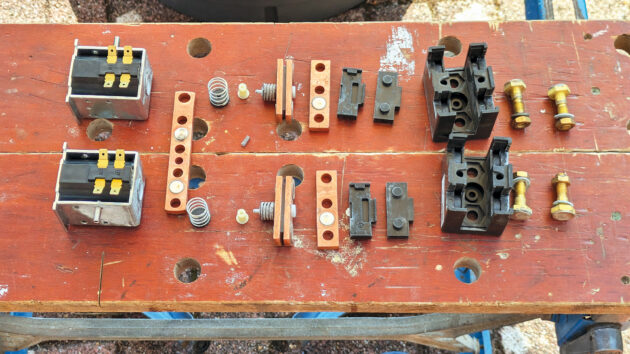
Mike ended up dismantling the relay to diagnose the problem. Photo: Mike Attree.
Cleaning
The relay must be dismantled for cleaning, and since there are a lot of small parts to get back in the right place, it’s a good idea to take plenty of photos as you take it apart. Once the relay is in pieces, check its contacts for wear, pitting and corrosion.
Contacts are normally made of silver-alloy plated copper, and can be cleaned with fine 1,600-grit sandpaper; a good way to do this is to put the sandpaper on a flat surface and gently rub the contact over it in small circles, taking care not to sand through the silver plating. Contacts should end up with a bright, smooth finish, but if they remain badly pitted (or you break through the silver plating), they’ll need replacing.
Copper busbars, washers etc. can be cleaned in a similar way, but this time with coarser 600-grit sandpaper, as there’s no vulnerable silver plating to damage; make sure that all joints are clean and bright before reassembly. I used water and an old toothbrush to remove corrosion from the solenoids, and then gave their rods a spray with WD40 to inhibit corrosion.
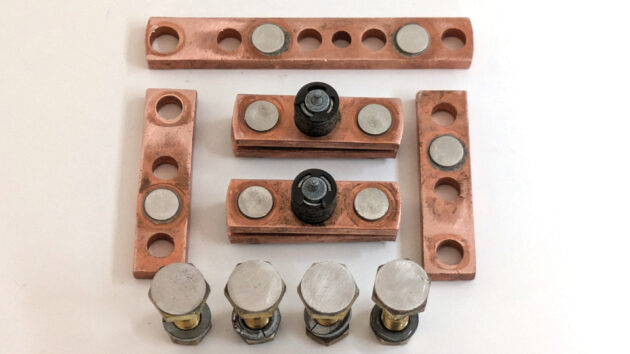
Mike cleaned all of the contacts in the relay using fine-grit sandpaper. Photo: Mike Attree.
Reassembly and test
The photos taken during dismantling will prove invaluable during reassembly, as will any assembly drawings downloaded from the internet. Dielectric grease can be used on electrical joints, but I prefer not to use so-called ‘conductive pastes’, as these introduce another metal into the joint; and despite the name, they don’t actually conduct electricity anyway.
After reassembling the relay, test it by applying 12/24V to its coils, checking for the reassuring clicks from the contacts.
At the same time, test the relay for correct make-and-break continuity. Note that this type of relay is designed to work in a particular orientation, so make sure to test it the right way up. Next, turn your attention to the motor, and while it’s on the bench, take the opportunity to vacuum out any carbon dust and replace worn brushes.
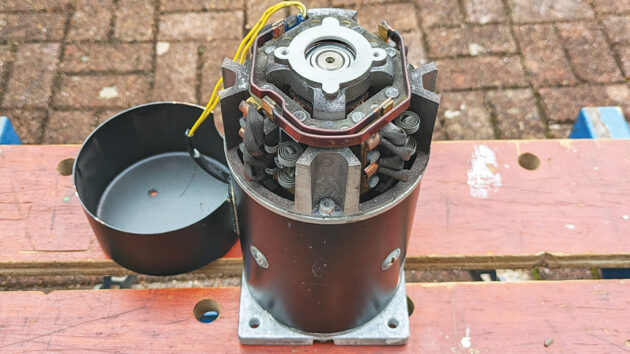
The bow thruster motor showed evidence of carbon dust which can lower insulation resistance, leading to wear. Photo: Mike Attree.
Refit the relay to the motor, grease the motor’s drive pin and reinstall the assembly back in the boat; isolate all power before reconnecting cables, and make sure that everything goes back in the right place.
Bow thruster cables carry heavy currents, so ensure that cable terminals are properly crimped; clean all contacting surfaces to a bright finish, and tighten joints down firmly.
Never run a bow thruster out of the water, so assuming that’s where it is, check that it works properly and that electrical joints remain cold. Measure the voltage at the bow-thruster’s motor while running, and confirm that this is according to the thruster’s manual (ours is specified as ~10.5V).
If the voltage is low, you’ll need to attend to your batteries and/or wiring, as bow thrusters can be damaged by running them at too low a voltage.
Once the carbon dust was removed from the motor, Mike also checked all the brushes. Photo: Mike Attree.
Conclusion
We were disappointed that an expensive piece of marine equipment had corroded and failed, but at least we were able to fix the problem ourselves. Overhauling our bow thruster’s electrics was not difficult, and it was very satisfying to restore faulty machinery to full working order. Our DIY repair saved us almost £800 in parts and labour, and it’s reassuring to know that our self-overhauled thruster won’t let us down when we need it next.
How a boat bow thruster works
Bow thruster control boxes operate the thruster’s motor, but because they can only handle small currents they use relays to switch heavy motor currents.
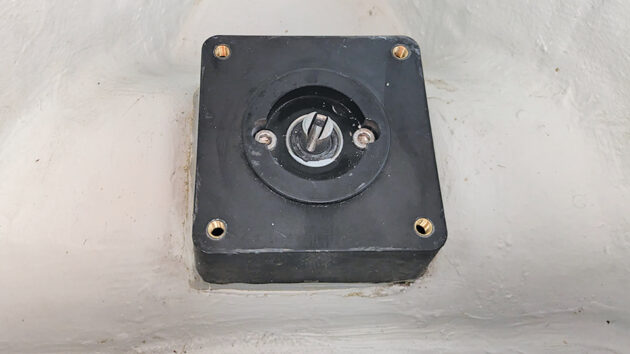
A boat bow thruster tunnel and motor mounting. Photo: Mike Attree.
Relays consist of solenoids (metal rods surrounded by coils of wire) and contacts (moveable heavy-duty busbars). When a current is passed through a solenoid’s coil, its rod moves to actuate the relay’s contacts; the contacts then switch the motor currents. To avoid electrical losses, relay contacts must have extremely low resistance, and to achieve this, they are snapped firmly together; which is what makes the characteristic clicking sound.
Bow thruster relays are sometimes described as contactors, and in fact the two terms are virtually synonymous. Strictly speaking, bow thruster relays should be called contactors as they are heavy current devices, but since the word ‘relay’ is more commonly heard, that’s what’s used in this article.
Bow thruster motors are powerful (ours is 6.8hp), and when running they produce a lot of heat; so much heat in fact, that if run continuously, they’d overheat and be damaged. Fortunately, because thrusters are only used in short bursts, this limitation is acceptable; however, to protect their motors, bow thrusters have thermal cut-outs to prevent users from running them for too long.
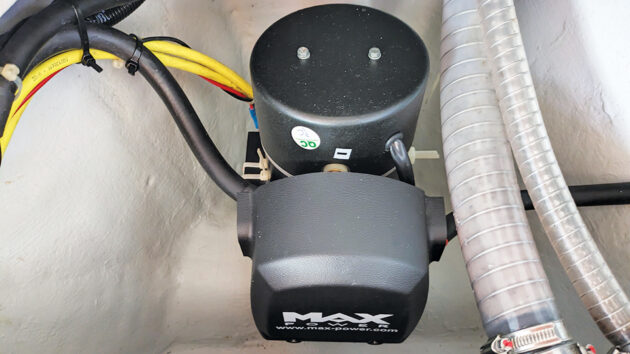
The bow thruster motor and relay back on the boat. Photo: Mike Attree.
High torque
Thrusters normally use ‘series-connected’ motors (field coils and armature windings in series) because this type of motor has the high starting torque needed to get a boat moving quickly. A downside of series-connected motors is poor speed regulation, and if run without a load (eg out of the water), the bow thruster can be damaged by over-revving.
Bow thrusters can push a boat in two directions, and they do this by reversing motor current (either in the field coil or the armature windings, but not both).
Referring to the bow thruster electrics drawing (above right) when the port relay is on, current flows through the motor’s field coil from left to right, but when the starboard relay is on, current flows in the opposite direction. In both cases, current flows through the motor’s armature in the same direction, so the motor reverses. Circuitry in the bow thruster’s control box prevents users from changing direction without a pause (to protect the driveline), and shuts the thruster down when it hasn’t been used for a while (for safety).
It’s possible to power a bow thruster from any of the boat’s batteries (start, house or bow), and the pros and cons of each are highlighted below.
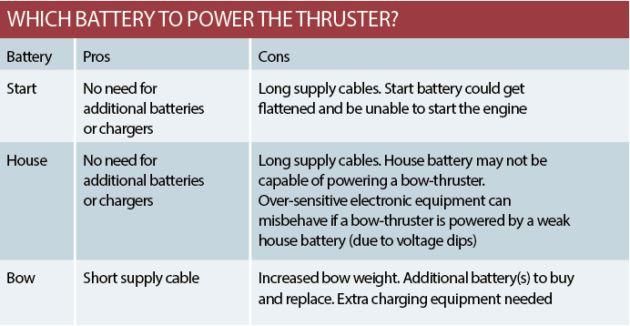
For peace of mind, we prefer to dedicate our start battery solely to the engine; and because we didn’t want the weight, expense and charging complexity of bow batteries, power our bow thruster from our house battery. Our house battery is lithium-ion which not only runs at a higher voltage than lead, but also has less voltage dip under load. This means we can use thinner, lighter and cheaper ‘thruster supply cables (albeit rated at 400A), yet still meet the bow-thruster’s minimum voltage specification.
Powering a 400A load is well within our DIY lithium-ion battery’s specification, and it easily powers our bow thruster (even without the engine running), but be aware that many commercial lithium-ion batteries aren’t capable of powering a thruster due to their limited current ratings. Multiple batteries can be put in parallel to increase current capability, but be careful with this approach, as one of the batteries will invariably take more than its fair share of the load, and if its Battery Management System (BMS) trips, the others will follow (ie cascade failure).
Lead acid batteries have traditionally powered bow thrusters, and here the battery’s CCA (cold cranking amps) figure is the one to check. Note that if you are using the house battery, check with the manufacturer first, as some deep-cycle batteries can be damaged by heavy current loads.
Finally, it’s worth remembering that running a bow thruster for, say, 20 seconds, consumes a relatively small amount of energy, typically 2Ah of charge. An alternator should replace this within a couple of minutes. Over the course of a day, a bow thruster will normally use far less energy than, for example, a fridge.
Mike Attree learned to sail with his circumnavigating friends aboard their Moody 425, and he and his wife enjoyed some wonderful holidays with them in the Mediterranean and Caribbean, gaining much from their vast sailing experience. In 2010 Mike and his wife bought their own boat (they’re now on their second). Their cruising area has included a trip from the Baltic to the UK, the South Coast, the West Country, the Isles of Scilly, Brittany and Normandy.

How to retrofit a bow thruster
Tony Moss and his wife, Marike, enhance the manoeuvrability of their Dufour 44 to make cruising life easier in their…

Should I get a bow thruster? Our expert answers your question
Q: I have a Vancouver 32 and I’m considering fitting a bow thruster as it’s a long keel yacht and…

Remote control bow and stern thrusters: reader tested
Will Renilson improves boat handling aboard his Jersey 36 and tests the Vetus remote control system and the Coastline Technology…
Tips to stay in control while close-quarters manoeuvring
Seasoned sailor Rupert Holmes shares his tips for better close-quarters manoeuvring under sail alone
Want to read more articles like How does a boat bow thruster work?

A subscription to Practical Boat Owner magazine costs around 40% less than the cover price.
Print and digital editions are available through Magazines Direct – where you can also find the latest deals.
PBO is packed with information to help you get the most from boat ownership – whether sail or power.
-
-
-
- Take your DIY skills to the next level with trusted advice on boat maintenance and repairs
- Impartial, in-depth gear reviews
- Practical cruising tips for making the most of your time afloat
-
-
Follow us on Facebook, Instagram, TikTok and Twitter