
With the end of the skiff build in sight, the devil really is in the detail. Nic Compton reports

It was always going to be a tall order: trying to turn a ‘quick ‘n’ dirty’ epoxy ply kit into a beautifully crafted family heirloom. Not quite as difficult as turning a sow’s ear into a silk purse or a bag of fish ‘n’ chips into a gourmet dish, but not far off.
As soon as Jeremy Butler decided he was going to varnish the inside and the bulwarks of his 14ft Nigel Irens-designed Western Skiff, he ramped up the construction standards of his project by several levels. For what is acceptable on a rough and ready home build, where gaps can be shamelessly filled with great dollops of thickened epoxy and hidden under several layers of paint, suddenly becomes unacceptable if the boat is going to be varnished and all its dirty secrets revealed to the world.

We’ve already seen how this approach has added time to Jeremy’s build: from scarfing the planks rather than finger-jointing them in Build your own Western Skiff – Part 1, to taping off the fillets to achieve a neat line and trying to achieve a smooth finish while epoxy coating the planking in Build your own Western Skiff – part 2, leading to hours of sanding. This month, as he moved on to the details of fitting out the hull, the issue came to the fore and really gave our perfectionist builder a major headache.
Download your own set of free plans today: pbo.co.uk/western_skiff
Browse the complete set of articles in this series online

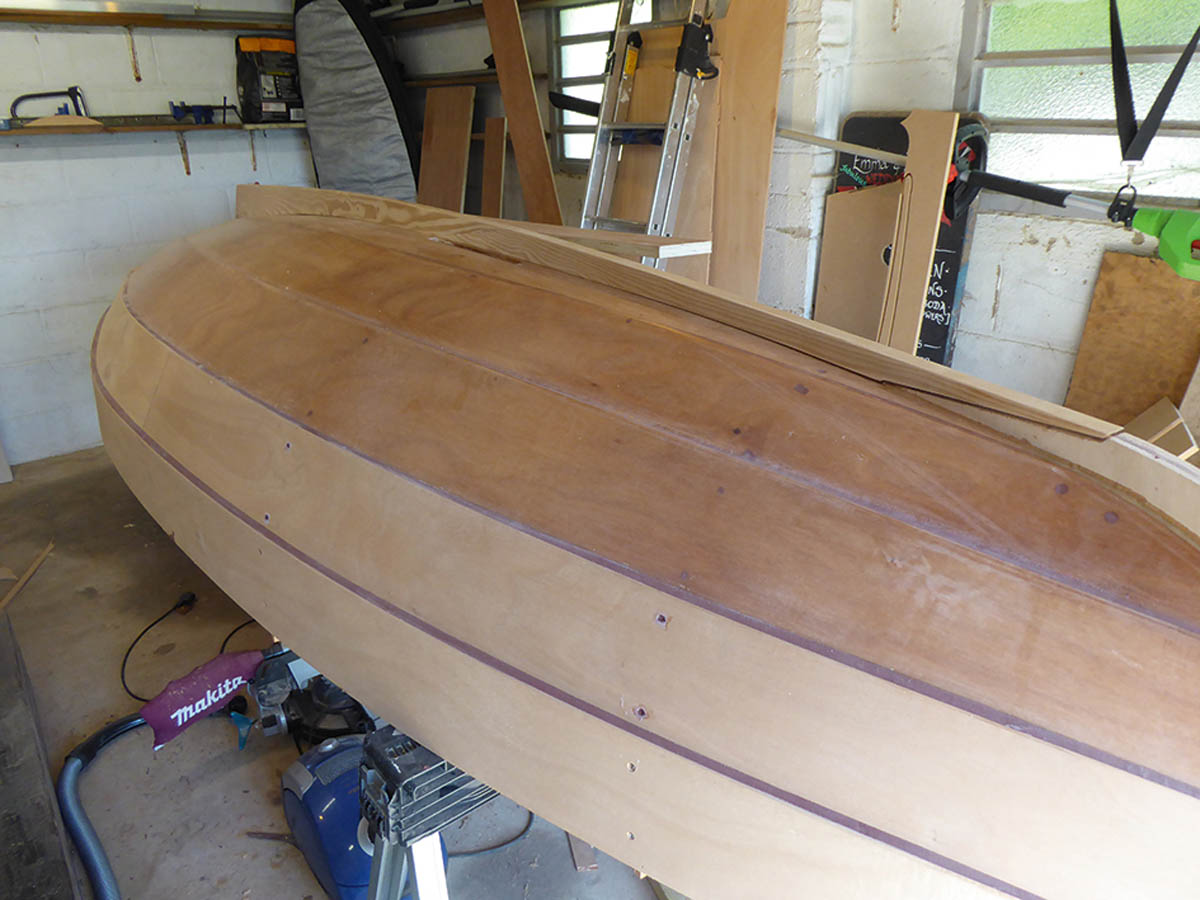
Nearly done – Jeremy Butler’s Western Skiff looking splendid
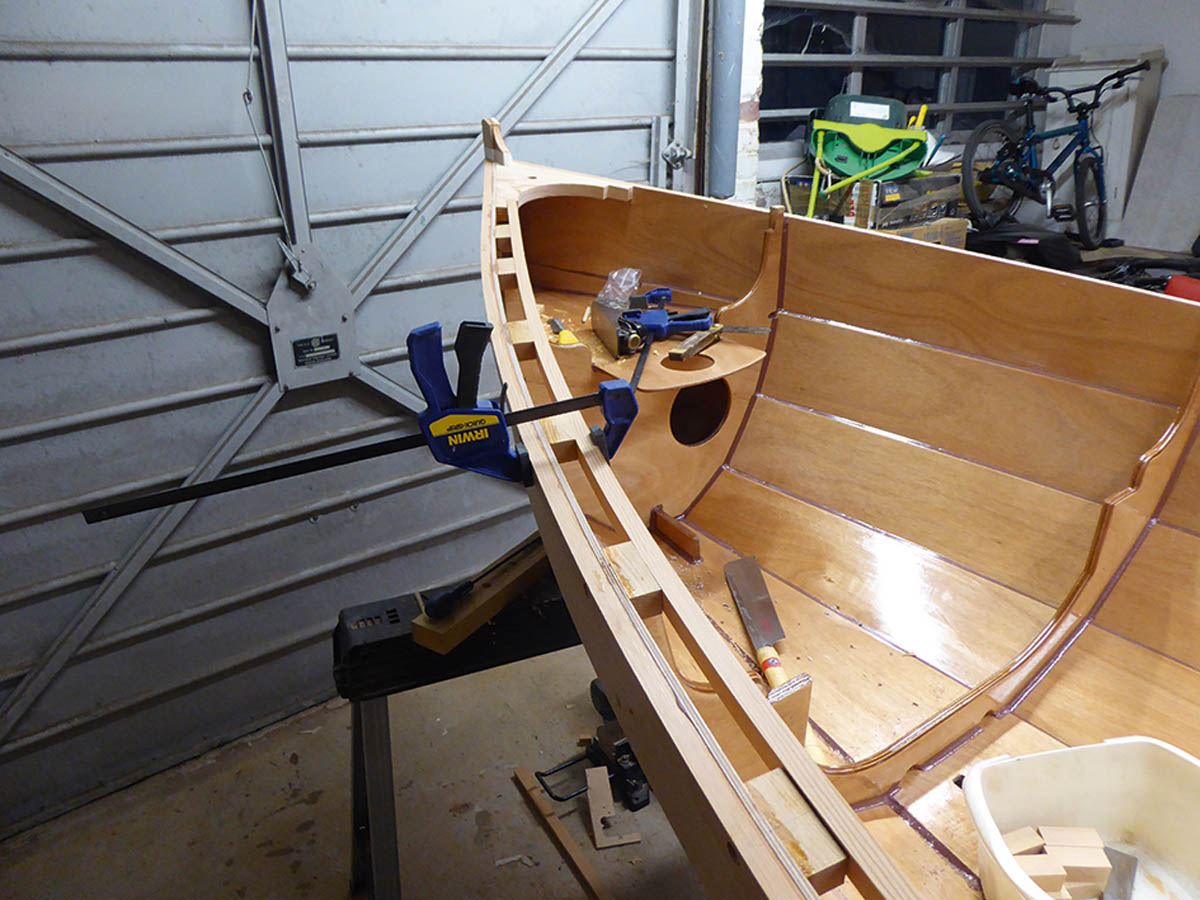
But, first, Jeremy had to fit the stem and keel. The stem was glued up from two layers of 12mm ply, with a 12mm hole on each side into which a dowel was placed to locate the two parts together exactly.
Once the epoxy had cured, the whole thing was glued and screwed to the apron – not without a certain amount of reshaping. The keel proved more complicated as Jeremy hadn’t ordered enough wood and ended up having to lengthen the piece he had by scarfing a short offcut of timber to the end of it.
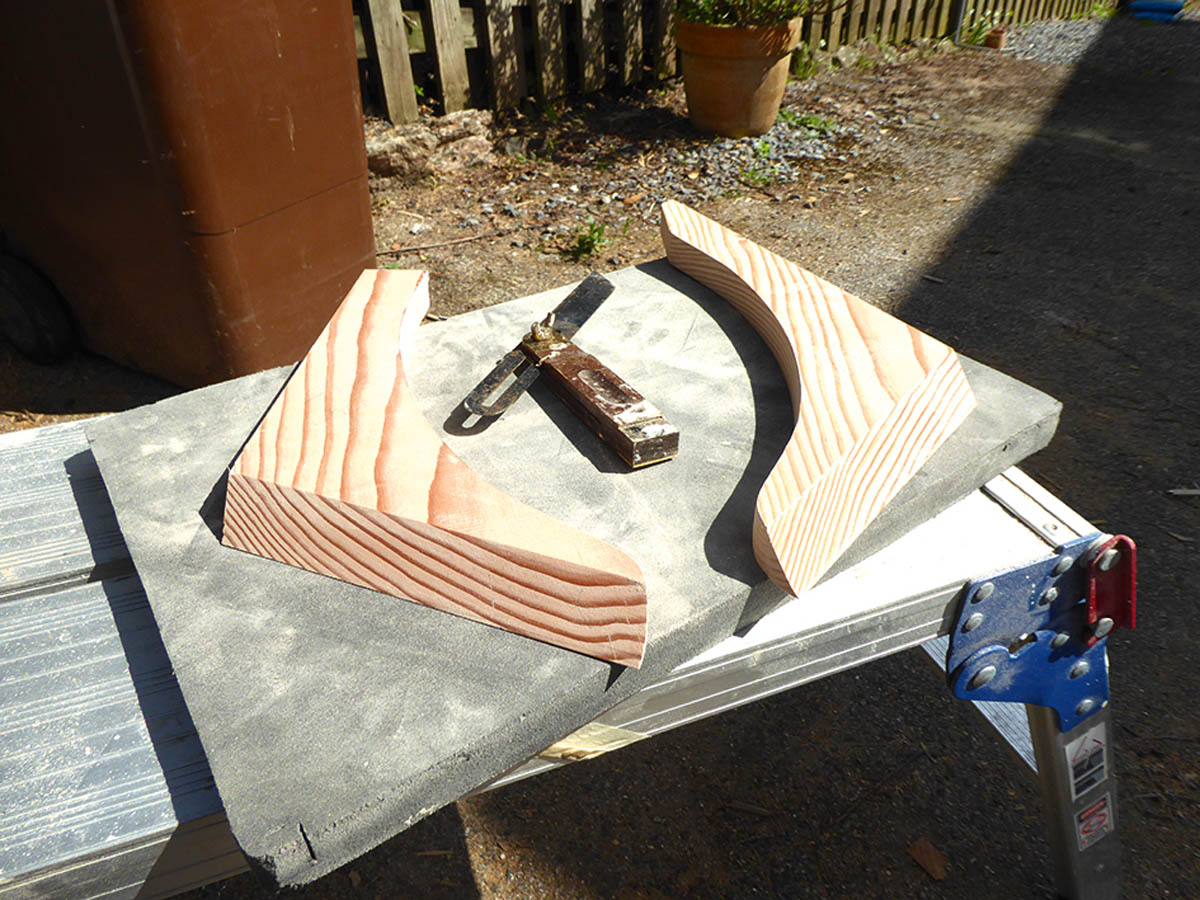
Things got more interesting when it came to the breasthook and quarter knees. In both the revamped kit (available from jordanboats.co.uk) and the free plans (available from pbo.co.uk/western_skiff), these are supplied as two layers of 12mm ply which are glued together to make up the 24mm thickness. The bottom layer is smaller than the top layer so that when the two are lined up there is a step on the sides which go against the hull – the nearest thing you can get to a bevel with a CNC cutter that only cuts on the vertical. The gaps are then filled with large quantities of epoxy.
I have to admit, when I built my skiff 22 years ago, this was the only bit I baulked at. It did seem like a bodge too far and I considered cutting ‘proper’ bevels myself – easily enough done on plywood with a sharp plane. In the end, I stayed with the plan and did the ‘bodge’, and 22 years later the knees have held up perfectly well.
But that wasn’t an option for Jeremy.
“I thought it would be an odd transition on the eye if I had varnished inwales which ran straight into painted plywood knees,” he says. “So I ordered extra Douglas fir in case I had time to make them out of solid timber.”
To make the timber knees, he used the top layer of the plywood knee supplied with the kit to make a cardboard template, which he then trimmed as necessary to fit the boat – having decided that the cardboard gave a crisper, neater template than the plywood.
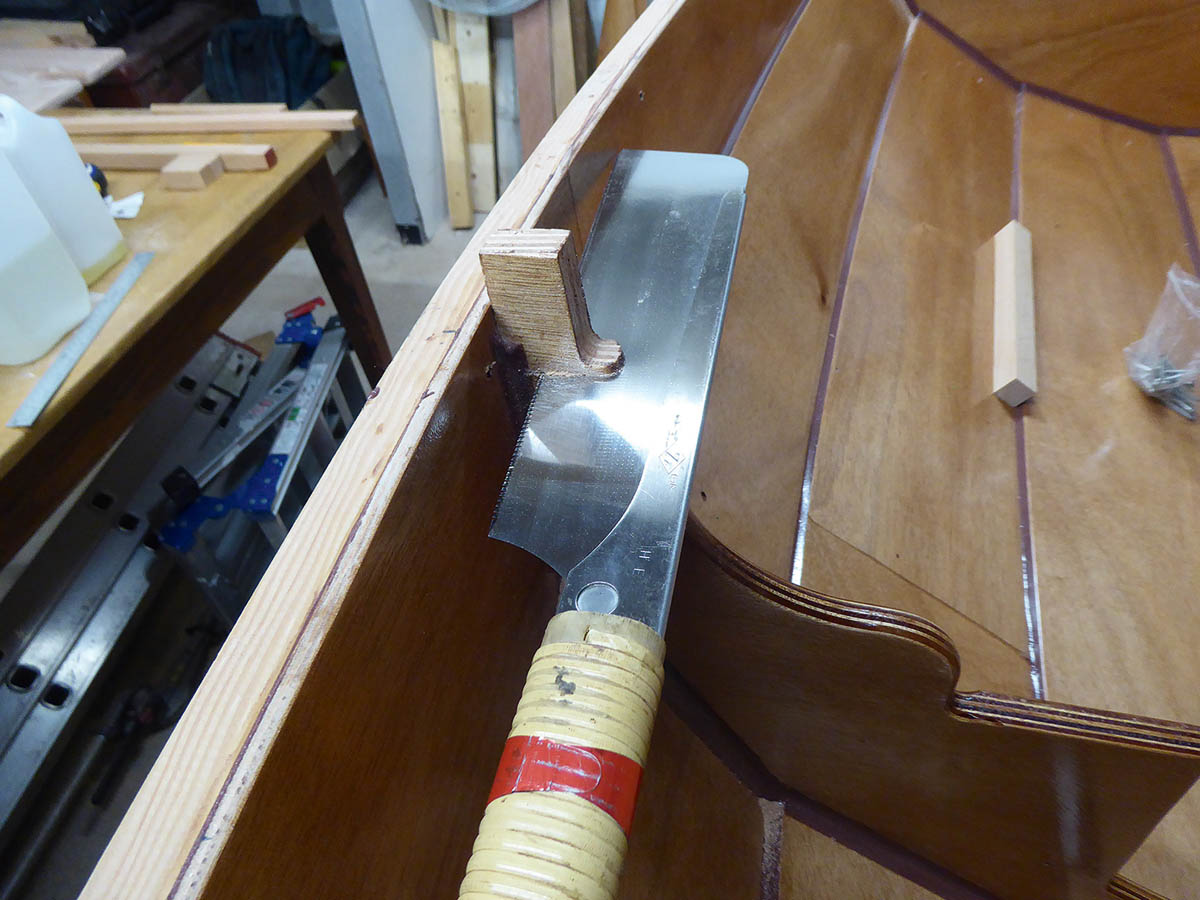
Japanese pull saw used to trim tops of frames
Superior cut
He arranged the templates on the 25mm Douglas fir left over from making the thwarts, making sure the grain of the wood ran diagonally across the knees as much as possible. He then cut out the outlines with a jigsaw, but for the slots used a Japanese ‘pull saw’ – which he reckons is far superior because “it’s so fine, so accurate, so sharp – it’s much easier to use, and you actually get square cuts with it”.
Unlike in the past, when Jeremy worked for Barrow Boats and enjoyed all the benefits of a fully-fitted workshop including upside-down belt sander, this time he cut the bevels by hand using a bevel gauge and a block plane.
“The grain of these northern timbers is really interesting: there’s a really hard winter growth then a really soft summer growth. When you drill through the wood, you can feel the layers as the drill kicks back on the grain line.
“The summer growth is very absorbent, so when I primed the edges of the knees it really sucked up the epoxy, and you could see a shiny line of epoxy where the winter growth didn’t absorb as much.
“If I had tried to glue them without priming, I would have ended up with a very dry joint.”
With everything going off at different angles, clamping the quarter knees is always tricky – tighten the clamps too much and the knee is likely to shoot up into the air.
Because of this, Jeremy chose to glue and clamp the knees in place rather than use screws, as he felt there was a danger of the knee moving and going out of position while it was being drilled. You could argue the opposite, that the screws help prevent the knee from sliding out of place once the glue is applied, but the proof of this particular pudding is that Jeremy’s knees look spot on and are not likely to come apart.
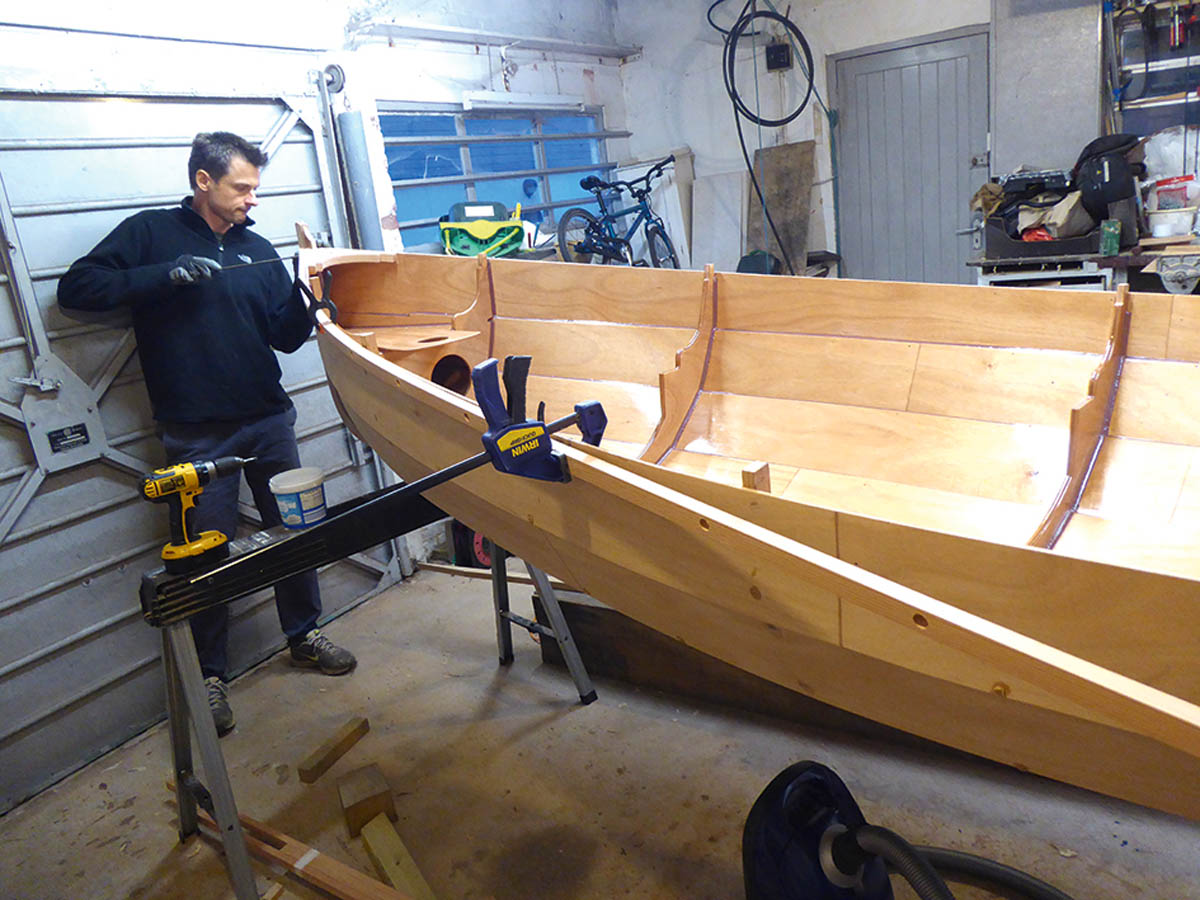
Next came the gunwales and inwales, and again Jeremy’s decision to varnish created quite a bit of extra work – or certainly a lot of extra thinking time.
The basic structure is simple enough: two lengths of 26mm x 16mm Douglas fir form a gunwale on either side of the boat, attached to the top of the sheer plank.
On the inside, two matching lengths of wood form the inwales, notched at either end into the breasthook and quarter knees and with a series of 24mm x 25mm wooden spacers keeping parallel with the sheer plank. It’s an attractive looking, lightweight structure which, held together with epoxy, gives a lot of strength and rigidity to the top of the boat.
Jeremy came up with an ingenious plan to glue and screw the various layers using the minimum number of screws. First he drilled plug holes in the gunwale, so it could be plugged and varnished later. Then he glued and screwed the gunwale to the sheer strake using short screws.
Crucial move
As soon as the glue was set, he removed the screws and drilled pilot holes through the first two layers.
He then glued and screwed the blocks in place using medium length screws.
When the glue was set, he removed the screws again and drilled pilot holes through the first three layers. He then glued and screwed the inwales in place using long screws, which he left in place for added strength. Crucial to this process is taking the screws out before the epoxy was fully cured.
“Glues like this have a clamping time which is relatively short, and they continue to gain strength for several hours after that. With this glue, if I glued it up late at night, I would take the screws out first thing in the morning when they hadn’t totally adhered. If you leave it until evening, it’s too late and you can hear a bang when taking screws out and you stand a good chance of shearing off a screw or damaging the heads as the driver slips.”
So far so good. The tricky bit was working out the spacing of the blocks and what to do with the top of the frames. On the original boat, the frames were sawn off level with the top of the sheer plank, and a notch was cut into the inside edge of the frame for the inwale to sit on. Any discrepancies or gaps between the inwale and the frames were simply filed with epoxy.
But, as Jeremy was varnishing his bulkwarks, he didn’t want unseemly epoxy-filled gaps, so decided to cut the tops of the frames off altogether and cover the sawn-off tops with strategically-placed blocks.
“I then had to work out a sensible spacing which would look good to the eye, but covered the top of the frames and also took into account having blocks where the rowlocks were going to be – and I had to work it all out before I drilled the plug holes in the gunwale, because the position of the blocks determined the position of the fixings. I did it all once and then realised I’d made the spacing too narrow and had to start all over again!”
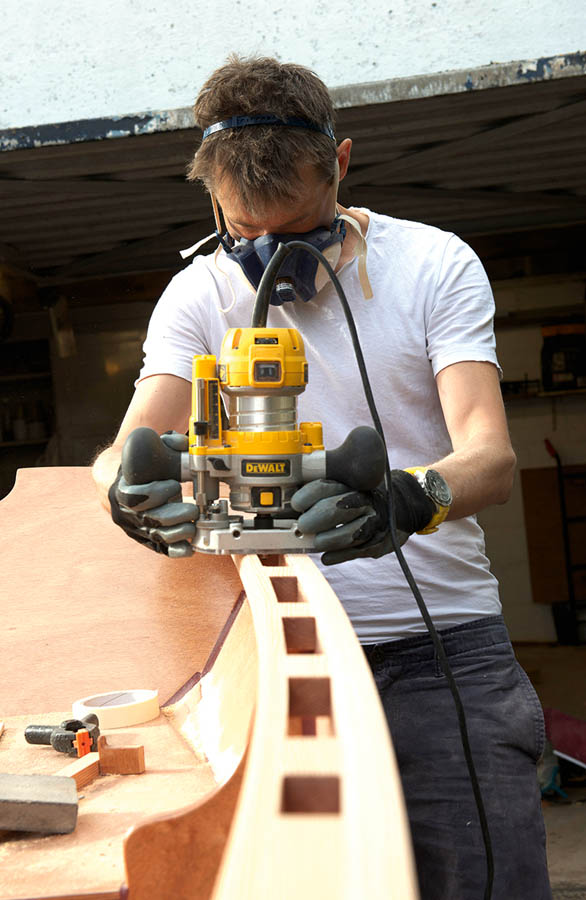
Using a router to round off the edges of the inwales
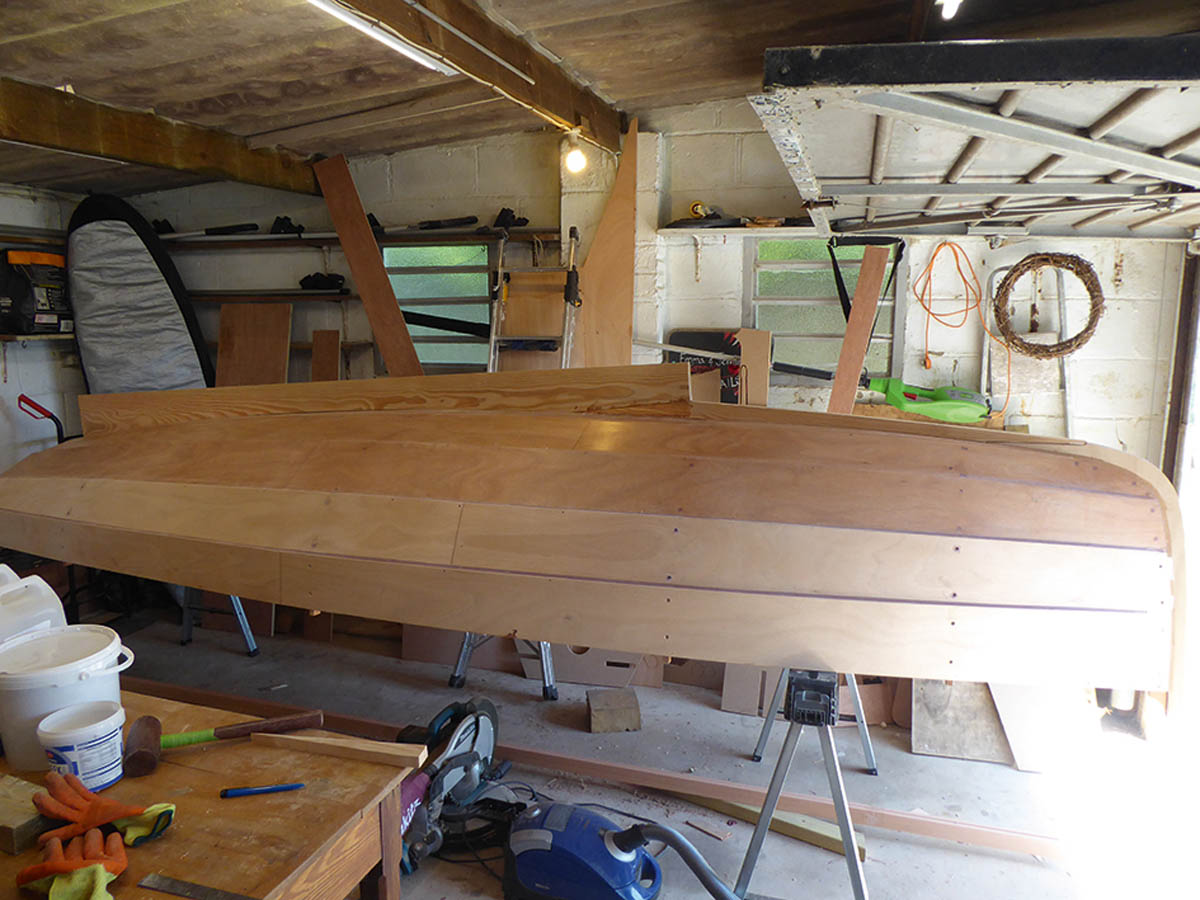
By the time I visited Jeremy, these complex calculations had been resolved, the gunwales and inwales had been fitted and he was gaily rounding the edges off with a router, as if he didn’t have a care in the world. Spring was in the air at the Butler household: the boat was out of the garage, the garden was in bloom and we even got a few bursts of sunshine for the photos. Most of the building work on the boat was done, and it remained just to plug those holes in the bulwark, seal the top planks with epoxy and then paint and varnish the whole boat.
“The kit is tuned to a quick-and-easy style of boatbuilding, and I am trying to do it slightly differently. The work has gone a lot slower than expected this month because of the decision I made earlier, to keep the top strake and gunwales varnished. You definitely have to go one way or the other, and I’d rather take a bit more time and get it absolutely right.”
Cost so far…
Previous months £1,507.83
This month
Gunwale screws £4.99
Painter & fitting £12.45
————————-
Total this month £17.44
Total so far £1,525.27
Time so far (hours)
Previous months 88¼
This month:
Finishing inside 7
Breasthook and knees 4
Stem and keel 3.5
Gunwales and inwales 14.5
———————————-
Total hours this month 29
Total hours so far 119¼
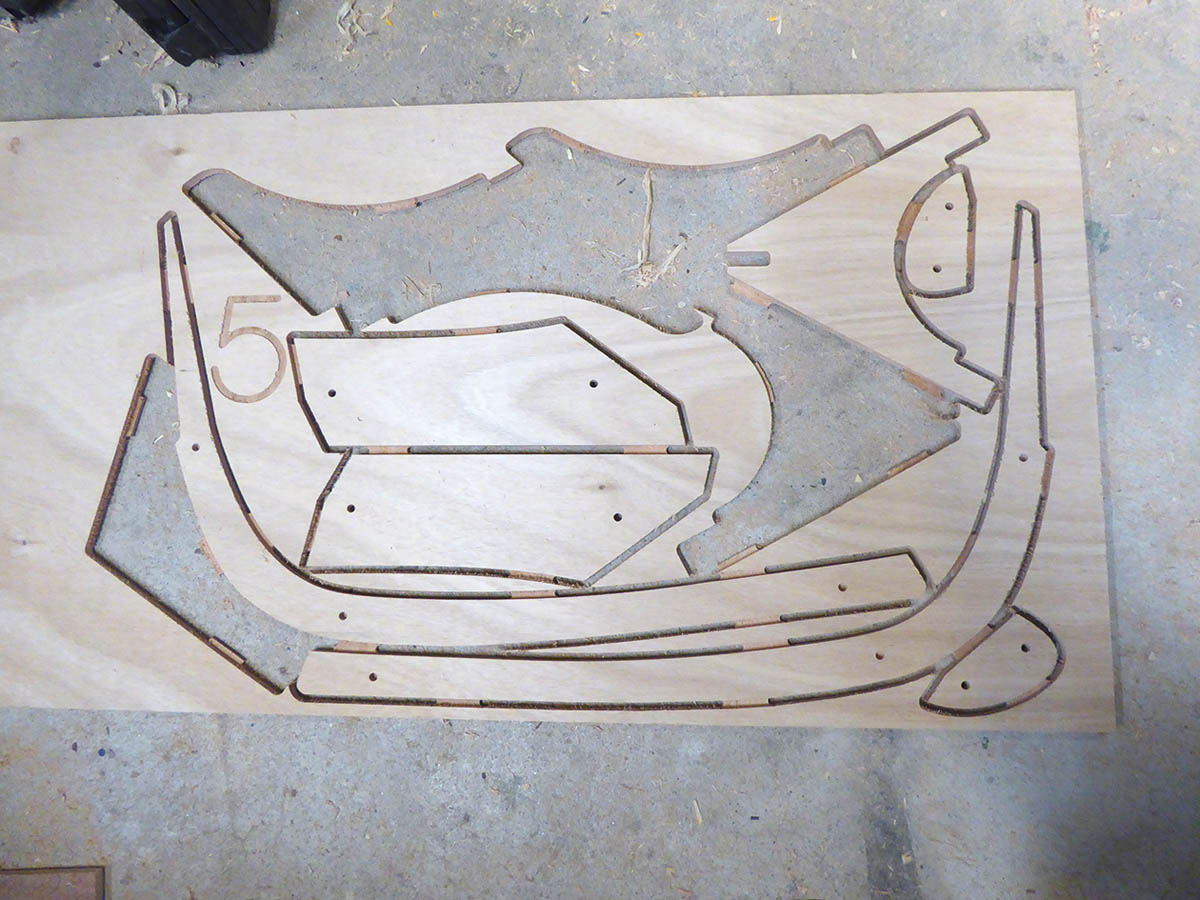
1. The stem, breasthook, knees and rudder cheeks all nested in the 12mm ply. All are doubled up to make up the 24mm thickness..
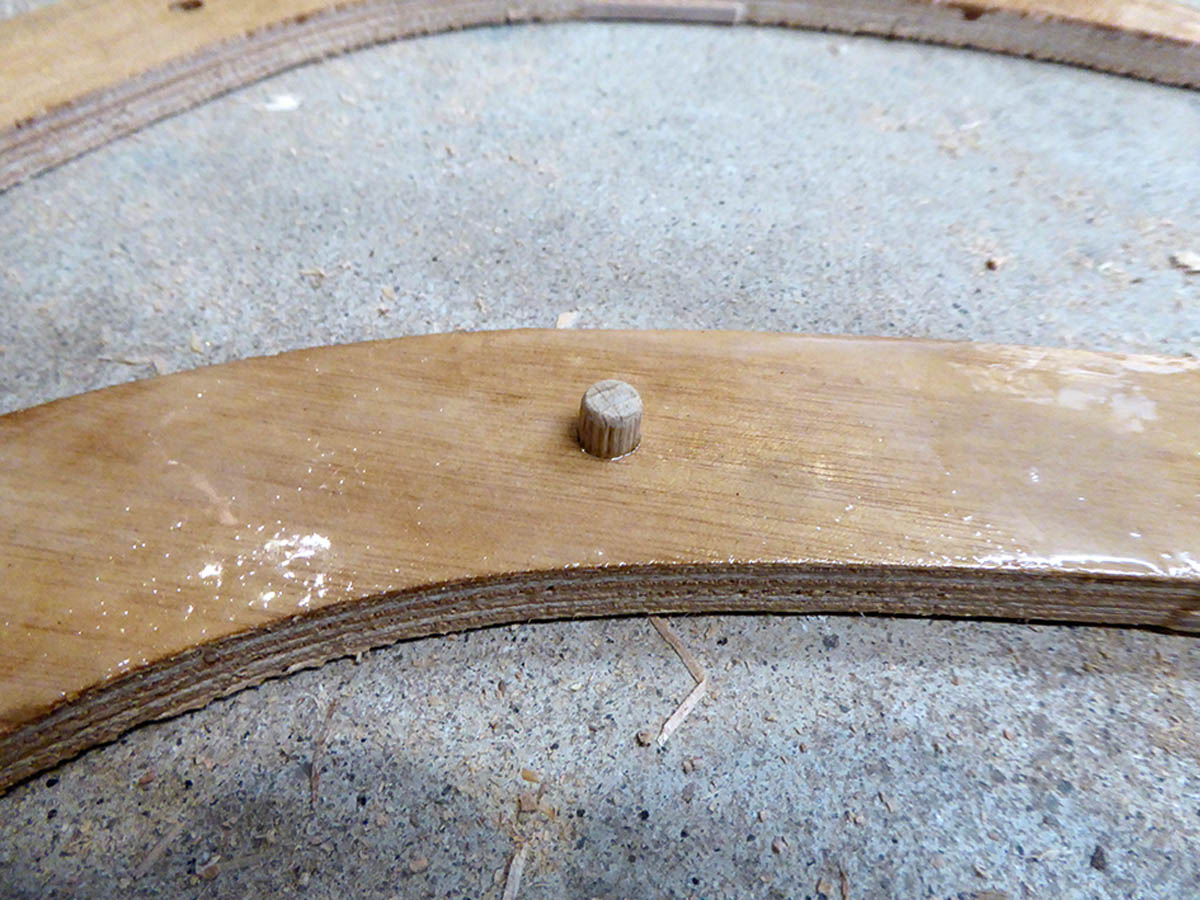
2. The stem layers (and most of the other parts) have holes on each side into which standard joiner’s dowels are placed to locate the pair accurately.
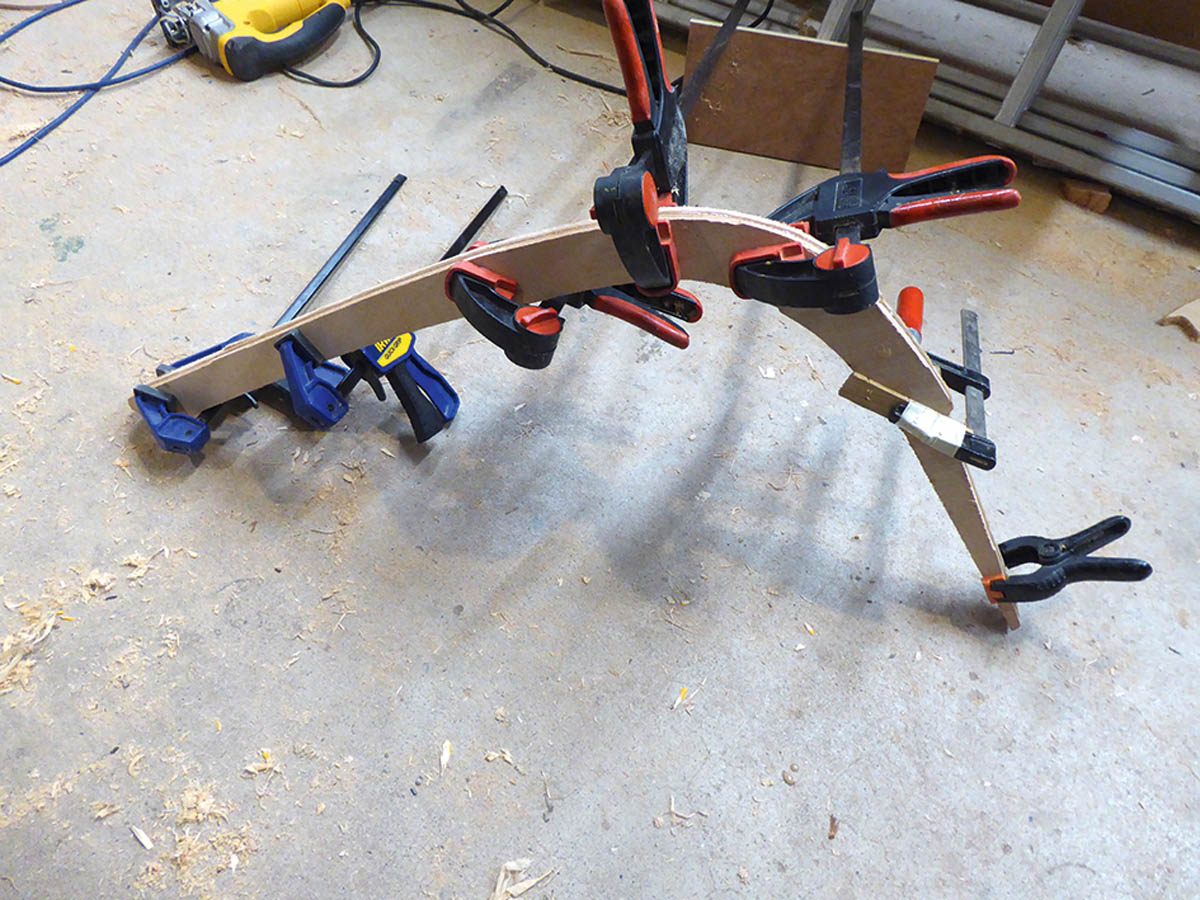
Jeremy used seven clamps to press the two sides of the stem together evenly – though he could have just as easily weighed them down instead.
4. The stem is fitted over the apron and held in place temporarily with three large screws with large penny washers to protect the plywood.
5. Trying out the MDF keel template supplied with the kit. The template comes in two parts and is joined together with a finger joint.
6. Jeremy scarfed together the two parts of the actual timber keel in situ, although it was later removed for final shaping.
7. The finished keel being dry fitted. Jeremy decided to glue it on after the interior fit out was finished, to make the boat easier to work on.
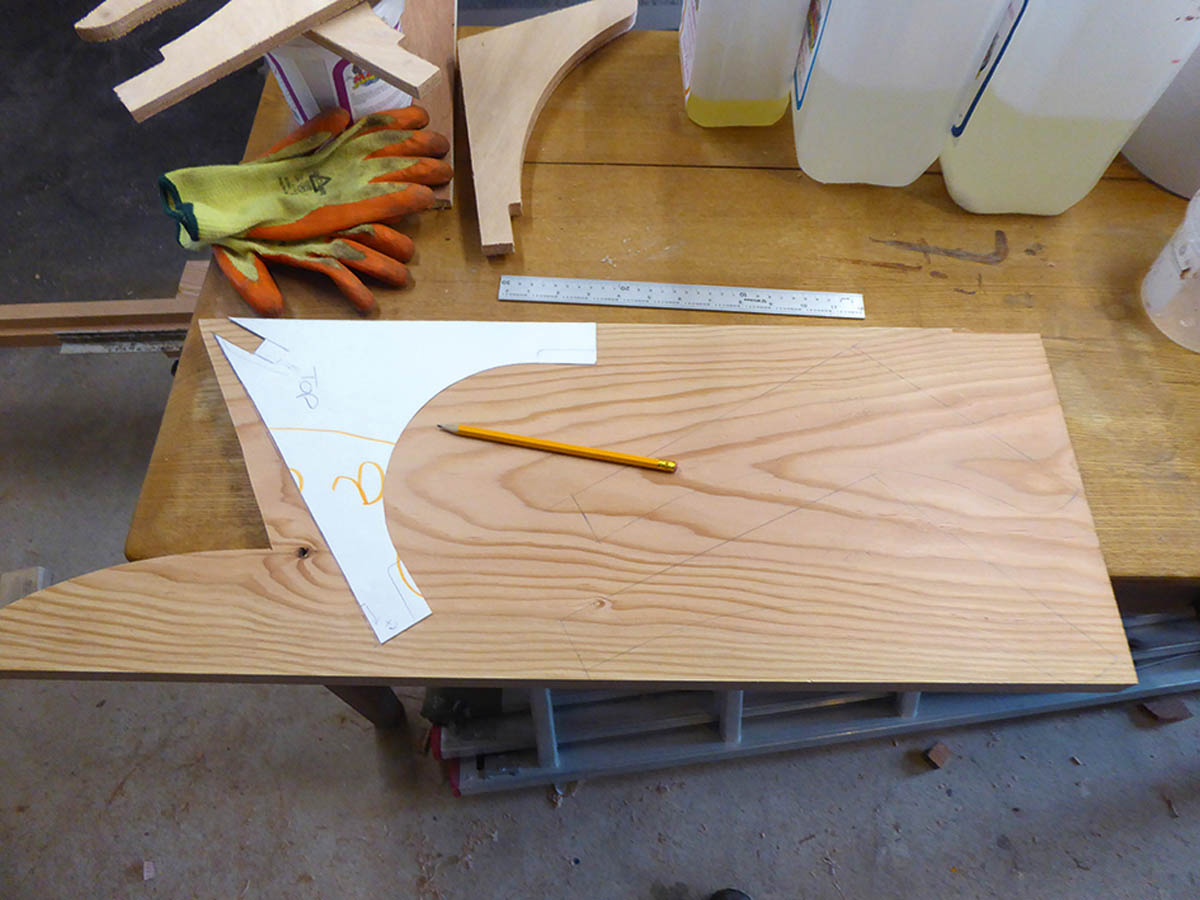
8. Plotting out the breasthook and quarter knees on a piece of 25mm Douglas fir, trying to keep the grain crossing on the diagonal.
9. The breasthook fits snugly against the apron and sheer planks – a difficult trick to achieve given the multiple angles of the hull.
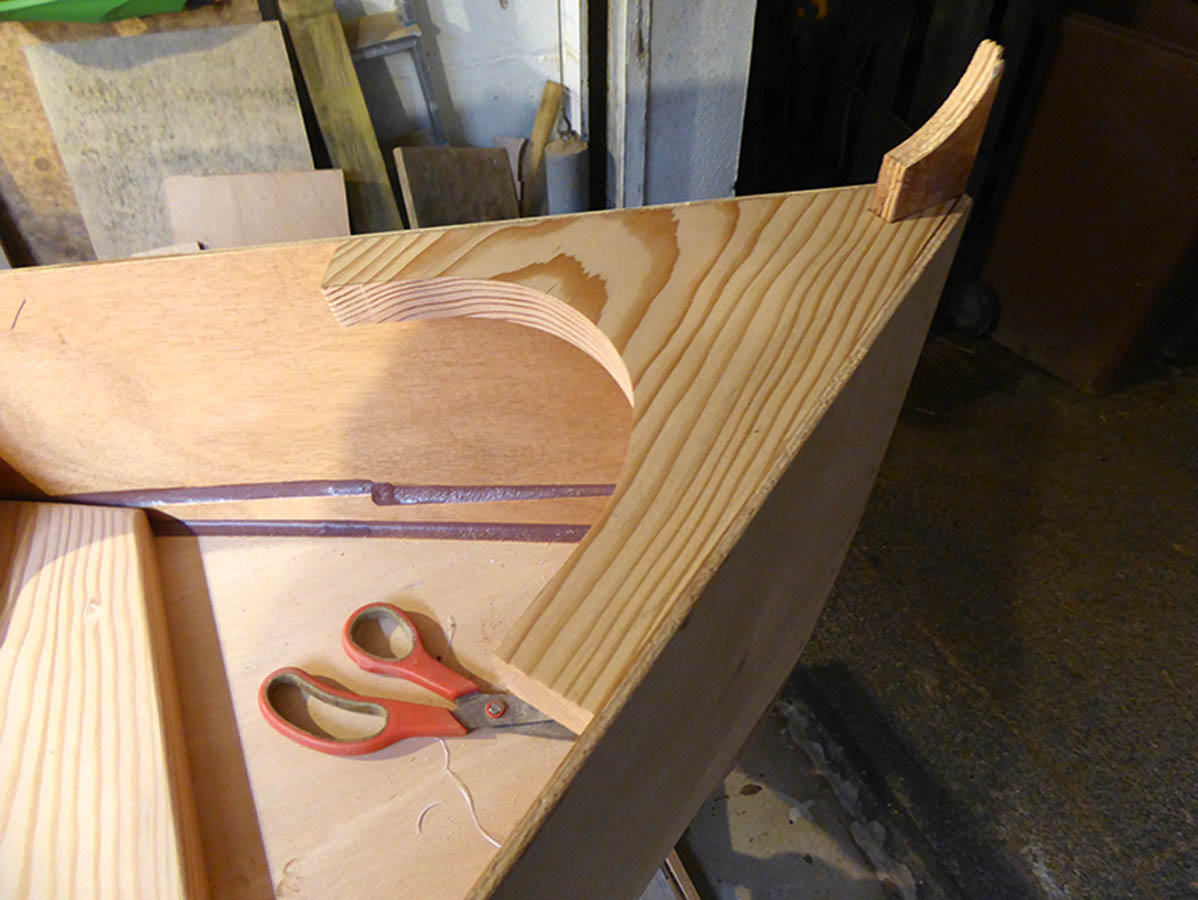
10. A single clamp holds the breasthook it place while it is being glued. The hole is for the painter to pass through to a ring on the underside.
11. The quarter knees received similar treatment. The dark lines show the tough winter growth which was surprisingly hard to cut, even with a plane.
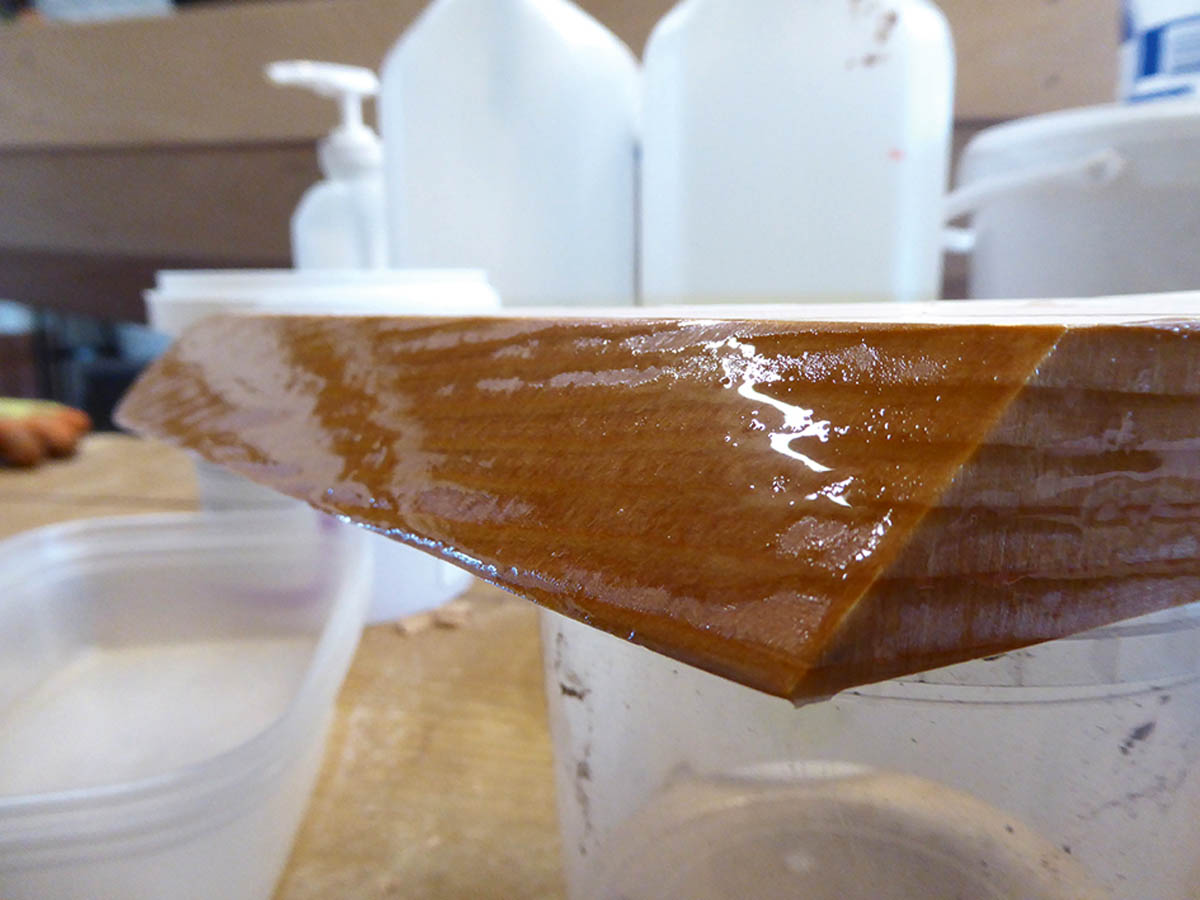
12. A quarter knee primed with neat epoxy prior to glueing. The soft summer growth was extremely absorbent so priming was essential.
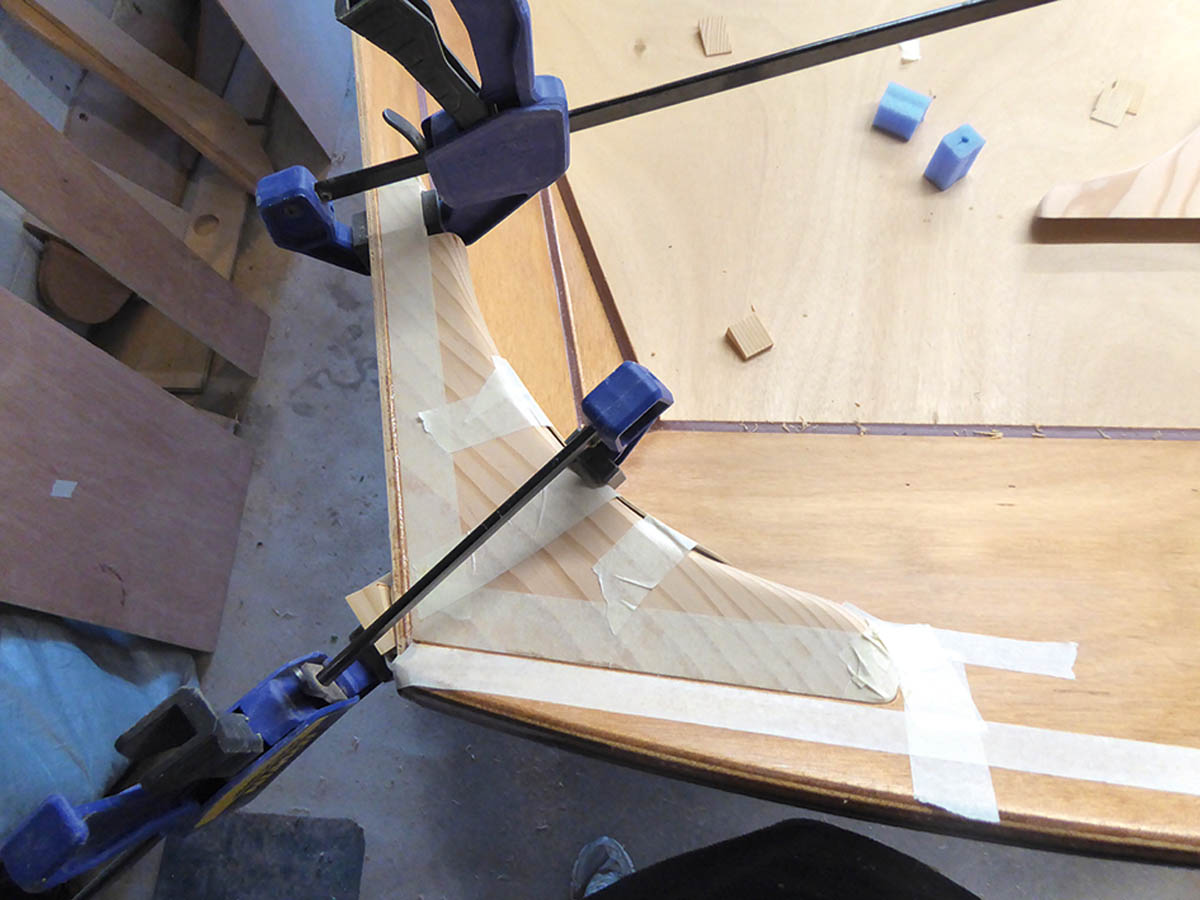
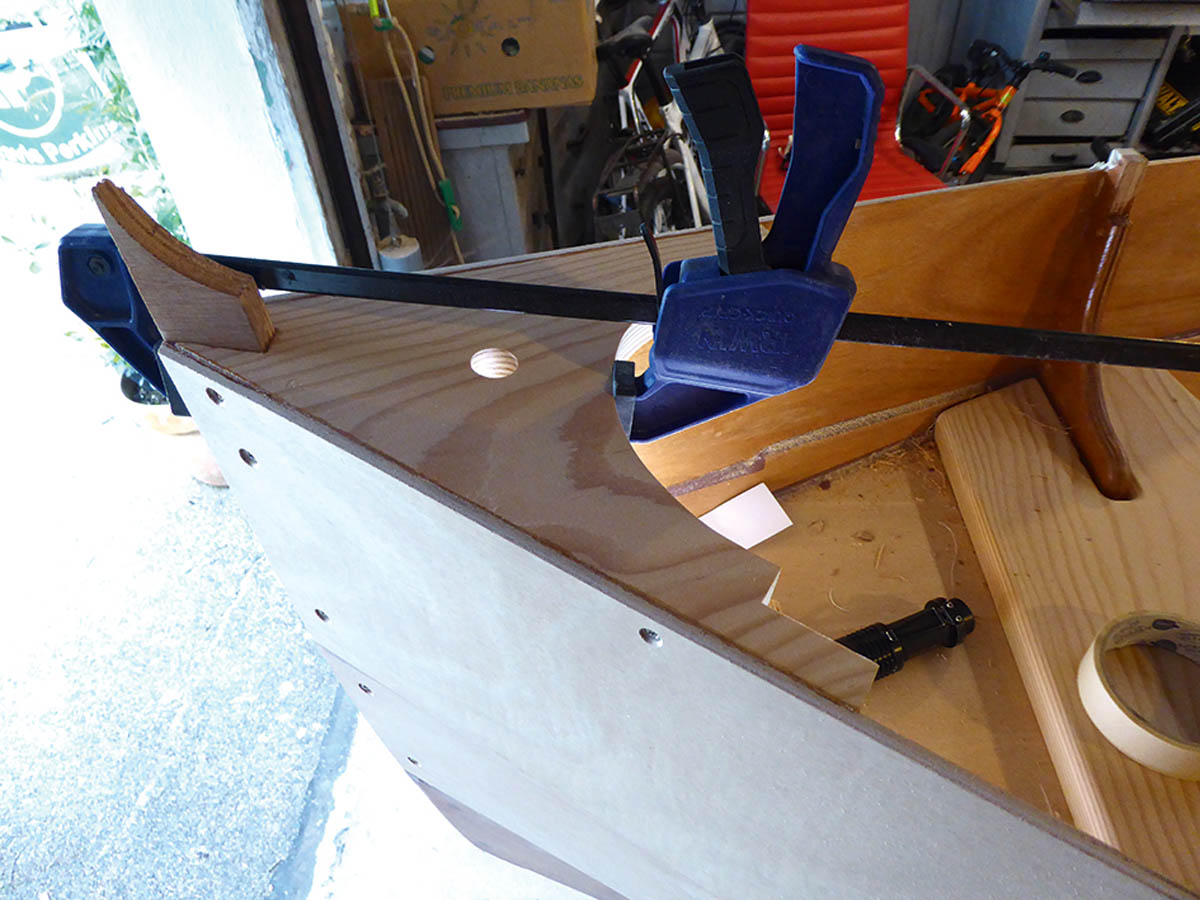
13. Clamping the quarter knees was tricky because of the angles. Note the wedge used to stop the clamp sliding. Masking tape keeps the surfaces clean.
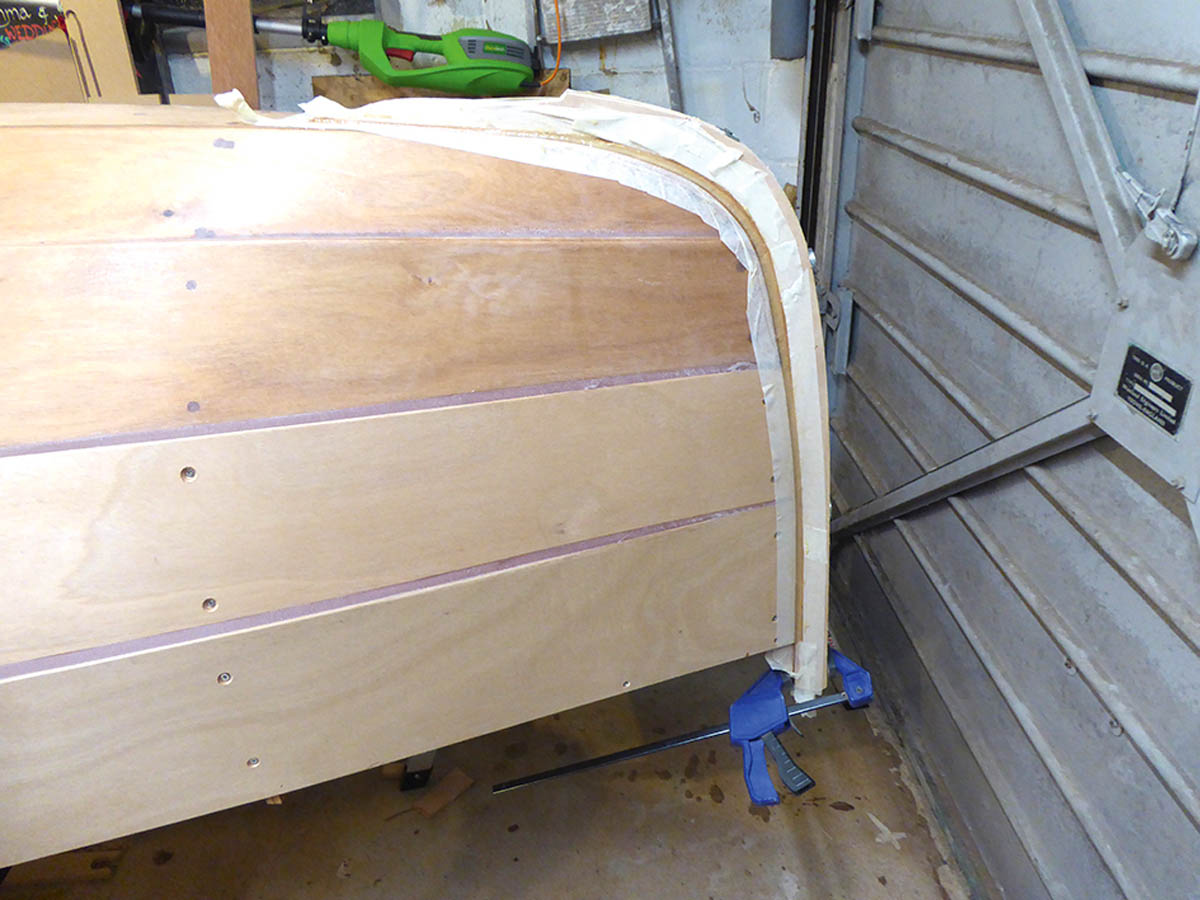
14. Dry fitting the port bulwark. The plug holes have already been drilled, and the first set of screws will be used to attach it to the sheer strake.
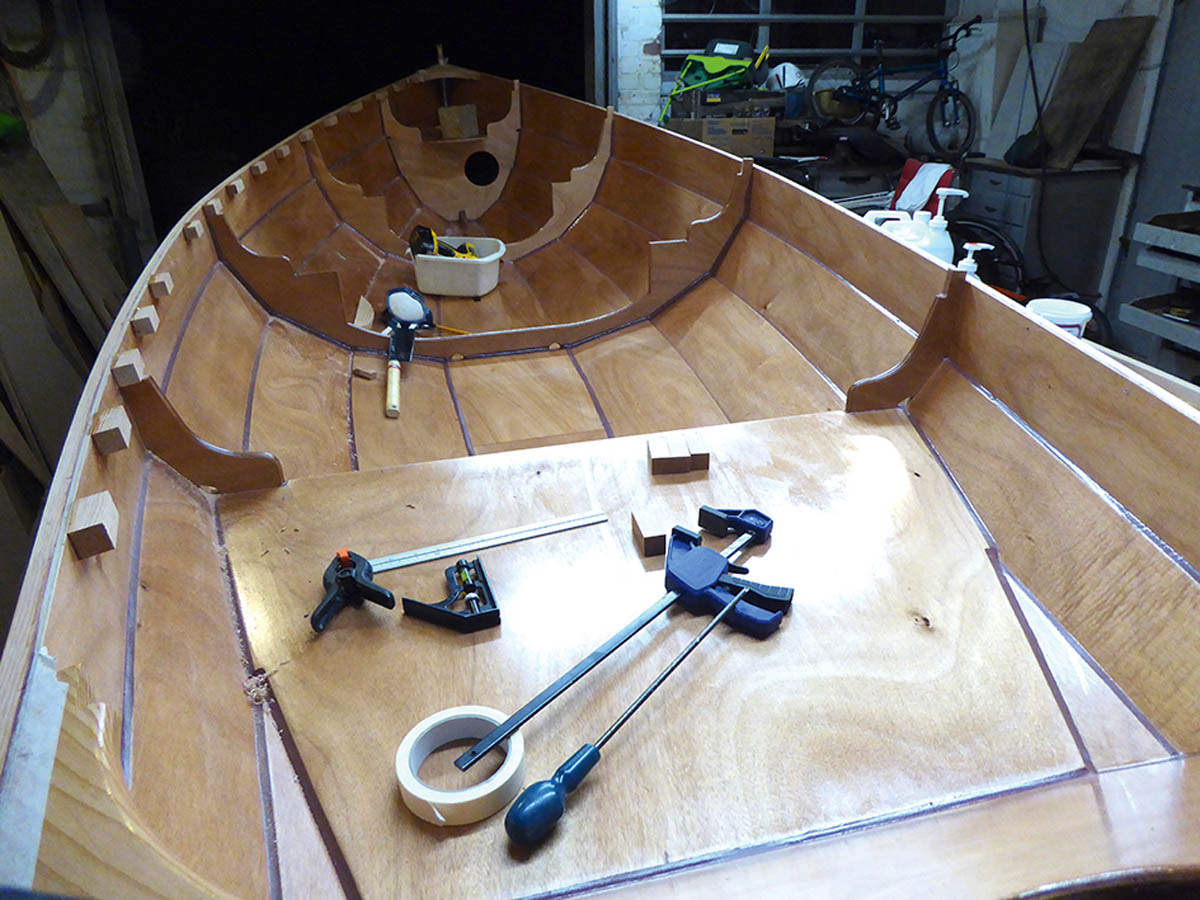
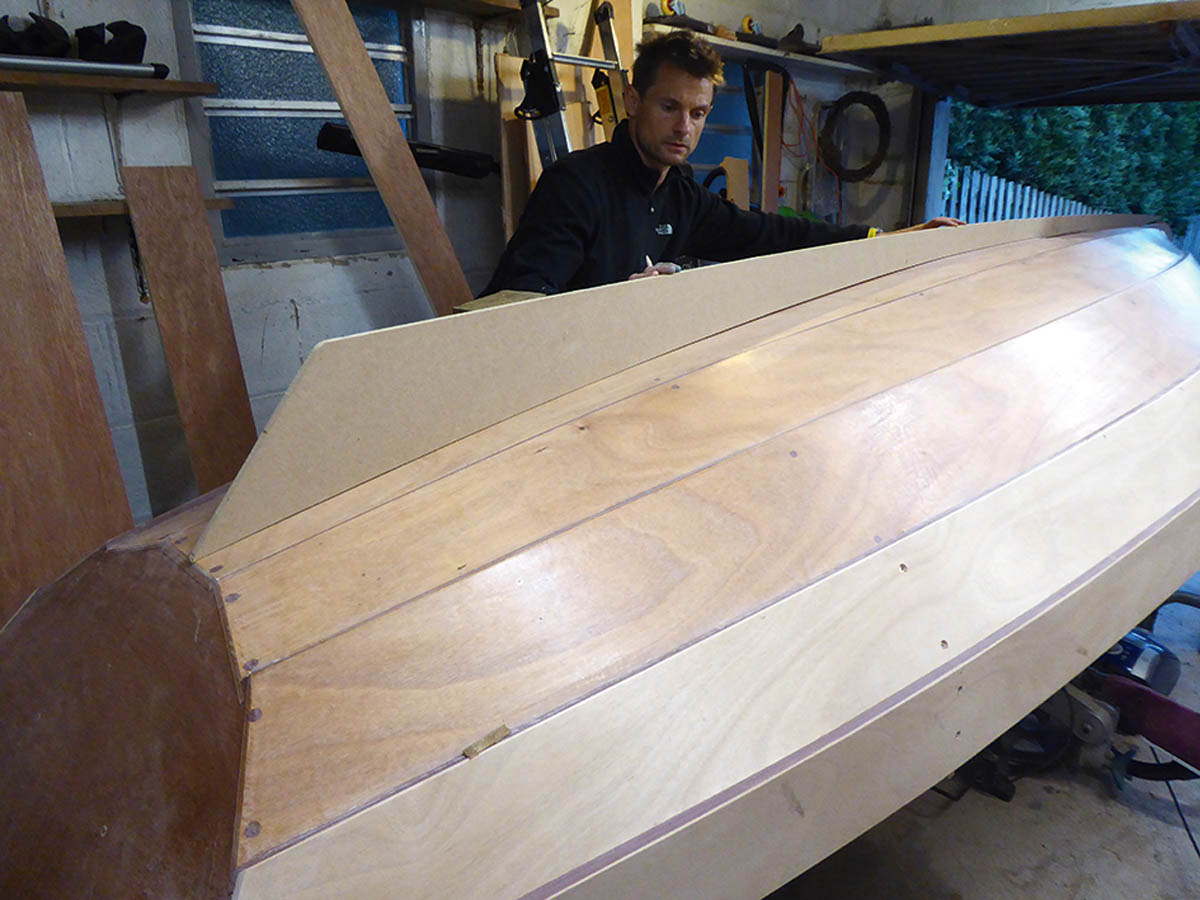
Working out the spacing of the inwale blocks proved a major challenge. Note how the top of the frames have been cut off and blocks fitted over them.
Dry fitting the inwale. The sheer plank was left slightly proud so it could be planed back later for a perfectly flat finish.
 How to get free plans

How to turn free plans into plywood parts and templates
- A set of PDF plans (excluding the sail plan and outboard conversion) for personal use only is available free of charge, but please, please don’t forget a small donation to the Ed Burnett memorial fund: justgiving.com/fundraising/bill-burnett1
- The 39 pages of plans (size ‘A zero’) should be printed (black & white is fine; printing firms are available online).
-
Once printed, join together individual sheets by matching the corresponding numbers in each corner and aligning the target marks.
-
Affix the templates directly onto plywood sheets (2440mm x 1220mm / 8ft x 4ft), aligning the edges and you are ready to cut the parts. We estimate
- 4 1/2 sheets 6mm ply
- 1 sheet 9mm ply
- 1 sheet 15mm ply
- 1/4 sheet 12mm ply
- 2 sheets 12mm MDF
- Solid timber (eg. 1in Douglas Fir) for thwarts, etc
Instructions for free Western Skiff plans – click here to download
Overview pdf of Western Skiff plans (10 pages of A4) – click here to download
Full set of pdf plans of Western Skiff (39 pages of A0) – click here to download
Rig dimensions & sail plan – click here to download
Building an outboard well during skiff restoration in 2015, by Nic Compton
Browse the complete set of articles in this series online