
With the old, poorly-shaped tiller on the Snapdragon 23 having reached the end of its life there was only one thing for it – laminate a new one. David Pugh shows how to make a tiller
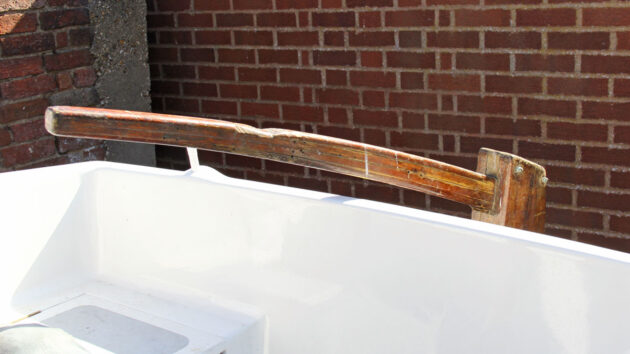
Balancing cost is one of the trickiest parts of a restoration. Even if you buy the boat for a song, it’s unlikely you’ll save much money in the long run: but doing your own work does at least mean you get a boat to your own specification and finished to your own standards. We tried to reuse old fittings and woodwork on our Snapdragon 23, but it was clear we would need to make a tiller rather than restore the old one.
Water had crept between the laminates and destroyed the glue on the old tiller, the windvane self-steering lines had worn deep grooves in the timber and, crucially, the end of the old tiller was too high for comfortable steering. We decided that a new one would be better, and would allow us to revise the shape.
How to make a tiller: laminating the tiller
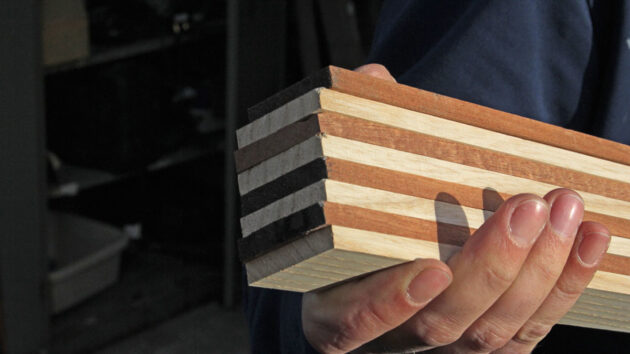
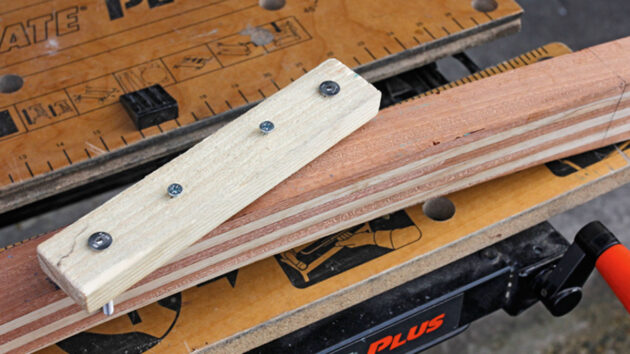
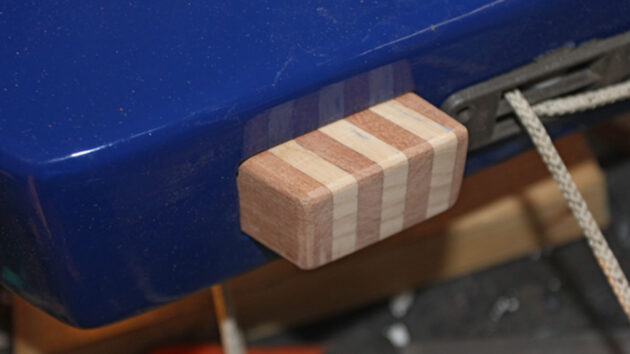
1. We haven’t got machining facilities, so having measured the old tiller we ordered eight laminates planed to thickness and slightly longer than the old tiller: four in ash and four in sapele.
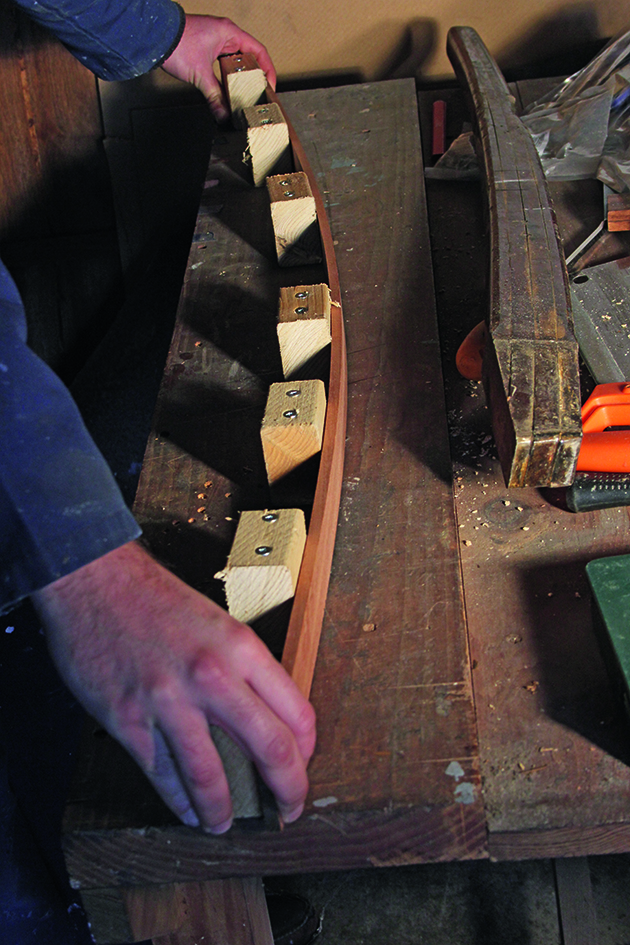
2. The aft part of the tiller needs to pass through the slot made by the aft coaming and traveller, so we used the old tiller to set the initial curve. Further forward we increased the curve to lower the end of the tiller. With the shape drawn on the bench we screwed blocks in place to make a jig.
3. Resorcinol phenol formaldehyde resin glues (we used the Polyproof brand) are completely waterproof and ideal for laminating. We used a toothed spreader to apply a layer to one surface of each laminate, then sandwiched them together.
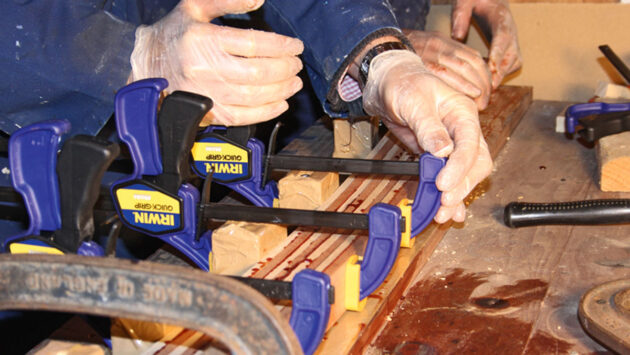
4. With the glue in place, we clamped the laminates to the jig. Working from one end allows the laminates to slide against each other as they bend. All the gluing areas you don’t want to stick need to be protected with plastic – parcel tape is cheap and effective for this.
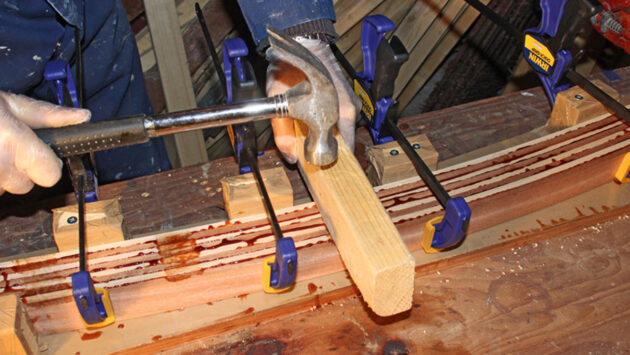
5. If any laminates stand proud, use a block of wood and a hammer to tap them down before giving the clamps a final tighten.
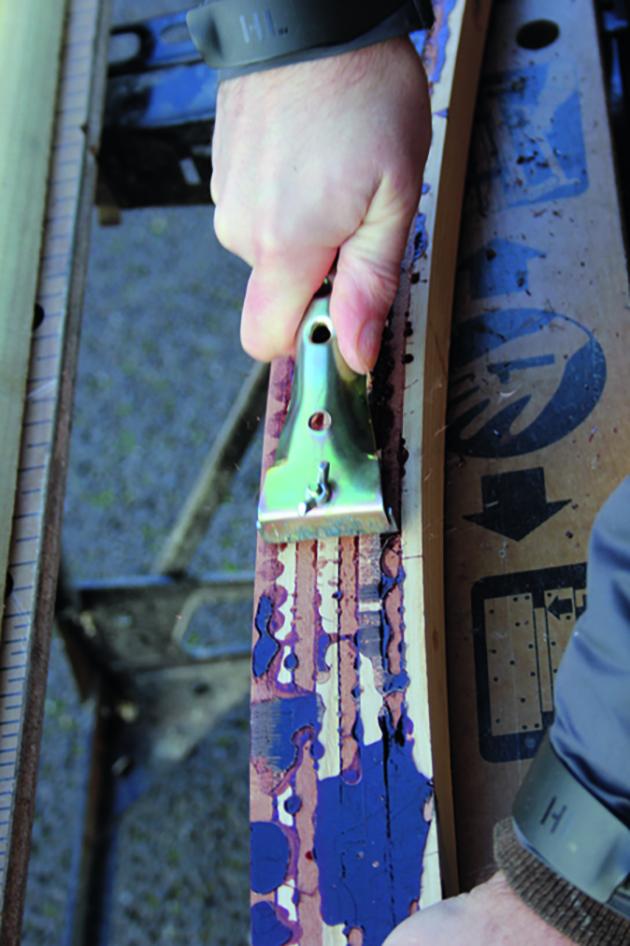
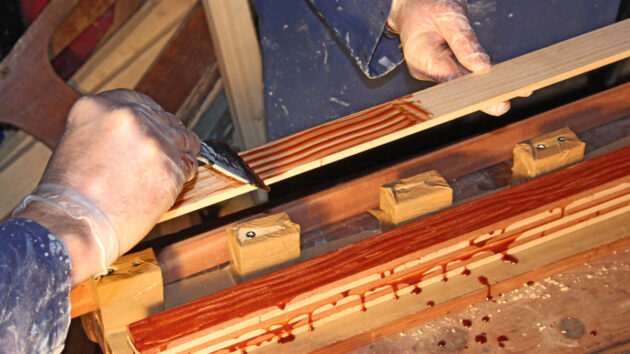
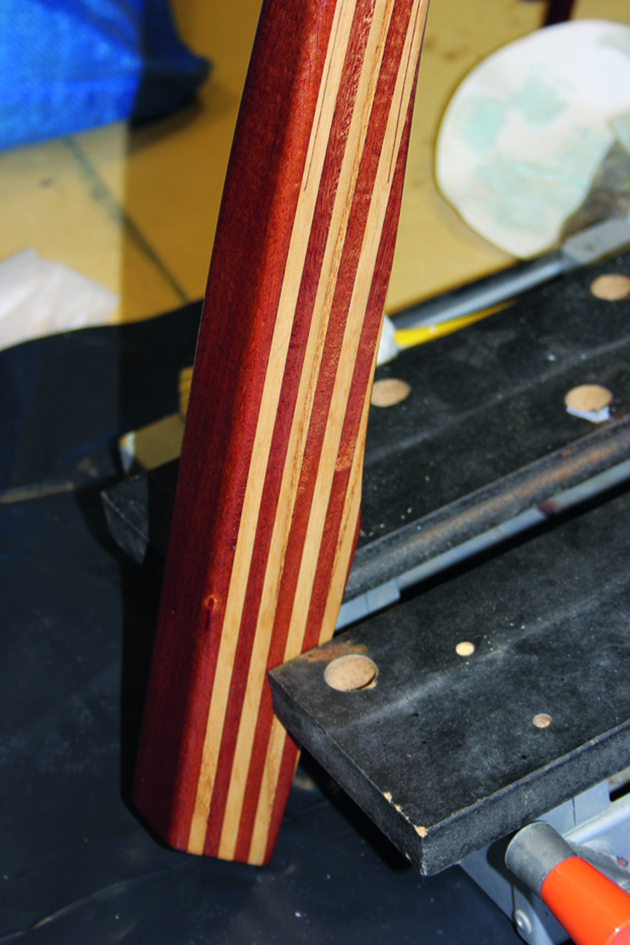
6. Once the glue had set, we removed the clamps. Where the glue had squeezed out we roughly removed it with a tungsten-carbide scraper and a belt sander – the resin takes the edge off planes and chisels like lightning. A jack plane finally levelled the edges of the laminates.
How to make a tiller: initial shaping

1. We’d set the curve correctly for the upper laminate, but there was plenty of timber to remove from the lower face of the tiller to give it a proper shape.
One of the boat’s sail battens proved ideal to mark the curve.

2. A bandsaw would be ideal to ensure a square cut, but we didn’t have one. We tried a jigsaw, but unfortunately the grain of the ash caused the jigsaw blade to wander – although square at the top, the bottom would go off course. Not to be recommended.

3. Instead, we carefully used a tenon saw to cut across the grain down to the level of the marked curve at intervals of about an inch, then knocked away the waste with a sharp chisel.
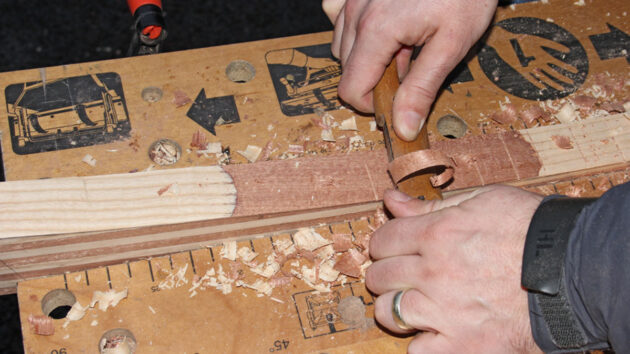
4. An old wooden spokeshave with a fairly flat bed proved ideal to finish the job. With laminated timber it’s quite easy to stay square as the ends of the laminates provide a guide. We also planed a gentle taper on the sides of the tiller, resulting in a square at the forward end.
Making it round
1. We wanted the forward end of the tiller to be round, so first you need a square. From that point you need to plane to an octagonal shape, then to 16 sides before final shaping. A spar gauge helps mark the octagon: set the pins at the ratio 7:10:7.
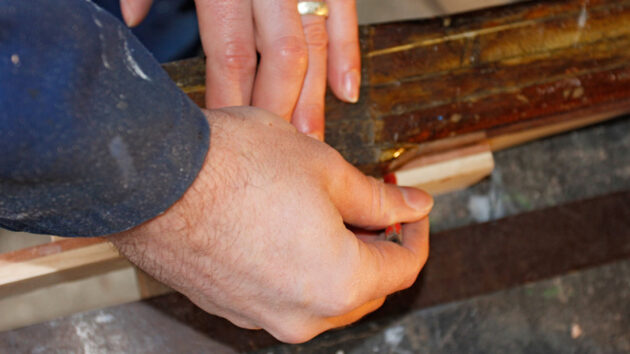
2. Because the tiller needed to taper back to a rectangle at the rudder, we only marked the first few inches with the spar gauge. A mortise gauge helped continue the lines further aft. It’s best to scribe lightly and reinforce the marks with a pencil, as deep marks may not be planed out fully
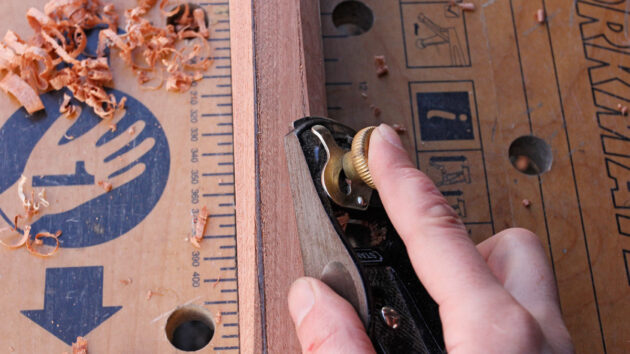
3. With the tiller marked, we used a plane on the convex surfaces and a spokeshave on the concave surfaces to remove enough material to form an octagon at the end. We
judged the final taper going aft by eye.

4. We then repeated the procedure to make 16 sides. By this time, the end of the tiller was beginning to look quite round!
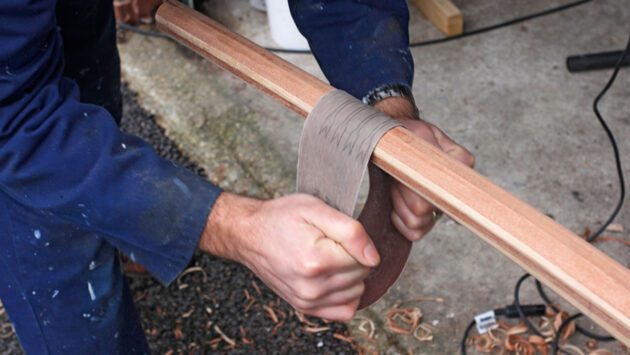
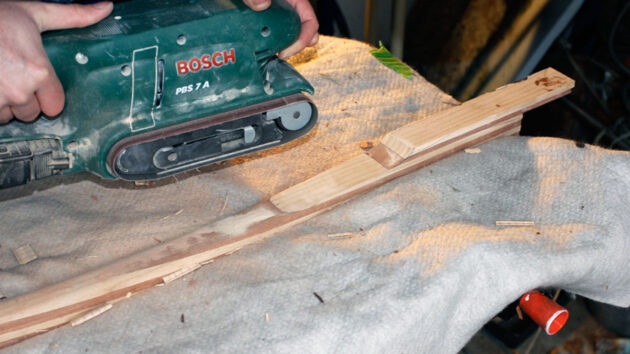
5. With a large section, such as a mast, it can be worth planing to 32 sides, but for a small section it’s easier to sand from 16. A belt sander belt turned inside out and used across the grain worked a treat, followed by hand-sanding along the grain.
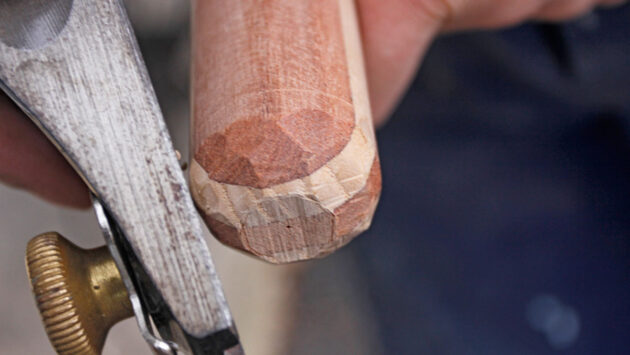
6. Once we were happy with the shape, we cut the forward end square and used the same techniques to mark a hemisphere on the end. A block plane removed the majority of the material, followed by sanding.
Fitting and finishing
1. We needed slightly more depth for the tapered section at the aft end of the tiller to fit the rudder stock, so we glued in place some of the waste laminates cut away during the initial shaping. Once cured and cleaned up, we used the old tiller to roughly mark the shape required.
2. The curve just forward of the rudder stock taper was quite tight, so once we had removed the excess material we used the front roller of a belt sander to tidy it up.
3. Final fitting was a mixture of measurement and trial-and-error, carefully planing off enough material to allow the taper to fit snugly inside the rudder stock – with some tolerance for varnish.

4. Once we were happy with the fit we marked the end of the tiller parallel to the aft face of the rudder stock and trimmed it with a tenon saw…
5. … leaving about an inch to protrude from the rudder stock. A combination of a block plane and sandpaper cleaned up any rough edges, and this was followed by a final, all-over sand with 240-grit paper.
6. All that remained was to apply seven coats of varnish
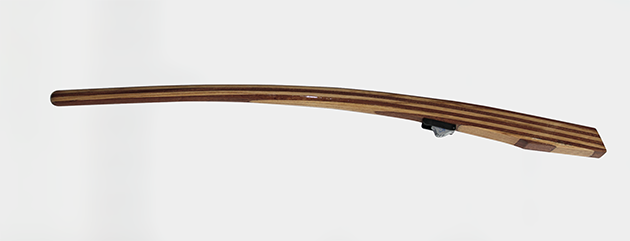
The finished tiller

The art of veneering: step-by-step
Face up to the task of applying veneer with the help of boatbuilder Tony Davies

Tiller to wheel conversion: step by step
If you have a tiller-steered boat and would rather have a wheel, how would you go about converting it? David…

Moving from varnish to wood oil
Don’t be a slave to varnish. Louise Ras explains how she transitioned to wood oil instead

Painting and varnishing a boat: how to get the perfect finish
Kit boat builder Polly Robinson shares her tips for painting and varnishing a plywood-epoxy boat
Want to read more articles like How to make a tiller for a boat?
A subscription to Practical Boat Owner magazine costs around 40% less than the cover price.
Print and digital editions are available through Magazines Direct – where you can also find the latest deals.
PBO is packed with information to help you get the most from boat ownership – whether sail or power.
-
-
-
- Take your DIY skills to the next level with trusted advice on boat maintenance and repairs
- Impartial, in-depth gear reviews
- Practical cruising tips for making the most of your time afloat
-
-
Follow us on Facebook, Instagram, TikTok and Twitter