
Gordon Davies and Alison Mainwood describe how trial and error led them to design and build their own very lightweight compact folding dinghy at a very reasonable price

A dinghy adds an enormous amount of fun to a cruising holiday, but on a small boat there is always the problem of where to stow it.
Hang it on davits and it gets in the way in tight manoeuvring and it can block the view astern; storing it on deck is often a nuisance.
Our first yacht was a second-hand Moody 31, which came with a neat Avon inflatable and outboard. We could stow it below and inflate it quickly, but we hated the gymnastics involved in mounting the outboard and didn’t like carrying petrol.
As we worked out our style of cruising we realised that we rarely actually needed the motor. In a peaceful anchorage it was preferable to row quietly, and our dinghy rowed as badly as most inflatables.
The much-loved Moody was our weekend and holiday home for eight years and that was the dinghy we had.
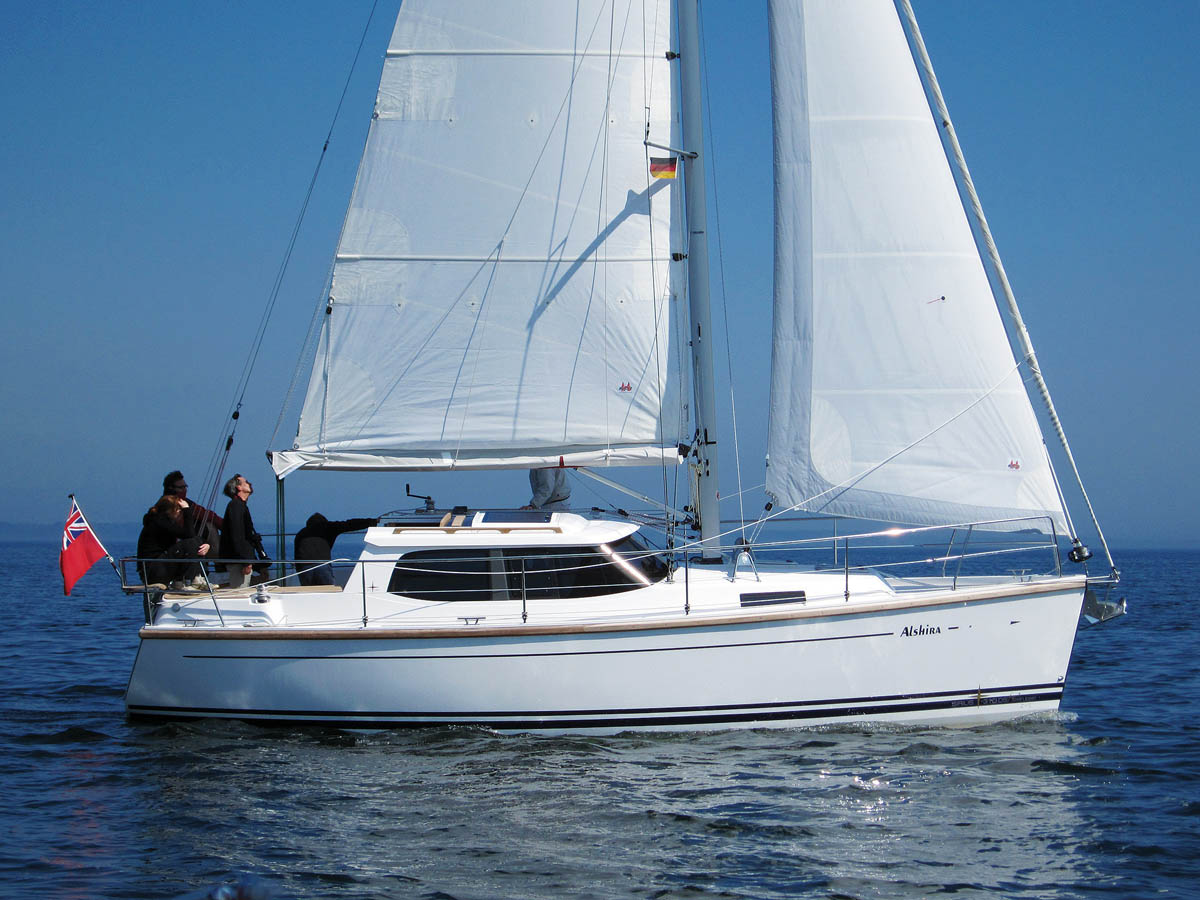
Sirius 310 Alshira’s self-tacking jib means foredeck stowage for a tender is out of the question
Gordon retired in 2010 and we had our Sirius 310 deck saloon boat built. Alison was still working, so we kept Alshira at the builder’s base in north Germany through one summer and got to know her.
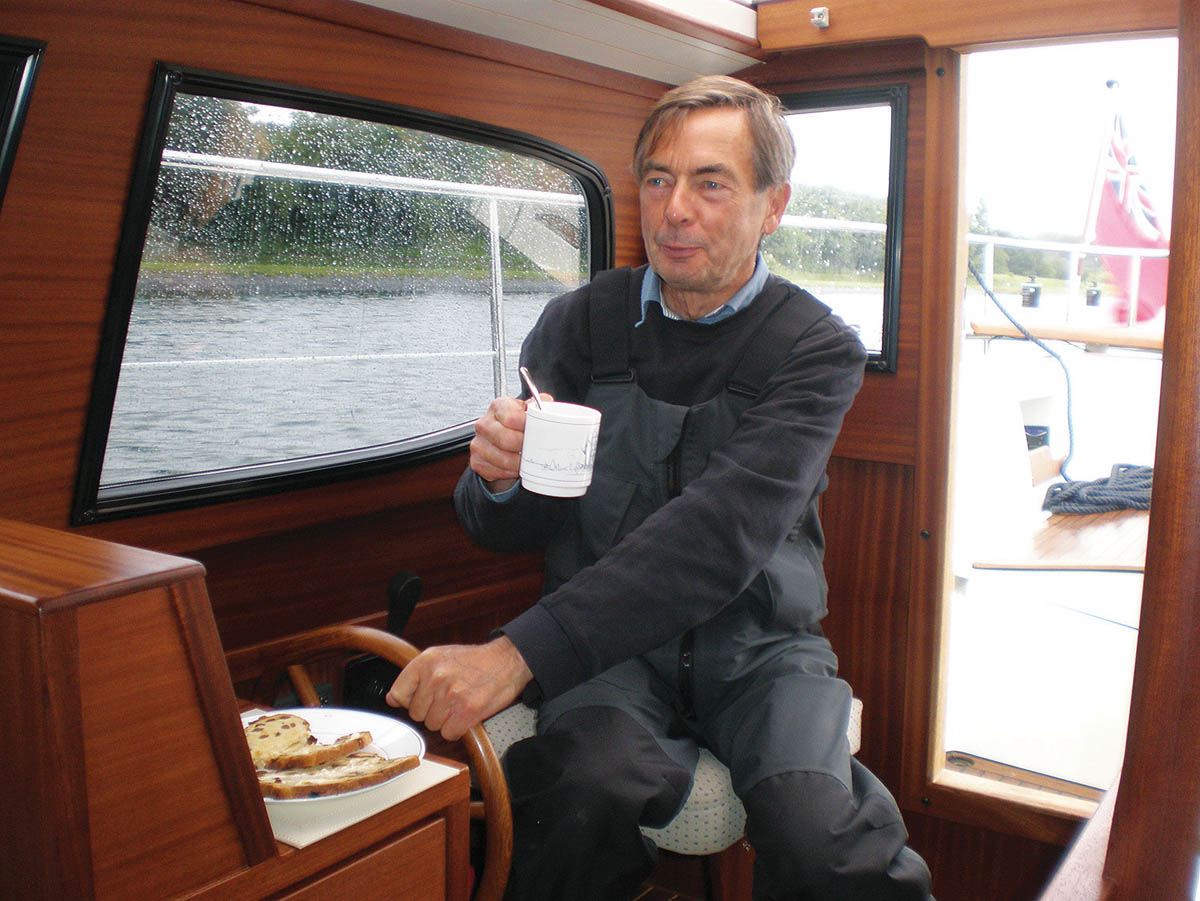
Alison loved being able to see out as she navigated, and a trudge homeward down the Kiel Canal in pouring rain showed the benefit of the inside steering position.
We liked being able to make the longer passages with both of us inside, warm and dry.
Visibility from the inside helming position could be easily blocked by gear strapped to the stanchions
The 360° vision was essential. And that created a problem for dinghy stowage on deck.
There were excellent commercial folding dinghy designs and nesting tenders on the market, such as the Banana Boat and the Portaboat, but the versions suitable for two adults stow at full length (over 2.5m), so would have to be lashed to the stanchions blocking our view. We have a self-tacking jib, and so cannot carry something like a Nestaway on the foredeck.
We were also at the limit of our boating budget.
But there was a simple solution which appealed to us – building a boat at home. Since we had extensive experience of making plywood kayaks, why didn’t we make a plywood folding dinghy, tailored for storage in the technical room?
Aboard the Sirius 310 deck saloon – we had specified a technical room instead of a cabin beneath the cockpit (photo by David Harding)
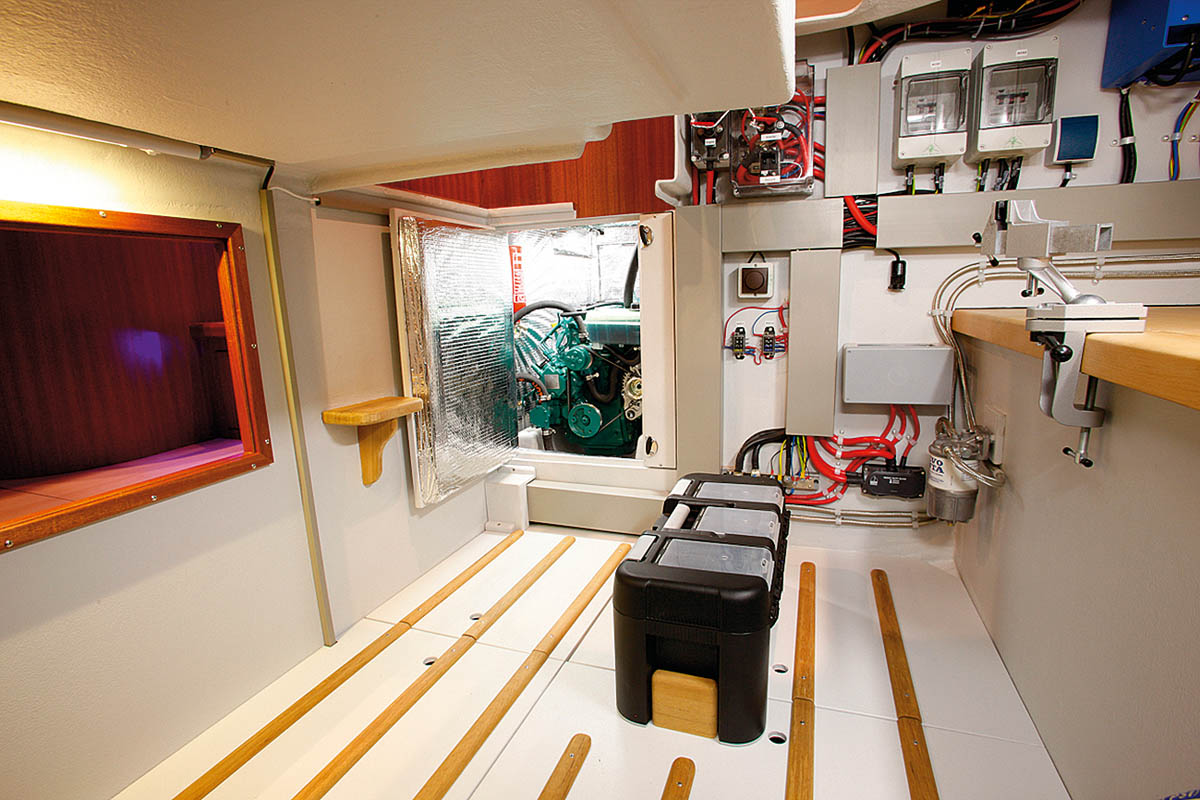
We only occasionally have visitors and one cabin on the Moody had always been ‘the shed’. On our new boat we opted to have only one cabin. As well as giving us a much larger cabin and heads compartment, we now had a technical room under the raised saloon.
Well, it turned out to be not quite that simple…
Article continues below…

A new build nesting dinghy for a newlywed couple
In the days before inflatable dinghies it was common to have a hard dinghy, to be left on the mooring…

Make your own dinghy wheels
A 2.7m dinghy with a solid aluminium floor is great, until it comes to moving it around on land –…

How to build a Baby Tender – the miniature clinker boat baby cradle
I first saw a cradle boat at a wooden-boat show years ago, and thought to myself: ‘When I have kids,…
How to design a folding dinghy
A model proves the design
Before cutting wood we needed an exact design, but it was Alison’s idea to make a model which helped us realise a number of important features of the concept.
1. Each side panel is joined to its bottom panel all along the chine. When the boat is folded up, the side panel lies flat on top of the bottom panel, which can only happen if the adjoining curved edges are exactly the same shape.
2. This first point dictates that when the dinghy is unfolded the bottom panel will bend up at the bow and stern creating rocker, or curvature, on the underside of the boat.
3. The amount of rocker depends on how much the sides lean out.
4. The gunwale is a not a simple curve thanks to the amount of rocker and the different angles of the panels when the boat is unfolded.The hull in progress shows the shape
How to make your own oars
Our oar shafts are not the usual circular cross-section – an elliptical shape saves weight and is just as strong in the direction of pulling.
A long time ago we decided that it is better to use a metal rowlock than a wooden thole pin. We use a peg through the shaft and a cushion of rope to stop the oar from sliding through the rowlock.
The blades of the oars were made by laminating three layers of 3.8mm marine ply forced into a dish shape by an assembly of clamps. The blade is glued into a slot in the shaft.


First attempt at building a folding dinghy
The technical room on Alshira is 1.8m long and so we reckoned that the dinghy should not exceed 1.4m.
That would still give us a useable tender.
Looking around for ideas, we were impressed with the Flapdoodle design. It was too large for us but gave us valuable ideas.
We started building in the cold winter of 2010 – too cold to use the garage for construction, so the spare bedroom became the varnishing station and the living room was the boatyard.

Main parts of the first build

Start of fabric secured by an extra central plywood strip

Alison building in the living room

Folded hull is easily carried
The basic shape of that first attempt was a success, and we have kept it through successive builds:
- The boat had a single chine. Each side could be folded inwards on top of the bottom board.
- The narrow central strip provided the room for the two halves of the boat to fold together to give a package that could be carried under the arm.
- We cut the panels for the hull in 6mm ply and stitched them together with nylon fishing line.
- The joints were sealed with plastic-coated fabric, held tightly to the panels by screwing strips of 6mm ply over their edges.
- The fabric covered the bow and stern, with 6mm ply panels slotted in behind them.
- The seats were 10mm ply for strength.
- The woodwork looked good and the boat was amazingly strong.

Gordon tests out the MkI dinghy
But the strength came at the price of weight – much of the hull was a double thickness of 6mm ply – and even worse, it leaked. We could never get the ends of the boat completely watertight. So eventually we gave up and started again.
A Mark II folding dinghy
It was essential to get the weight down, so we switched to 4mm ply and screws were banned. We needed to make all the components lock together. What followed is diplomatically called a steep learning curve, but we did get some of it right.
This design used a transverse beam. To stop it jumping out of its mount we simply pinned it with a piece of 6mm dowel – a treenail, or trennel – which worked perfectly. Dowel is weak when bent but strongly resists shearing.
On this boat we glued waterproof fabric to the side and bottom panels and continued the fabric round the bows and stern.

A good example of a dowel pin in use
Underside of one of the MKII’s seats

All wooden components of the MKII boat

Covering the hull with plastic-coated fabric

The bagged up second build
But again, it didn’t work. The fabric fitted the folded boat perfectly, but it was baggy when the boat was unfolded and so was vulnerable to abrasion.
The nylon stitching also rubbed against the material when the joints were folded and unfolded. And there was still the problem of leaking at the ends of the chines which we could never solve.
But we now had a lightweight dinghy that could carry the two of us. It was a bit cosy, looked ludicrously small, but was similar in size to our original two-person Avon inflatable.

The MkII tender was cosy but useable
But surely we could improve the design so it didn’t leak…?
Third time lucky!
In 2012, Alison retired and we set off on the first of our four-plus month summer trips, which gave us time to think.
For ease of rowing, and extra security, it would be good to have a larger boat, around 2.5m long.
For stowage that would require a new design allowing the boat to split into halves.
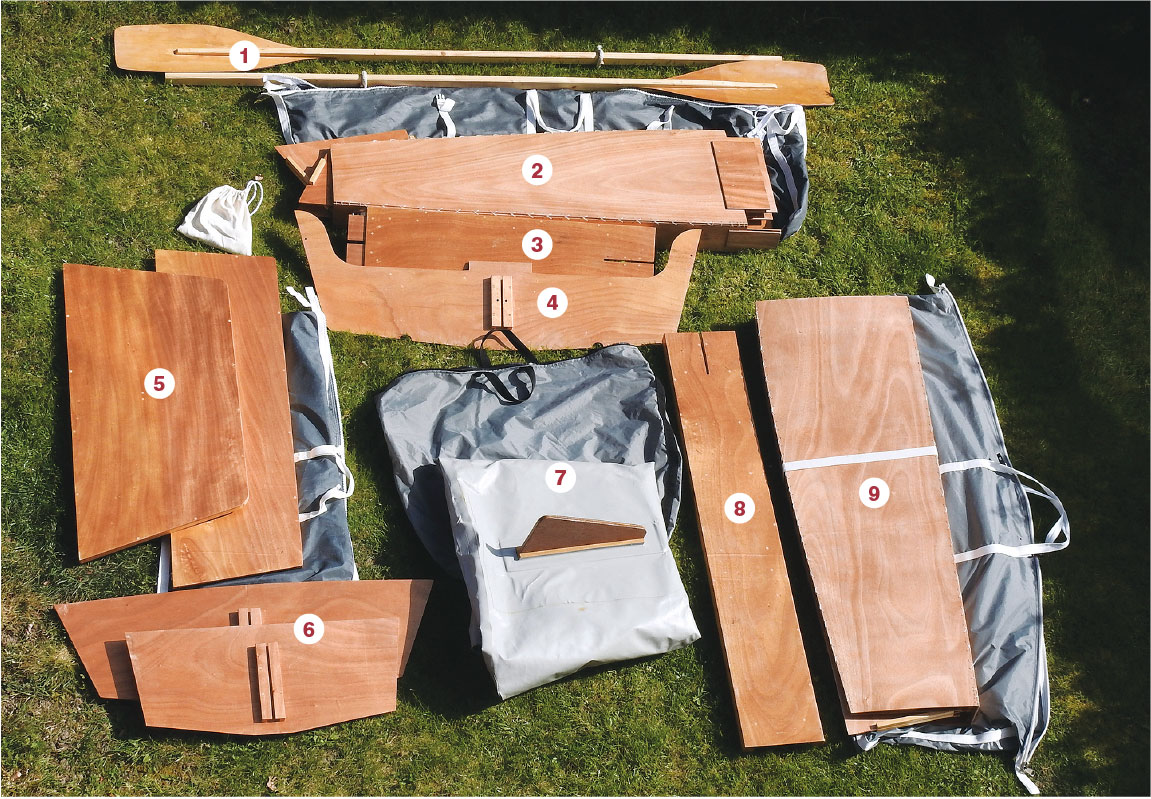
The two main hull sections are around 1.25m long and have a bag each. Seats and full-width bulkhead also go into these bags. The third bag holds bow and stern sections and the decks, while the fourth bag is for the watertight skin. 1. Oars 2. Forward hull sections 3. Front half of longitudinal seat 4. Central bulkhead 5. Fore and aft decks 6. Bow and transom sections 7. Fabric skin and skeg 8. Rear half of longitudinal seat 9. Aft hull sections
We had never solved the problem of making the folding joints watertight, so the solution was to avoid this problem altogether. We decided to make the fabric into a skin that would sit around the plywood hull, using generous darts in the material to get good overlaps. That way we would just be gluing flat pieces of fabric together, and that is reliably done with the recommended two-part glues.
Building was delayed while we moved house, escaping from London to the East Coast. We built a workshop in the garden, but the first things we built there were garden gates, bookcases and then a rigid dinghy and a new kayak to use on the river across our lane.
The new folding dinghy was designed again first as a paper model, then, since the hull has a simple shape, an Excel spreadsheet was used to check the draught (and hence the freeboard).
We also calculated the position of the centre of buoyancy with different loads, because in a lightweight dinghy the crew must be able to sit so that the boat is balanced. The simplest solution is to use a longitudinal seat and have two sets of rowlocks. With two people in the boat, the forward rowlocks are used and with one or three people the aft set is used.
Planning finished, it was time to start building. The hull panels were cut in 3.8mm three-ply marine plywood bought online from Robbins Timber of Bristol.

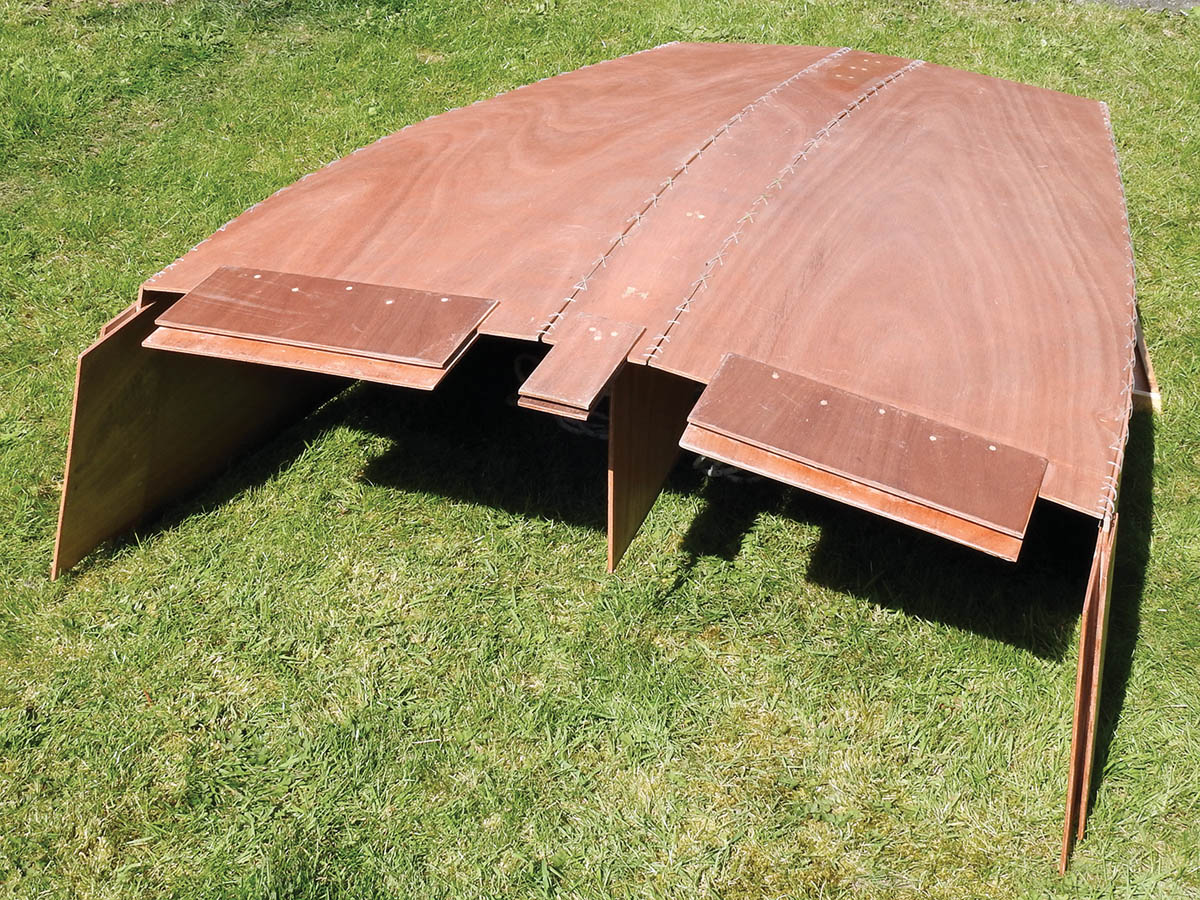
Stitched seams
The hinge joints were made by sewing the boards together using Ultima Seastrike fishing line with a 100lb breaking strength. The line passes through holes 2mm in diameter, 5mm in from the edges of the panels and spaced 25mm apart along the edges.
One thread follows a zigzag along the holes, and a second thread forms the crosses by zigzagging in the opposite direction. We gave the wood a couple of coats of polyurethane before sewing the panels together, so that the polyurethane could seal the edges of the holes (exterior grade polyurethane from a DIY shop is sufficient for the job).

Bulkhead pin, toggle etc
The dinghy breaks in half at about the midpoint. Because the joint does not have to be watertight, we simply slot the back half between plywood sleeves attached to the inside and outside of the front half of the boat. Four small, basic toggle latches obtained online from RS Components secure the two halves together.
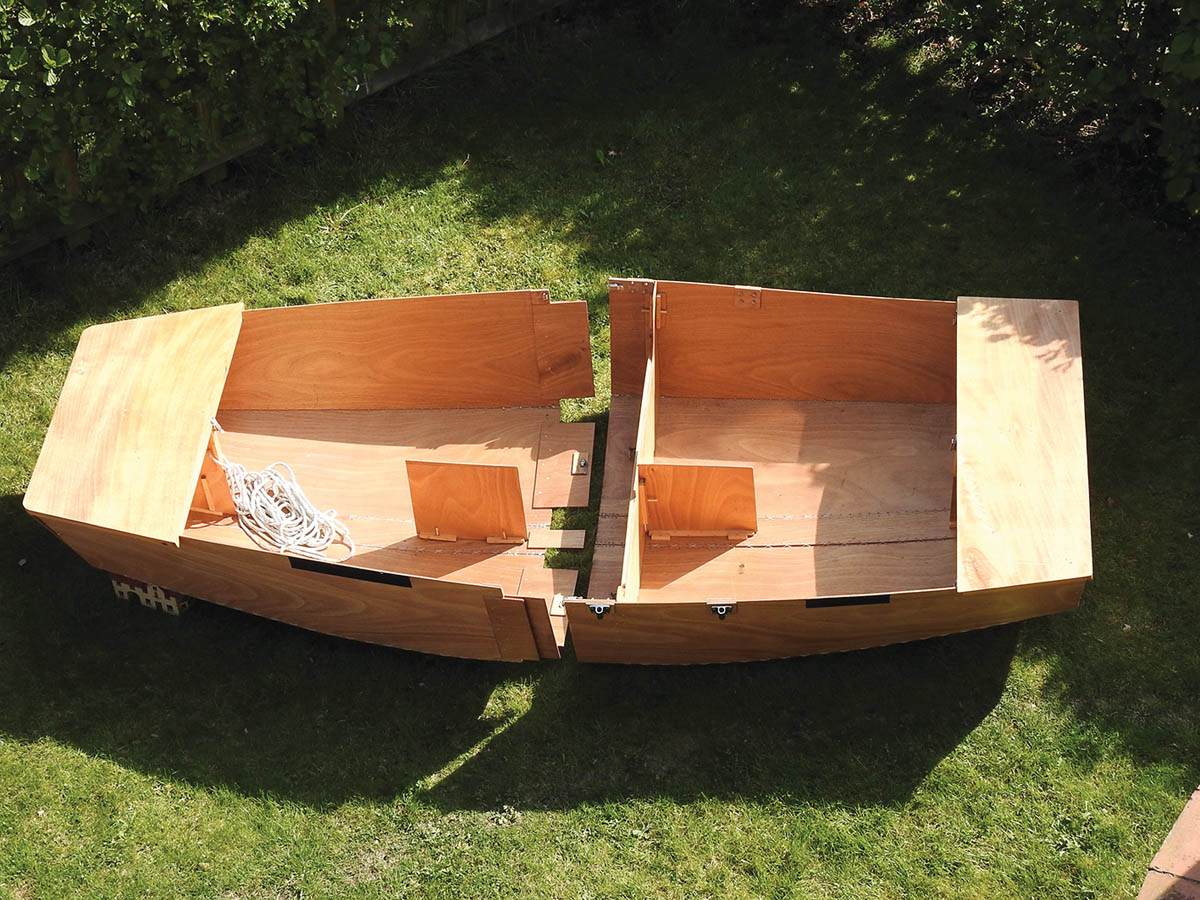
Boat breaks in the middle to keep components small enough for stowage
Plywood sleeves on one half slide over the other
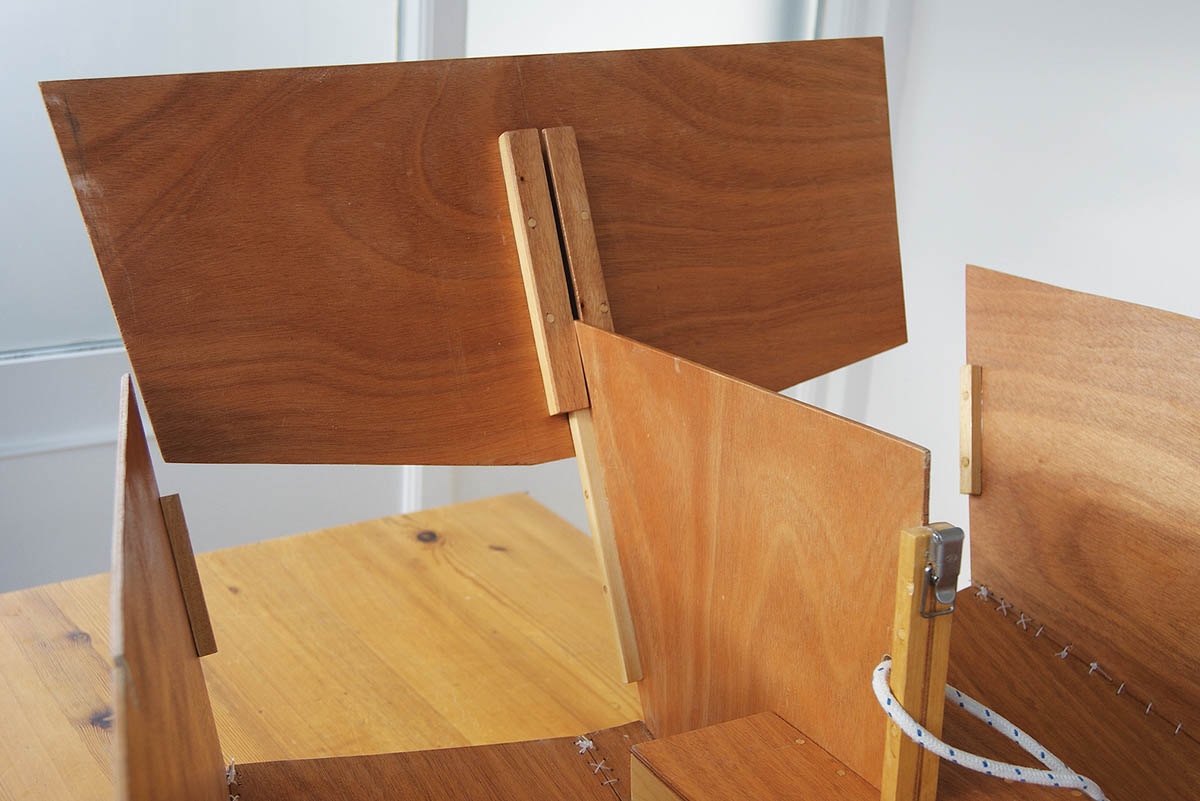
To hold the sides of the dinghy out, and also to help support the seat, we have a bulkhead across the middle of the boat. We fix it in place with a system used throughout the boat: on the side panels we glue pieces of 10mm square-section softwood leaving a gap into which the bulkhead slides. Wherever we have glued components together, we have also drilled through them and glued in some 6mm dowel, to further strengthen the joint without extra weight. The bulkhead is held in place on each side of the boat by passing a 6mm dowel pin through it and the square-section wood. These pins have never broken in use.
Bow plate sliding into position
To maximise useable space in the dinghy, the bow is squared off. A plywood vertical panel is glued to the central plate at the bottom of the boat, sandwiched between square-sectioned wood. The front edge of this plate has square-section wood glued to both sides, down which the bow plate can slide into position. The vertical partly supports the foredeck, which locks on to the bow plate and the sides of the boat. By the time the deck has been pulled downwards by toggle clips, the front of the boat is becoming rigid. The same system is used at the stern.

The underside of the longitudinal seat.
The longitudinal seat is made in two pieces. The ends are slotted to connect with the two verticals at each end of the boat. The centre of the seat sits on the transverse bulkhead and also on two more vertical ply pieces, which sit on the central plate at the bottom of the boat, near its middle. These verticals are right where the central board bends most when the boat is unfolded, and so cannot be glued into position. There has to be some flexibility for the movement, even though it is only a few millimetres, for example by using square-section wood to trap the vertical in a groove.
Skin and skeg
Next was the waterproof skin for the boat. We used 560g/m² PVC coated polyester from Attwoolls Manufacturing, glued with Polymarine PVC two-part adhesive. Our sheet was 1.5m wide, enough to cover the bottom of the boat in one piece with a few dress-making darts. It can be cut using domestic scissors, and easily and reliably glued using the two-part glue.
All the edges of the skin are folded over and glued, to give a double thickness for resistance to tearing, and a cord runs round the boat, inside the fold, to stop the edges from stretching.
At the bows we overlap the skin on to the foredeck and slide the plywood structure into it. That overlap further strengthens the bow structure. Similarly at the stern a flap in the skin overlaps the stern deck and is tied down using the cord.
On each side of the boat there are two short lengths of heavy duty Velcro, 50mm wide, to stop the skin from sagging.

Skin tied down at the stern
The skeg is incorporated in the skin. In cross-section it has a T-shape with the top part of the T secured to the skin by glued strips of the plastic sheet. For strength, the skeg is made of 10mm marine ply. The fabric is strong enough to hold the skeg in place. In fact we have had no tears anywhere in the skin in three years of use.
In use on a cruise
The folded hull stows in homemade bags in the technical room on our Sirius 310. Each bag is light enough to be easily lifted out and carried to the foredeck where the plywood structure is assembled. A spare halyard lifts it so that we can slide the skin on, the dinghy is then lowered on the halyard into the water, and towed round to the stern for easy access. Assembly takes ten minutes.

Note the skeg attached to the boats skin on the underside.
The dinghy has now been used on trips to Denmark, Norway and the west coast of Scotland with minimal wear and tear. Obviously we take care when landing on a pebble beach, but the dinghy is easily carried up the beach by one person at each end. It rows easily and is stable – an adult can stand at one side without capsizing it – and it tows happily.
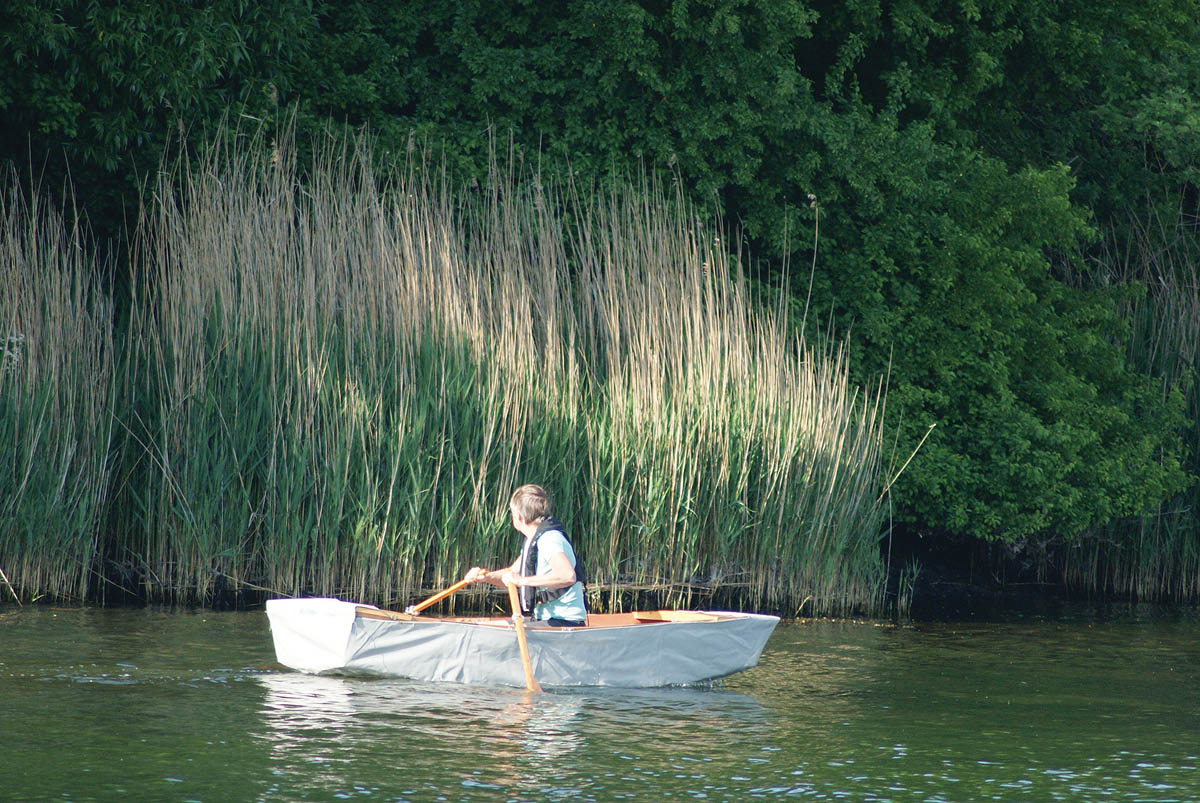
Alison rowing the MkIII tender
The emphasis with this boat is its practicality and we don’t pretend that it’s beautiful. But despite the long genesis, its construction and use have given lots of fun.