
Fitting a PVC gunwale strip to your boat is a sustainable, maintenance-free alternative to traditional teak that any competent DIYer can master, as Jake Kavanagh explains
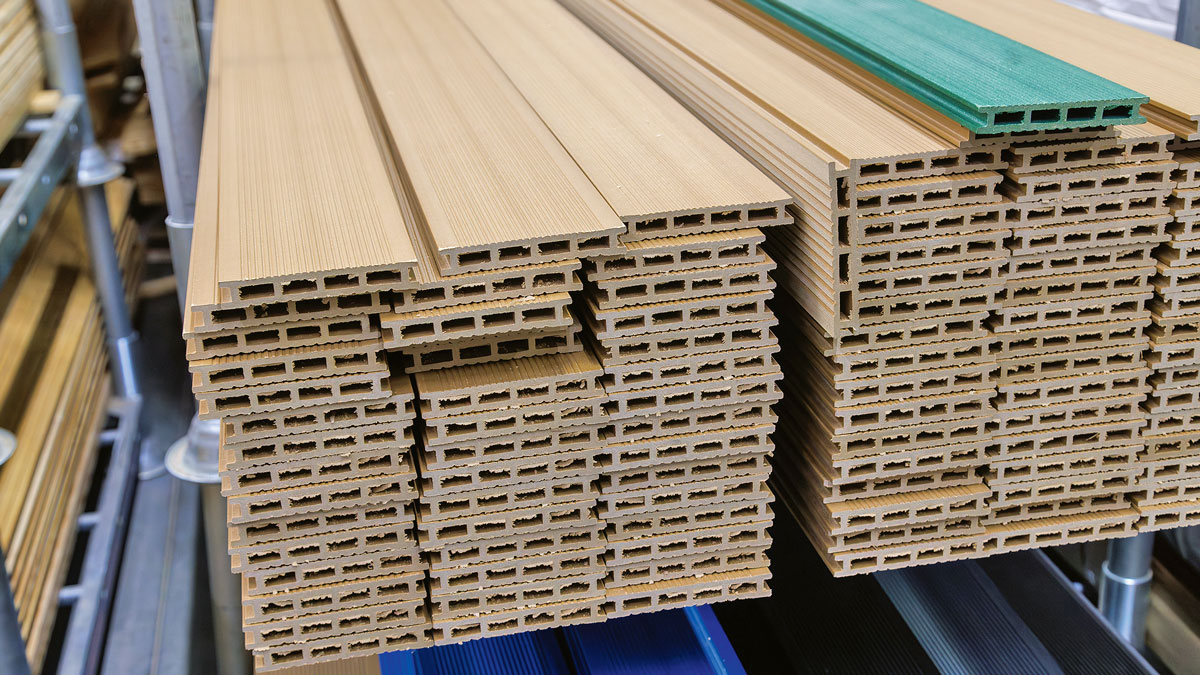
With pressure on the marine industry to become more sustainable, a key area of advancement has been in artificial woods, especially teak. There are now some polyvinyl chloride (PVC) alternatives that look and feel as good as natural timber but are much more affordable.
They are colourfast, need virtually no maintenance, and are easy to work with. On the downside, they’re a little hotter underfoot and heavier than hardwood. Typical weights for forest teak, for example, are 655 kg/m3 (41lb/ft3), while PVC is around 1,380 kg/m3 (128lb/ft3).
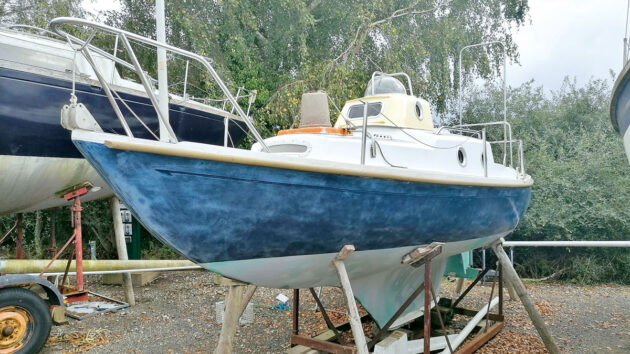
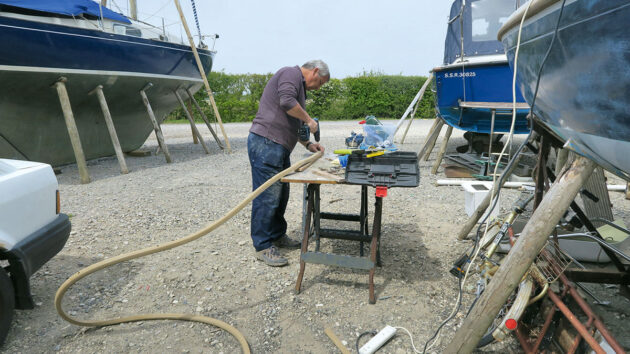
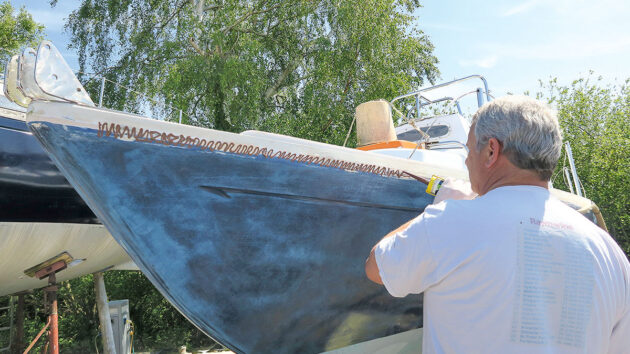
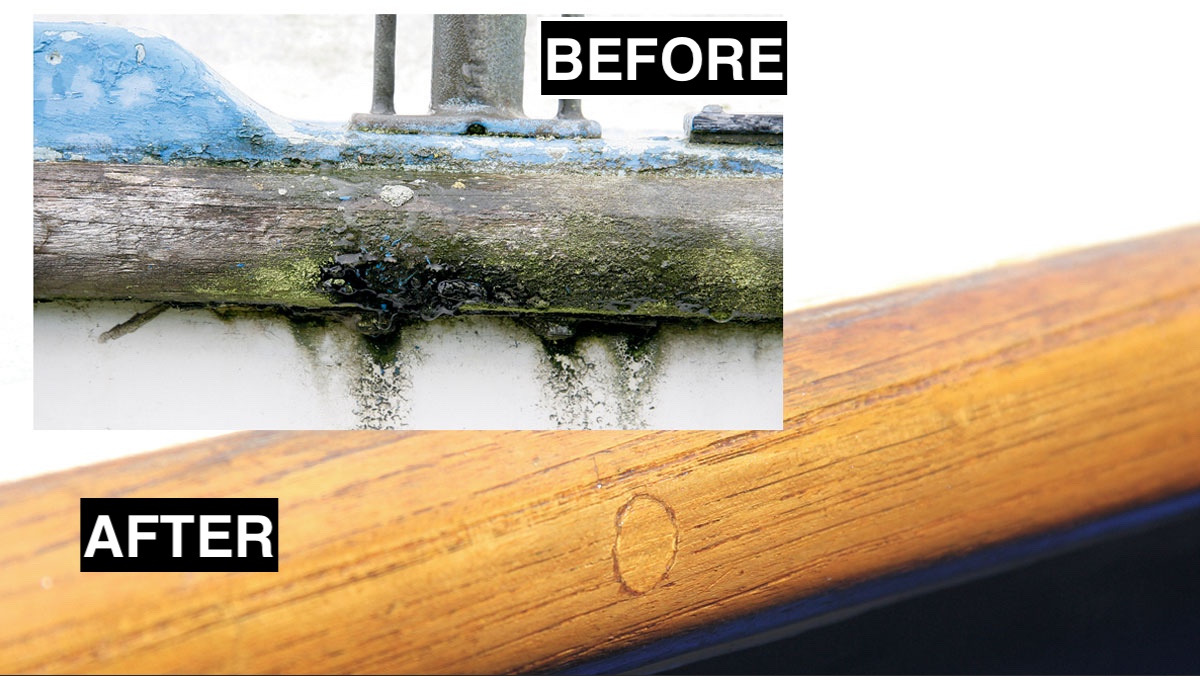
On seeing an example from UK-based Wilks Fendering (now acquired by Flexiteek International, also head-quartered in the UK) in 2019, I decided to replace the badly weathered gunwale strip on my 21ft Corribee Pod with a PVC alternative.
The solid PVC gunwale we used has been superseded by rigid PVC Wilks ‘Bump!’ Credit: Flexiteek
The PVC gunwale is available in several profiles, colours and sizes, and the brochure guides you to the right choice. I opted for a like-for-like swap with TR36L2G, a D-shape profile that offered a ‘traditional’ teak colour with a pronounced grain (I also had the option to buy a smooth extrusion and apply my own ‘grain’ using sandpaper).
The fendering is sold in 10m lengths and was supplied wrapped as a coil for transport. However, TR36L2G is now only available from distributors, but the DIY replacements have proved easier to install. Pod’s gunwales measured 5m on each side, so a 10m roll was sufficient.
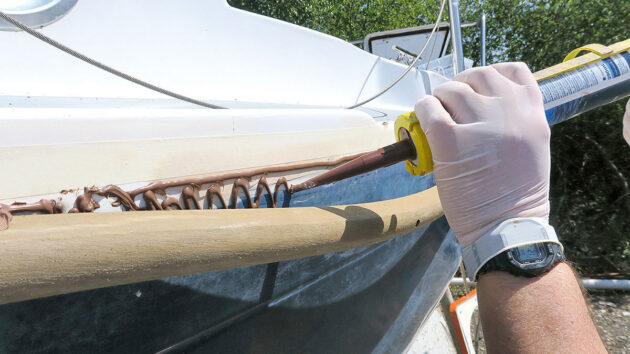
Also required for the fitting of the PVC gunwale was a length of colour-matched piping as a screw hole filler, a special prep wipe for the hull, and several tubes of Bostik brown MSR adhesive sealant.
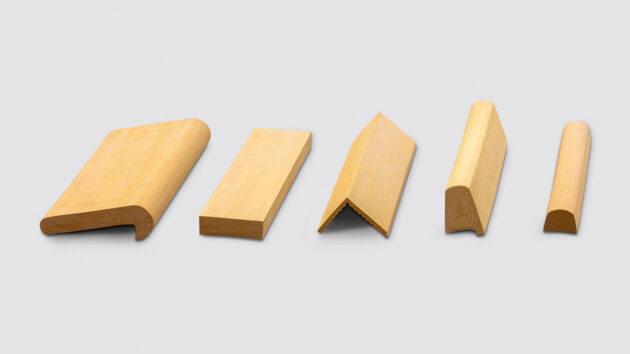
The extrusions can be made for almost any part of a boat where timber is traditionally used, such as rubbing strakes and even capping rails. Credit: Flexiteek
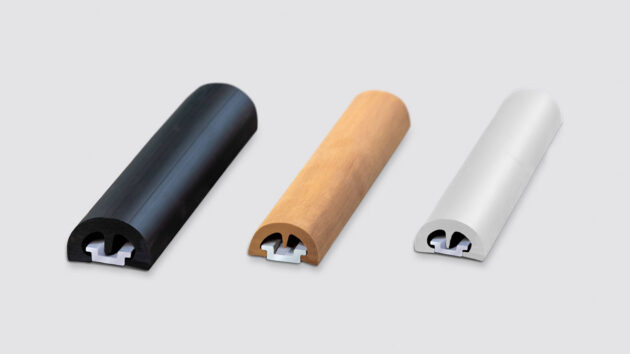
The D-section we used is still available from Flexiteek distributors, but has been superseded for DIY use by the Click (black and white only) and Bump! versions. This profile is easier to fit and uses the flexibility of the supporting track to create an almost perfect curve as it traces the deck line. No fixings are visible upon completion except for the end pieces.
This is a job any competent DIYer can do and needs no extra materials except for stainless steel screws for the track. Once installed, it can be left alone for years.
The cost of the project was as follows: Bump! 10m: £157.94 Track 10m: £111.36 End caps (x4): 136.76 Stainless steel screws: £10 Total £416.06
Useful websites: www.wilks.co.uk www.flexiteek.com www.marineindustrial.co.uk
Prepping the hull for PVC gunwale
Credit: Jake Kavanagh
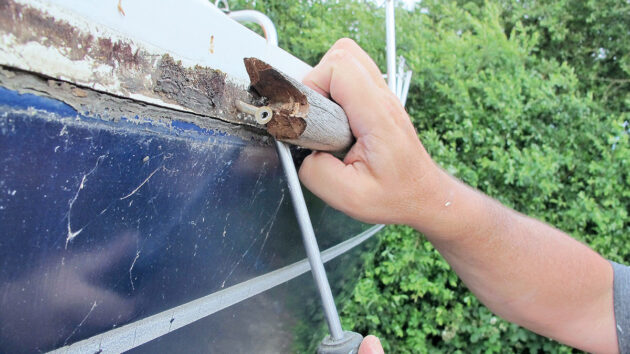
1. The old gunwale strip was damaged and rotten, so screws and rivets were extracted, and the wood levered off with a chisel. Any stuck screws were heated, the resulting expansion making them easier to take out once cooled.
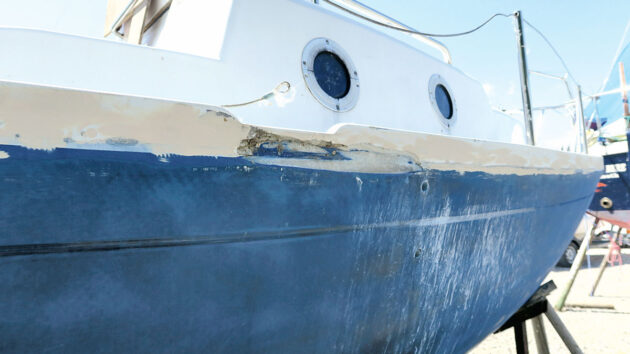
Credit: Jake Kavanagh
2. With the old strip gone, the hull to deck joint was abraded back until smooth. The screw holes and any other gaps or damage from the gunwale strip removal were then filled and made good with epoxy filler.
Credit: Jake Kavanagh
3. The hull and filler were then gently sanded back with an orbital sander with 60- then 80-grit to ensure the surface was smooth and flat from bow to stern. The hull and toe rail were due to be painted anyway.
Credit: Jake Kavanagh
4. Masking tape was applied directly above where the new gunwale would be placed to catch any squeeze-out of the adhesive. We didn’t mask below, relying instead on cleaning up with a sharp-edged scraper. (‘Bump!’ track fitting is much quicker).
Credit: Jake Kavanagh
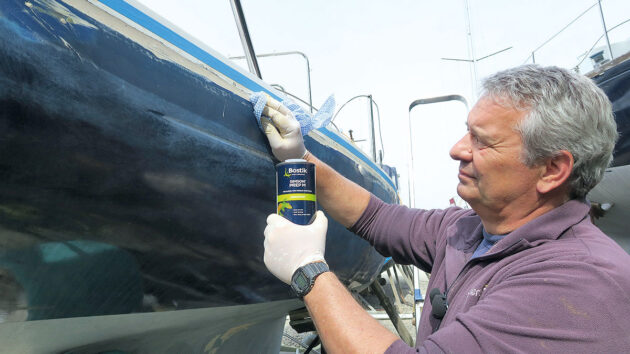
5. The area to be bonded was then cleaned with Bostik Prep M, also available as disposable wipes. This formula removes any oils or silicone from the surface to ensure a strong bond.
Fitting the PVC gunwale
Credit: Jake Kavanagh
1. The moulded gunwale strip was uncoiled and drilled with screw holes roughly every 50cm, worked out for even spacing along the boat’s length. The material cuts quite easily, so care must be taken to drill gently, especially if you’re used to working with hardwood.
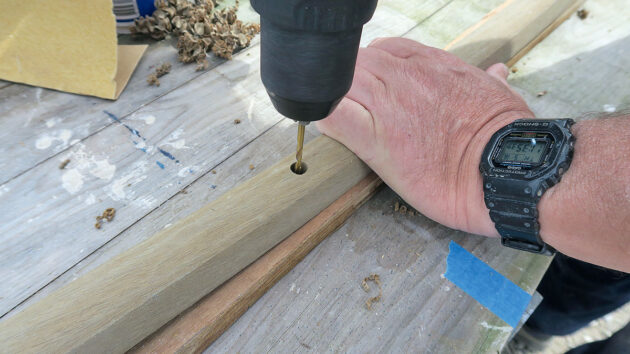
Credit: Jake Kavanagh
2. The holes were stepped, the smaller hole wide enough for the shaft of a stainless steel self-tapping screw, the larger hole, descending halfway, the same diameter as the 8mm piping. You can drill for panhead or countersinking – either works.
Credit: Jake Kavanagh
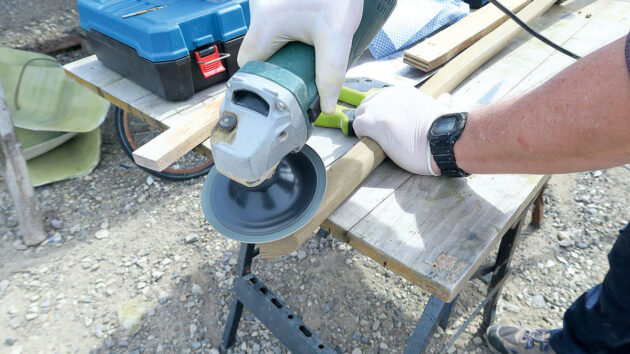
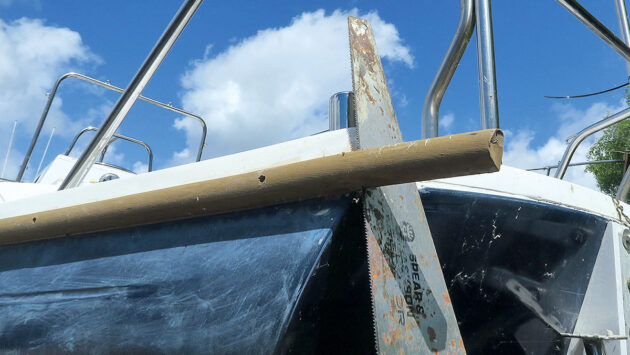
3. The original strip has a shaped end at the bow, so this was recreated with an angle grinder and hand-finished. The pigment is consistent and goes right through the material, just as with natural wood, and is highly UV and chemical-resistant.
Credit: Jake Kavanagh
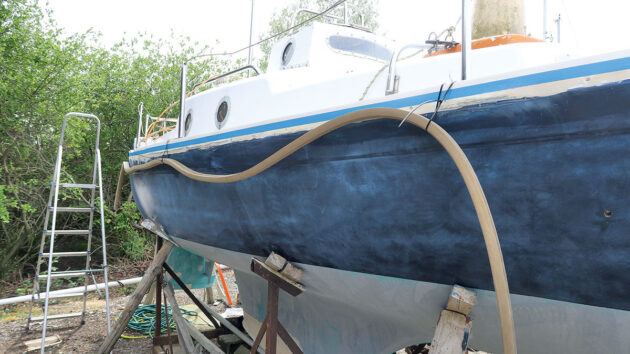
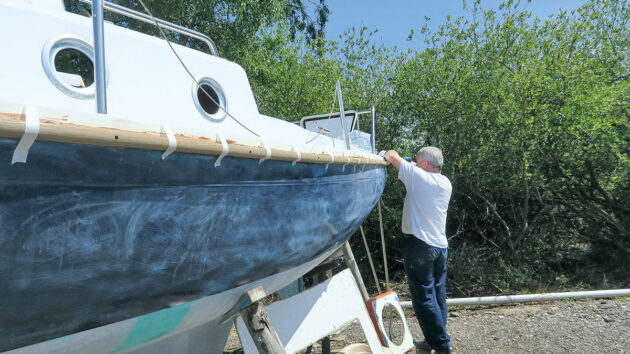
4. We offered the fender strip up to the hull to get the right positioning, but of course, it sags – another reason Wilks developed the Click and Bump! varieties. Cable ties held it temporarily high enough to be manhandled.
Credit: Jake Kavanagh
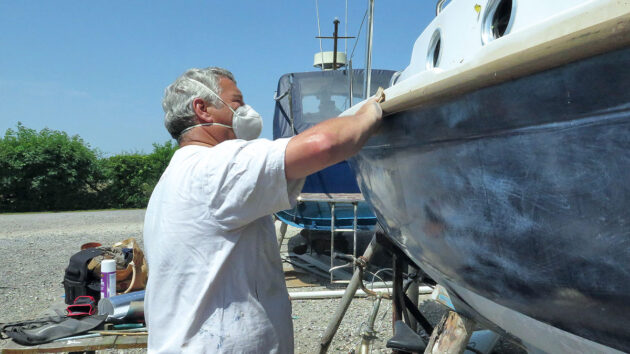
5. We applied the Bostik adhesive in stages, working from bow to stern. The amount was over-generous to start with, but we were able to gauge how much was needed as the job progressed.
Credit: Jake Kavanagh
6. Prep a short section with adhesive (between 2-3 screw holes), push the gunwale into position so screw holes can be drilled into the hull. For hollow D-section profiles, a rigid PVC strip can be inserted inside to stiffen the product.
Credit: Jake Kavanagh
7. Care was taken to only do a short length at a time, and to constantly check for a gentle curve in the fender with no peaks or troughs. Nowadays, I would use the easier-to-install Bump! version with the same ‘traditional’ mock teak colouring.
Tidying up
Credit: Jake Kavanagh
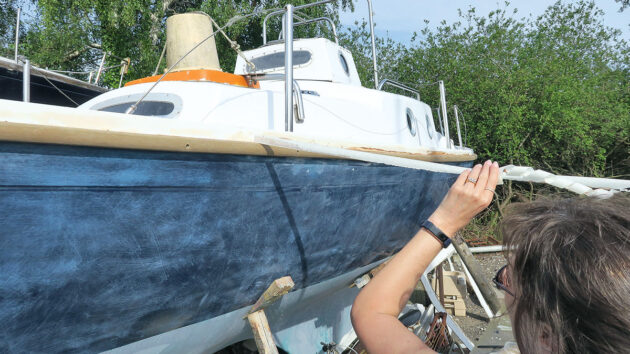
1. With all the screws in place and the tape preventing any sagging, the strip was left to dry. The horizontal masking tape was removed while the sealant was still wet, as this makes the clean-up easier. White spirit removes any mishaps.
Credit: Jake Kavanagh
2. Cut the overhangs at the stern with a handsaw, then buff over with coarse sandpaper to match the grain. The stainless steel end caps available for Bump! would also look good here.
Credit: Jake Kavanagh
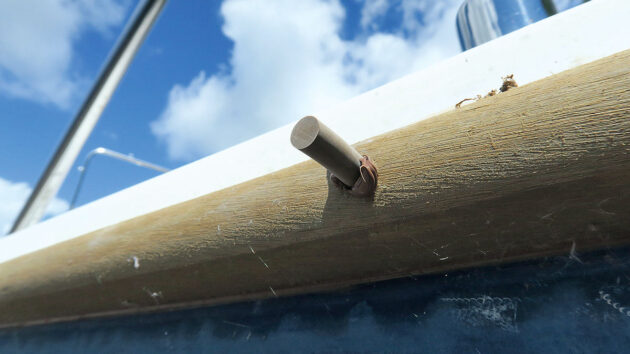
3. With the vertical tapes removed once the adhesive was dry (usually 24 hours for a full cure), we cut lengths of piping. These were dipped in adhesive and inserted into the screw holes, standing proud.
Credit: Jake Kavanagh
4. Lastly, carefully slice off the excess plug and then sand the exposed end so it blends in with the ‘grain’ of the rest of the gunwale strip. The result looks great, and so far hasn’t shown any change of colour, even under the hot sun of several summers.

Fitting a new toerail or grabrail on your sailboat or motorboat
Rupert Holmes explains the techniques for the removal and replacement of toerails and grabrails on our your boat
Rubbing strakes refurbishment: step-by-step guide
Rubbing strakes take a lot of abuse, so it is important to pay them some attention. Ben Meakins shares how…

Boat wood: a complete guide for yacht owners
Boatbuilder and finisher Lyndon March explains which types of wood work best for different repairs and modifications on board
Can I use composite wood for boat repairs?
PBO reader Colin Doyle needs to make repairs to his cabin sole. Is using composite wood a good idea? Boat…
Want to read more articles like PVC gunwale fitting: How to replace rotten teak with a sustainable synthetic alternative?
A subscription to Practical Boat Owner magazine costs around 40% less than the cover price.
Print and digital editions are available through Magazines Direct – where you can also find the latest deals.
PBO is packed with information to help you get the most from boat ownership – whether sail or power.
-
-
-
- Take your DIY skills to the next level with trusted advice on boat maintenance and repairs
- Impartial, in-depth gear reviews
- Practical cruising tips for making the most of your time afloat
-
-
Follow us on Facebook, Instagram, TikTok and Twitter