
Tony Davies shares his step-by-step guide to making a compression joint for fuel systems
A compression joint is widely used on fuel systems’ pipework and is extremely reliable in terms of fuel-tight integrity.
Compression joints are simple to assemble and, if properly fabricated, should always give perfect results. However, problems can and do occur when they are incorrectly assembled, which can lead to distorted joints, and the most common cause of problems is over-tightening during assembly.
When installing copper pipework, it’s important to provide enough supporting saddle clips close to the joints to prevent the joints from coming under stress due to movement or vibration.
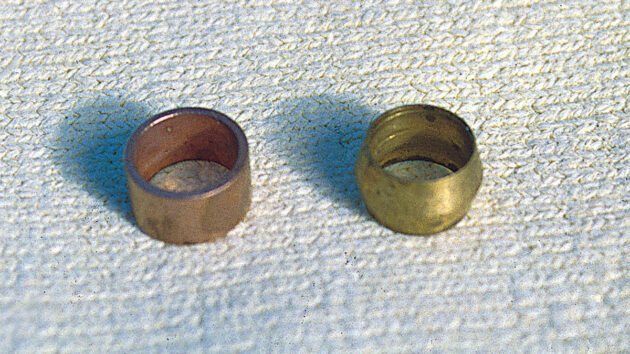
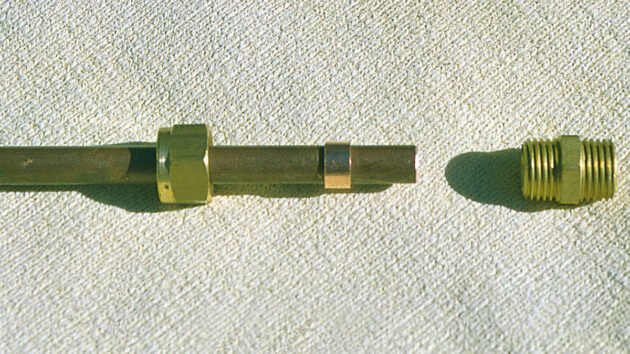
There are several types of sealing rings, also known as ‘olives’; they are generally made of either copper or brass. The most reliable for effective joint sealing is the copper ring type as copper is softer than brass and therefore adapts more easily to the compressive pressure of tightening the nut. Beware that some types of joints require brass or even stainless steel sealing rings so it’s wise to check before beginning the job. For this article, the standard copper ring found on British ‘Wade’ compression fittings is used (below left). These are mainly used on liquefied petroleum gas (LPG) and fuel systems. Brass olive-types (right) are commonly used in household heating systems.
As a final reminder when making up fuel system pipework, leaks on the pressure side of the lift pump will become evident due to fuel appearing around the joint. Leaks on the suction side may not appear at all as air will be drawn in under pressure from suction of the pump, but fuel may not leak out as there is no pressure to help it pass the seal.
Do not be tempted to over-tighten all the joints to prevent leaks as this will only lead to more problems with distorted joints. Once all the joints have been ‘nipped’ up, they should not leak and the problem may well lie elsewhere.
DIY Compression Joint – Step-by-Step
Credit: Tony Davies
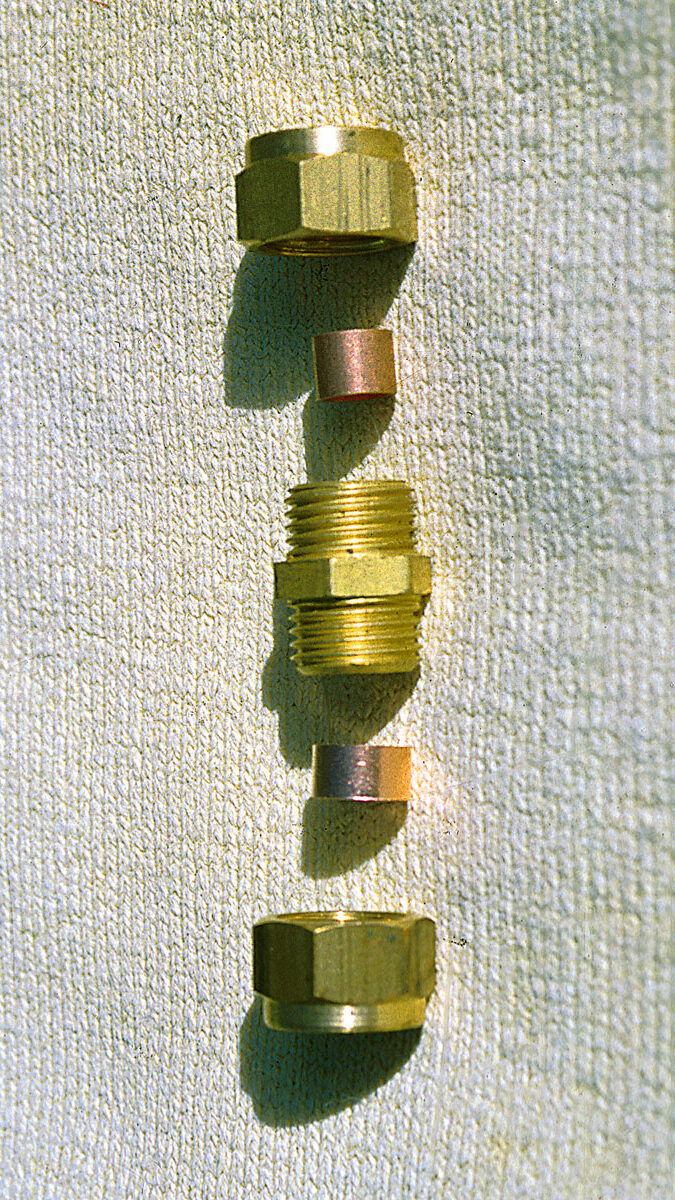
1. Start by familiarising yourself with the correct order of assembly. This straight joint is shown with the nuts outermost, the sealing rings next and the central joint body into which the ends of the tube are fitted.
Credit: Tony Davies
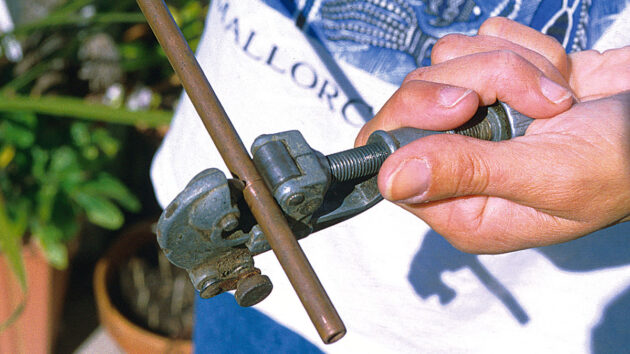
2. To prepare a joint for assembly, the tube end should be cut off squarely, preferably using a tube cutter. These are cheap to buy and make pipework assembly far quicker, especially where several joints are required. A tube cutter ensures the end of the tube is cut square while also placing a small chamfer on the end of the tube making assembly easier. A junior hacksaw used carefully will do the job, but the tube end will need sanding to remove all burrs before assembly.
Credit: Tony Davies
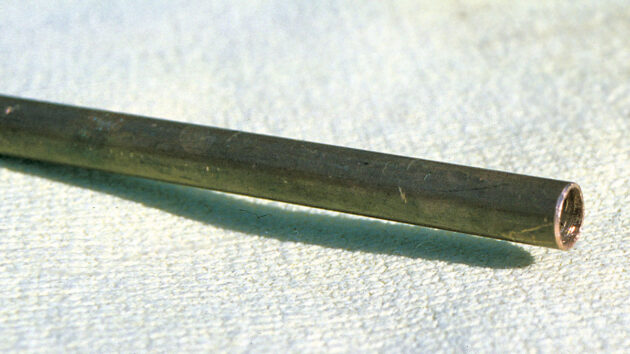
3. It is vital to keep the end of the tube for assembly straight so it enters the joint squarely. Also, have at least 2in (25mm) of tube before any bends. When working by hand it’s difficult to begin a bend close to the end of a tube without kinking the end, so allow an extra 6in (150mm) of tube at the end where the fitting is to be placed. Then, once the bend is formed, cut off the excess back to 2in before the bend.
Credit: Tony Davies
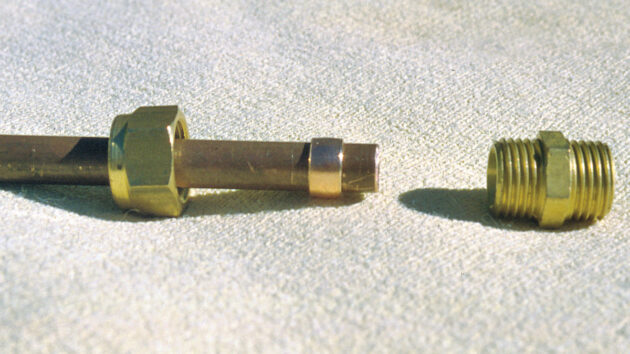
4. To assemble the fitting, the nut is first slipped over the tube with the thread facing the fitting, then this is followed by the copper (or brass) ring. The tube end is slipped into the fitting and pushed up against the flange inside.
Credit: Tony Davies
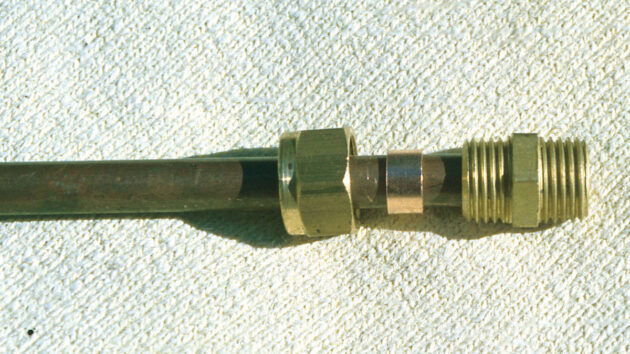
5. The copper ring is now slid up against the face of the fitting followed by the nut, which is carefully threaded onto the fitting. Ensuring the tube remains firmly inside the flange, hand-tighten the nut.
Credit: Tony Davies
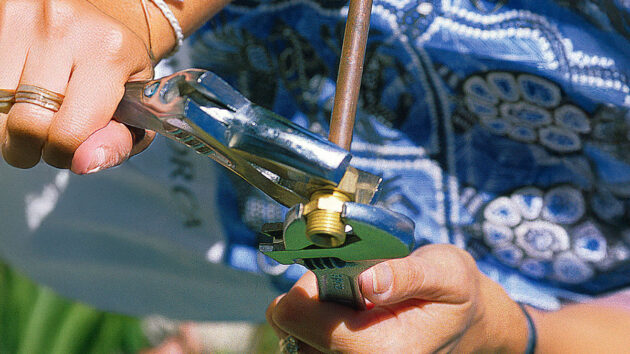
6. Tightening the nut with a spanner while holding the joint with another will complete the job, and for small bore fuel line sizes, this should not require more than about one complete turn to effect a perfect seal. I usually tighten the joint a little at a time until the tube can no longer be turned within the fitting. This indicates there is pressure on the copper ring and that this pressure is also being transferred to the tube.
Credit: Tony Davies
7. A correctly made joint can be dismantled and reassembled many times while still providing a perfect seal. This example shows the copper sealing ring with bright rings around each end and a very slightly convex shape, indicating a perfect seal.

Credit: Tony Davies
Overtightening will distort the ring seal and crush the pipe causing the joint to leak. It’s better to undertighten the joint as it can always be nipped up slightly later if there are any signs of leakage.

The art of veneering: step-by-step
Face up to the task of applying veneer with the help of boatbuilder Tony Davies
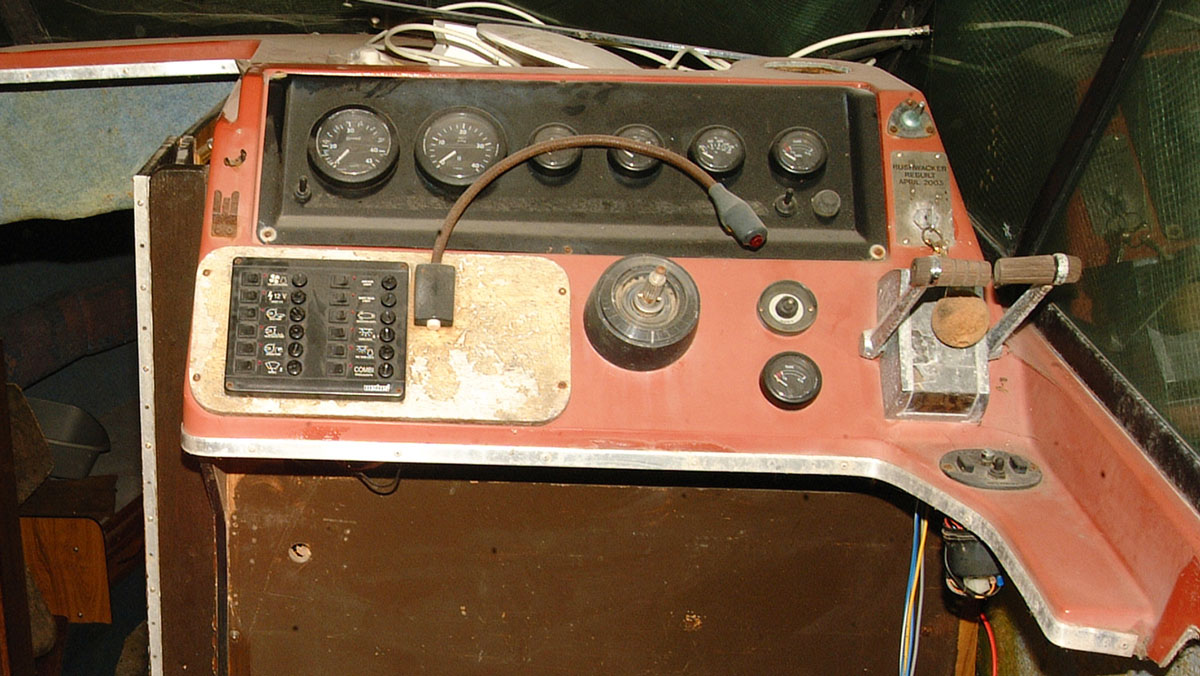
Boat instrument panel and helm refit: step-by-step
Tony Davies shows how he rebuilt the helm position and instrument panel on a 1970s Reinell V-204 sports cruiser
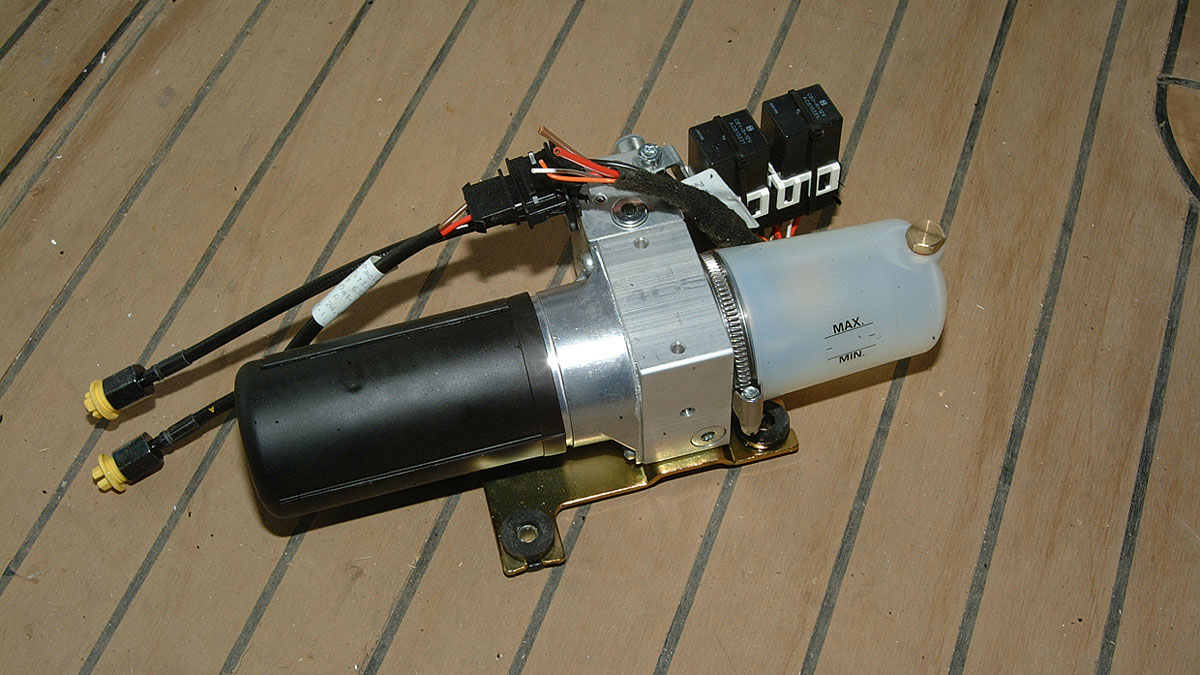
How to fit an autopilot pump
Tony Davies demonstrates how to replace an electro-hydraulic autopilot pump
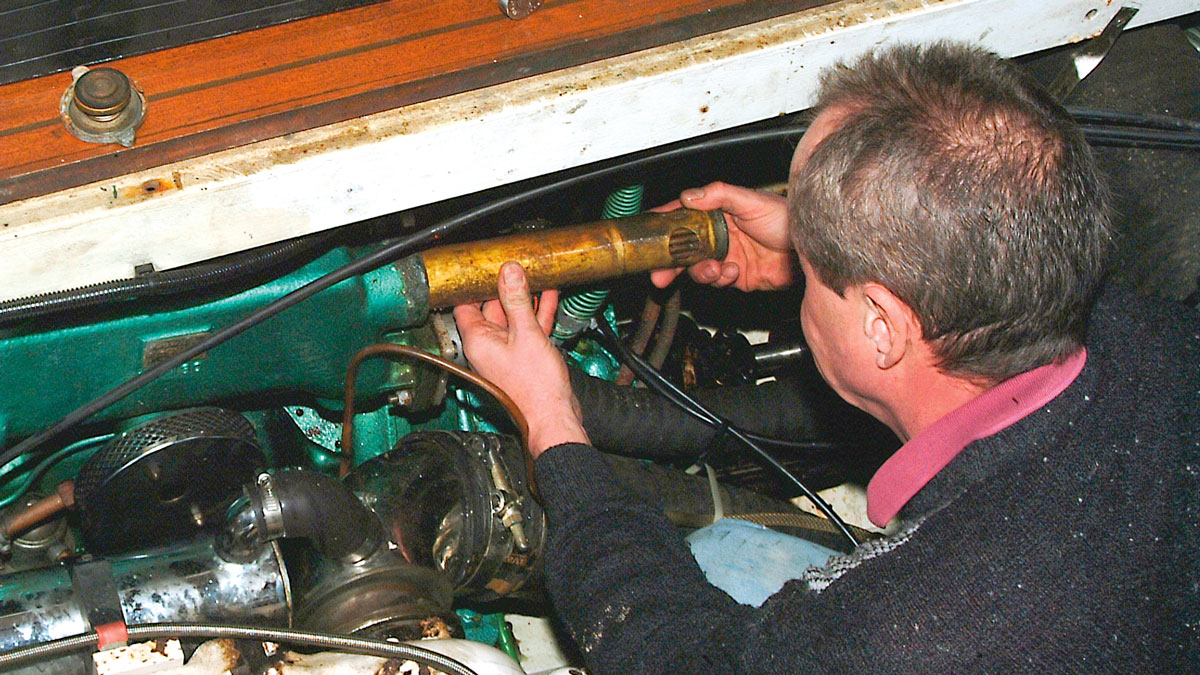
How to service a marine engine cooling system
Is your boat's engine beginning to run hotter than normal? It may be time to service the cooling system, suggests…

What to read more practical articles like How to make a compression joint?
A subscription to Practical Boat Owner magazine costs around 40% less than the cover price.
Print and digital editions are available through Magazines Direct – where you can also find the latest deals.
PBO is packed with information to help you get the most from boat ownership – whether sail or power.
-
-
-
- Take your DIY skills to the next level with trusted advice on boat maintenance and repairs
- Impartial, in-depth gear reviews
- Practical cruising tips for making the most of your time afloat
-
-
Follow us on Facebook, Instagram, TikTok and X