
An electronic display showing chain and rope deployment means you can anchor single-handed without leaving the helm. Gilbert Park reports

I often sail single-handed and after using a rode counter on another boat, I decided to fit one to my Nimbus 365. I already had markers on the chain at 6m intervals and controls for the windlass in the bow and at the helm, but being able to control the boat and know how much rode has gone out (or in) from the helm makes anchoring in strong winds easier and also reduces the likelihood of drifting into another boat when weighing anchor in crowded coves.
As I already had windlass controls at the helm, I went for a simple standalone rode counter that displayed the amount of rode out, alarmed when the anchor was about to enter its stowage position and could cope with mixed rode (30m chain and 50m rope). I decided on a Lewmar AA150, which was the same make as the windlass and has two different set-ups: for mixed rode, the magnet is fitted to the upper side of the gypsy; for chain-only rode, the magnet fits to the lower side.
Installing the rode counter
 For such an innocuous little gauge there is quite a lot of effort involved installing everything. There are multiple permutations for the installation (vertical or horizontal windlass; two types of rode) but the instructions cover all the eventualities.
As my windlass was the same brand as the rode counter the holes for fitting the magnets and sensors were pre-drilled.
Once it’s all connected and working, you have to tell the unit what Lewmar winch you have and it will automatically calibrate itself.
If you have another make of winch or an older Lewmar one then the instructions show you how to do a manual calibration.
In the package was a gauge (which is not waterproof), two magnets and their connectors, a sensor with a 2m cable and a comprehensive user guide. I also needed a 6m extension to the sensor’s 2m cable so the signal would reach back to the cockpit. I extended the other cables myself.
How it works
 Rode counters have a magnet fitted into the chain wheel (gypsy) and a magnetic sensor fitted into the base plate of the winch. Every time the magnet passes the sensor one revolution of the gypsy is counted. The counter is also fed windlass motor data, meaning it can calculate stretch when rode switches to rope, plus the windlass controls (up/down buttons) are linked electrically to tell the counter if rode is coming in or out.
Step by step: Fitting to the instrument console

1. The gauge is 11cm deep with the cage on the back so I had to measure carefully. I covered the area of console with masking tape (so the drill wouldn’t slip), marked it up and drilled a 3mm hole first and then used a 50mm hole cutter.

2. Having sorted out which wire goes where I soldered the wires together and wrapped each wire in shrink wrap. To support the wires I also put a larger piece of shrink wrap over all of them so they’d be held tightly together.
Working at the bow

3. The gypsy on my Lewmar windlass had two correctly sized holes drilled already for the two possible magnet locations (one for chain-only rode and the other for chain and rope rode). For a mixed rode the magnet is fitted to the upper side of the gypsy. Once in place it was sealed with a little epoxy putty.

4. After disconnecting the wires it was time to remove the windlass motor and gearbox. I placed some old towels on top of the chain beneath it in case I dropped anything. Then I released the four nuts holding the deck plate down, one of which is visible in this photo.

5. I levered the plate free and found a predrilled hole in the deck plate in which to fit the sensor. I used a silicone mastic to glue the sensor in place, but any removeable flexible sealant will do. I also drilled a hole in the deck for the sensor’s cable, starting with a 4mm bit followed by a 14mm bit. I refitted the deckplate ensuring plenty of sealant all around the edge as well as around the edge of the newly drilled hole.
Making the electrical connections
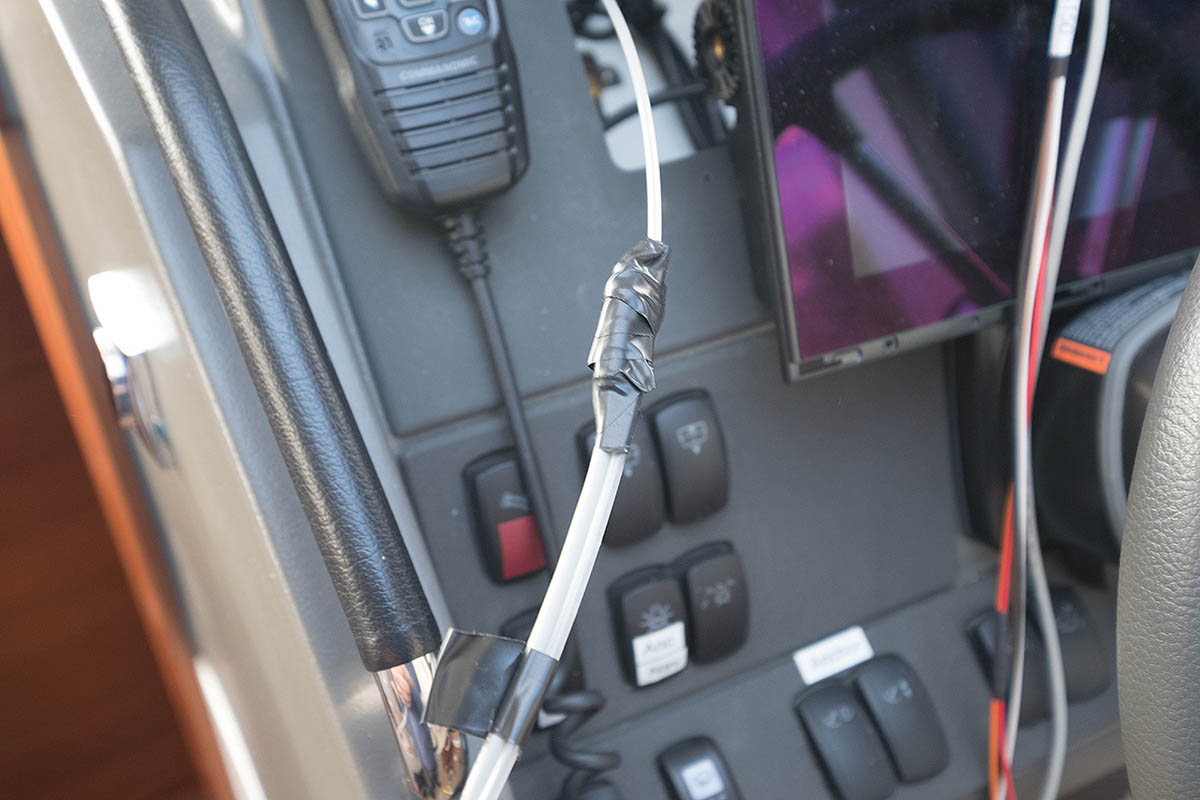
6. I connected the wires then started pulling them through from the cockpit using a combination of flexible rods and wire. This was the most difficult and time-consuming part of the whole project! The picture shows the sensor wire attached to the nylon pull-through. Note that the tape has been tapered to lessen the risk of the shoulder of the connector catching.

7. Finally all the wires were through into the anchor locker. The photo shows the brown, white and sensor cables, plus I added a pull-through (red cord) – for future reference. The brown and white wires are for sending windlass motor strain info to the rode counter, which is able to then calculate rode stretch.

8. With all the wires in place the sensor cable was connected, the other wires cut to length and male bullet connectors attached. The connectors were then wrapped in waterproof tape. I tested the gauge and it all worked. Finally, once it was all working the wires were secured out of the way so they wouldn’t catch on the chain.
TOP TIPS FOR WORKING UPSIDE DOWN (for prolonged periods)
 Working upside down and into a recess above you can be trying at times. Here are some tips that might make it easier:
- Nothing is ever quick, so make yourself as comfortable as you can. In my case it was a matter of putting padding on the bowsprit so my chest could rest comfortably on the deck.
- Don’t use small, fiddly cable ties. Use the largest ones you can.
- If you’re going to use stick-on mounts make sure they have a water-resistant, high-modulus glue that needs about a minute’s pressure to make sure it sticks. Put cable ties into the mounts and very loosely put the ties around the cable. All you have to do then is slide the mount to the right position, press it into place, bring the wire up and tighten the tie. Cut off any excess.
- Use towels or sheets to prevent anything dropped falling into the bottom of the locker.
- If you don’t fancy ties then use the boatbuilder’s trick of holding the wires in place and putting some sealant around them.
First published in PBO Summer 2020