
After years of searching for his dream boat, Drew Maglio explains how he fixed the V8 engine on his new-to-him Chaparral 2550 SX with an impressive top-end engine rebuild
When I set out to take my dream boat home, I didn’t expect it to entail a top-end engine rebuild, but let’s rewind.
Upon selling Walden, a 1987 Ericson 38-200 sailing sloop, and moving from South Florida to Annapolis, Maryland, it was time for a new boat.
Our previous two boats, a 30ft Sea Ray and the 38ft Walden, had sucked much of the joy out of boating due to the litany of repairs, maintenance, and necessary modernisations that I had to perform on them.
Nonetheless, after enjoying a few months’ reprieve, I began looking at online classifieds all over the US Eastern seaboard for a particularly elusive model of boat that I’d always dreamed of owning but had never been able to locate and secure.
The dream boat
As a child growing up in South Florida, my father owned a 1989 Chaparral 2100 SX bowrider that he bought new at the Fort Lauderdale International Boat Show for $17,500 (£12,982).
I loved that this sport boat featured classic and sleek ‘go-fast’ lines, while maintaining a functional and practical deck layout for the vintage.
However, I didn’t like its dated interior, carpeted plywood deck, or open bow design.
Hence, my personal dream boat became its larger, closed-bow brother: the 2550 SX, which makes a fine coastal runabout (due to the additional safety that a closed bow affords) and overnighter.
Unlike the 2100 SX, later models of the 2550 SX cuddy cabin featured a glassfibre floor liner, a heads, a small galley, and a spacious berth, perfect for sleeping two.
Although I always desired to own one of these vintage sport boats, I could never find one… until now.
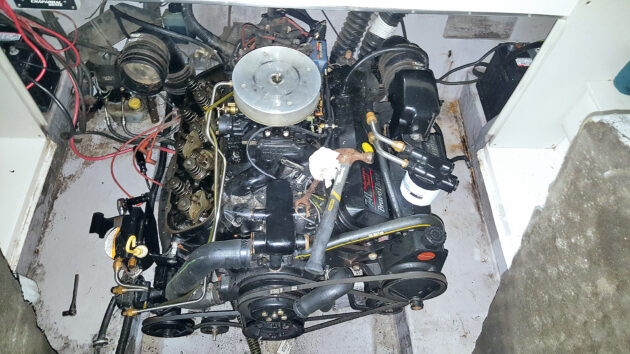
The top-end engine rebuild once the engine has been installed on the Chaparral 2550 SX, Soul Rebel. Photo: Drew Maglio.
Patience is a virtue
I now lived in Annapolis, Maryland, but my dream boat was 1,000 miles away in Plattsburgh, New York, which lies on the shores of the serene Lake Champlain.
As you might imagine, this made the logistics of purchasing the vessel both tenuous and tedious to iron out.
To exacerbate matters, the boat was locked in storage until March. I maintained contact with the seller before we were finally able to make the trip in late May.
Before trekking north, we agreed upon a purchase price of $15,000 (£11,127), which included the boat, original trailer, and many extras like a full canvas enclosure, mooring cover, and cockpit cover—all contingent upon a thorough inspection and sea trial.
After months of preparation we rented a Dodge Ram 2500 diesel truck to make the journey to bring our new baby home.
The trip north was uneventful and upon arrival we checked into a hotel for what would be a mostly sleepless night.
After years of anxiously and thoroughly searching for a 2550 SX in a condition worthy of ownership—no small task for a hull design over three decades old that was only produced from 1988-1996, and in limited numbers as far as production power boats go—the day was finally here.
I would have the opportunity to lay eyes on my prize in the wild.
Why this boat?
At this point, the reader may be asking: why this hull of all the others out there?
The answer is that in addition to a childhood nostalgia for this particular class of vessels—and affinity for classic muscle boats in general—the 2550 SX is both exceptionally sleek and sporty with clean, sharp, and timeless lines, while maintaining a deck and cabin layout that is functional and spacious unlike the typical ‘go fast’ boat made by Fountain, Formula, and others.
Additionally, the 2550 SX is both big and capable enough (with its 20° deadrise hull) to battle the big water of the Chesapeake Bay, while simultaneously being small and simple enough to transport via trailer and maintain, powered by a single V8 big block sterndrive power package housed in an engine compartment with plenty of space to work.
Additional considerations included the hull pad for efficient and effortless planing and a very functional, but aesthetically pleasing, swim platform that will come in handy if I ever return home to my native Florida.
First impressions
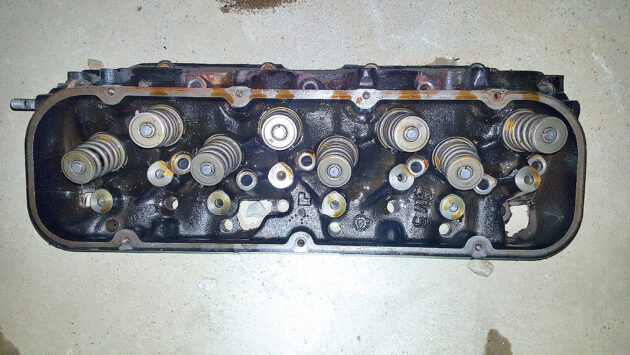
The removed cylinder head before it was sent to the machine shop. Photo: Drew Maglio.
Arriving at the owner’s home on the scenic banks of Lake Champlain on a cool May afternoon, the 1995 2550 SX, named Grape Expectations, as an ode to the nearby vineyards that are a defining feature of the Plattsburgh, NY area, was resting on its OEM (original equipment manufacturer) teal painted steel trailer under both a full mooring cover and a snap-on cockpit cover: a wonderful sign for someone looking for a well-cared for vessel.
Under the covers, it was apparent the boat had been taken care of, albeit a bit dirty from being stored for the last six months.
After climbing all over the vessel into every nook and cranny, it was clear the boat was all original and essentially a time capsule from 1995: for better and worse, it featured the original stereo, VHF radio, snap-in carpet, upholstery, engine, and outdrive.
I personally prefer to buy boats that have been unaltered by their previous owners because most alterations and/or extensive repairs have often been done in a shoddy manner.
On the flip side, this typically means that an all-original 25-year-old vessel will require an extensive refit and modernisation to be shipshape and ready for use.
Nonetheless, after careful inspection and thorough going over of the systems, hull and deck for glaring issues like structural rot, we sea-trialled the vessel with John, the current owner.
The sea trial was mostly uneventful, and the boat planed and performed fairly well, minus one stall, which I chalked up to bad fuel or a failing mechanical fuel pump.
Realising a top-end engine rebuild is needed
There was, however, an intermittent popping/rattling sound that was audible only under certain throttle positions, which experience taught me was likely a stuck intake valve, which caused a slight backfire through the carburettor under load.
With these concerns revealed by the sea trial, we reduced our offer and agreed upon a sum of $14,000 (£10,385) for the boat, trailer, and all accessories.
The trip home with our new boat was long, slow, tedious, and nerve-wracking.
Because the trailer had only been used to drive one mile to a nearby boat ramp to launch and retrieve the vessel, the tyres were very old and had lots of small cracks on the sidewalls and tread.
Fortunately, I had purchased a new, full-size spare tyre and wheel for the trek home, which came in handy when we had a blowout about four hours into the return journey.
After successfully replacing the blown tyre, we went exceptionally slow: a crawling 55mph was our average speed the rest of the way home to Annapolis.
As a result, we arrived at our marina around 4am; we unhooked the trailer, covered the boat, and returned the truck to the rental agency. Although the boat was now ours, the journey ahead was just beginning.
True cost of a top-end engine rebuild
A few days later, after familiarising myself with the boat and doing some preliminary detailing, we decided to take our new vessel out.
After idling out of the marina channel and dropping the throttle, we were met with an incessant and much intensified popping and reverberation sound that was only intermittent on the sea trial.
After a quick call to my best friend, Brandon, who has worked in the past as a marine mechanic, it was clear that the sound was an ominous harbinger of something more serious than a mere sticky intake valve.
As a result, the engine would have to come apart so that I could diagnose and fix what was causing the unseemly popping noise that was coming from the top end of our boat’s 7.4lt (454cu in) petrol V8 Mercruiser (GM) motor.
The first task was to conduct a simple compression test, which showed that two cylinders on the starboard cylinder bank had very low compression of around 20PSi, while two cylinders on the port side were around 120PSi, indicating a likely blown and/or warped head gasket.
On a typical used Mercruiser 7.4/454 big block marine engine, you want to see compression of around 145-150PSi on all cylinders.
With these results recorded, it was time to begin the onerous task of stripping down the engine, and the first step was to remove the exhaust manifolds, risers (similar to exhaust elbows, except a riser is a long, vertical pipe which elevates exhaust gases often to above the waterline, to prevent water from siphoning back into the engine), and all the accessories bolted to them.
I then unbolted the intake manifold and valve covers and disassembled the valvetrain, including the rocker arms, push rods, guide plates, and flat tappet lifters, being sure to store all nuts, bolts, and fasteners in labelled zip-lock bags for a much less painful reassembly.
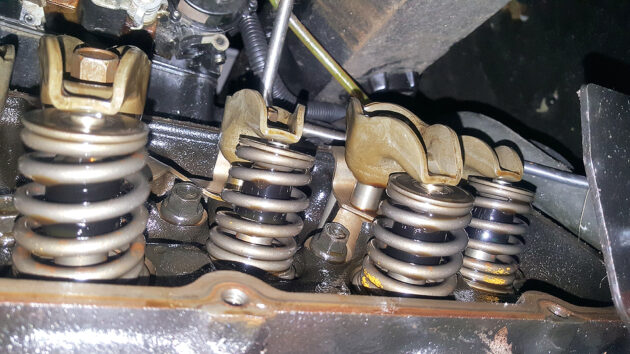
No valves were stuck either open or closed on the valvetrain. Photo: Drew Maglio.
With the exhaust, intake, and valvetrain out of the way, I was able to unbolt the exceptionally heavy and unwieldy cylinder heads from each side of the motor, taking care to place them in designated cardboard boxes resting on the swim platform for safe storage and transit to the machine shop, where the heads would be disassembled, cleaned, and rebuilt with new valve stem seals.
I also bagged the rocker arms, push rods, and guide plates for transport to the machine shop for a closer inspection by the machinist.
On removing the heads, my suspicion of a blown head gasket was confirmed.
Overheating
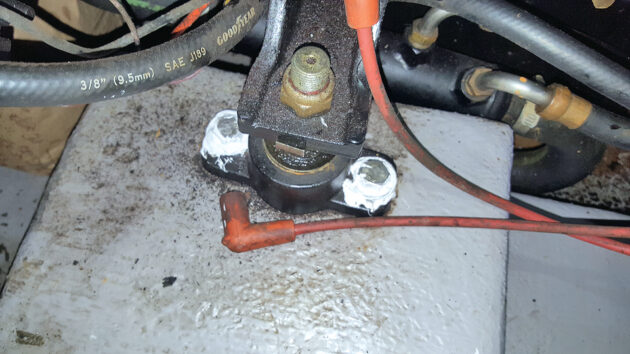
The engine mounting lag bolts were rebedded with 3M 4200 to prevent rot in the wood motor mounting boxes. Photo: Drew Maglio.
Head gaskets ‘blow’ for various reasons, including age, but more often than not it’s due to an overheat event, and John had hinted that such an event had occurred to Grape Expectations.
In our case, the head gasket blew between cylinders 4, 6, and 8. The piston in cylinder 6, once exposed, was completely silver and devoid of all carbon build-up because it was clear that a minuscule amount of water had been seeping into the combustion chamber while the engine was under load in gear on the water, essentially ‘washing’ the piston clean.
With this revelation, the source of the mysterious popping noise was determined to be caused by the No6 cylinder attempting to compress water.
Since water does not compress, it was reverberating back through the intake valve, into the intake manifold and out of the carburettor, causing both a backfire and a slight misfire.
Nonetheless, once the motor was apart, the rotating assembly was carefully inspected and rotated by hand, and I was able to determine that the bottom end of the motor was not damaged.
All that was needed was a total overhaul: a top-end engine rebuild.
With the condition of the motor now known, the cylinder heads were transported to the machine shop to be overhauled, while I pursued other tasks.
I began to browse online marine parts retailers for a new wet exhaust system.
On the typical marine petrol engine, the cast iron exhaust manifold and risers are the weakest link in what is a fairly simple and robust propulsion system.
Exhaust gases are drawn from the cylinder head’s exhaust port into the exhaust manifold after being compressed out of the combustion chamber by the piston.
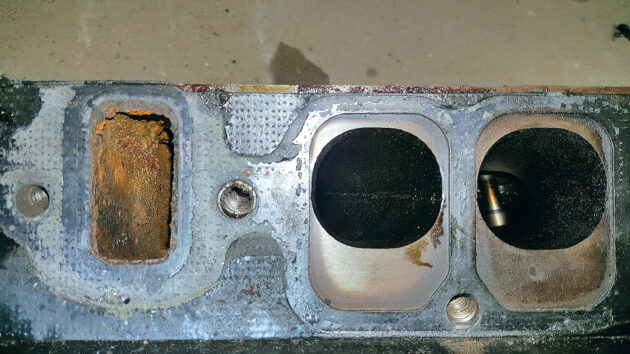
The intake ports on the cylinder head. Photo: Drew Maglio.
Obviously, these exhaust gases are exceptionally hot and must be cooled before being evacuated from the glassfibre vessel. Therefore, the exhaust manifold contains a water jacket where seawater cools the gases being exhausted from the engine – a system known as a raw water-cooled exhaust.
Bolted to the top of the exhaust manifold is the exhaust riser, which rises the mixture of exhaust gases and cooling water above the static water line before evacuating the gas and water mixture overboard through what is often called the ‘Y-pipe’ which, in the case of a typical petrol or diesel sterndrive, then directs the exhaust flow through both the transom assembly and propeller hub.
Failure points

The scale build-up inside the exhaust manifold water jacket passage. Photo: Drew Maglio.
The typical failure points in this system include the water jackets in the exhaust manifolds and the gasket joint between the exhaust manifold and riser.
In either case, the result is the same: if either of these trouble areas fails, water reversion from the wet exhaust back into the cylinder with an open exhaust valve will occur, likely resulting in the catastrophic engine failure event known as ‘hydrolock’ that occurs when a piston attempts to compress water (which as has been said, does not compress).
It likely results in severe damage to the piston connecting rods (bending or breaking, typically resulting in rod knock).
For all I knew, our existing raw water-cooled exhaust system was original to the engine and boat, and I was not about to put a 25-year-old cast-iron wet exhaust back on what would essentially be a brand-new motor after the top-end engine rebuild was complete.
Replacement exhaust manifolds and risers are made by many different companies, but common brands include GLM, Sierra, Barr/Osco, and OEM.
A new GLM exhaust manifold would cost $800 (£593) new, but I came across a set of much superior Osco exhaust manifolds and risers on Facebook Marketplace listed at $500 (£370).
After a bit of haggling over the phone and an hour’s drive, I’d procured a high-quality new old stock marine exhaust system for our boat for only $400 (£296).
Jobs list, including my top-end engine rebuild
With the new exhaust system secured, I decided to replace our absent ‘exhaust flappers,’ which reside in the aforementioned ‘Y-pipe’ and prevent water reversion in the case of a sudden engine stall or forceful reverse manoeuvre.
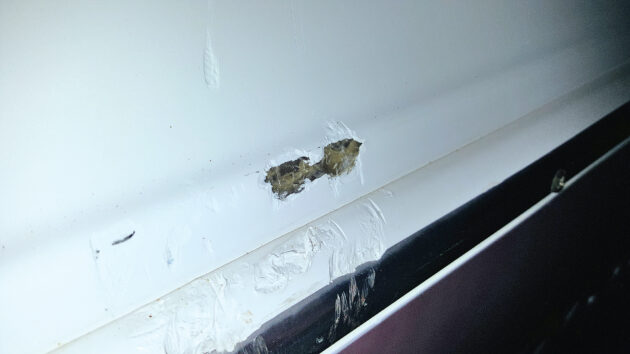
After 25 years, Soul Rebel had plenty of dings in the gel coat which Drew repaired. Photo: Drew Maglio.
After this was complete, I cleaned and thoroughly scraped the engine block surfaces to remove all old head gasket residue in preparation for reassembly, replaced the drain plug, repaired a myriad of gel coat blemishes, re-bedded all screws and fasteners in the engine compartment (to prevent future rot), and installed two grease fittings to allow for the greasing of the carbon steel steering pin.
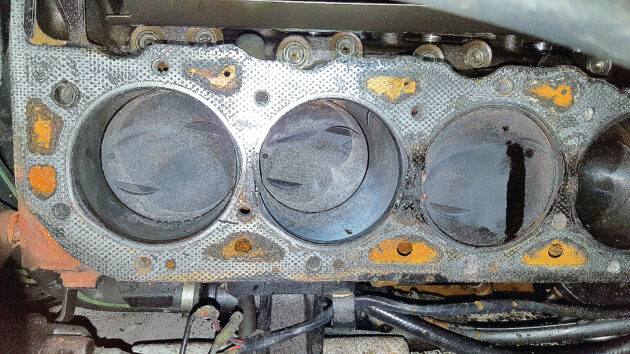
The blown head gasket caused by overheating. Photo: Drew Maglio.
In the meantime, we also rechristened the boat Soul Rebel, in honour of the late Bob Marley and one of his best and most spirited (in our estimation) songs.
After about a month at the machine shop, the cylinder heads were as good as new and ready for pickup.

The cylinder head with the valvetrain disassembled and head bolts removed, ready for the machine shop. Photo: Drew Maglio.
Reinstallation
With the machined heads in hand, I installed the new head gasket and allowed the starboard head to rest on its engine block dowel pin.
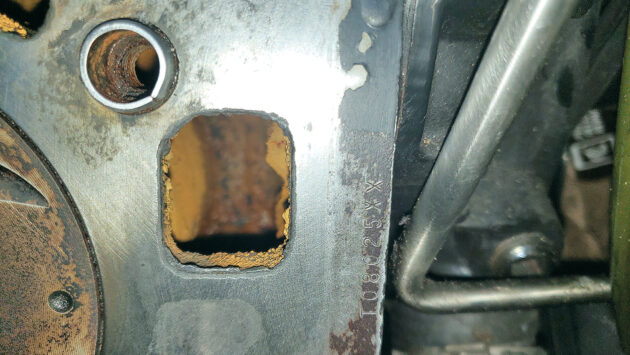
The engine block serial number and dowel pin on the Chaparral 2550 SX. Photo: Drew Maglio.
I then began the onerous task of fastening the starboard head via the Mercruiser prescribed torque sequence, which calls for three rounds of installing and fastening the head bolts in a specific order, ending up at about 65lb/ft or 75lb/ft, per short bolt and long bolt, respectively.
To help the bolts thread through the block without issue, I greased the new bolts’ threads, in addition to making sure the block threads were free of rust and debris.
Though it took all night, I was able to get the starboard side torqued down without issue, and then proceeded to reinstall the push rods, rocker arms, and valve guide plates, before moving to the port side of the motor.
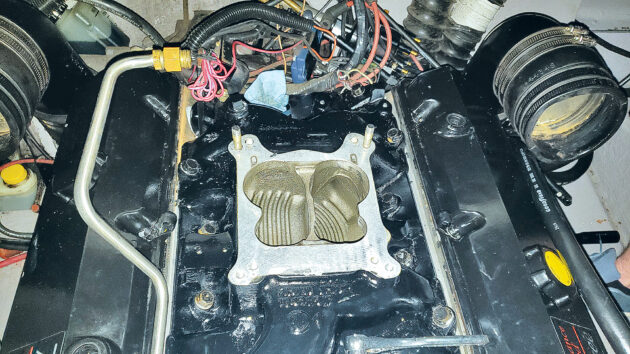
The freshly painted intake manifold reinstalled and torqued down to specification. Photo: Drew Maglio.
Work was going well on the port side, and I was nearing the end of the laborious and intensive torque procedure, when, all of a sudden and on the second-to-last bolt, I suddenly felt the bolt that I was gingerly tuning to final specification begin to move without resistance.
The bolt had sheared, though as luck would have it, that fateful head bolt snapped in the middle near where the thread began to meet the engine block.
With the Maryland summer halfway complete, Soul Rebel’s splash date would be delayed once again while I fumed and ruminated over the next course of action: surely I didn’t have to take the 150lb cylinder head back off and start again?
Planning for a top-end engine rebuild
After a few days of mulling over possible solutions, I decided the only tenable course of action was to remove the head to get a better look at the broken bolt.
The situation turned out to be a bit anticlimactic: after removing the head, enough of the bolt remained above the engine block to spin it out with a pair of vice grips. I was incredibly relieved.
I then chased out the threads with a tap to ensure the bolts wouldn’t have to overcome any additional resistance, then placed the head back on its dowel pins to begin the torque sequence all over again. It went without incident this time, and the port head was successfully torqued down.
Next, I replaced the intake manifold and carburettor, which were now dry after being painted with engine enamel and therefore ready for reinstallation.
The carburettor reinstalled onto the intake manifold. Photo: Drew Maglio.
After the intake manifold was torqued down to specification, I reinstalled the valve covers; the engine was starting to look like an engine again.
Over the coming days and weeks, I continued putting the engine back together piece by piece.
After the intake, next was the distributor which was set as closely as possible to base timing, with the rotor pointing at the No1 cap point while the engine’s No1 piston was rotated to top dead centre (TDC) before the heads were reinstalled.
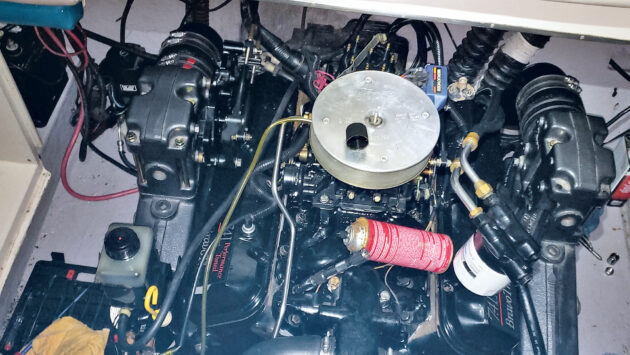
After this, new spark plugs and plug leads were installed, followed by the new exhaust manifolds and risers. A new impeller and thermostat were also fitted, only after broken impeller pieces were fished from the engine’s oil and power steering cooler; this was done to ensure the new engine had an ample supply of cooling water to prevent hot spots between cylinders from forming.

The air filter was badly clogged. Photo: Drew Maglio.
I also installed new V-belts on the engine pulleys, replaced the fuel tank’s anti-siphon valve, replaced the fuel filter, and changed the engine oil and oil filter to ensure the rest of the summer would be trouble-free.
With the engine fully back together, the long-awaited moment of reckoning was here: would my DIY top-end engine rebuild be good enough?
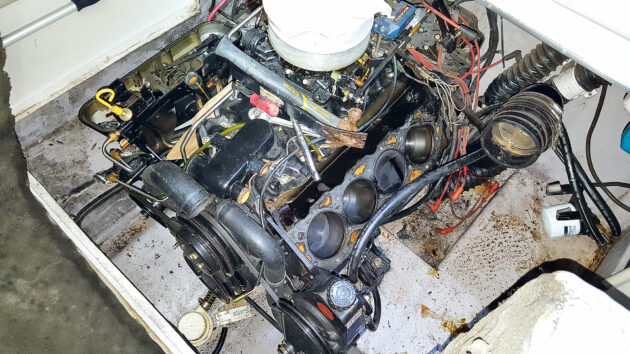
The top-end of the engine disassembled. Photo: Drew Maglio.
Proof of the pudding
Ready to start the engine and work out the kinks under load, we had the boat placed in the water by the marina.
After priming the engine with fuel by cranking and cranking and cranking, while simultaneously pumping the throttle to open the carburettor choke and create a greater induction of air and fuel into the carburettor’s body, the engine roared to life.
I allowed the engine to warm to temperature while I checked for water and oil leaks – I found none.
I did, however, notice a small drip of fuel where a metal fuel line threaded into the carburettor body, which I promptly remedied with Permatex Fuel Resistant Sealant.
After the engine warmed up to temperature, it began to surge in revs because the ignition timing, idle speed and mixture screws were improperly adjusted.
Over the next couple of hours, while the boat idled at the dock, I set the base timing to 8° BTDC (Before Top Dead Centre – the point in the piston’s stroke when it is approaching the highest point of its travel) with a timing light, a wrench, and a careful hand.
After the timing was set, I adjusted the idle speed screw to set the idle speed rpms to the correct range of 600-750rpm under load.
It seemed to me from the sound of the engine and exhaust smell that the idle mixture was close enough, if not perfect, so I did not adjust it after all.
We decided to test the engine and took the boat out in Chesapeake Bay.

Starting the engine for the first time after 100 hours of work on a top-end engine rebuild. Editor’s note: always wear a lifejacket when the boat is underway. Photo: Drew Maglio.
While I was extremely apprehensive dropping the hammer the first time, I am happy to report that the 454 Mercruiser purred and performed admirably that day, and in the nearly 100 hours since the overhaul.
While there were additional glitches to work out with Soul Rebel, including a stalling problem that required a new mechanical fuel pump and the replacement of the plastic throttle shifter, I can say that the top-end engine rebuild is a resounding success.
Drew Maglio is a writer and avid sailor who has owned 11 boats over the years. Drew turned his love for boats and boating into a career path – first becoming a marine mechanic, then a marine surveyor. He operates Capital Marine Services based in Annapolis, Maryland, USA, where he lives with his wife, Hannah.
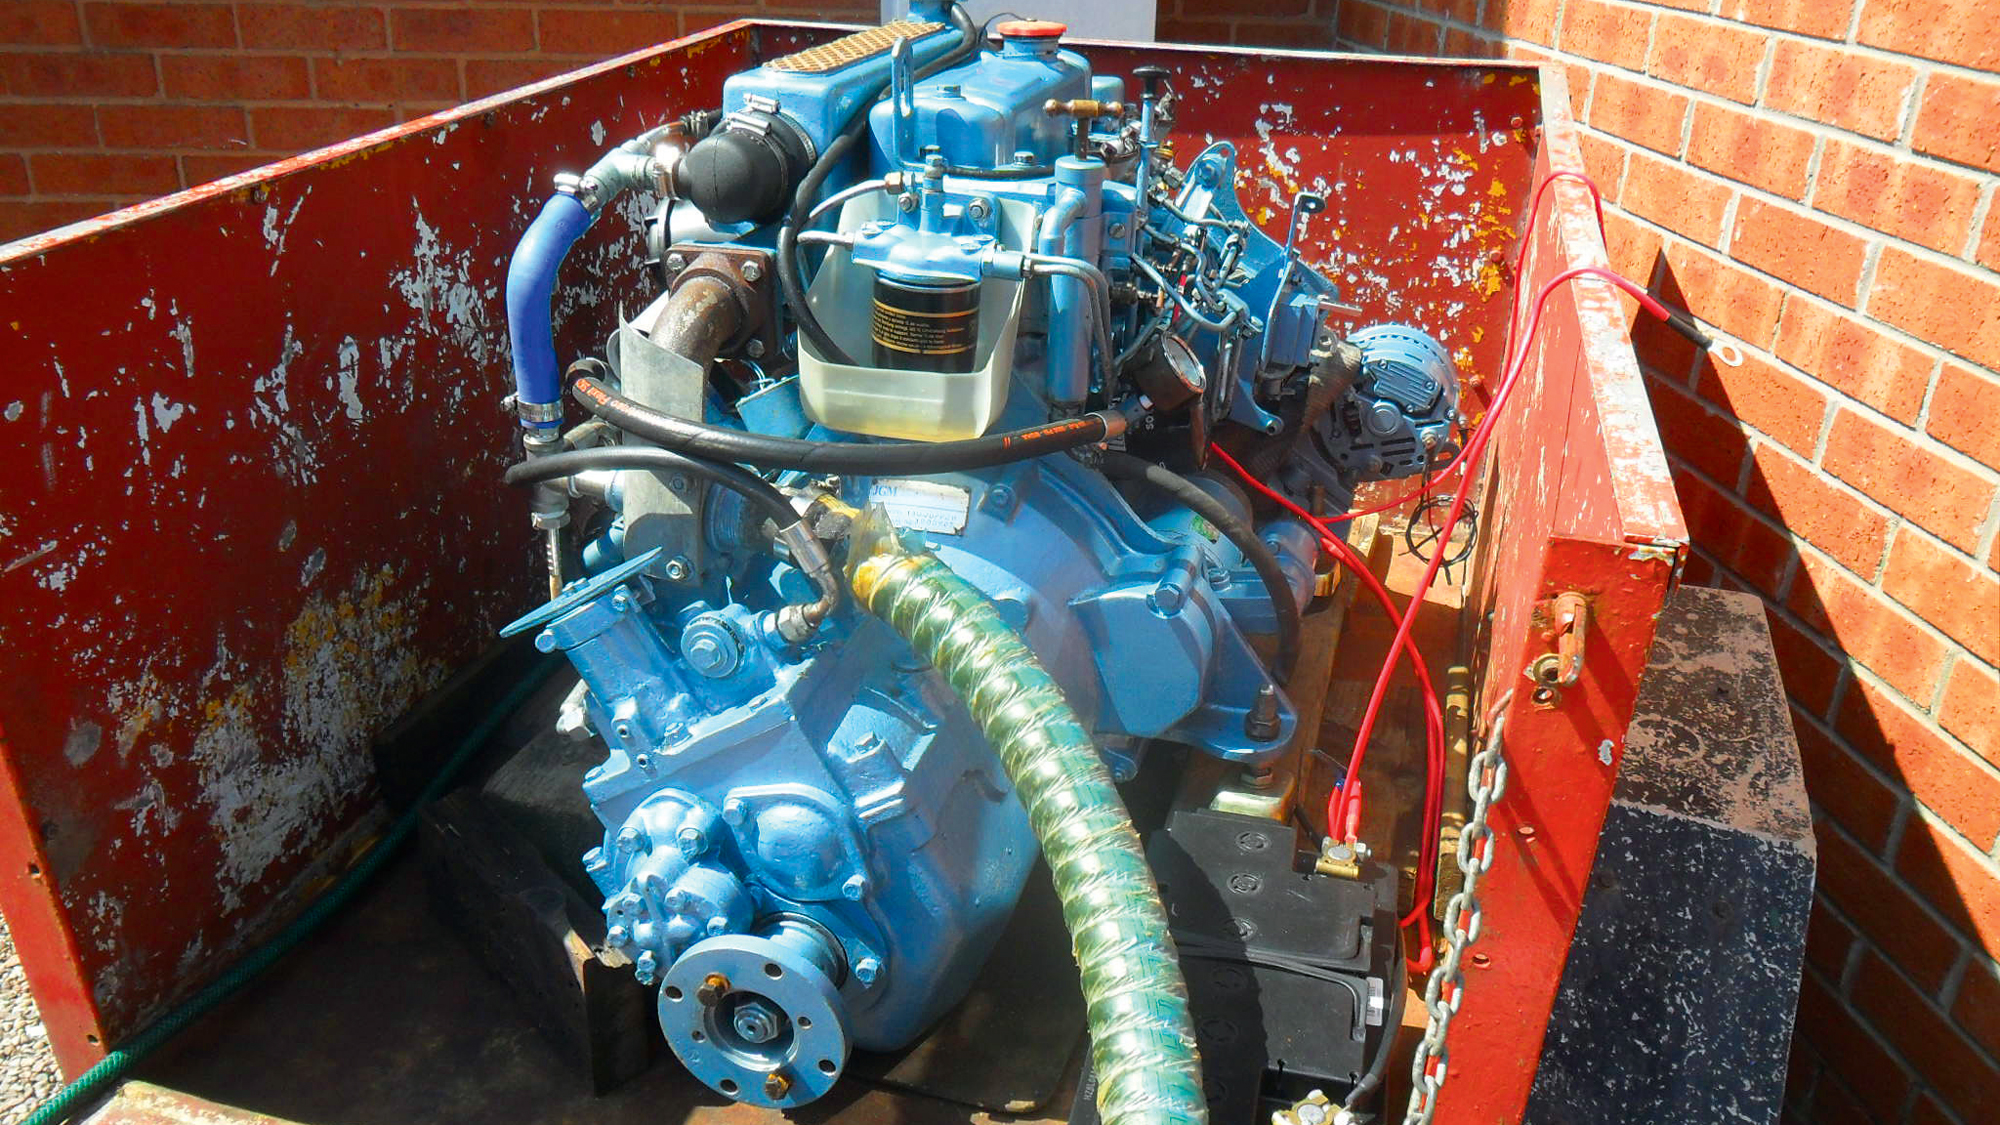
The simple rebuild that saved a 50-year-old BMC diesel engine for less
When I started Tudor Rose’s old BMC (British Motor Corporation) 1.8 diesel engine one windless summer morning, a dense pall…

Replace or rebuild? How to tell if your old boat engine is salvageable
Most of us will know someone – and may have been that someone ourselves – with a rusty, rattly, oily…
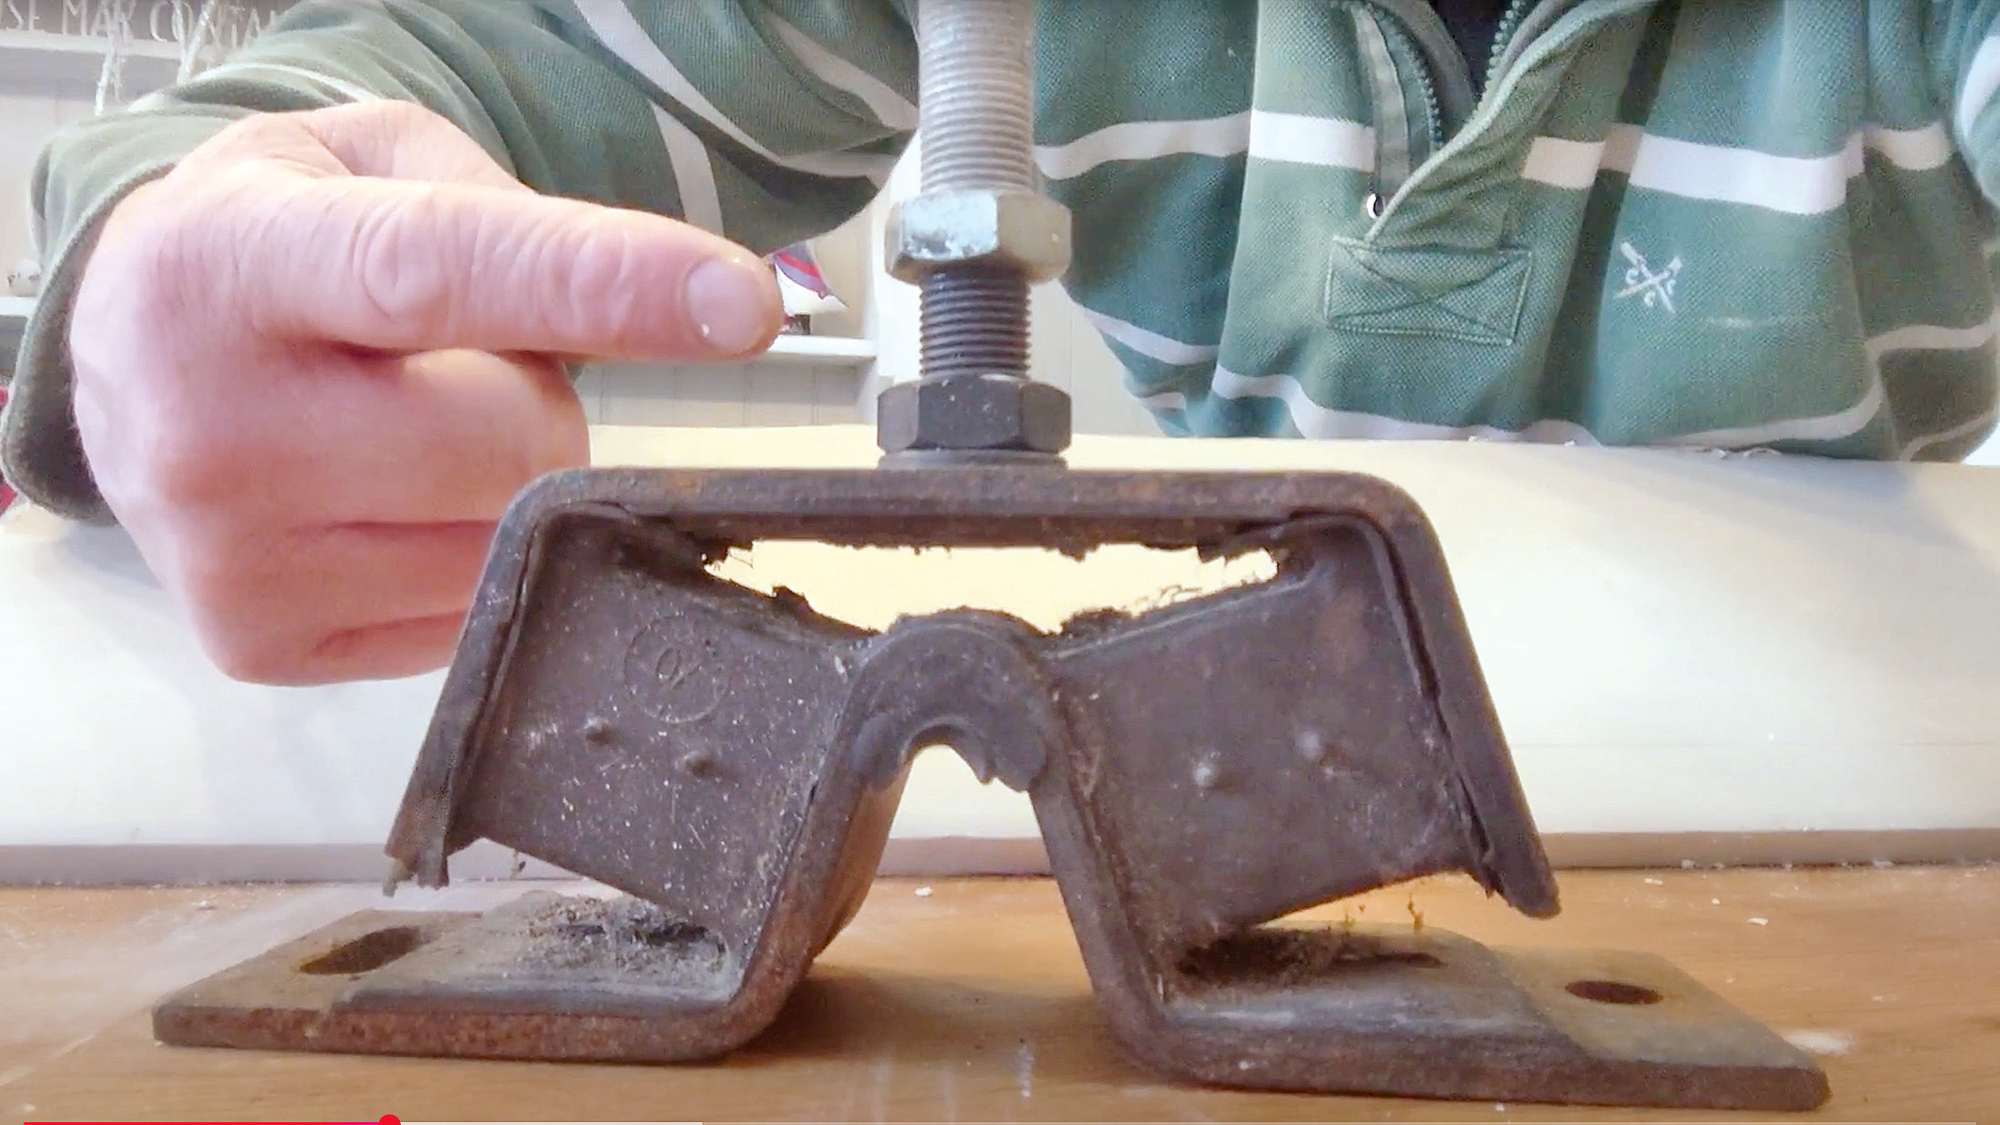
Replacing your boat’s engine mounts
Marine engine mounts are designed to isolate engine vibration noise from the boat’s structure. They’re susceptible to diesel and water…

Rebuilding an outboard motor gearbox: step-by-step
Small outboard motors can often be a low priority when it comes to maintenance. David Parker found out the hard…
Want to read more articles like How a top-end engine rebuild got me cruising on my dreamboat?

A subscription to Practical Boat Owner magazine costs around 40% less than the cover price.
Print and digital editions are available through Magazines Direct – where you can also find the latest deals.
PBO is packed with information to help you get the most from boat ownership – whether sail or power.
-
-
-
- Take your DIY skills to the next level with trusted advice on boat maintenance and repairs
- Impartial, in-depth gear reviews
- Practical cruising tips for making the most of your time afloat
-
-
Follow us on Facebook, Instagram, TikTok and Twitter