
Mark and Nicky Green decided to insulate their Cobra 850 themselves, and found it was the key to their long-term dream of living aboard
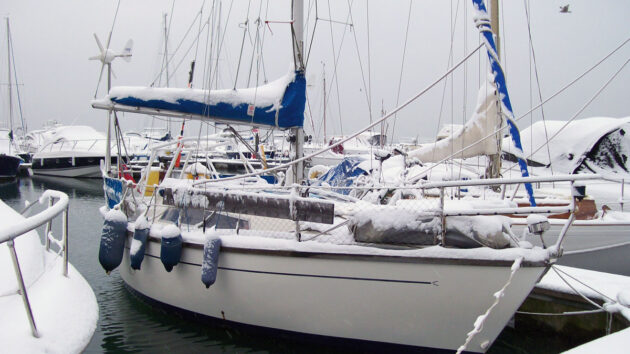
I slid open the hatch of our Cobra 850 Water Lily one chilly December morning and accidentally tipped snow all over myself and Poppy, our dog, whom I’d just coaxed into a morning walk. I poked my head out into the crisp air: Water Lily now looked like a floating igloo as everything was dusted with several inches of snow. Unconvinced, Poppy shook herself indignantly and dived back under the duvet.
Crunching through fresh snow on the pontoon felt surreal. Surely we had to be mad, living on a boat during the coldest winter for 100 years? ‘Aren’t you cold?’ Everyone was always asking us.
Our standard reply was that keeping warm wasn’t an issue because the boat was such a small space to heat. What did turn out to be more of an issue – a major problem, in fact – was condensation.
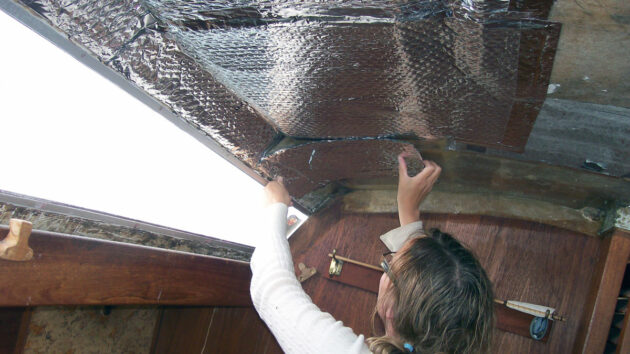
Nicky applies some of the tin foil bubble wrap
When anyone asked how we managed living aboard in winter, having swapped a three-bedroom house for a 28ft (8.5m) sailing boat, I mentioned my ‘koi carp’ theory: koi carp only grow as big as their environment allows, so a small pond – Water Lily, in this case – meant we had a lot less stuff. During our winter aboard there were definitely testing times: friends made kind offers of spare rooms in warm, dry houses, and we were certainly tempted.
However, inspiration came from our marina neighbours Dick and Nina. This intrepid couple have lived on board their gorgeous wooden sloop for 27 years! ‘I haven’t lived in a house since I was 14,’ Dick told us. ‘They’re stuffy and claustrophobic. I only have to open the hatch and look up at the stars, and I’m happy.’
Enthused by our neighbours’ positive attitude, I pondered how to solve the growing problem of condensation. With electricity prices rising and the cost of our panel heater pushing £50 a month and beyond, it was time for some lateral thinking. A dehumidifier seemed the best option, but with space at a premium and a meagre budget I wondered if I should take a longer-term view and think about insulating the cabin sides.
Fitting insulation to Water Lily
With an increasingly damp boat and low morale on board, I called on a friend, Simon White: truly the most capable person I know. Simon was in the process of converting a chapel in Oxford into a house and knew a thing or two about insulation.
Late one December evening he arrived armed with a sample section of 50mm Celotex insulation board and a leftover roll of vapour-proof polythene membrane. Over a cup of tea, we formulated a plan.
I stuck the Celotex and some wood battens to the hull beneath my desk in the bow cabin with Sikaflex. We then sealed the joins with aluminium tape and placed two layers of polythene between the insulation and sections of 4mm plywood that I screwed into the battens. I sealed the plywood edges with a bead of silicone, and the result was a simple and effective way of dealing with the condensation.
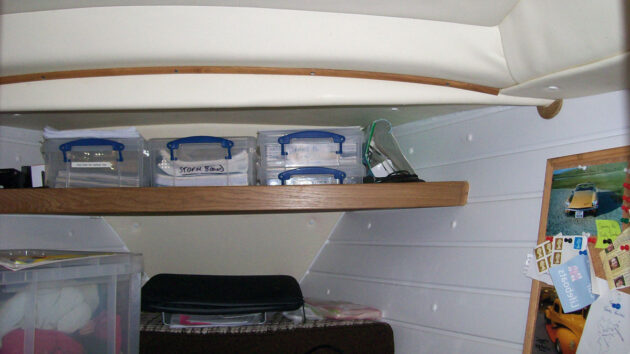
The bow cabin lined and retrimmed with plastic cladding sides and vinyl deckhead surfaces
After some research I discovered that a more space-efficient 25mm Celotex was available from a local builders’ yard. While Nicky was away working, I attacked the locker space adjacent to the main berth, removing the plywood panels and insulating behind them. The result transformed our comfort on board; at last we didn’t have damp bedding and the boat felt warmer.
When Nicky picked up more freelance work, I tackled the pilot berth. This required a slightly different approach because of the greater expanse of hull and the changing concave angles. I removed the old vinyl, which was wet with mildew and shedding its perished foam back – a dirty, horrible job.
I scraped the lumpy bits of old glue off the hull and fastened on battens as before. Three full sheets of Celotex were cut and glued in place with Sikaflex, making a gigantic mosaic.
Realising that plywood and vinyl panels weren’t practical in this much bigger area I remembered an article I’d seen in PBO, in which the resourceful boat owner had used UPVC tongue and groove cladding to the saloon deckhead. I made some enquiries and found I could buy a 5m length of 300mm-wide hollow cladding.
The big advantage of the cladding is that it’s flexible enough to twist along its length to fit to the shape of the hull. It’s also easy to wipe clean, and at first glance looks like painted wood. Pleased with my initial trial section, Nicky and I walked a 16ft bundle of five lengths along the quay back to Water Lily, taking care not to knock any pedestrians into the water along the way.
I began installing the insulation and cladding in the pilot berth. I did have to make a join where long horizontal hull curves met vertical concave profiles, but overall it worked out really well.
Break out the bubble wrap for insulation
April soon came along: Nicky and I had somehow managed to survive the winter and plan our wedding without killing each other! We’d arranged to leave Water Lily in the marina for a few extra days, and on 2 April I hoisted Nicky over my shoulder and carried her over the ‘threshold’.
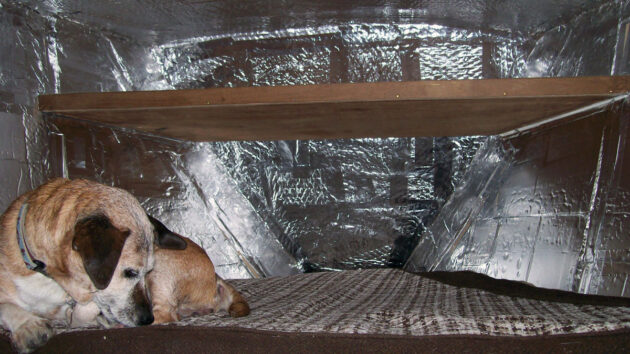
Poppy in what looks like a space capsule – the bow cabin, covered in Celotex and bubble wrap
Once the wedding celebrations were over it was back to reality, so we motored round to the boatyard for a lift out and more boat work. Having learnt a valuable lesson about insulation, and with Nicky’s tenants moving out of her flat, we decided to move back on land for a few months and invest our wedding present money into insulating the rest of Water Lily. We removed all of the old deckhead lining in the main cabin and insulated everywhere that had contact with the hull above and below the waterline.
Where space was an issue, for example the deckhead, we had a chat with Dave and Tess Mawhood from Delta Marine, who suggested bubble wrap glued in place with spray adhesive – a genius idea. To combat cold and damp at low level I raised the floor by half an inch, sandwiching foil-lined bubble wrap between plywood which I then screwed down with stainless steel self-tappers. I found some flexible aluminium trims that I fixed and glued around the bilge covers, then worked out the finishing heights for a carpet tile covering. The UPVC cladding and insulation was working out so well that I lined my bow cabin office and the heads with it too.
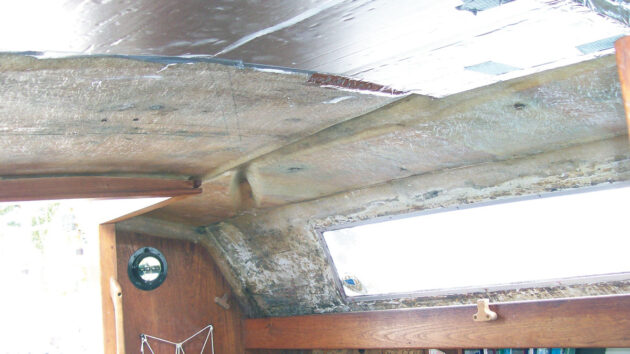
Water Lily with her old deckhead lining removed
Key to the cabin refurbishment was sorting out the leaky Perspex windows. They were heavily scratched and the mastic seals had cracked and perished, so they had to come out. Guided by top-notch advice from boat repairer Chris Gibbons, Nicky and I carefully removed one window at a time and scraped out the old mastic.
We then masked up the frames and resealed the Perspex with black Sikaflex deck caulking. Next we set up a jig to hold the windows upright and smoothed out most of the scratches with super-fine wet and dry.

Mark trims the bubble wrap
Chris loaned me his polishing machine so I used it with a finishing compound, drastically improving visibility through the Perspex. Finally, we applied a wax polish and, after many long hours of hard work, the windows looked almost new.
We still had to fix new vinyl panels around the window aperture and clamp gorgeous new teak frames into place. These had been measured, cut, mitred, shaped, sanded and varnished up to this point. Now the frames needed to be screwed into position: Nicky ignored my frustrated mutterings and patiently helped me remove and reinstall the windows and teak, many times, until one side was completely finished.
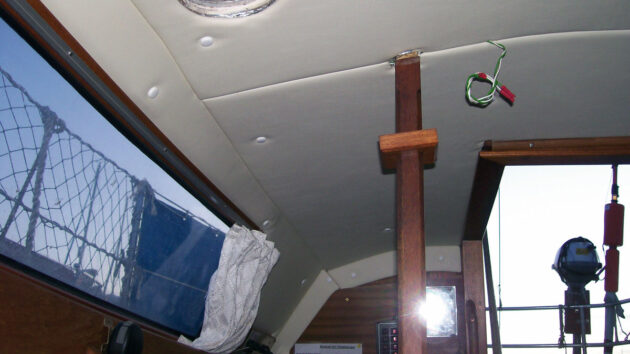
Large vinyl-covered panels hide the insulation on Water Lily’s deckhead
What a difference it made: with the windows and surrounding vinyl in place, we could finish applying the foil bubble wrap and large lining panels for the deckhead. With new vinyl hiding the tin foil bubble wrap, Water Lily’s main cabin no longer looked like the inside of a space capsule.
We still have some finishing work left to do, but the boat interior is fully insulated and lined. Jobs to do include new curtains, foam cushions, the upholstery and laying down the floor carpet tiles. We’re planning on living aboard for the next two to five years, so all the work will be worth it. Who knows, maybe we’ll follow in Dick and Nina’s footsteps and still be on board 25 years from now?
Choice of insulation
Overall, we found insulation and ventilation equally important. When selecting insulation, avoid anything that will absorb water. There are spray foams available, but this can be expensive and is better suited to an empty, completely gutted boat interior. We used 25mm closed cell foam Celotex, available from builders’ yards in 8ft x 4ft rigid sheets, and foil-clad bubble wrap from B&Q.
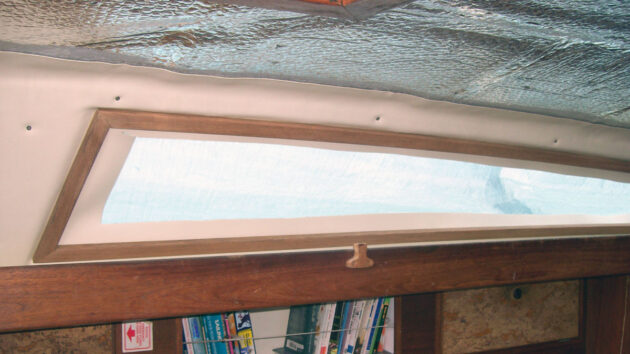
Teak frames fitted around the Perspex windows ready for the vinyl trim to be cut back to size
We also installed a vapour barrier between the Celotex and interior UPVC cladding, then sealed the Celotex and bubble wrap joints with aluminium tape. I’d be tempted to use multiple layers of bubble wrap instead of Celotex next time because it was much quicker and easier to install – mainly because being flexible it followed the curves of the boat much more effectively. It also created far less waste and mess.
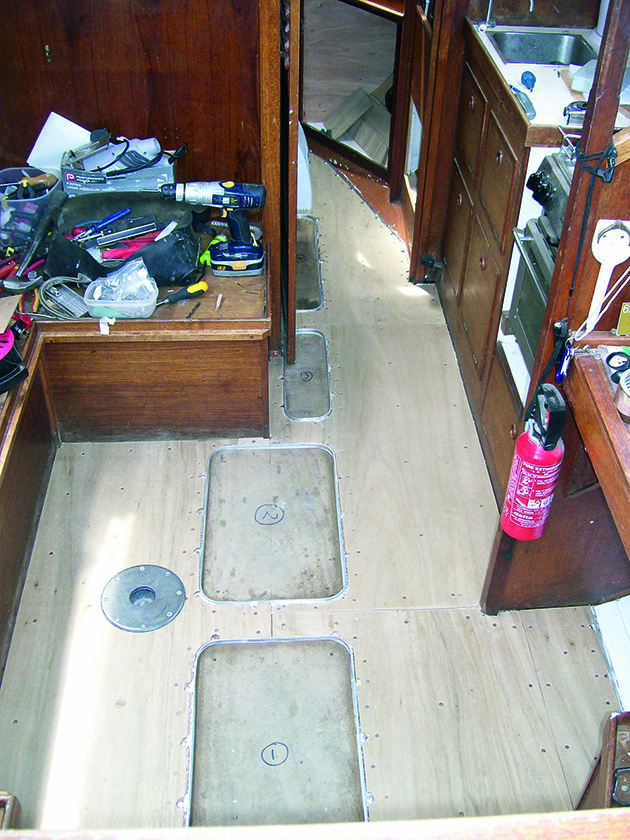
The insulated floor, with aluminium trims around the bilge covers
After completing the pilot berth insulation and cladding, I used wider (50mm) battens for the rest of the boat to give more margins for error with screw fixings. Always measure where the battens are and draw a plan before installing the cladding or lining panels so you can be sure of picking up the battens when screwing through the cladding. Be careful with what length drills and screws you use to avoid holes in the hull or deck. Practise cutting and gluing smaller panels that are not immediately on show first: it’s tricky getting the corners right.
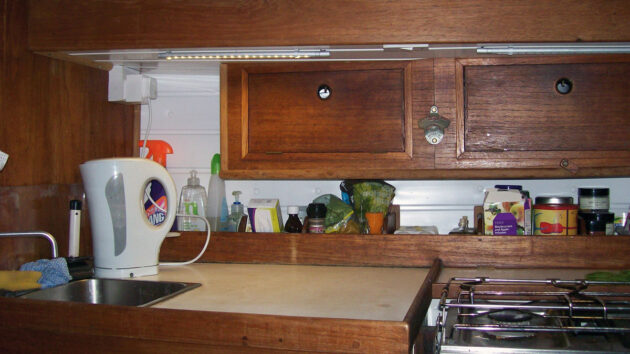
Cladding continues behind the galley lockers
Making templates out of wallpaper lining paper works well, but buy the heaviest grade you can. Use spray glue in a well-ventilated area – remember, the fumes are flammable. Finally, insulating your boat will test your patience, lighten your wallet and produce a huge amount of work that will take far longer than you anticipated.
However, if you’re taking a long-term view and are contemplating living on board during the winter, it’s definitely worthwhile.
Top tips for living aboard in winter
- Preparation before going into a winter on board is essential. Improvement work is much easier when the boat is out of the water.
- A cockpit cover to shield the entrance from rain is high on the list of essential equipment. We’ve rigged up a tarpaulin, which has made a huge difference.
- Our electric towel rail worked brilliantly for drying things during wetter weather, so the heads doubled up as a drying room and an airing cupboard.
- Most boats are designed with summer temperatures in mind. Be prepared for big heating bills unless you insulate.

Boat condensation: one sailor’s solution to keep your boat dry
Many boats suffer from water droplets forming on cold windows as a result of hot air or steam becoming cool…

Hull insulation: a DIY guide
Richard Rogers explains how to insulate the hull of a small yacht for high latitudes sailing to cold, remote and…
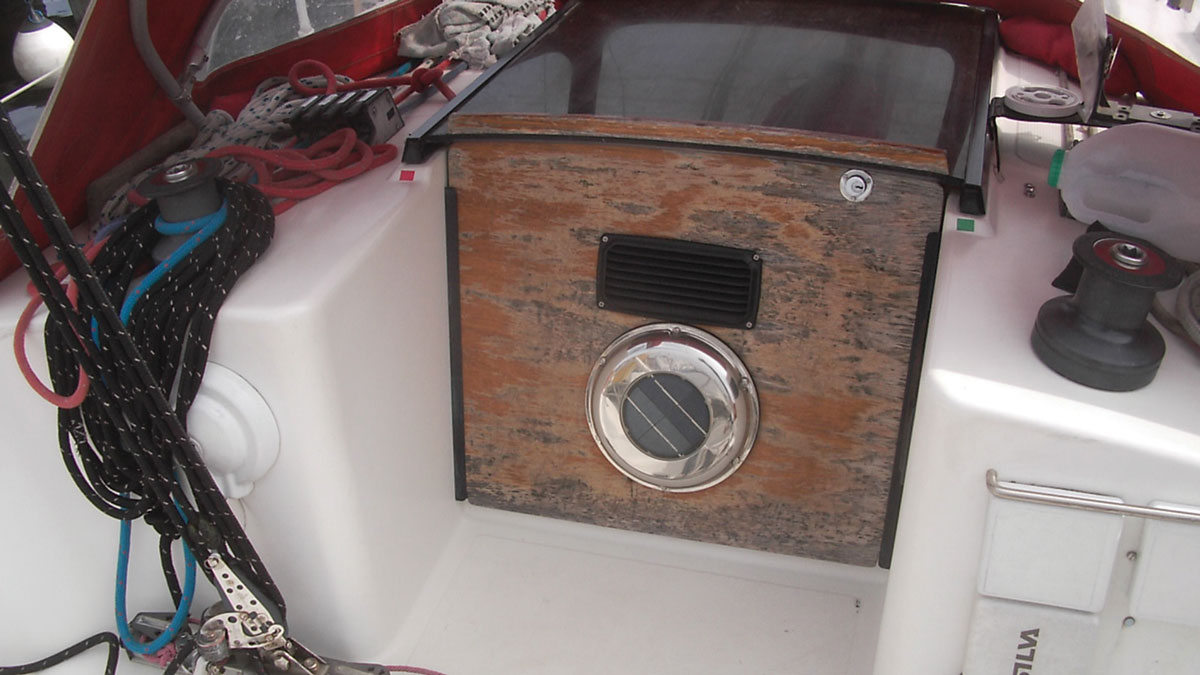
Banish winter damp: install a solar-powered vent
Ten years ago, Colin Haines installed a solar-powered vent on his boat. He shares the results and if it still…

Winter sailing: top tips to keep you as snug as a bug on the water
Staying afloat this winter? Ali Wood has some top tips for keeping warm while winter sailing
Want to read more articles like From damp cushions to cosy home: The simple insulation job that changed life on our boat?
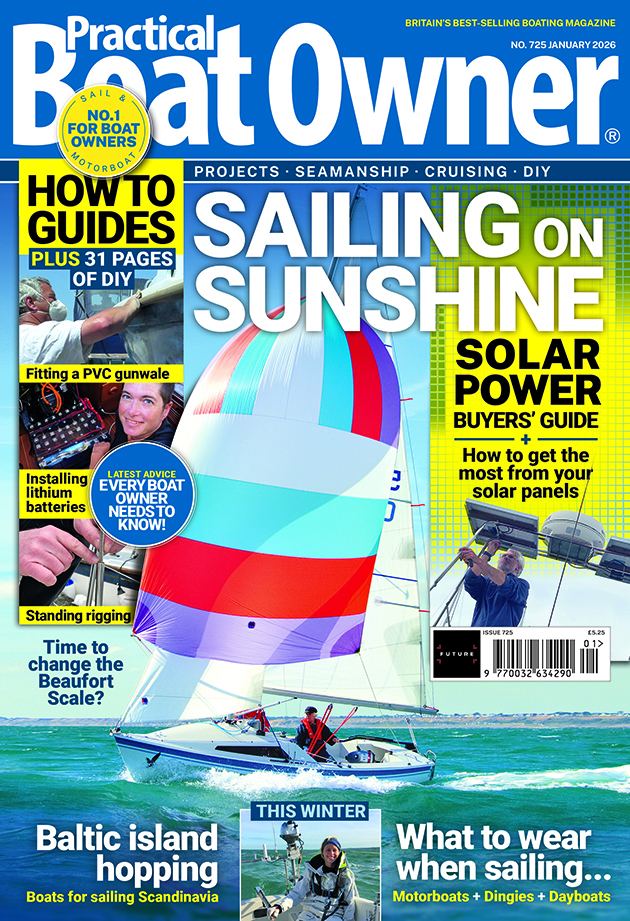
A subscription to Practical Boat Owner magazine costs around 40% less than the cover price.
Print and digital editions are available through Magazines Direct – where you can also find the latest deals.
PBO is packed with information to help you get the most from boat ownership – whether sail or power.
-
-
-
- Take your DIY skills to the next level with trusted advice on boat maintenance and repairs
- Impartial, in-depth gear reviews
- Practical cruising tips for making the most of your time afloat
-
-
Follow us on Facebook, Instagram, TikTok and Twitter