
Keel bolts need regular inspection on all boats, and the long bolts used on wooden craft are particularly susceptible to corrosion. Richard Johnstone-Bryden explains how to remove them
If a keel parts company from a yacht, capsize is the inevitable result, which is why checking and replacing keel bolts is essential.
But keel bolt failure is not something expected only of older boats – there are plenty of documented cases of relatively new boats suffering as well.
For wooden boats, checking keel bolts is a matter of withdrawing them one by one for inspection. This should be carried out regularly as part of your boat’s long-term maintenance programme.
The interval between inspections will be determined by the type of metal the bolt is made from: mild steel should be checked every four to five years, while bronze can be left for up to eight years.
The example of checking and replacing keel bolts below is being carried out on a traditional wooden boat
Before slipping your boat
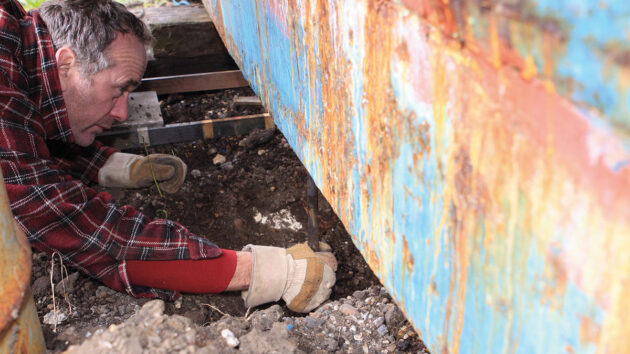
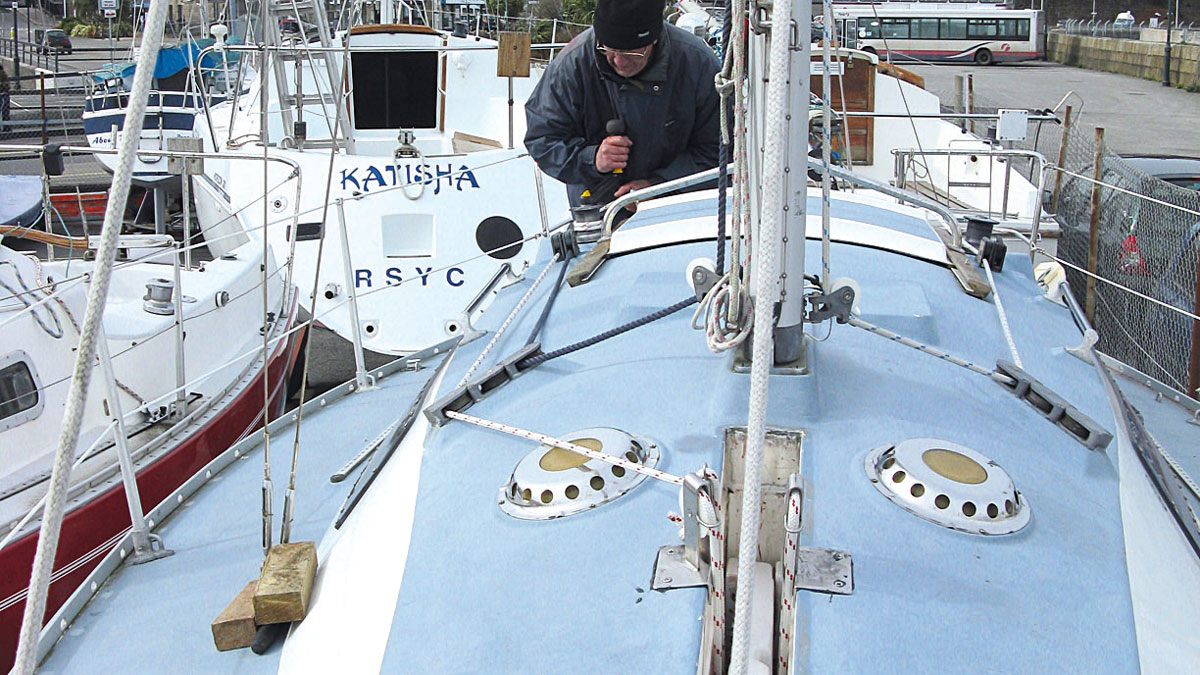
Before slipping your boat, you need to consider the issue of access to the keel bolts. It’s important that any supporting blocks under the keel should not restrict access, and at the same time, you need to ensure there is enough space underneath the keel to enable the bolts to drop out. This can be done by placing the boat on blocks on either gravel or earth and digging a pit underneath each bolt in turn.
The alternative is to support the boat high enough above the ground, but this may not always be practical. Two people will be required to successfully complete the process of dropping and fitting each bolt. The work underneath the boat begins by chiselling out the cement or filler that was used to cover each bolthead.
Removing keel bolts
Credit: Richard Johnstone-Bryden
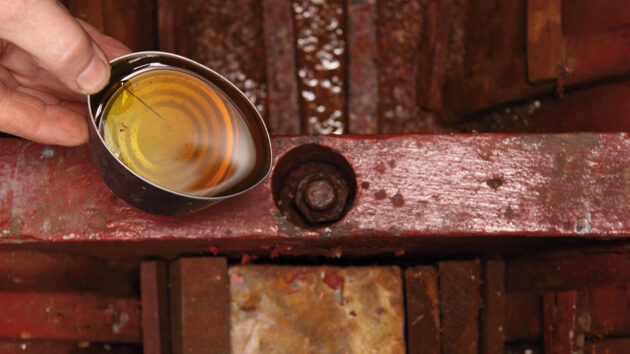
1. Remove Securing Nut: Inside the boat, remove the cabin sole and any internal ballast that may be concealing the securing nuts. The removal of the securing nut can be helped by pouring penetrating fluid (diesel will also do) over it to soak in for a few days before dropping the bolt.
Credit: Richard Johnstone-Bryden
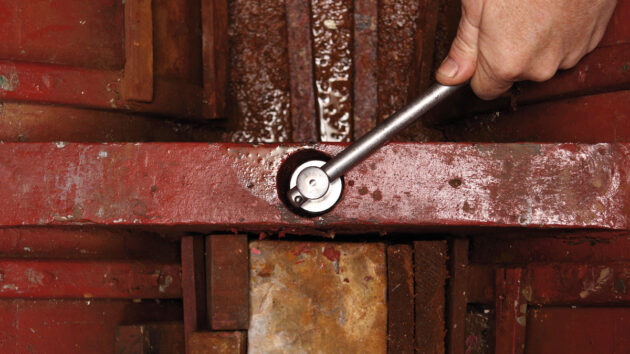
2. Loosen the Nut: Having allowed the penetrating fluid to work its magic, it’s time to loosen and undo the securing nut with a socket spanner. An extension bar on the spanner handle can provide extra leverage.
Credit: Richard Johnstone-Bryden
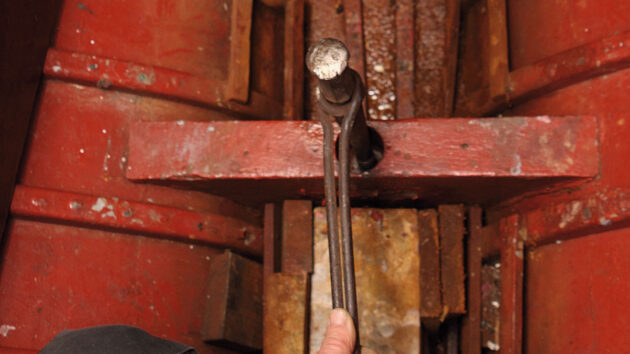
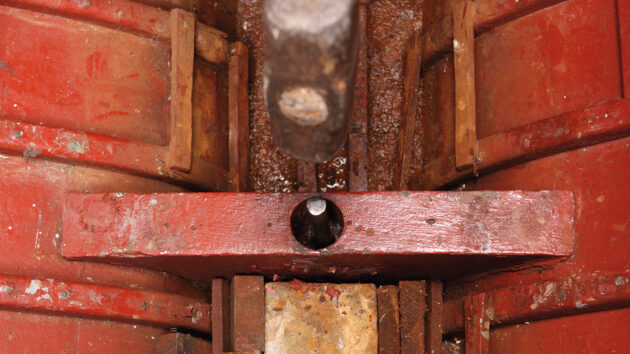
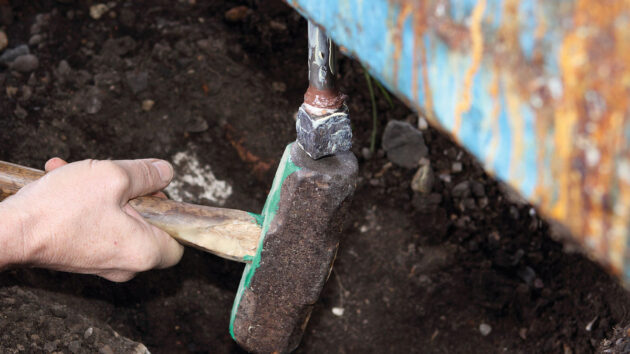
3. Drive Down the Bolt: The bolt is now ready to be driven down through the keel with a sledgehammer and a large punch or drift. Choose a punch close to, but slightly smaller than, the diameter of the keel bolt. To ensure hands are kept well clear of the danger zone, the punch should be held in place above the keel bolt either through a hole in the end of a length of wood, or through the coil in a metal bar bent to shape for the purpose. Strike the punch firmly with the sledgehammer.
Credit: Richard Johnstone-Bryden
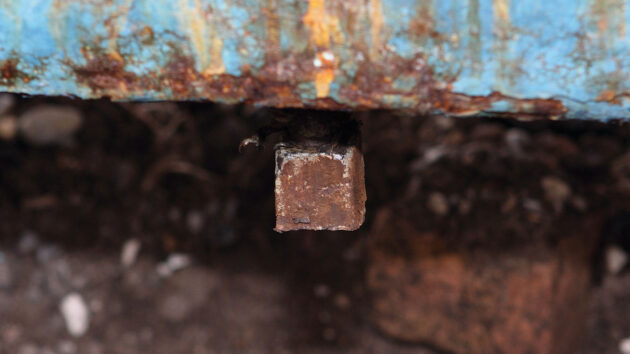
4. Check for Breakage: As soon as the bolt starts to move, stop and check that the bolt head is actually starting to protrude below the boat. If it is, then simply carry on. If the head hasn’t emerged, it could be that the bolt has corroded to a fine point and been broken in two by the force applied with the hammer. Subsequent blows will only drive the upper section of the bolt past the lower part to create an even bigger problem. If you suspect the bolt has broken, one solution is to weld a T-piece of steel on to the head of the bolt underneath to enable it to be drawn out with a crowbar or lever. Once the lower part of the broken bolt has been removed, it should be possible to drive the upper section back up the hole with a punch and extract it from inside the boat.
Credit: Richard Johnstone-Bryden
5. Continue Driving: Providing the bolt is dropping as planned, continue to drive it through the keel using the sledgehammer and punch. Keep an eye on the situation underneath to ensure the bolt continues to move.
Credit: Richard Johnstone-Bryden
6. Extract the Bolt: Once the bolt has been driven most of the way through the keel, it should be possible to pull it the rest of the way out for inspection.
Replacing keel bolts
Credit: Richard Johnstone-Bryden
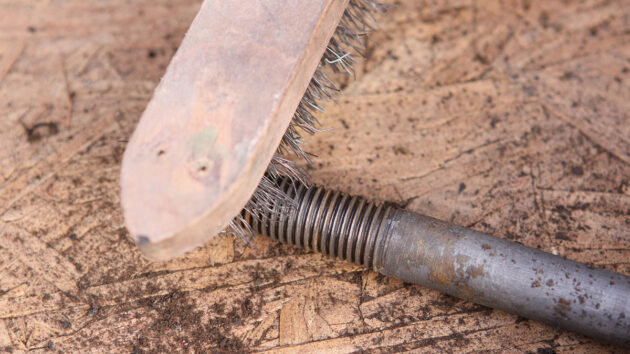
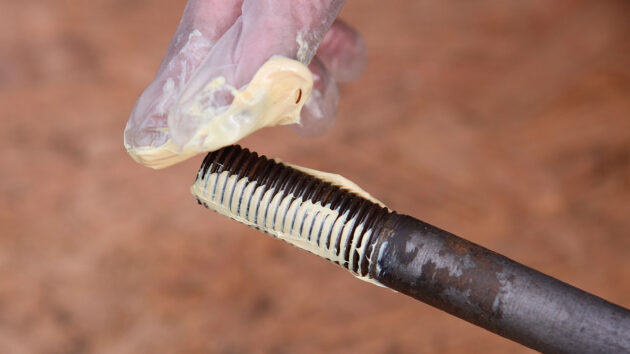
1. Clean and Coat: Bolts – old or new – should be thoroughly cleaned before being coated with a metal primer, epoxy or black tar varnish. The thickness of this coating will be determined in part by the size of the hole: there’s no point applying several layers of a coating for it to be peeled off as soon as the bolt is hammered into position. By the same token, if there is some slack, then a thicker coating can be applied.
Credit: Richard Johnstone-Bryden
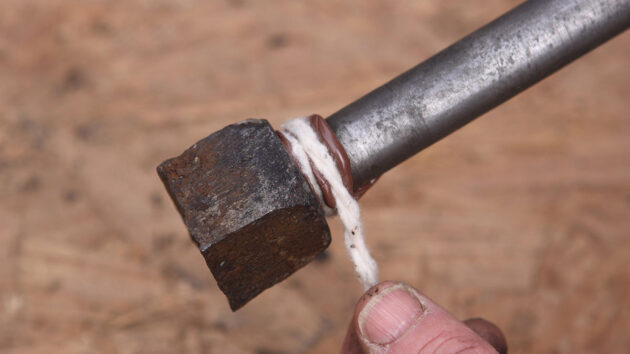
2. Apply a Grommet: A grommet should be formed around the head of the bolt by applying a ring of mastic, then winding on roughly two turns of caulking cotton. Tie off the cotton with a half hitch and cut off the surplus with a knife before smearing some more mastic along the cotton’s upper edge.
Credit: Richard Johnstone-Bryden
3. Lubricate the Bolt: To prevent the thread at the top of the bolt from becoming clogged when it is forced up through the keel, simply apply some grease. It’s also worth applying grease along the entire length of the bolt to help it slide more easily into place.
Credit: Richard Johnstone-Bryden
4. Push and Hammer: Push the bolt back up through the keel, hammering it upwards with a lump- or sledgehammer when it gets tighter. It’s worth having a second person inside the boat to help monitor the bolt’s progress. Once the bolt is fully home, put the washer and securing nut in place and tighten them up securely. If the bolt head is recessed in the bottom of the keel, cover it with an appropriate filler to complete the job. Once the boat has been back in the water for a while and sailed, check and re-tighten the bolts as necessary.

How to check keel bolts
Colin Brown describes a series of checks you can carry out to assess the structural integrity of the bolts which…
Making a lifting keel easier to raise
After struggling with a heavy lifting keel, Brian Johnson builds a simple tackle to make light of the problem

The pneumatic keel
Ben Lowings talks to Bjorn Haraldsson about his simple air-regulated keel

Keel types and how they affect performance
Peter Poland looks at the history of keel design and how the different types affect performance
Want to read more articles like Checking and replacing keel bolts on wooden boats?
A subscription to Practical Boat Owner magazine costs around 40% less than the cover price.
Print and digital editions are available through Magazines Direct – where you can also find the latest deals.
PBO is packed with information to help you get the most from boat ownership – whether sail or power.
-
-
-
- Take your DIY skills to the next level with trusted advice on boat maintenance and repairs
- Impartial, in-depth gear reviews
- Practical cruising tips for making the most of your time afloat
-
-
Follow us on Facebook, Instagram, TikTok and Twitter