
A faulty gauge might seem minor, but it could be enough to end your cruise. With a little knowledge you can get things working, says Rubicon 3's Bruce Jacobs
Every boat has a number of gauges for water, fuel and waste tanks. Every so often, one of them will stop working properly – giving no reading at all or a false reading.
Not a significant breakage in itself, but enough to seriously alter your decision making on passage if you think you have no fuel left.
With a bit of knowledge, it is an easy problem to troubleshoot and fix gauges. The problem can only be one of three things: power to the gauge, resistance in the sender, or a break in the circuit. Here’s what to look for.

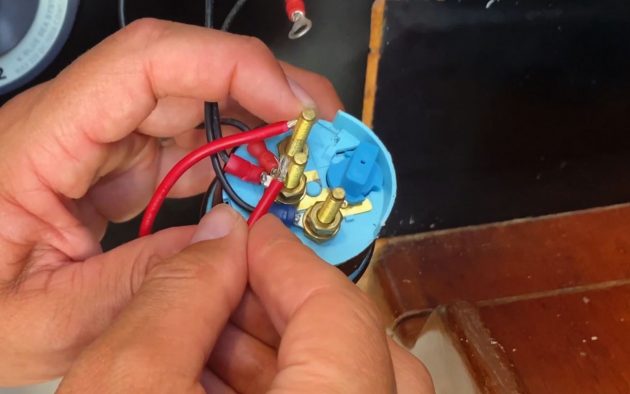
Identifying the wires
Working with your electrical system, switch off the instrument circuit before you do anything. Held in place by friction or a screw collar, remove the gauge from its mounting.
Exact configuration of the wires varies from brand to brand, but the principle is the same and there will be either three or four wires on the back, attached to terminal posts.
These are: a positive DC feed in, marked ‘I’; a negative, marked GND for ‘ground’ (this may have two wires to link several gauges to the negative); the sender, marked ‘S’, which receives information from the sensor; some gauges will also have terminal for power to a backlight.
Note: it is crucial that you never touch a positive wire to the sender or you will break the sender in the tank and probably the gauge as well.

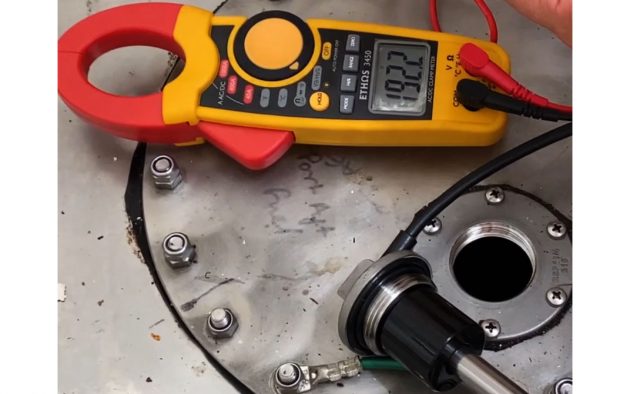
Check voltage
First off, we check for power to the gauge. If there’s no voltage it won’t show anything. The first thing we want to do is check that the gauge itself is getting voltage.
If there’s no voltage it’s not going to show you anything. Set your multimeter to voltage, place the probes on the negative and positive terminals. In a 12V system, it should show something around 13V.

Check the sender
On top of the tank will be the sender, to which two wires are attached. They may be different colours but it doesn’t matter which way round they are there will be two wires.
One will go to the sender post on the gauge and the other will go to the negative post on the gauge. Disconnect the wires, and unscrew the sender unit – it’ll either be a float on a vertical post or a horizontal lever arm.
To check the sender alters the resistance, set your multimeter to Ohms and put the probes to the wires. As you slide the float up and down, the resistance should change, though the actual numbers are not important.
Check the gauge
You can test the gauge by changing the resistance in the circuit. To remove all resistance, ground out the sender by putting a wire from the sender post to the negative, and the needle should jump across its full range.
If it’s working you then know the problem is in the wire or the sender. Just be careful not to touch the wire to the positive post.
Our How To series is brought to you in association with GJW Direct. GJW Direct offers some of the most comprehensive and competitive boat insurance policies on the market. With more than 175 years in marine insurance, when you insure your yacht with us, you’re dealing with the boat insurance specialists, leaving you free to enjoy your time on the water.
With thanks to Bruce Jacobs and the experts at rubicon3adventure.com, the UK’s specialists in adventure sailing and training.