
For a boat with a wheelhouse, a screen washer is a small but important accessory. David Parker shows how to fit a new pump

Spares for an engine water pump, namely an impeller, are one of those ‘must have items’ most boat owners would probably label as essential. Also when it comes to general electric bilge pumps, many craft will also typically have manual options as a backup should there be a problem. However there’s one little pump on board which can get overlooked by motor boat owners or in fact anyone with a wheelhouse steering position.
I’m talking about the windscreen washer pump. It’s one of those minor things you take for granted but as soon as it packs up you miss it pretty quickly. It happened to me on a choppy day when it wasn’t raining but there was lots of wind-driven spray. It was the sort of conditions where you need the wipers and screen washer on a stop-start basis to keep the blades lubricated. Soon I had salty smears all over the glass and this going into bright sun and more spray soon restricts a clear field of vision.
The pump had been working fine in the short bursts required but then just stopped without notice. I could hear it working but no water was coming out and cursory checks afloat didn’t cure it. It wasn’t like when a wiper motor completely packs up. Then you rapidly lose visibility in an unnerving watery blur, but the faulty pump was certainly a problem which needed sorting before going out again.
Investigations began when I got back to my mooring. I must confess that I didn’t even know where this little pump was but fortunately I could still hear it whirring when activated so tracked down the noise and located it tucked up inside a system locker by the wheel console.
It was no bigger than the washer pump used in a car: in fact that’s exactly what it was and I got a similar replacement for under a tenner from a motor factor outlet.
Replacing it was not a difficult job and it works on the same simple principle as when installing any other pump on board. It has an inlet for a feed supply and an outlet where the pumped water comes via a built-in 12V motor with standard positive and negative terminal feeds.
But of course when is anything exactly that straightforward on a boat?
This was a system which had probably been in place since the boat was built and inevitably there were some modifications with adapters required and key things to remember such as fitting a non-return valve and being able to isolate relevant parts of the water supply.
While I was doing the job I also took the opportunity to replace the water filter between the tank and the feed pipes, a job which was probably long overdue.
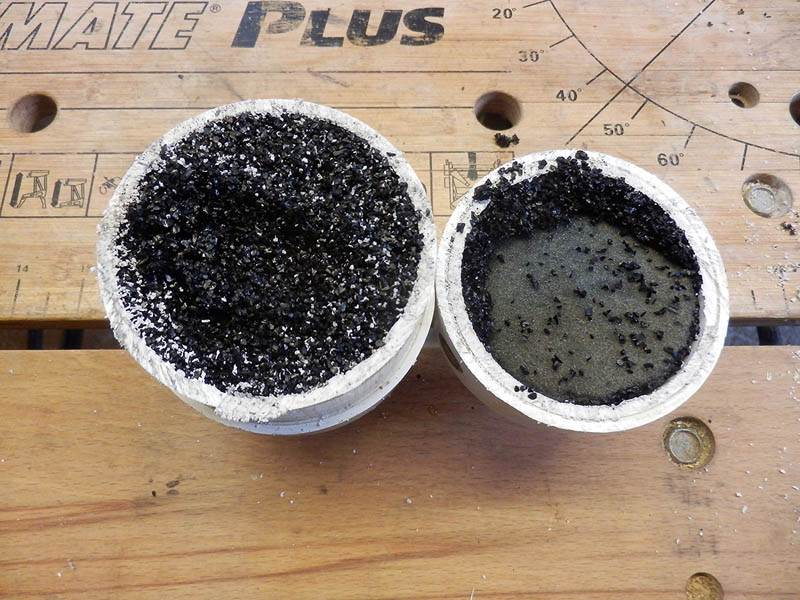
In case you’ve ever wondered, this what it looks like inside an inline water filter – I cut my old one in half with a hacksaw. It is full of carbon granules which do the filtering… maybe not the best idea to do this on board, mind, the particles can go everywhere! The irregular surfaces and pore structure of the carbon granules work by capturing water-borne contaminants as the water flows through them. Eventually, however, the carbon can’t ‘soak up’ any more impurities at which point the filter will need to be replaced.
I also considered changing the washer supply system itself with a standalone windscreen washer kit which is maybe worth considering in the future or if you come to do a similar job. These kits consist of a separate tank with a pump, some of which are built in, and the other accessories such as the tubing and connectors.
My supply is fed off the main water tank and I decided to stick with this for now for both speed and convenience – and it was cheaper. Here’s how I did it.
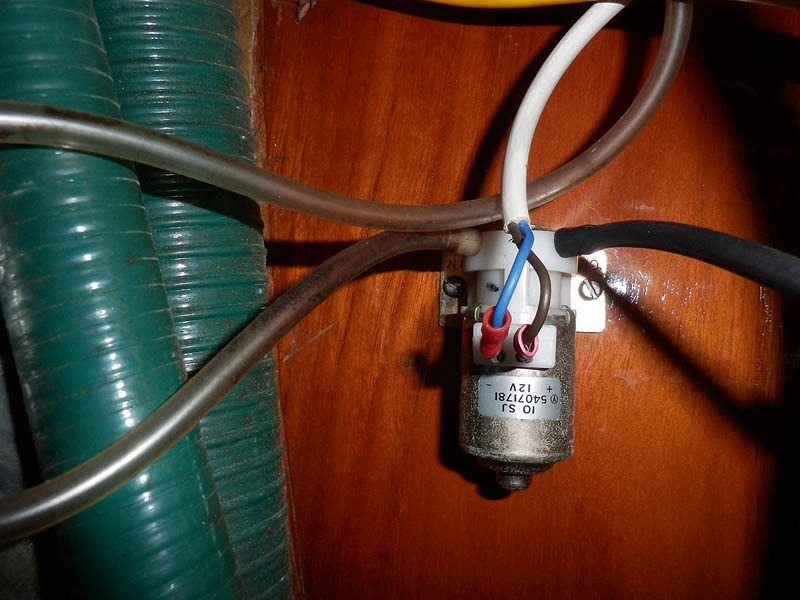
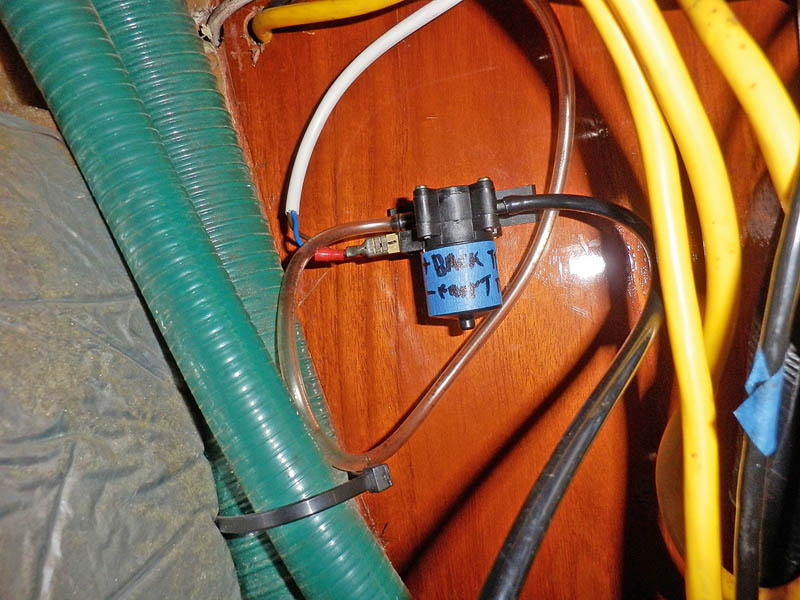
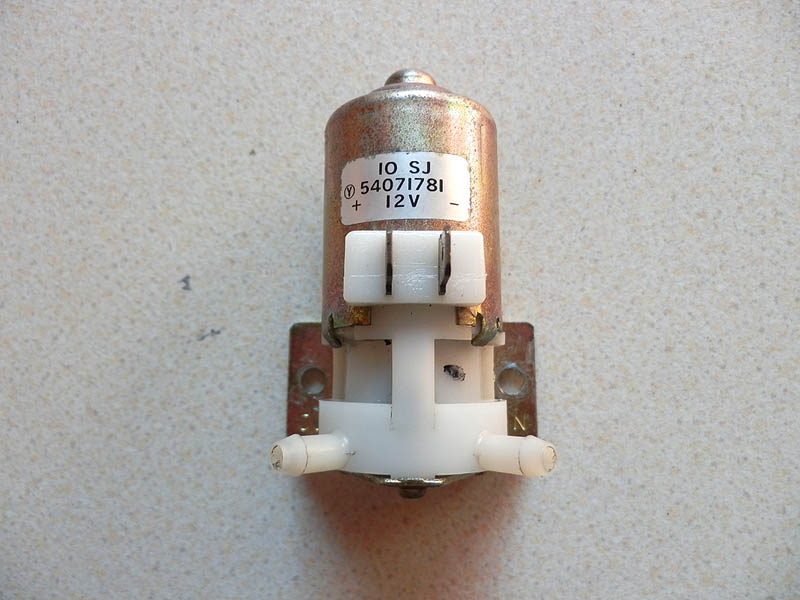
The first job was tracking down the old pump. These motor vehicle types aren’t big and this one measured approximately 2¾in (70mm) x 1¼in (35mm) x 1¾in (45mm) deep including the terminals and connector lugs.

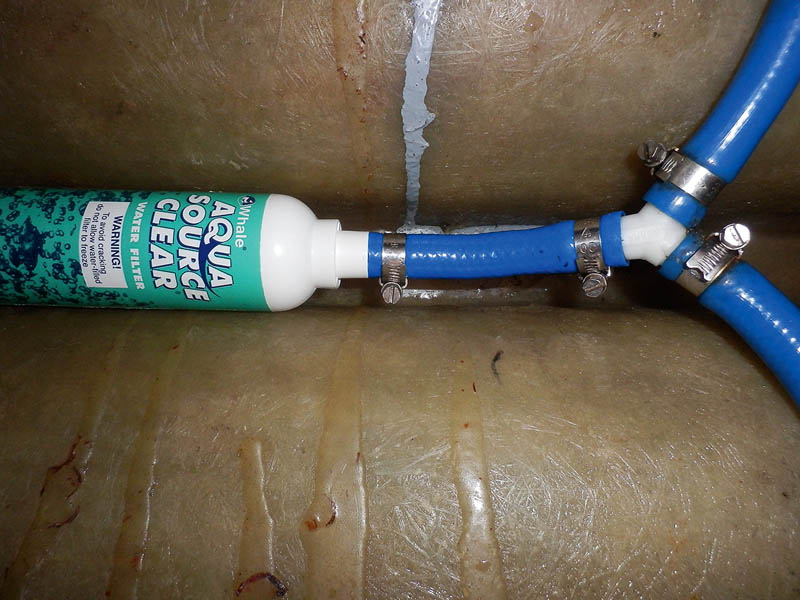
2. Next job was to trace the feed end from the main water tank. Three blue cold water pipes came off the tank diverted by Y-connectors. These were standard ½in (12mm) pipes but larger sizes are also common. One pipe was to the galley, one to the heads and one was connected to the plastic washer tube.
3. There was no shut off valve for the main tank so I needed to have wooden bungs ready to prevent my fresh water supply emptying into the bilge. If you don’t have machined bungs like this then whittled down sticks or dowel will work if you also wrap them in rag to jam them home.
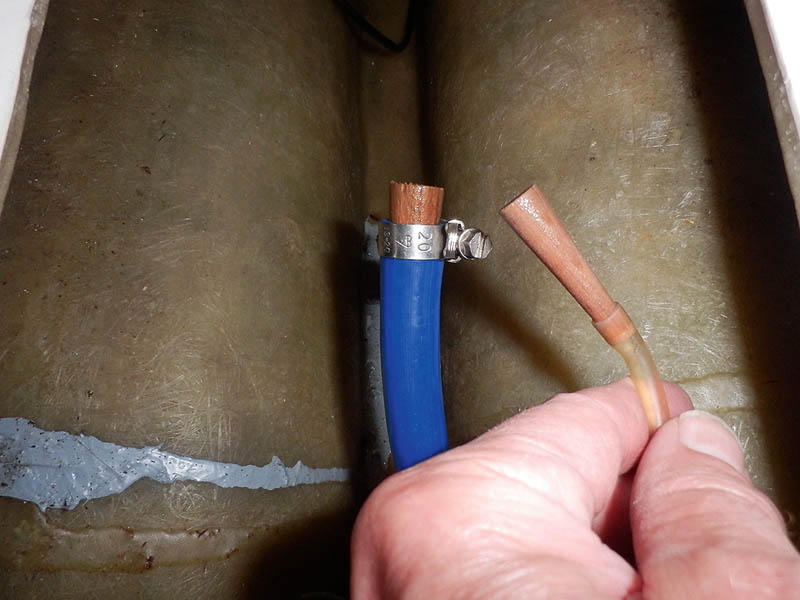
4. I had to cut off the end of the tank pipe because the old non-return valve had been sealed in. It was functioning OK but not designed to be removed and having been glued in position the end spilt when removing it
5. I then traced the clear tube from the tank to the washer pump along its entire length. This meant removing panels but I wanted to ensure it wasn’t kinked or had become jammed along the way. These motors are not powerful and the flow must not be impeded.
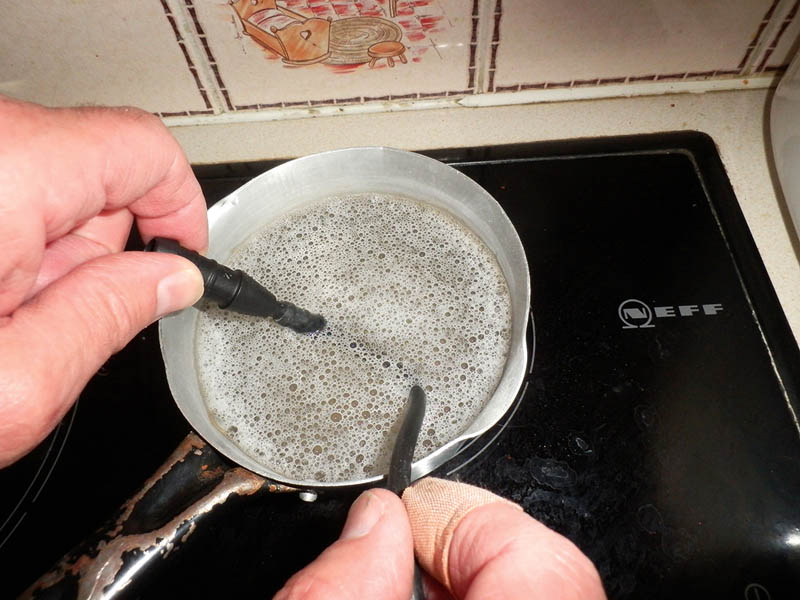
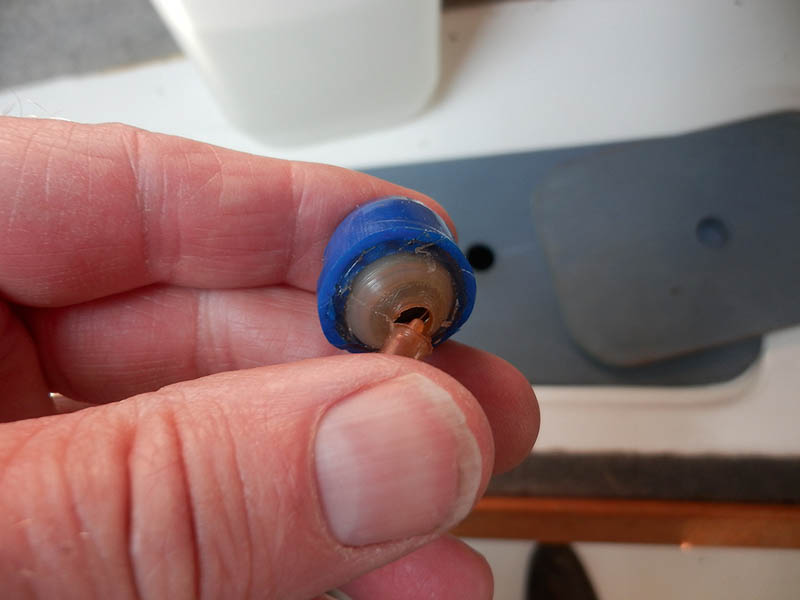
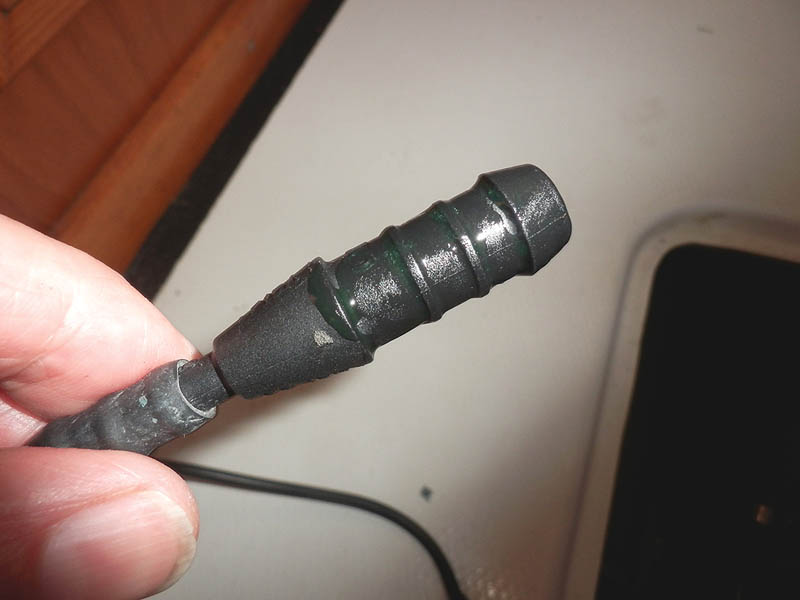
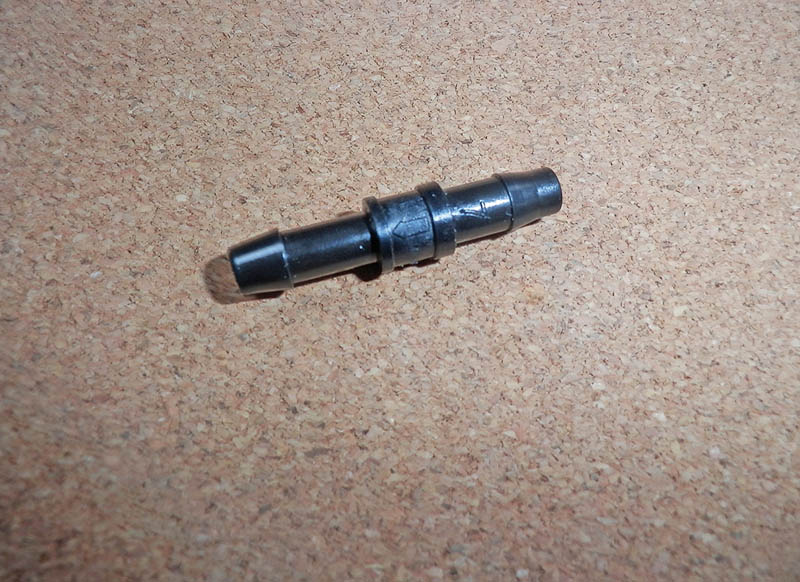
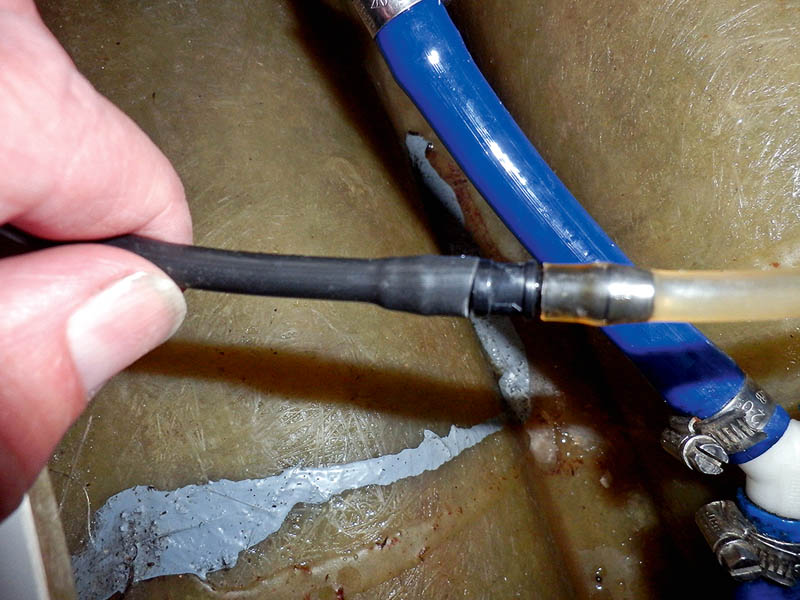
6. I wanted a reducer of 12mm down to 5mm for the reconnection but could only get one which was 12mm down to 6mm. The 5mm tubing was a tight fit on the 6mm spigot and very stubborn to get on. I used boiling water to soften a length of new black tubing enough to work it over the ribbed spigot.
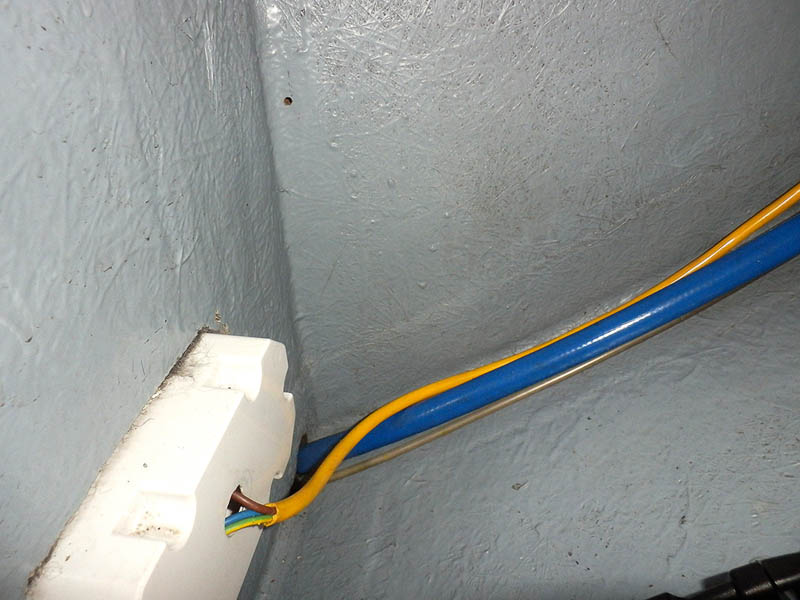
7. With the thin pipe attached to the reducer spigot I could then reattach the thick end into the 12mm water pipe. Space was tight working in the bilge so to make the job easier I lubricated the end with washing up liquid.
8. A key part of the system is the non-return valve. This stops water flowing back down from the pump each time it is switched off – in which case it won’t work again without priming to get the airlock out. I bought this one for a couple of quid in Halfords.
9. I used the non return valve to join the new black pipe from the tank to the existing clear pump tubing that runs on through the boat. It’s a simple push fit, but ensure when fitting that the arrow on the valve points in the direction of flow.
10. The new pump could now be installed in position. Unlike the old one, however, the positive and negative terminals on this were not marked and neither were the inlet nor outlet tubes. So to ensure the water pumped the right way and the terminals were correct I tested it first at home.
11. While I was about it, I fitted a new water filter between the tank and the feed pipes. This would give me fresher drinking water but also ensure no debris or muck from the old filter would block the non-return valve or pump impeller – it was a bit of extra expense but better than having to strip things down again.
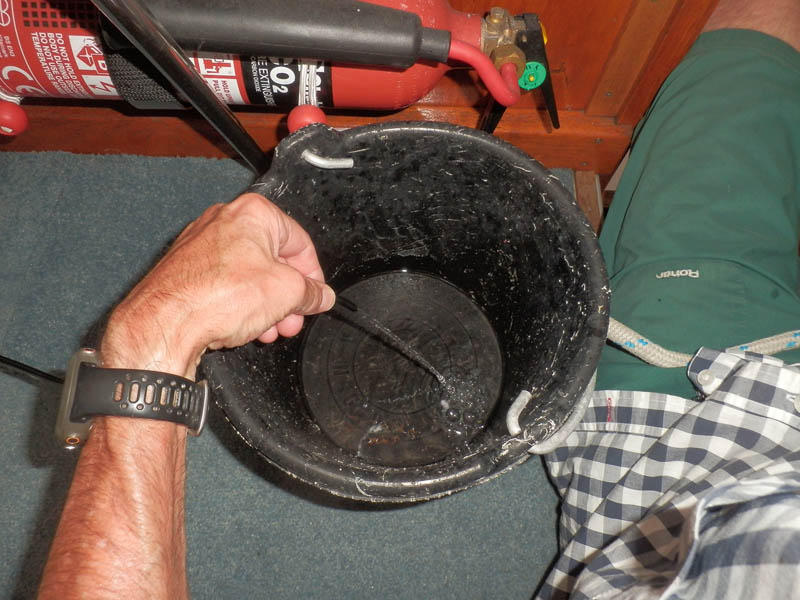
12. I sucked water through to prime the pump and then ran a test in a bucket to make sure the pump and non return valve functioned correctly. I could then confidently reconnect the supply to the windscreen washer pipes.
How to do a temporary pump fix at sea
1. If you have a problem when you’re out on the water with no access to replacement parts it is fairly simple to strip a pump down to check it. The end with the motor typically has ± symbols and the impeller is housed inside the casing with the tubes.
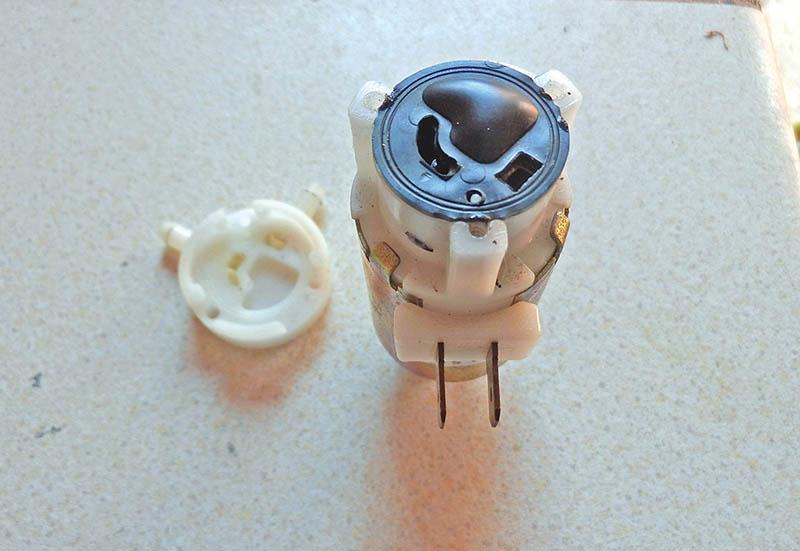
2. Remove the bottom of the casing and you’ll find a rubber membrane that directs the water flow from the feed pipe to the flow port.
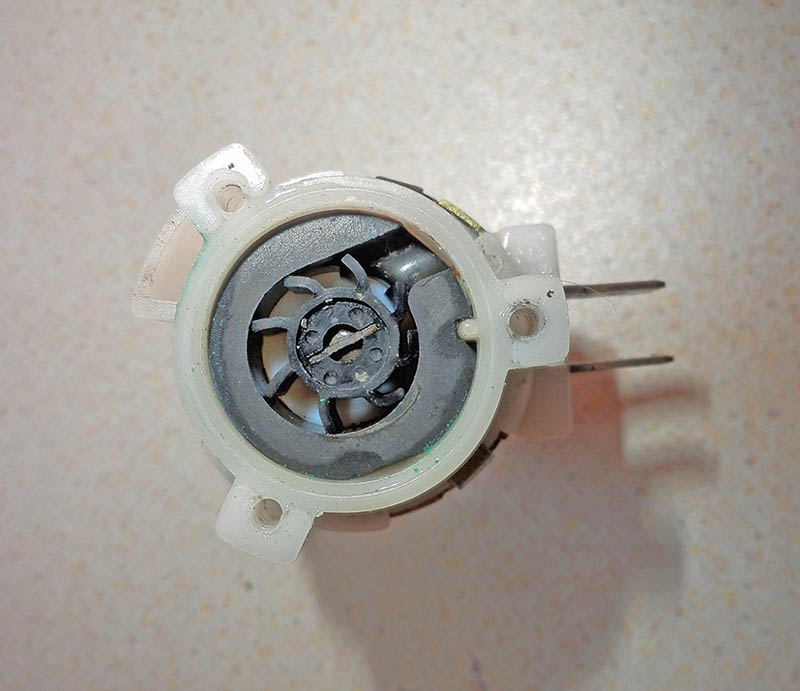
3. Underneath the membrane sits the small impeller so you can check whether any fins are broken or whether the drive spindle is slipping. In my case the latter was the problem which is why I had noise but no water – a drop of epoxy might just fix this temporarily.
Top tip: Before installing any electric pump it’s always a good idea to test it first. This can be done simply with a bucket of water, some short lengths of tubing, and a 12V source such as a car battery (using the cigar lighter socket with feed wires from it is often a handy set up). If the electrical terminals aren’t labelled testing the pump first will also give you the opportunity to check the polarities by establishing the correct direction of flow.