
Rupert Holmes explains how to prepare and use fairing compound and prepare the GRP-covered plywood decks on his project boat
Having made structural repairs to the plywood decks, my next task in restoring Minestrone was to strip, sand, fill and fair it to a uniform finish. I’d expected this to be a relatively quick job – after all it was only cosmetic work – but I couldn’t have been more wrong, and it took an inordinate amount of time to restore the deck to an acceptable finish.
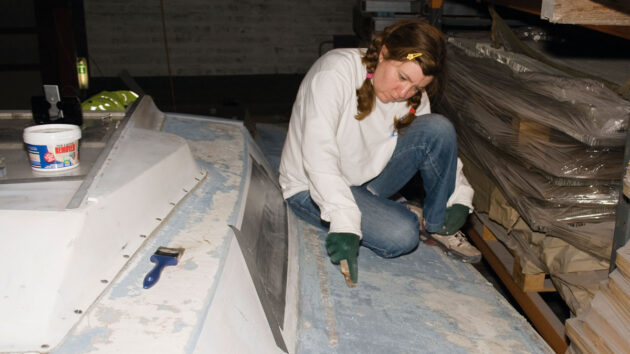
The biggest problem stemmed from one of the drawbacks inherent in the glassfibre over plywood construction of the deck. As the glassfibre had not been laid down in a mould, when the boat was built the upper surface of chopped strand mat had been filled with fairing compound to create a smooth surface. Over the years this had been painted with many coats of rubberised deck paint, much of which was now coming away in big flakes, occasionally taking lumps of fairing compound with it.
In my initial optimism I had assumed this would be an easy matter to sort out. After removing the deck fittings, the plan was to sand the deck paint away until all that remained was largely sound material.
My tool of choice for this was a professional Metabo 150mm rotary disc sander, which I’d used on previous projects to great effect. As well as a rotational speed of 13,100rpm, this model also has an eccentric action, which I was sure would make relatively quick work of the task if using coarse 40-grit sanding discs. Again, my optimism proved ill-founded – the machine made almost no impact on Minestrone’s deck paint.
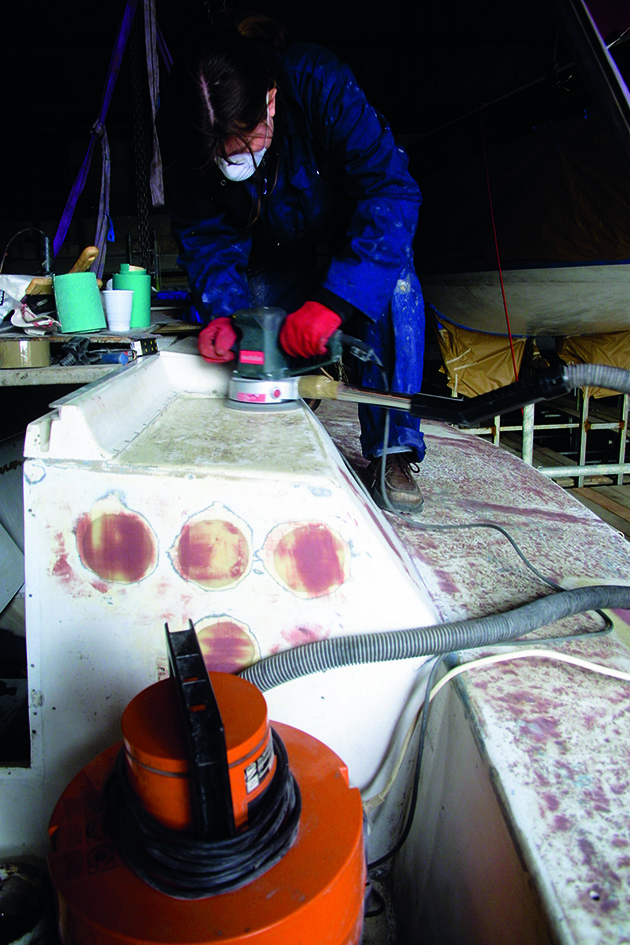
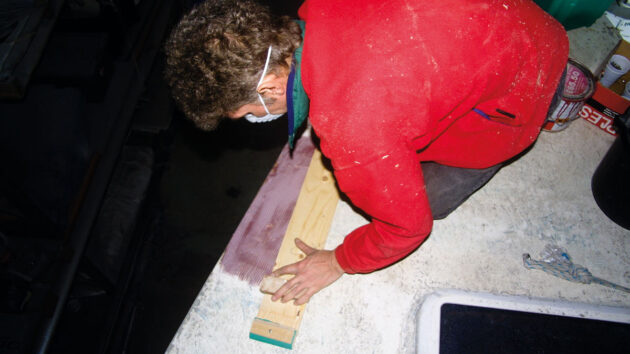
Sanding the partially-faired coachroof, with a vacuum cleaner extracting the glassfibre dust
created by the sander. Credit: Rupert Holmes
There appeared to be only two other options at this stage – using a chemical paint remover or a hot-air paint stripping gun. The hot-air gun needs careful use on a glassfibre surface, as it can melt the laminate just as effectively as the paint, so I opted for the chemical stripper.
Standard strippers will also dissolve glassfibre, and I was disappointed to find Nitromors no longer makes its once-popular glassfibre product. Some research online found a suitable product from Ecosolutions that can be bought mail order, or from B&Q. As well as being safe for use on glassfibre, it’s also water-based, and a lot more pleasant to use than conventional paint strippers.
All the same, using it proved to be painfully slow and, worse still, the fairing compound came off with the paint! It seemed, though, that I had no choice but to persevere with this route, although I still used a hot-air gun with extreme care to finish off any particularly stubborn areas.
In retrospect, I might have saved myself several long weekends of effort by getting hold of a decent belt sander to abrade the deck paint to a sound level. Failing that, knowing that I now have the skills to repair any small areas of accidentally softened laminate, next time I’d probably go for the hot air option from the outset, being very careful not to allow the surface to get too hot.
Filling in holes in plywood decks
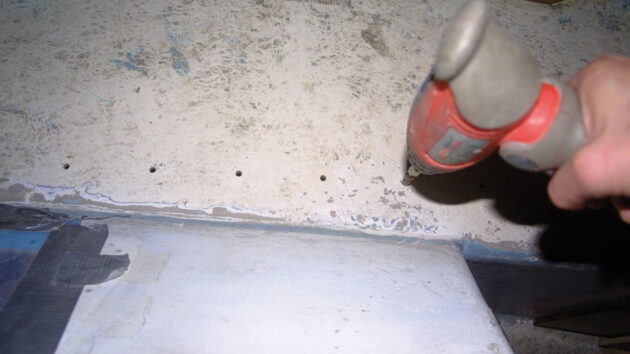
With the deck stripped, I had to find a way to plug nearly 200 bolt holes – Minestrone’s original deck layout had some 9m (30ft) of genoa tracks to cater for numerous overlapping headsails. I planned to modernise the rig with non-overlapping jibs, so these would be redundant.
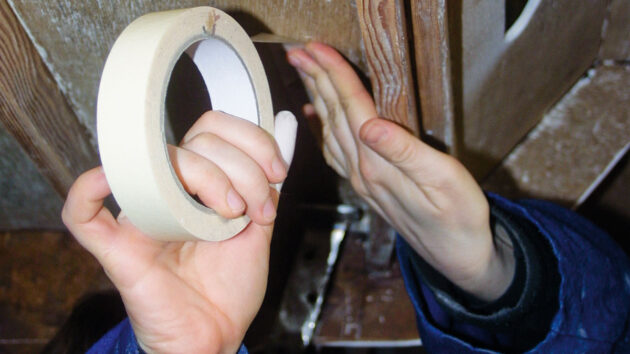
I started by drilling out each hole one size larger – the quickest way to clean out the holes and remove any old sealant. Initially, I planned to make hardwood plugs for each one and glue them in place with epoxy, but as I gave it more thought it became clear this would take an age – the plugs could be cut relatively easily using a drill press, but would have to be glued in position individually, before being chiselled off flush with the deck both inside and out.
Instead, I masked off underneath each line of holes and, having wetted the plywood edge of each hole with epoxy coating, mixed epoxy and silica filler to a
consistency at which it would just flow off the end of a mixing stick into the hole. This proved to be an easy and effective solution, and was less than a morning’s work.
Filling the bolt holes: step-by-step
Credit: Rupert Holmes
1. Bolt holes for redundant deck fittings were first cleaned out using a slightly larger drill bit.
Credit: Rupert Holmes
2. The holes were next closed off underneath with some masking tape.
Credit: Rupert Holmes
3. Then the exposed wood inside these drilled holes was sealed with a coat of epoxy resin…
Credit: Rupert Holmes
4. … before being filled with a mix of epoxy and silica drizzled from a mixing stick.
Fairing plywood decks
The next task was to fair the entire deck to a smooth surface, and this included building up the previous structural repairs to a slightly higher level to match the surrounding area. When fairing you have three choices: sand the material away until the entire area matches the lowest point, fill with fairing compound to bring the level up to the highest point, or sand the highest and fill the lowest points. I chose the third option, a middle ground, but sanding progress was still slower than I’d expected, so in reality I was only able to remove the highest peaks.
Sanding has the potential to create a lot of fine glassfibre dust – an irritant and significant health hazard. I rigged up an old (but powerful) vacuum cleaner to the sander, taping the nozzle to the sander’s outlet and this worked a treat, removing almost all the dust created from sanding, although I still felt it was important to wear full protective gear.
Before the fairing compound could be applied, the entire deck had to be thoroughly cleaned so that it was free of dust. I started by vacuuming the surface, followed by brushing with a hand brush and pan. Next was a wipe over with white spirit, and finally with acetone over the local area on which I was working.
When I started applying fairing compound, it became clear there was not yet a sufficiently uniform level for my inexpert eye to work with, so I decided to make a longboard, which I’d use with coarse 40-grit sandpaper, with the intention of creating a uniform level over a much wider area than was possible with the sander.
The longboard was easy to make – I cut a metre-long length of thin, and therefore relatively flexible, low-grade scrap ply the width of a roll of sandpaper. The length was chosen as the longest I could comfortably use single-handed, although many professionals have much larger boards used by two or more people. Next, I added a couple of handles near each end of the board – old door knobs are ideal – and a couple of battens to hold the ends of the sandpaper on the back of the board.
The longboard worked far better than I ever imagined. It was hard physical work, and very dusty, but within a day I’d got the entire deck to a near-even level a little above the lowest hollows. Had I started with the longboard immediately after removing the deck paint, I’d have saved the best part of another two weekends’ work.
The metre-long board proved a little too large and inflexible for the transom and quarters, which have considerable camber, but a shorter board proved perfect for this area. Applying fairing compound was much easier and faster now – in particular, it was easier to see how much was needed to build up to the required level – applying too much is counterproductive, as it just creates more sanding work. In addition, the longboarding had evened out most of the irregularities in the levels of the deck.
I also experimented with different mixes for fairing compound, which yielded great results. I started out by adding only microballoons to the epoxy resin, figuring this would produce the fastest result, as they are really easy to sand. However, in my then-inexperienced hands, this mix proved difficult to work with – I had to make several applications in each area, and at times it was difficult to make it stick to the surface of the deck, despite meticulous cleaning and preparation beforehand.
Making and using a longboard for sanding: step-by-step
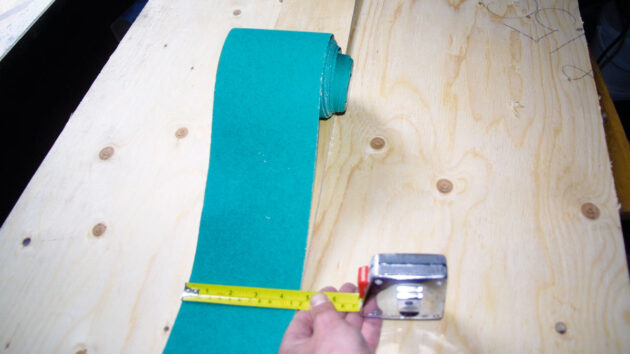
Credit: Rupert Holmes
Making the longboard – ply was cut to fit the sandpaper width.
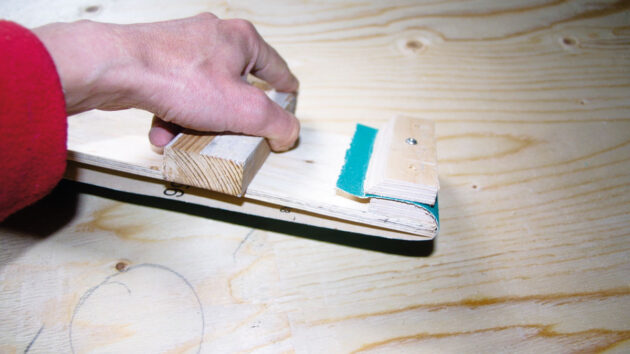
Credit: Rupert Holmes
The ends of the sandpaper were clamped between two pieces of timber screwed to the back of the board. Extra pieces served as handles.
Credit: Rupert Holmes
Using the longboard to sand the fairing compound previously applied with a notched spreader over one of the repairs on deck.
Mixing the goods
A 50/50 mix of silica and microballons proved much easier to work. Later still, I mixed glass bubbles and silica, which was even better. In theory, this mix would be harder to sand, but I was able to apply it much more accurately, and at more than twice the rate, so overall progress speeded up considerably.
Once I’d got the hang of fairing the original areas of the deck, it was time to attend to the areas of new plywood that had been scarfed in. I’d laminated over these with epoxy, but the level still needed to be built up to match that of the surrounding deck. Before I could do that, however, the amine blush that forms over epoxy surfaces needed to be removed.
The easiest way of doing this is to run water over the surface, until it no longer forms beads – the amine is water soluble. Once I was happy the amine had been removed, I allowed the area to dry fully, then sanded it to provide a key before applying fairing compound.
I started with one of the smaller patches, using a notched spreader to apply a layer of 50/50 microballoons and colloidal silica, trying to make sure all the peaks stood above the surrounding deck. This created an effect similar to a miniature ploughed field, the peaks of which could be readily sanded down to the level of the surrounding deck.
This proved to be much easier than expected, and I was able to establish the correct level surprisingly quickly. All that then remained to be done was to fill the hollows, but this was a slower process, taking several applications of filler to achieve an acceptably smooth surface, with the boundary between old and new all but invisible.
The new areas of epoxy laminate had been wrapped over the gunwale, to overlap onto the topsides. This area also needed fairing and, although the technique was broadly similar, there was a new challenge as I no longer had large areas of flat decks to line up with – everything was curved!
Overall, the fairing took ages – I lost count of the number of weekends spent on it. One of the problems was that I was keen to make the best job possible – and the comparisons I was inevitably making were with large, big-budget raceboats that were being refitted in the same shed alongside Minestrone.
When working on my hands and knees with my face just inches from the deck it was also very easy to focus on all the imperfections that would surely show through in the final finish. But, of course, no one actually inspects a deck that closely when sailing, or even when admiring a boat on her moorings.
In short, I could have achieved a perfectly acceptable finish with a lot less work. In addition, had I applied the first coat of primer sooner, the bigger imperfections would have shown up more clearly, which would have enabled me to focus on them, instead of getting bogged down by detail too early in the process.
Applying the fairing compound: step-by-step
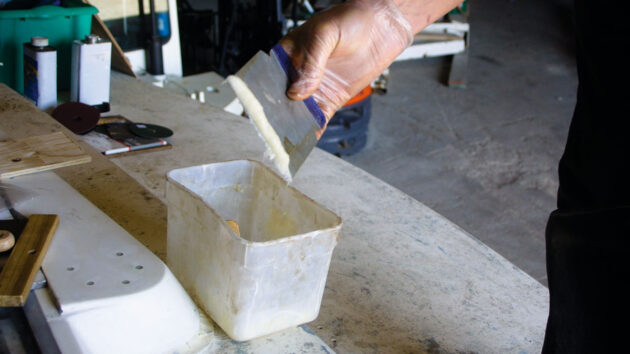
Credit: Rupert Holmes
Loading up the spatula with a mixture of fairing compound.
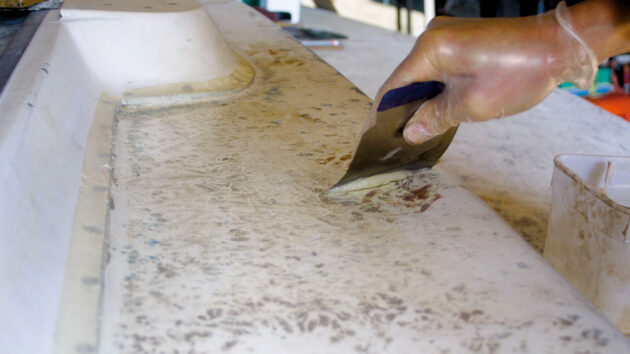
Credit: Rupert Holmes
Applying fairing compound to the coachroof. Use only enough to fill the hollows between the peaks, otherwise there’s a lot of unnecessary sanding to do!
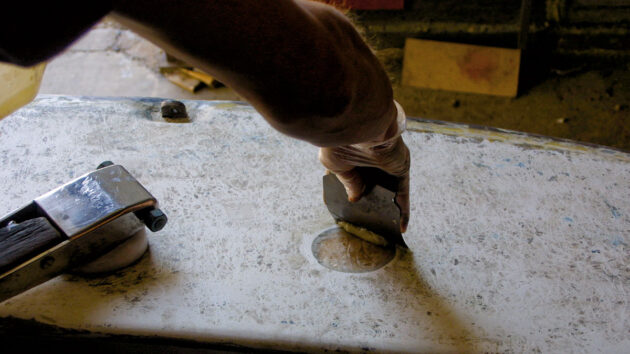
Credit: Rupert Holmes
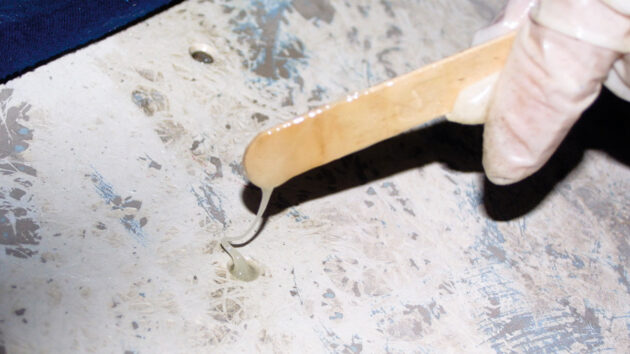
Applying fairing compound over a small piece of ply let into the after deck to fill the hole left from a redundant fuel filler.
Credit: Rupert Holmes
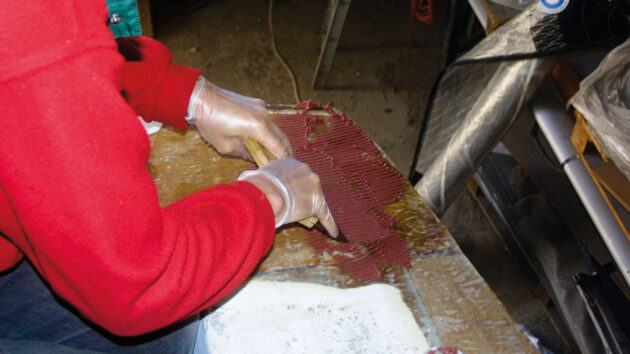
Using the notched spreader to apply fairing compound over the new timber in the deck.
Painting the plywood decks
I painted three coats of primer/undercoat with a small roller, with each coat taking a little more than an hour to apply. This transformed the appearance of the boat and was a great morale boost.
For the first two coats, I used an equal mix of grey and white over the entire cockpit, deck and coachroof, which all but eliminated the need to mask up. The third coat over the sides of the coachroof and cockpit, however, needed to be white, as I intended to finish these areas in white gloss.
For the deck paint on the flat areas, I again used a mix of white and grey to create a shade that’s easy on the eye in bright weather, but not so dark as to look dull.
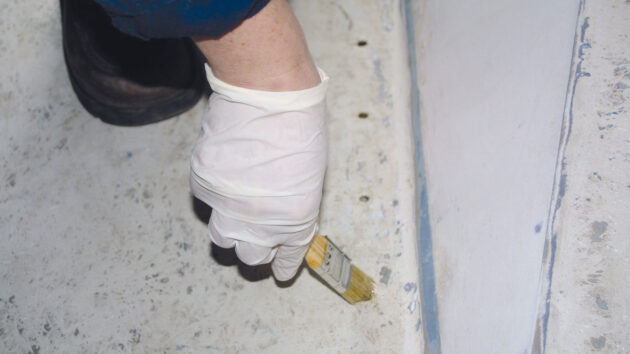
Applying fairing filler to curves
Try a gloved finger
How to build a boat with cold moulding: the secret to a hull that looks like GRP
Richard Johnstone-Bryden explains cold moulding, a time- and cost-effective method of combining the beauty of wood with the strength and…

Coating a GRP deck with SoftSand coating
Genevieve Leaper and Aleko Stephan remove the old teak deck on their Nicholson 32 and renovate the original GRP with…
DIY GRP repair: step by step guide
Guide to achieving a professional finish with a do-it-yourself GRP hull repair to fix boat damage using West System's glassfibre…
Want to read more articles like Reparing plywood decks: stripping, filling and fairing?

A subscription to Practical Boat Owner magazine costs around 40% less than the cover price.
Print and digital editions are available through Magazines Direct – where you can also find the latest deals.
PBO is packed with information to help you get the most from boat ownership – whether sail or power.
-
-
-
- Take your DIY skills to the next level with trusted advice on boat maintenance and repairs
- Impartial, in-depth gear reviews
- Practical cruising tips for making the most of your time afloat
-
-
Follow us on Facebook, Instagram, TikTok and Twitter